THE MANY USES OF OUR
WONDERFUL WOODSTOVE
|
Contents:
|
In addition, there is something magical about the fire itself that brings the house alive in the cold Winter months, and provides a very relaxing focal point about which to gather. Just seeing a fire makes you feel warmer, even if it hasn't yet warmed the room. And finally, the wood stove gives me so much peace of mind because I can heat the house myself in the Winter that I never want to live in a house without a wood stove again.
1. The heat from a wood stove can be used for many jobs, including:
(Click on blue highlighted terms to go to pages with detailed instructions.)
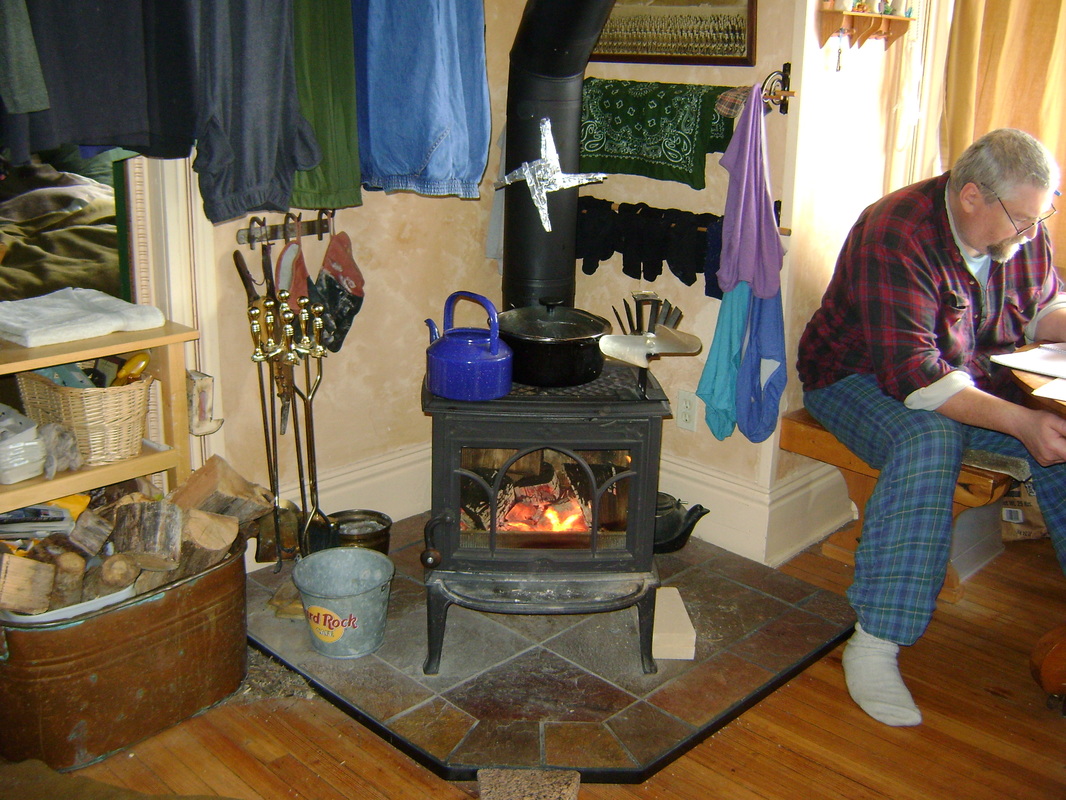
HEATING THE HOUSE: Of course, a wood heat stove's primary purpose is to keep the humans and animals warm. We also have a gas furnace, because our stove is not large enough to keep burning while we're at work all day or sleeping overnight. We keep our thermostat at 58 degrees F to save resources, then fire up the wood stove when we're home and awake. The fire heats up the house enough that the furnace shuts off.
|
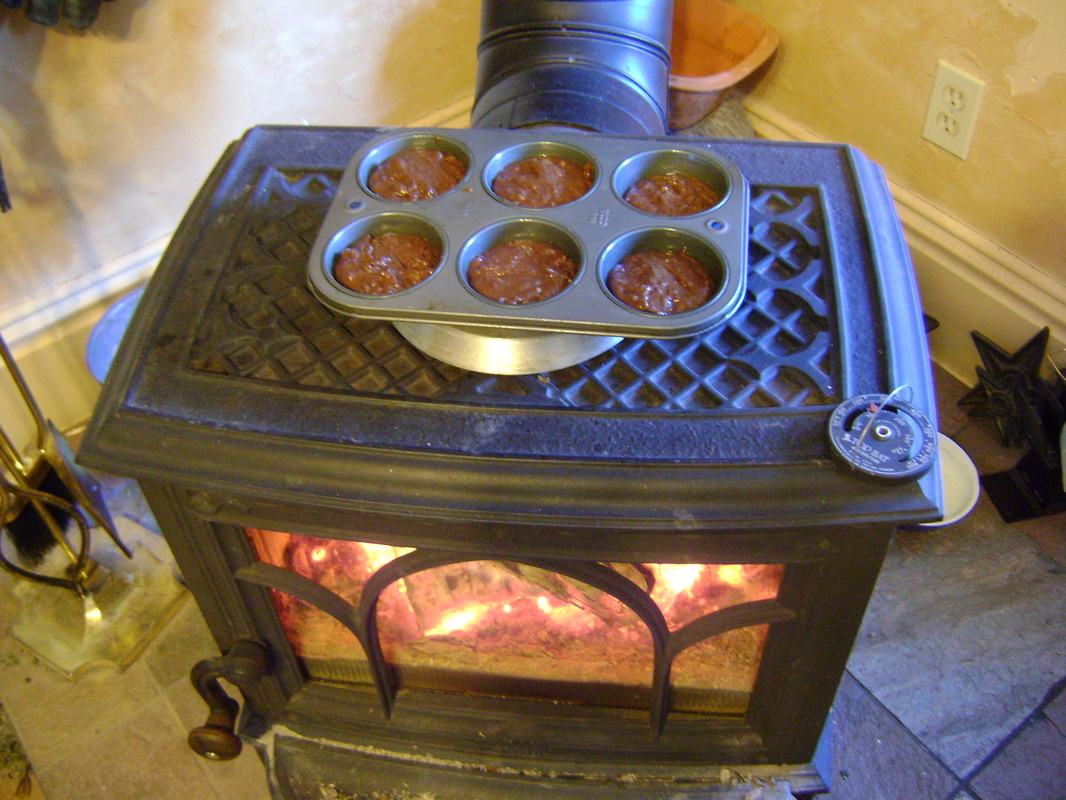
COOKING FOOD: Any wood heat stove can be used to cook food, assuming it has a large enough flat surface on top to set a pot. If you're heating your house with fire, why not save even more money by using it to cook your food too? Click the title to see our page on how to cook on top of and in the stove, including instructions on creating your own oven on top of the stove to bake the chocolate muffins show above.
|
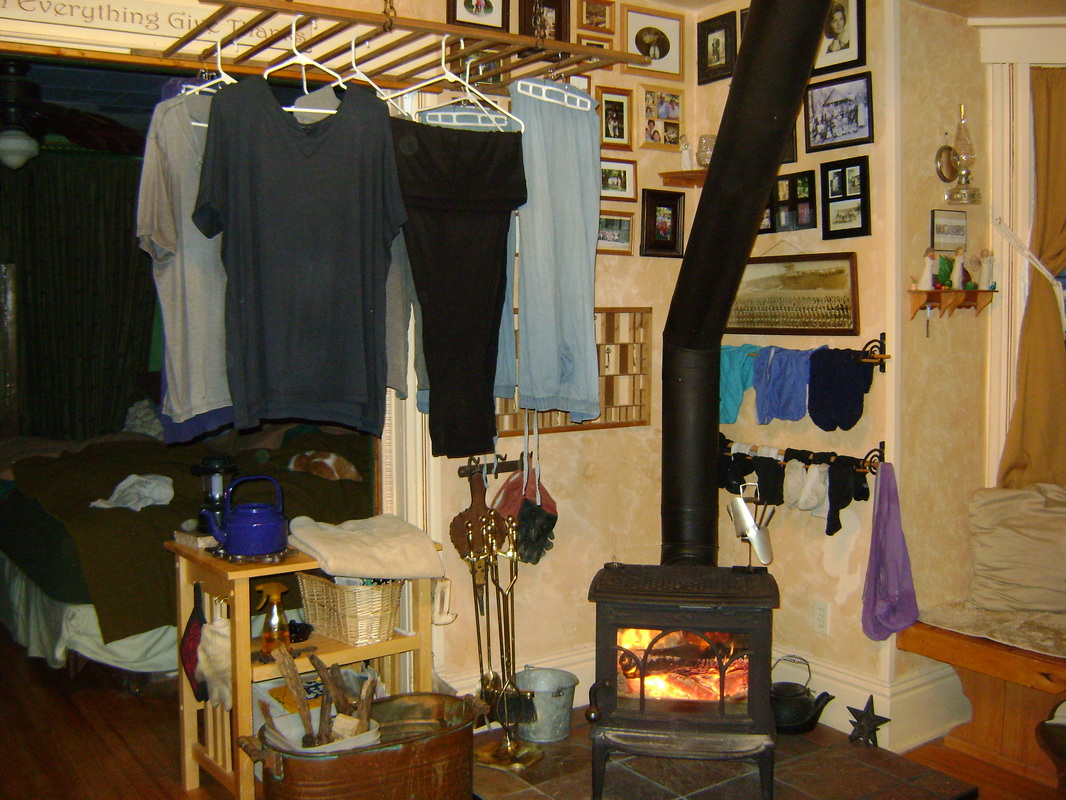
DRYING THE LAUNDRY: Click to see how we built the drying racks above and behind our stove to dry the laundry when our dryer broke down.
|
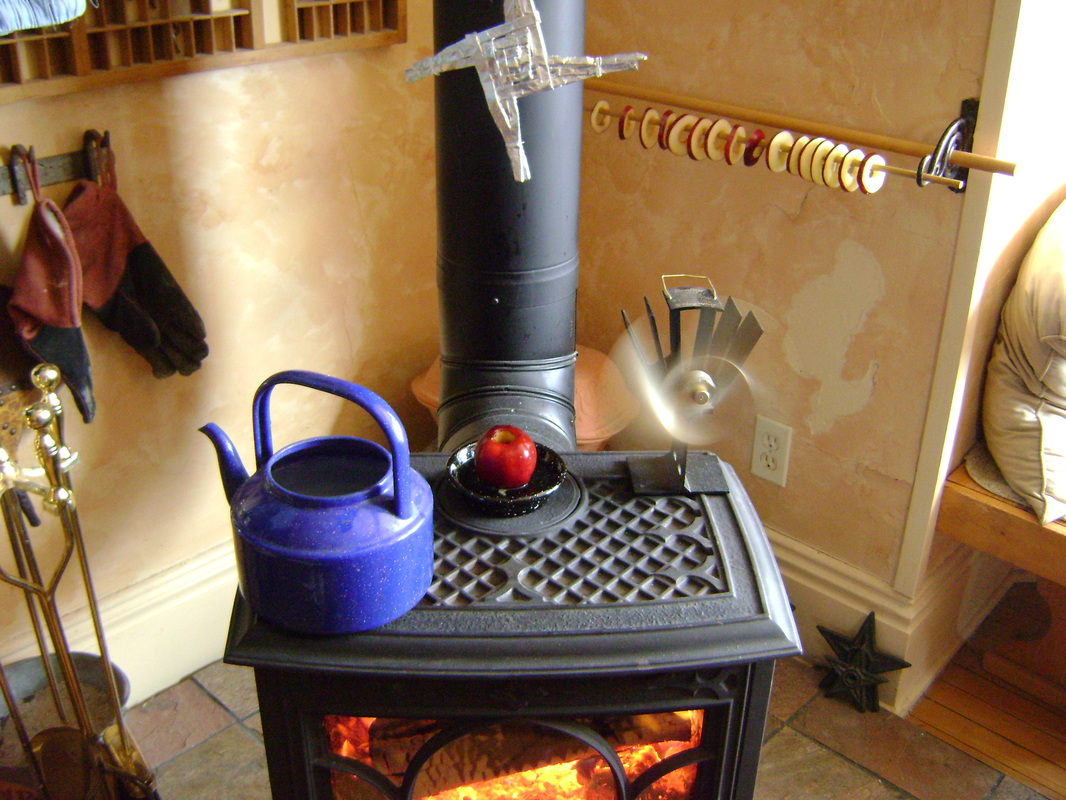
DEHYDRATING FOOD: Click to see how we dehydrate apples by hanging them behind the stove.
|
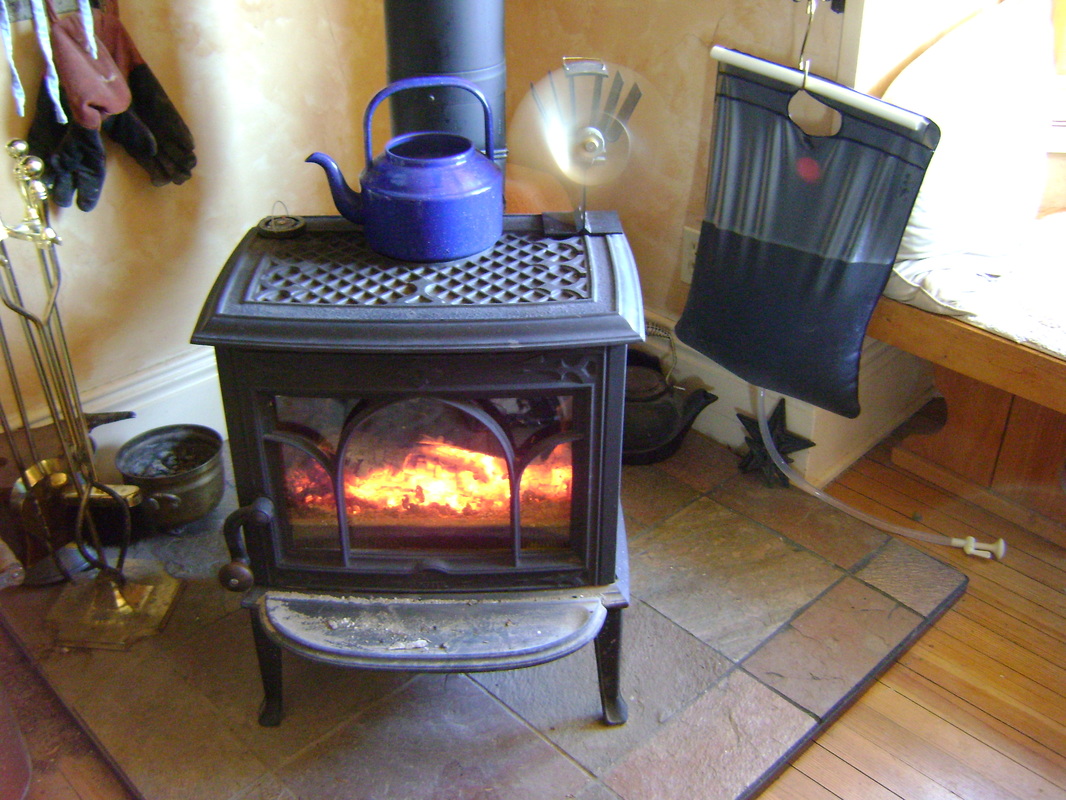
HEATING WATER:
|
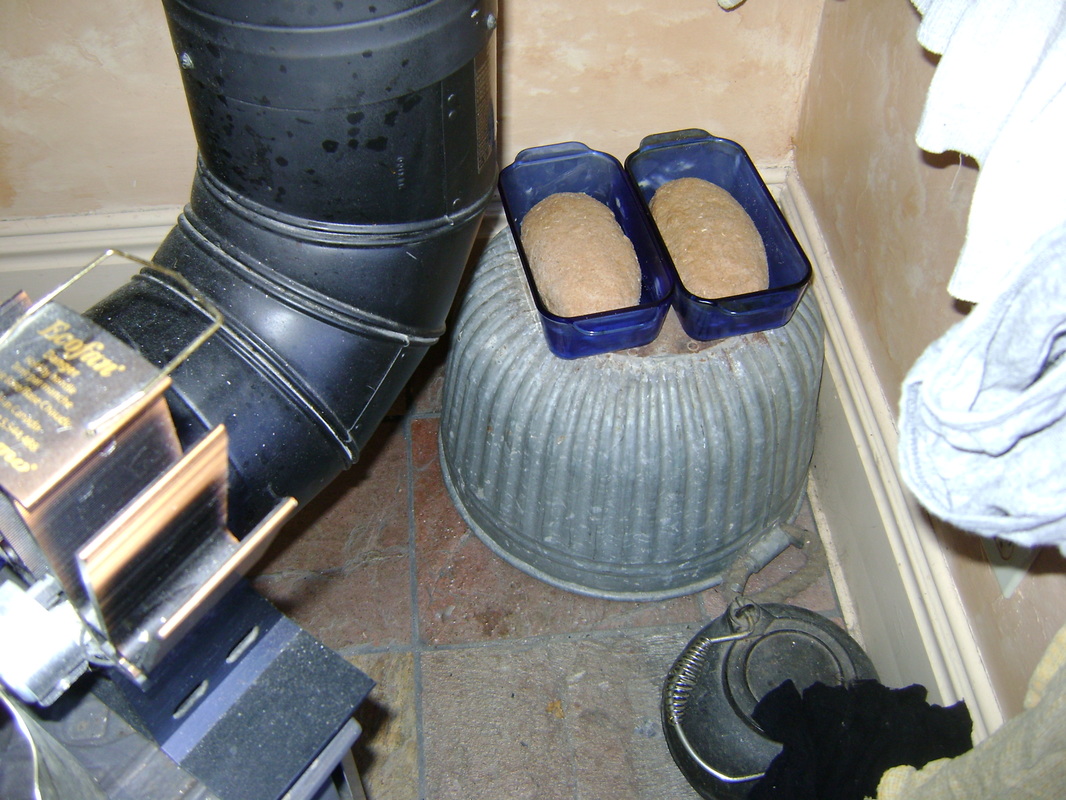
HELPING BREAD RISE: When we make bread, we leave it on top of this upturned metal bucket in the corner behind the wood stove. It rises really well with all the heat there. We're still looking for some metal shelves that would fit in same location to give us a larger space for warming food- the two bread pans barely fit.
|
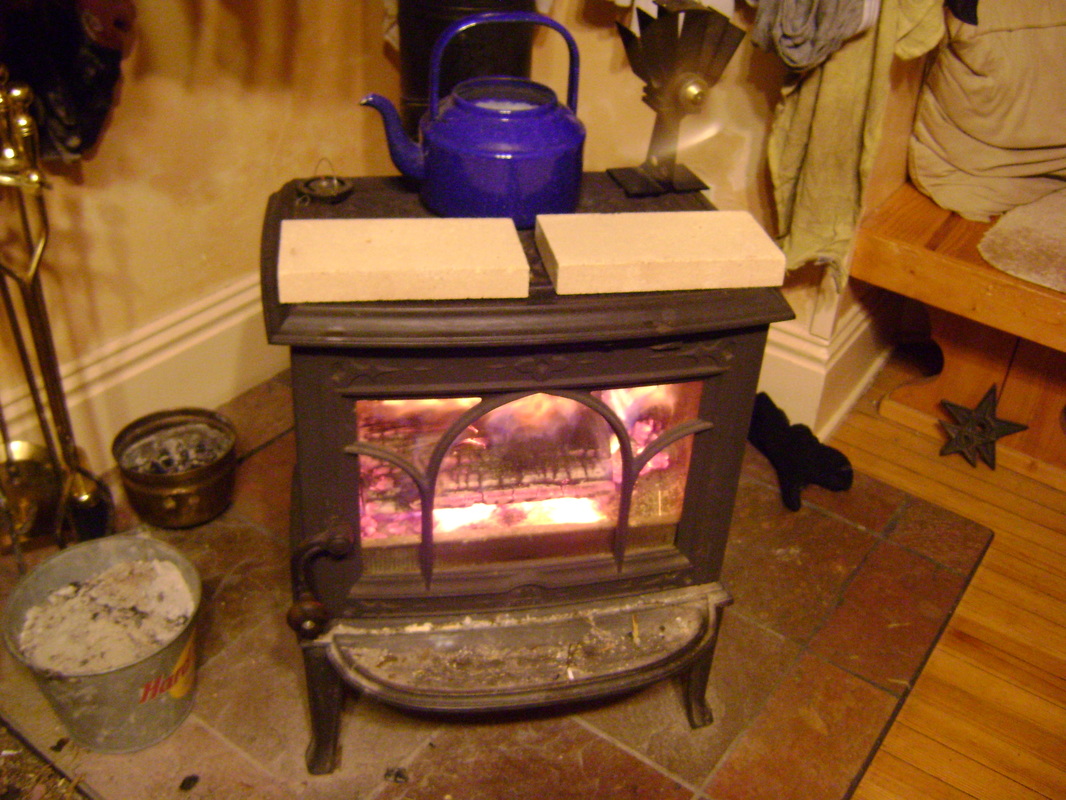
HEATING BRICKS: It used to be traditional to heat bricks by the fire and take one with you to warm the bed when you went to sleep. We bought some fire bricks and have been trying to figure out the best way to do this. So far, we have wrapped them in bath towels and placed them at our feet under the blankets. We'll add more information, as we learn more.
|
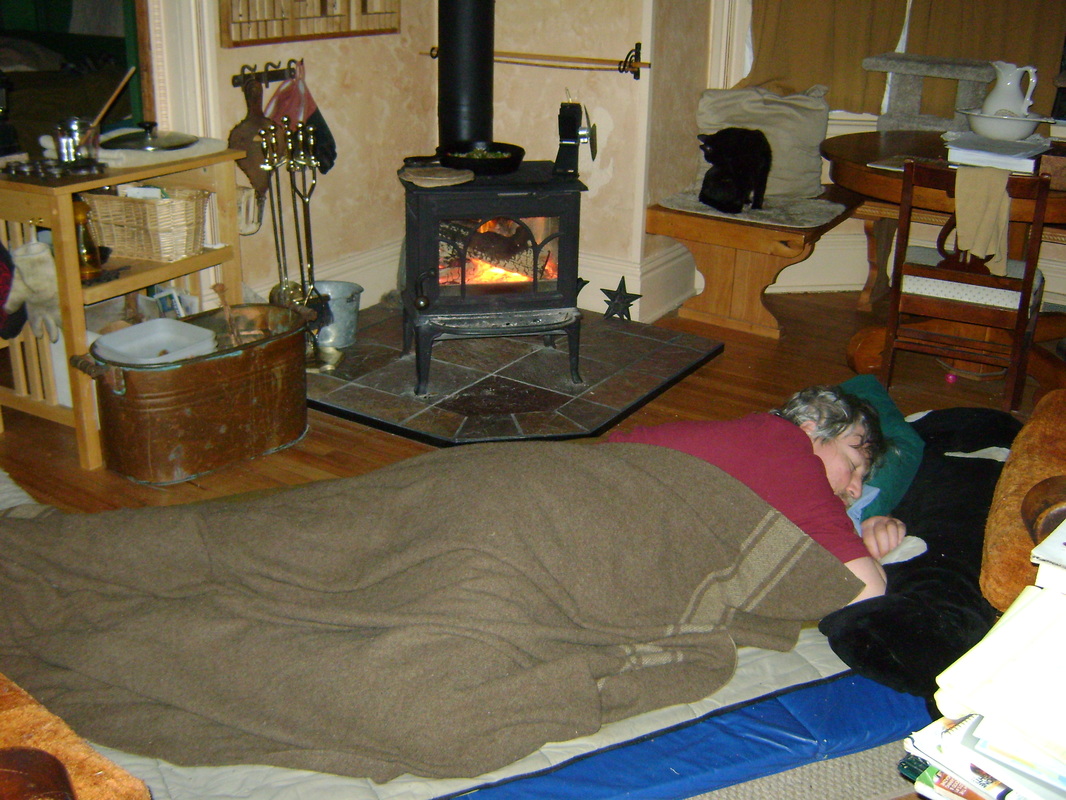
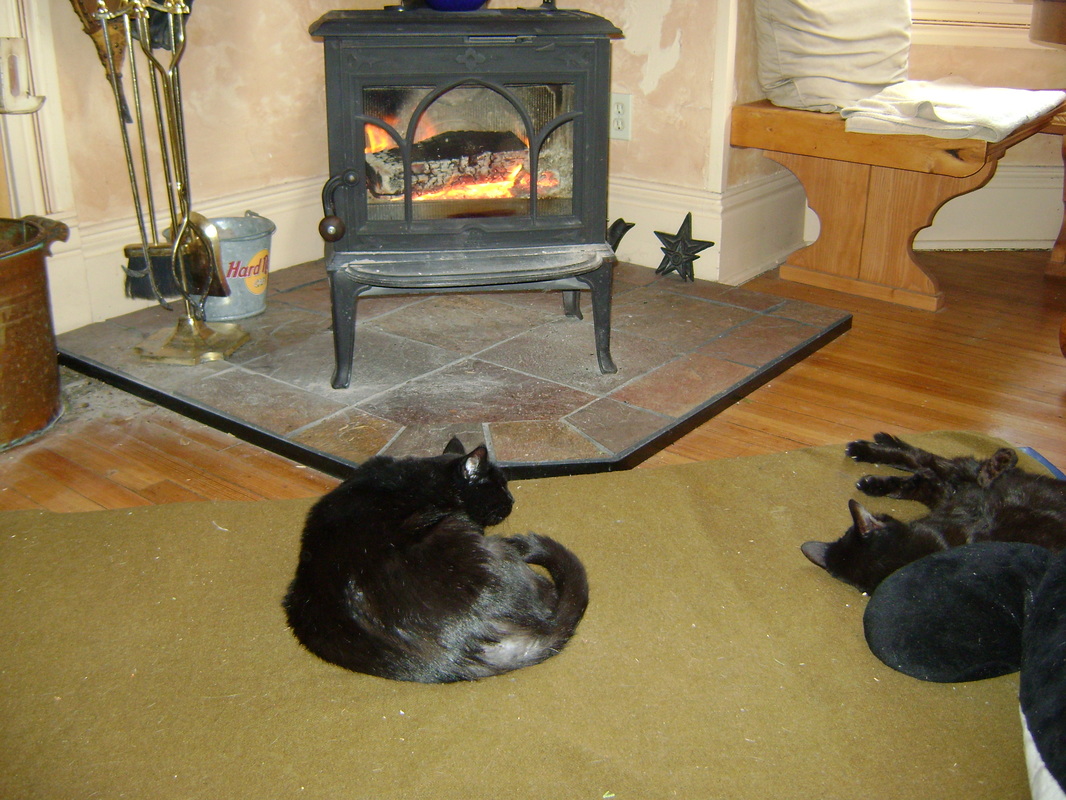
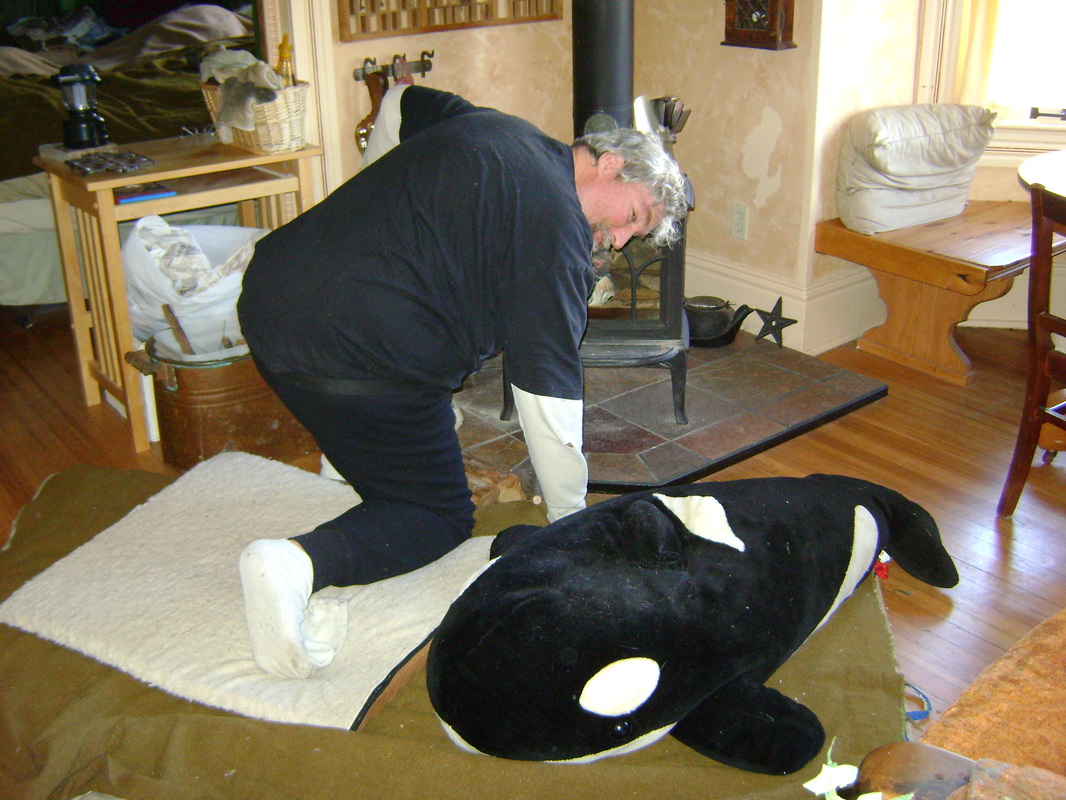
PROVIDING A COZY NAPPING SPACE: It's not fashionable and it gets dirty, but we put a pallet on the floor in front of the wood stove to provide a warm spot for cats and humans alike to take a nap. Our pallet is a blue exercise mat, covered in layers of sleeping bags and/or wool blankets. We also have an oversized stuffed whale that acts as a pillow, when the cats aren't sleeping on it (see below).
|
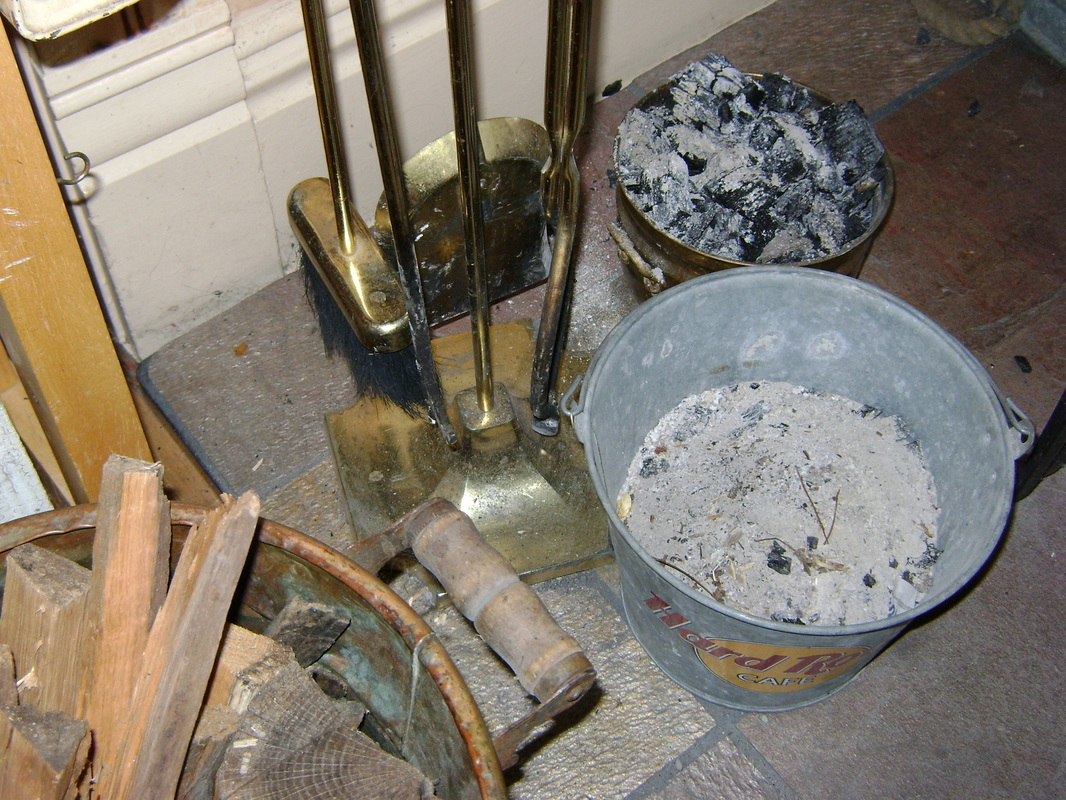
PROVIDING ASHES AND BIOCHAR:
|
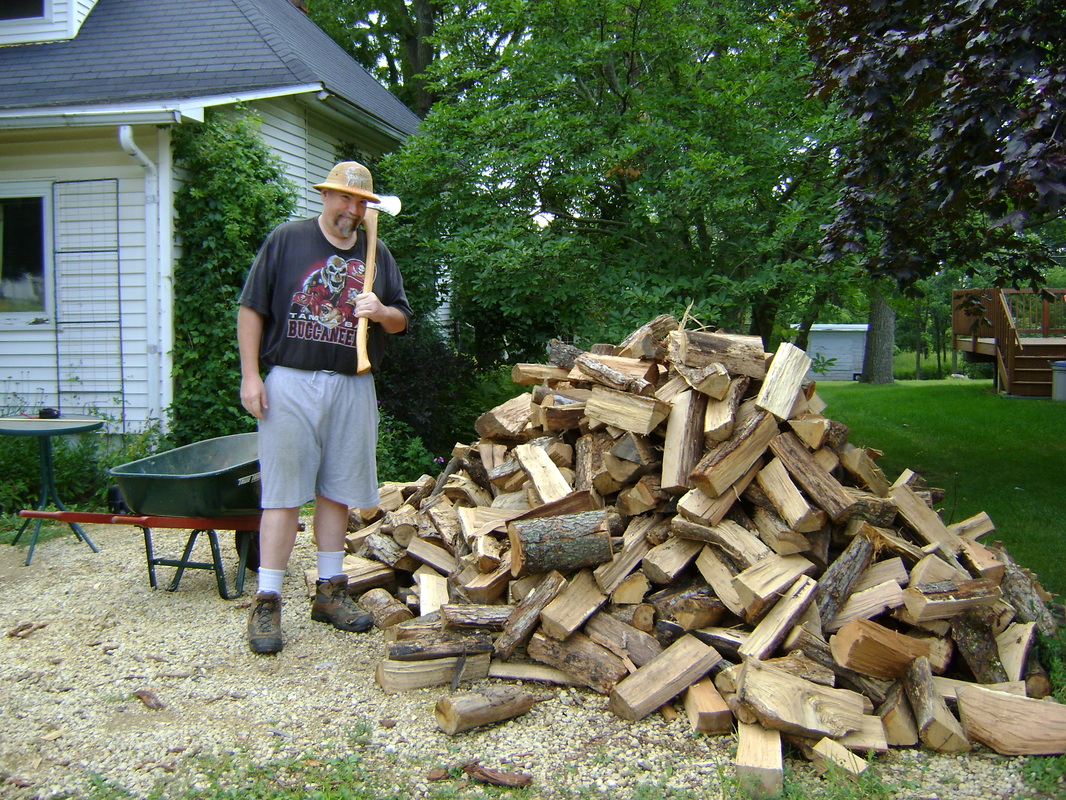
PROVIDING EXERCISE: It's great when your regular chores can get you the exercise you need instead of having to go to a gym. There's a lot of wood hauling and kneeling in front of the wood stove while tending the fire that helps keeps us in shape. And of course, if you cut or chop your own wood and/or kindling, it gets you outside and makes you even healthier (see Storing Wood).
|
2. Using & Maintaining a Wood Stove:Click to see more information on:
|
Homemade fire starters.
|
Wood delivery.
|
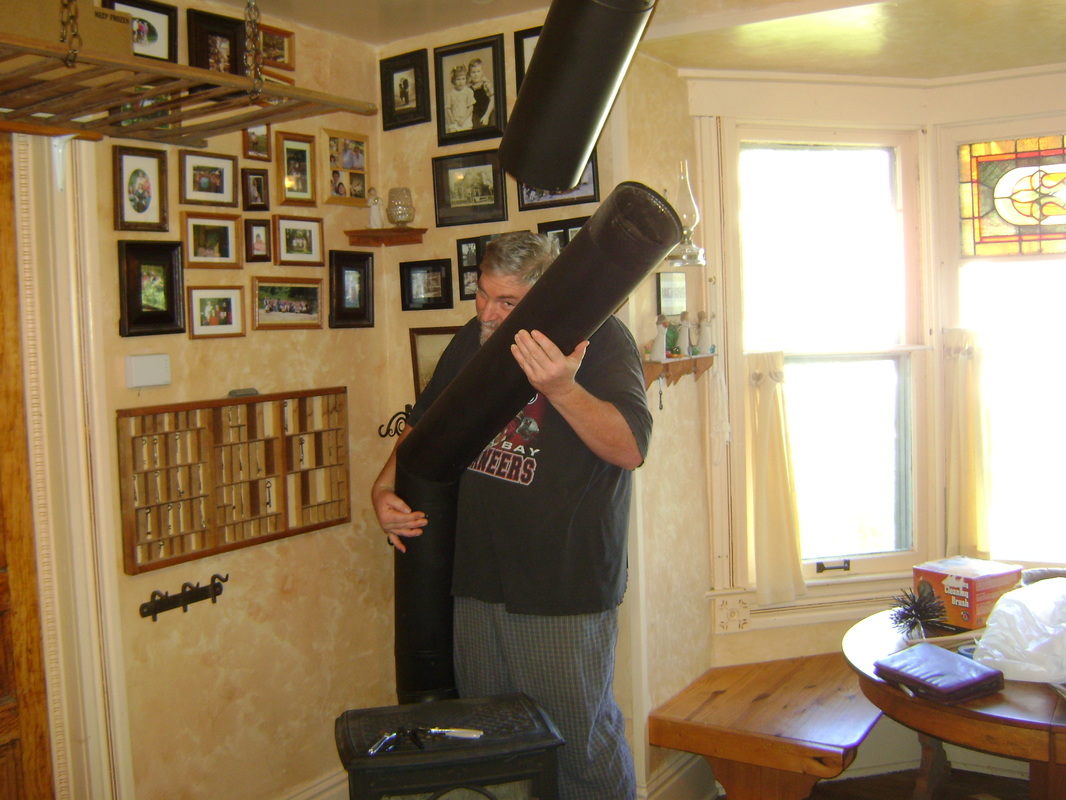
Cleaning the chimney.
|
3. Buying a Wood Stove:From Theresa:
We've gotten lots of emails asking about our stove. Here are the specs: Our Wood Stove is the Jotul F100 Nordic QT:
|
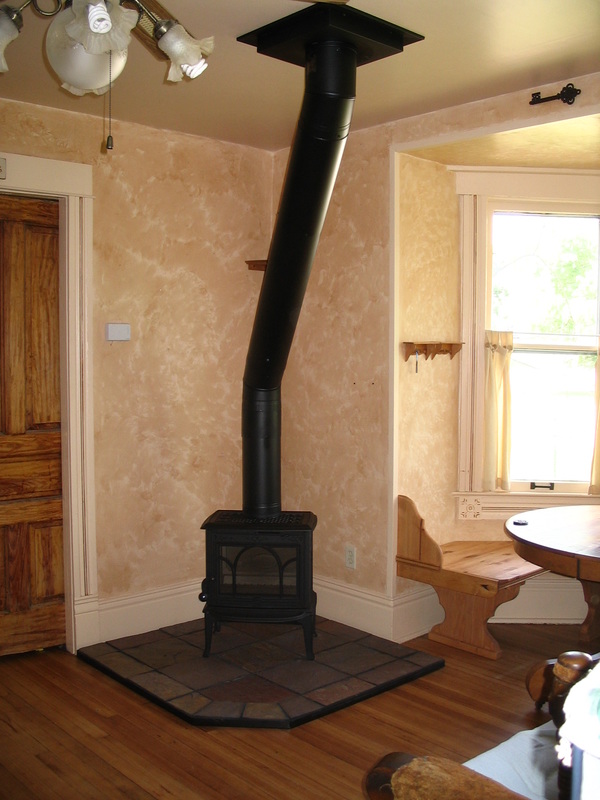
Our wood stove when it was first installed in our library, with the chimney coming out of the top. Later we had it switched to come out of the rear of the stove so we'd have more room to cook.
|
- We bought our stove in 2012, for about $5000 (stove & installation). The stove was around $1200. $3800 was for the installation of our chimney, which was tricky in our house. Ideally, the chimney can go straight up from the stove through the roof, but in our house it would have to go through the middle of Theresa's meditation alcove upstairs if it went up straight. So instead it juts out into the library at a 45 degree angle before going through the roof. The lesson from this is if you're going to install a wood stove, try to do it before you renovate the rest of the house so you have the most options of where to put it.
Shopping for Wood Stoves:
- Can you cook on it? When we went shopping for wood stoves, I always asked the salespeople which stoves I could cook on. This seemed to be an unexpected question. They would hesitate and then say that they wouldn’t recommend using it for cooking because it would mess up the finish. They were right about that- all the moving around of pots on top of the stove, as well as food stains from spills, can mar the finish, but the truth is, you can cook on anything that makes heat, as long as it has a large flat surface above the fire.
- Get three bids: If you have three companies in your area, make appointments for someone to come out from all of them to look at your house and tell you where you can and can't put a wood stove (assuming you don't already have a chimney). They will give you bids. We only had two companies come out, and we only ended up getting a bid from one (TopHat in Madison), so that is who installed our stove. We never heard back from the other company, I think because they weren't sure they could do our difficult installation.
- Deciding Where to Put the Stove: We wanted our wood stove in our library (see a floor plan of our house) because it was between the kitchen and the bedroom, which are the most necessary rooms of the house. With the wood stove in this position, we know that if we had to go for an extended time heating with only the wood stove we could close off the rest of the house and keep these rooms warm. If you have multiple places where you can have a stove, also consider putting it where you'll be able to see it most (from the dining table, the sofa, etc.)
Other things to consider when buying a stove:
- Soapstone wood stoves stay hotter longer. The stone absorbs the heat and radiates it back into the room even after the fire has gone out, but they are more expensive. Cast iron also does this to some extent. Steel stoves do not hold their heat very long.
- We chose to not get a stove with a catalytic converter, which keeps more pollutants out of the air, because we read that the converter needs to be periodically replaced. That didn't seem very self-sufficient to me. Newer stove designs pollute less and less, so there may be totally different choices on the market now.
- Get the right size: If you get a stove that is too big for the room in which you install it, then the room will get too hot to be in. Or, when it gets too hot you'll want smaller fires, but smaller fires are cooler and don't get hot enough to burn efficiently, which can create dangerous creosote and air pollution. We got a small stove for this reason, although we sometimes wish we had gone one size larger so that we could use longer logs.
- Take some time to learn about how wood stoves heat a room. See the recommended books in the Resources section below. If I remember correctly, radiant heat only goes in straight lines, it does not go around corners. So any space you want to be heated should be in a direct line of sight from the stove.
- A double wall chimney costs more but lasts longer before it needs to be replaced.
- Find out about your local regulations: We needed a building permit to install our wood stove. Your town may also have regulations against them. I believe ours has since passed a law limiting their use. I am not sure what people would have against them.
Other wood stove possibilities:
- Lately I’ve seen a wood heat stove advertised with a built-in oven, so I must no longer be alone in my desire to cook with my wood stove.
- It's called the Baker's Oven Wood Heat/Cook Stove. We would probably try to buy this one if we ever needed to replace ours.
- You can buy it through the Lehman’s non-electric catalog. It's currently listed for almost $3000 (not including installation, in 12/2015).
If we could do it over:
- We would put the wood stove against a different wall in our library, so that we could see the fire from the dining table and from the bed in the adjoining room (we had already installed floor to ceiling bookshelves on this wall before we installed the wood stove, and did not want to remove them).
- We would try to get a wood stove that is a little larger so it would take the more standard size longer longs (over 17"). We have found someone who will cut our wood shorter than usual, but in the past Bear has had to cut a few inches off of every log.
- We would probably buy the stove with the built in oven mentioned in the previous section.
- Theresa would research rocket mass heaters. They heat using very little fuel (such as twigs instead of logs) and give off very little to no smoke to pollute the air. There are also rocket stoves and rocket ovens, so we would try to figure out if I could combine the them.
4. RESOURCES
a. We didn't know anything about wood stoves before we bought ours. Theresa bought this book long before we ever considered buying a wood stove, just in case, and found it very helpful:
 |
Light the Country Fire: The Homeowner's Guide to a Neglected Skill
By Karen Bokram and Sarah Young, 2003. ISBN: 1-59228-112-5 This is a great book meant for the beginner that goes over all the important information you need, including safety issues. |
b. Theresa also looked in used book stores in the home repair sections. There are several home repair/renovation series that include a book on fireplaces and wood stoves. The information may be old, but some of it is still useful.
c. We have also bought this book, although haven't read it yet. It has information on splitting and stacking wood that we could probably benefit from, as well as instructions on how to cut down a tree if we ever need it.
 |
The Backyard Lumberjack
The Ultimate Guide to Felling, Bucking, Splitting, and Stacking by Frank Philbrick & Stephen Phibrick, 2006. ISBN-10: 1-58017-634-8 |