|

|
|
Gardening for Wildlife
From Theresa
Contents Include:
Why Garden for Wildlife?
When I think about gardening for wildlife, I remember the central symbol from the book Noah’s Garden by Sarah Stein (1993). She said that if we create wildlife friendly gardens on our property, and our neighbors do too, and their neighbors do too, we can create an ark that will help wildlife survive in the face of diminishing habitat. Here's how she explains it in the book:
"Textbooks often illustrate the balance of nature diagrammatically as a web of eating relationships among animals and plants...
The web is strong when there are many strands and their ties accordingly complex; break too many strands and it collapses.
The base of such a diagram is the vegetation to which all the strands are tied through the animals that eat it. In my botany textbook, the base is sketched as a bit of meadow; in reality, it is the entire landscape - not only my part of it, but yours and everyone’s whose claim to ownership confers on us all the opportunity and responsibility to plant it richly. We are all connected. A hawk may eat a snake that ate a mouse that ate a nut for breakfast, but the beech nut may have come from your tree, the mouse from my field, the snake from our shared wall, the hawk from a hundred miles north, and all of them must be supported on a varied and extensive smorgasbord.
We don’t have to - indeed, we neither can nor should - each provide all habitats, every sort of food. You plant nut trees and I’ll plant spruce, you keep a berry thicket and I’ll do the tall grass, or the bog, or the woodlot, the crowds of fruiting shrubs and beds of wildflowers. But let us weave them together into something big enough to matter by connecting each patch with others at the corners and along the boundaries. This is the rich, new landscape; this is the new kind of gardener who asks not whether he should plant this ornament or another but which patch is missing from his community, how he can provide it, and how animals will move from his patch to the next.
This is the ark."
Wildlife pond.
|
Brush pile.
|
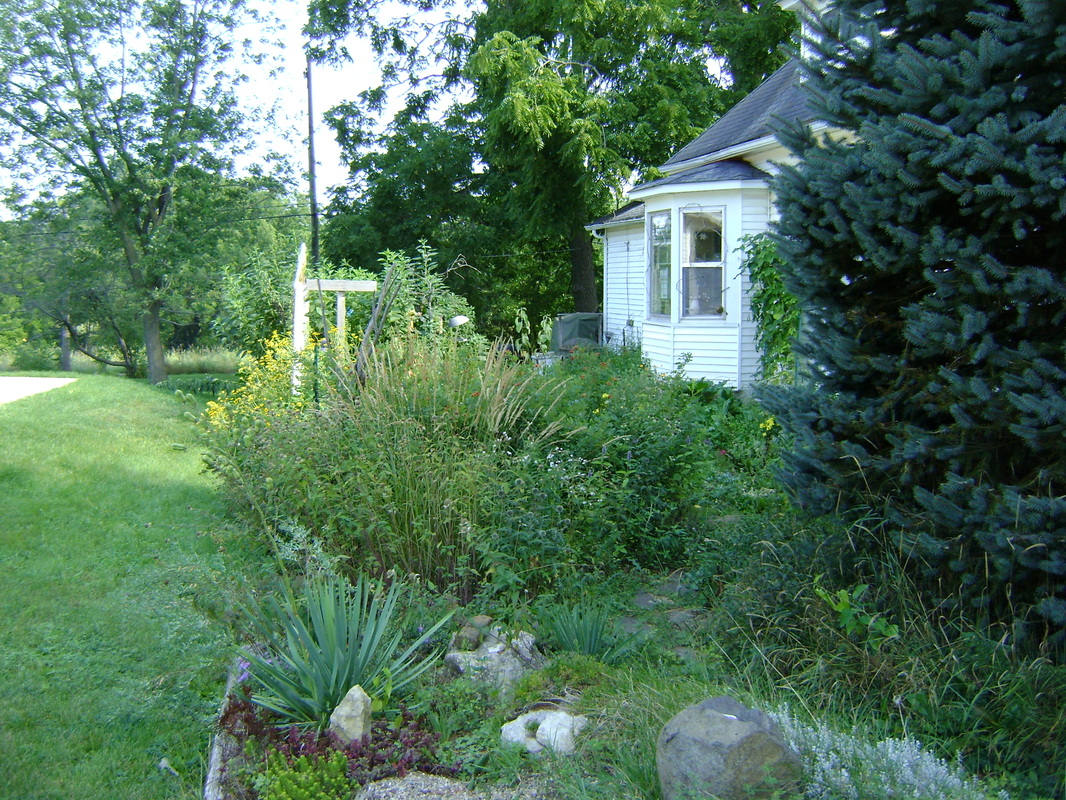
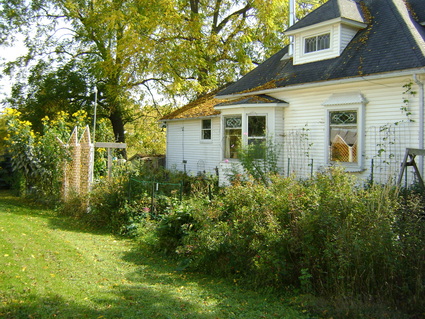
Our side yard.
|
Like Noah's ark that saved the animals from the flood, I am trying to build a little ark in our tiny yard.
Maybe my neighbors will decide to join me, and it will ultimately create significant change.
`
People don't always understand why I want my yard to have bugs, spiders, ants, mice, and other creatures that some people find undesirable. I want to provide habitat to support as much wildlife as possible, of all types, because all life is connected, and if I support other species, I am also supporting myself. If I create habitat for species lower on the food chain, such as worms and insects, then species higher up the food chain can take up residence as well (such as the birds that eat worms and insects). Humans may be at the top of the food chain, but that doesn't mean we can survive by ourselves, it means that we are being supported by all the other creatures lower down.
If we can restore wildlife habitat in our yards,
we are ultimately supporting the ecological systems that support us.
Let's Create Another Ark
If you are creating an ecologically sound garden following the permaculture principles discussed on this website, you will also be creating habitat for wildlife, in addition to growing food for yourself. So you'll see several permaculture principles repeated here.
You can specifically focus on making sure your yard supports wildlife
by fulfilling their four basic needs:
1. Food
(grow plants that offer seeds, pollen, nectar, nuts, berries, etc.)
2. Water
(add a bird bath, backyard pond, etc.)
3. Cover/Shelter
(e.g., plant evergreens for birds to shelter in during Winter storms)
4. Places to Raise Young
(e.g., grow trees, large bushes, or vines for nesting)
Many garden elements can provide for multiple wildlife needs, so instead of describing possibilities for each of the above categories,
I'm going to share what has seemed to work best in our tiny yard.
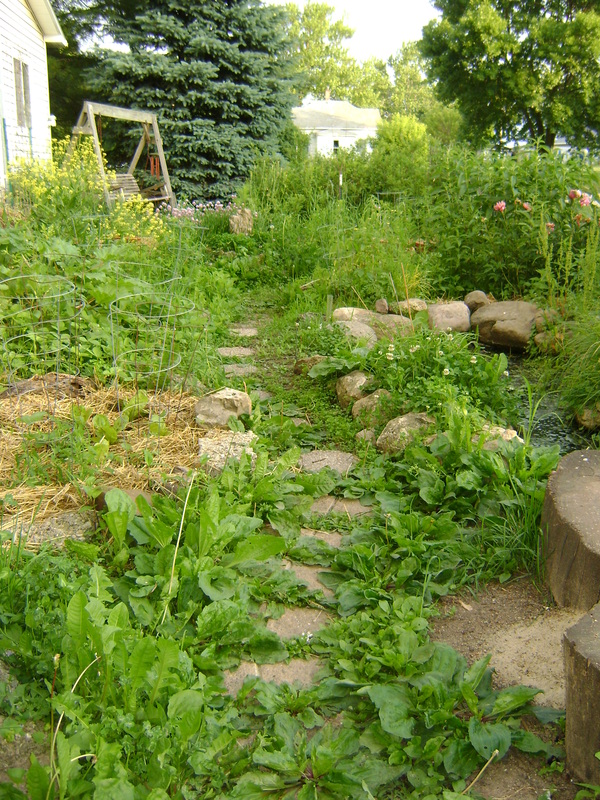
Planting for Wildlife
|
General Tips:
Look for wildlife gardening books or websites that list plants that benefit wildlife in your area. Some that I used are included in the Resources section at the end of this page. Wherever you live, keep these points in mind:
|
|
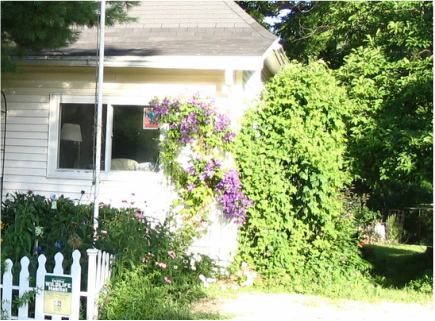
- Plant natives as much as you can, they are more likely to benefit wildlife. Below is the narrow shade garden on the southwest side of our house, one of the first gardens that we planted. It started out as lawn, except for a narrow bed of tulips, daffodils, and peonies planted by the former owners next to the house foundation. Now it is mostly native plants, including the virginia creeper vine growing on the side of the house (birds eat the berries), baneberry bushes, ostrich ferns, maiden hair ferns, sweet woodruff, hepatica, blood root, bleeding heart, jack-in-the pulpit, wild geraniums, and wild grape vine (on the tilted trellis at the back). This is the garden I walk through every day when Spring returns, to see what's sprouting. Many native shade plants bloom early, because they can get a lot of Sun before the trees leaf out, so this is the first area in our yard to have flowers in bloom.
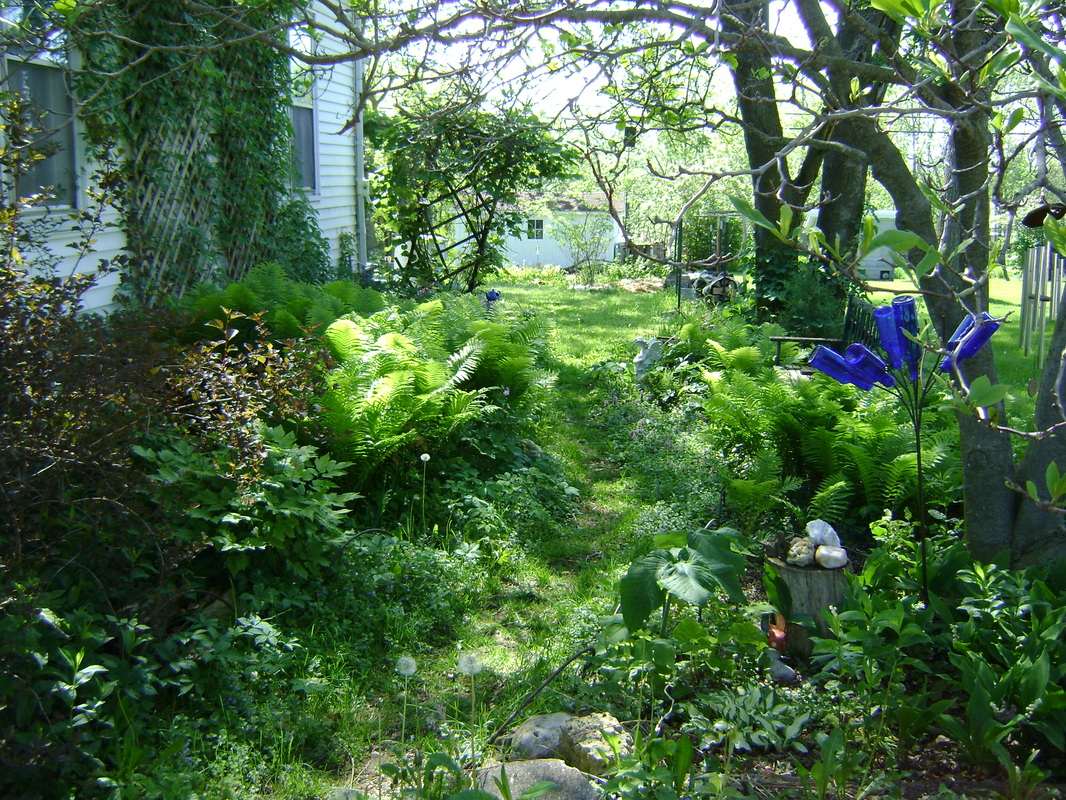
The shade garden in our side yard, planted mostly with natives that benefit wildlife.
|
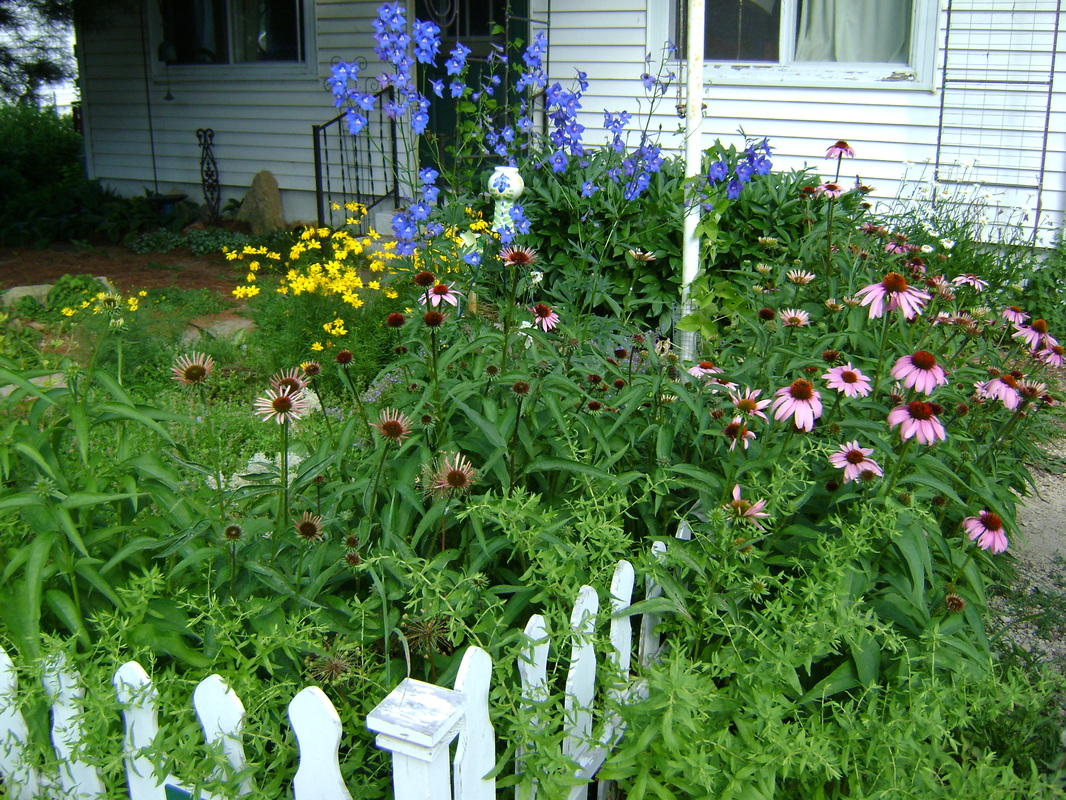
Flowers for Wildlife
Flowers can provide nectar, pollen, or seeds for bees, birds, and beneficial insects (that help your food crops grow), which in turn support animals higher on the food chain, as well as being beautiful. Try to have something in bloom during the whole gardening season (these grow well in Zone 4): Spring bloom:
Summer bloom:
Fall bloom
In our yard, birds enjoy eating the seeds from the echinacea (purple coneflower, below) and the anise hyssop we've planted. 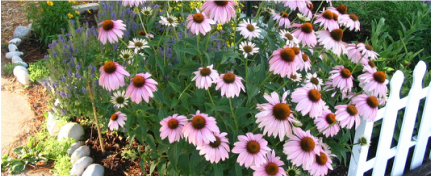
Echinacea is great for birds and butterflies, and it can be used medicinally. It stands up well in the wind, looks beautiful, and spreads itself generously.
|
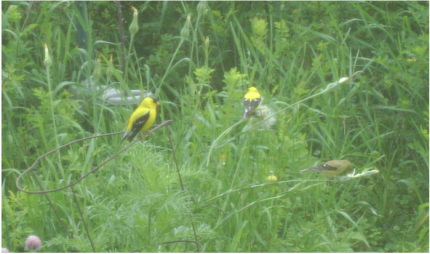
Here's a not very good photo of some goldfinches that I watched landing on these wild salsify plants (an edible). The salsify had flowered and gone to seed. When the birds landed on them, the plant bent over from the weight, and the birds gingerly slid down the stem to reach the seeds.
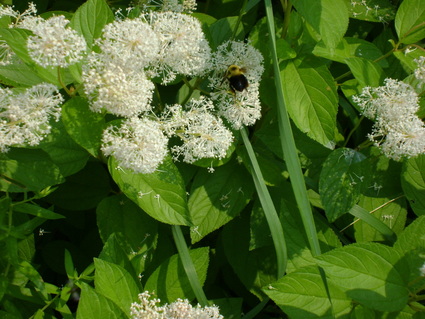
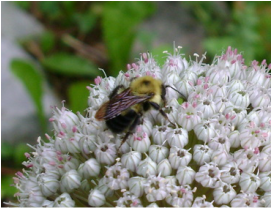
The white flowers of this New Jersey Tea plant are always covered with bees & insects.
|
Wildlife Gardening: Providing Cover/ Shelter
|
Any of the following will provide cover for insects, small mammals, butterflies, and/or birds:
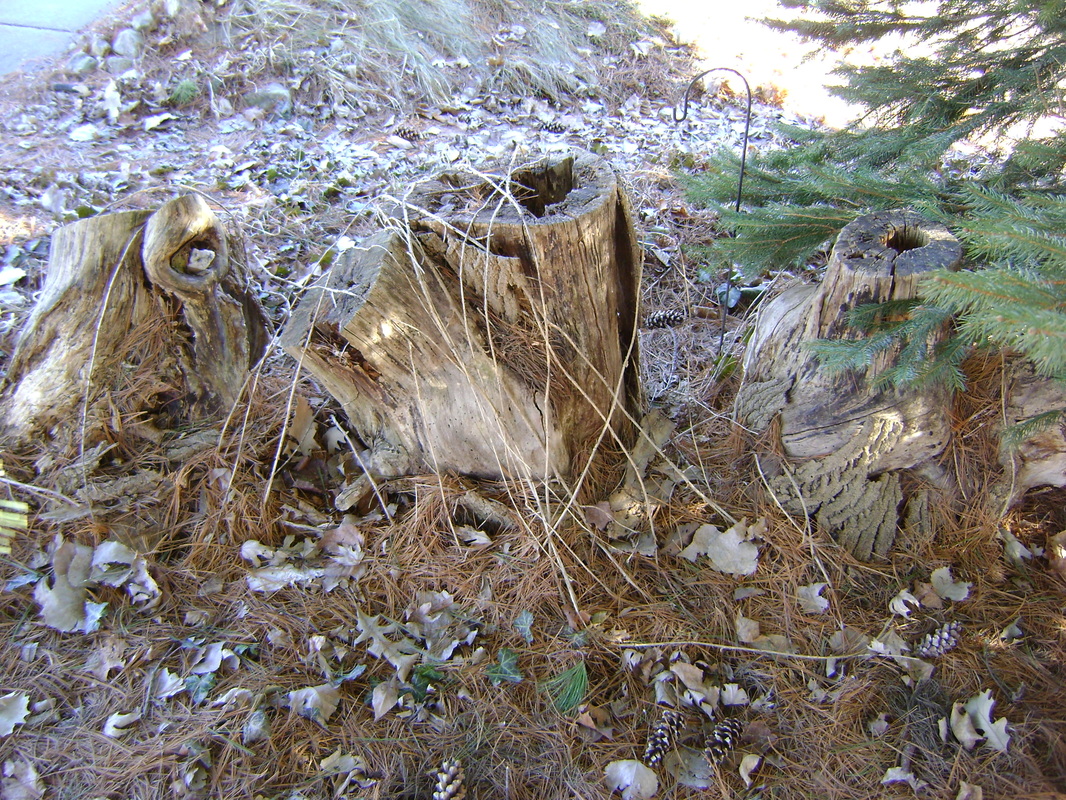
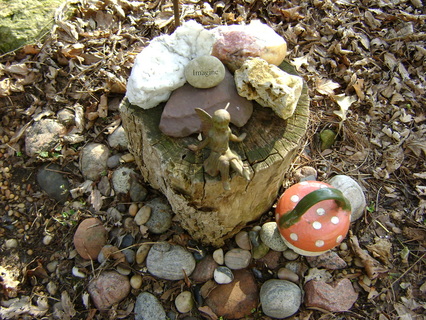
Above & Below: When our neighbors have cut down trees in the past, Bear has asked them if we could have some of the stumps they were trying to get rid of (Bear says it helps to have a large husband that people won't say no too even if they think he's crazy). We've left the tree trunks around the yard in various places. In the front yard (above), we created what Bear laughingly calls "Stumphenge," with three trunks over which vines grow in the Summer (we couldn't afford to buy large rocks to make a Stonehenge). When these got old enough, the bark loosened, providing places in which butterflies and insects can take shelter. As the stumps decay, they nourish all sorts of other life. Stumps also can do double duty as small end tables in a seating area, or to display garden figurines. We've also seen pairs of baby squirrels using them as a jungle gyms while chasing each other around the yard.
|
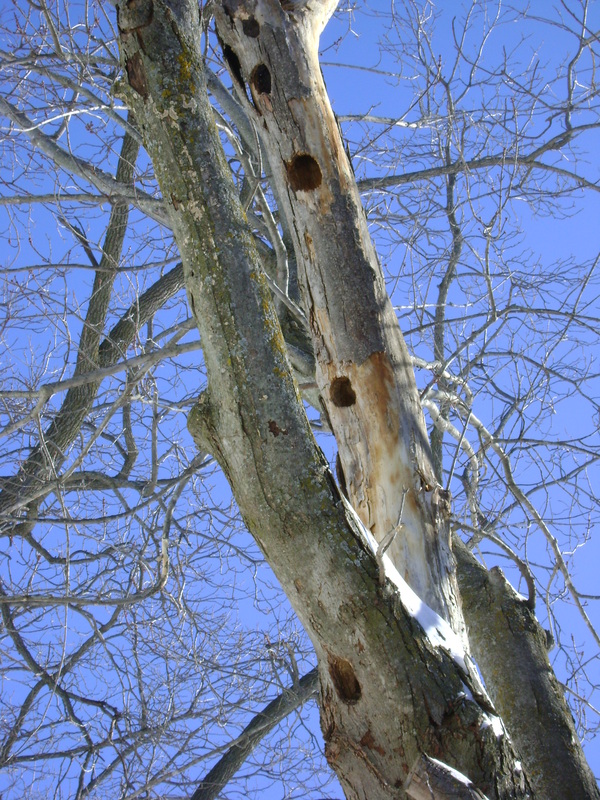
The snag below, which is a maple tree in our side yard that is partially dead, provides food for the woodpeckers, who drill holes in the dead branches looking for insects to eat. The larger holes are used to raise young birds or as nesting holes for squirrels
if they become big enough. 
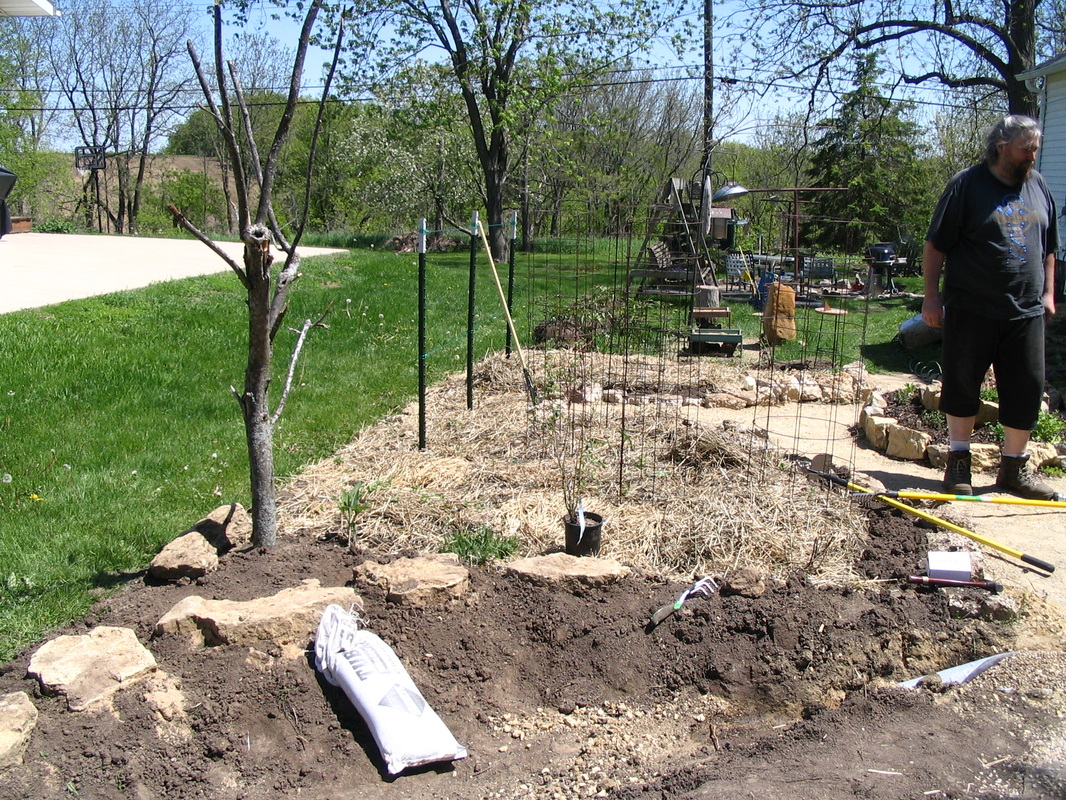
Make your own snag (above): If you don't have any dying trees in your yard, but can get a large tree limb, you can anchor it in the ground and make your own "snag." Dig a hole, insert the trunk, and fill in around the trunk with rocks and soil. As soon as we put up the snag in the photo above (it's behind the white sack sitting in the rain garden we're creating), birds started using it as a perch. It's not big enough to provide nesting sites, but the birds do search for insects in its bark.
|
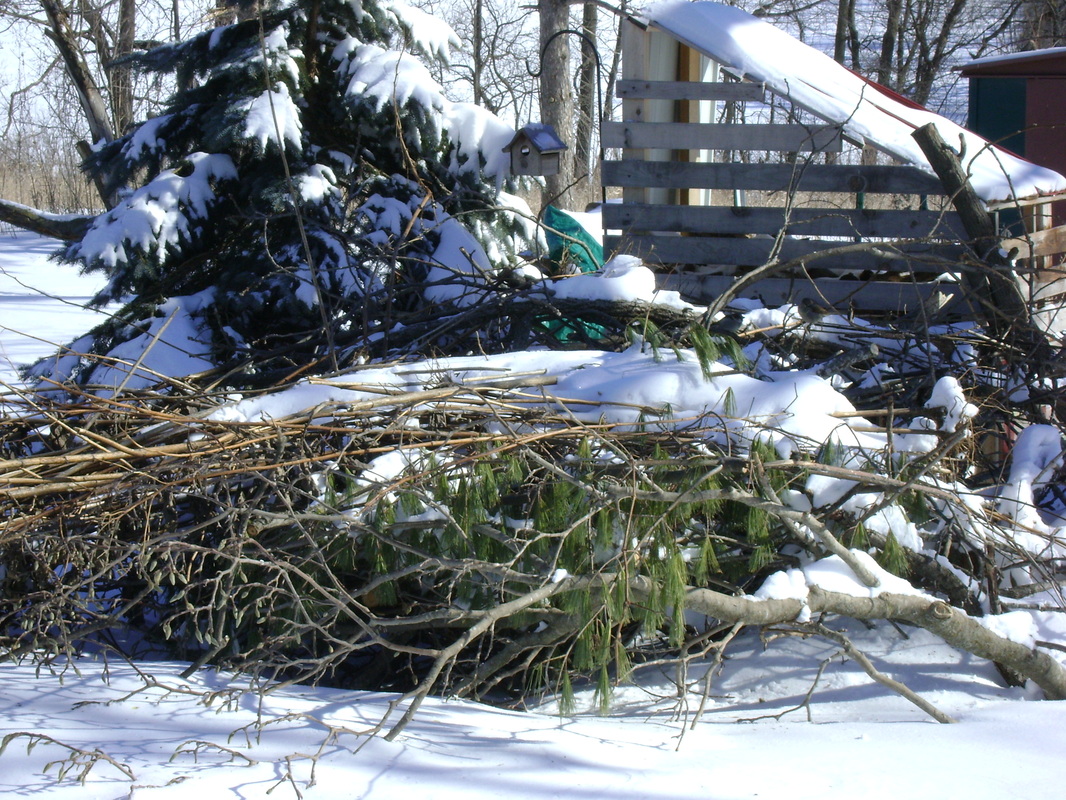
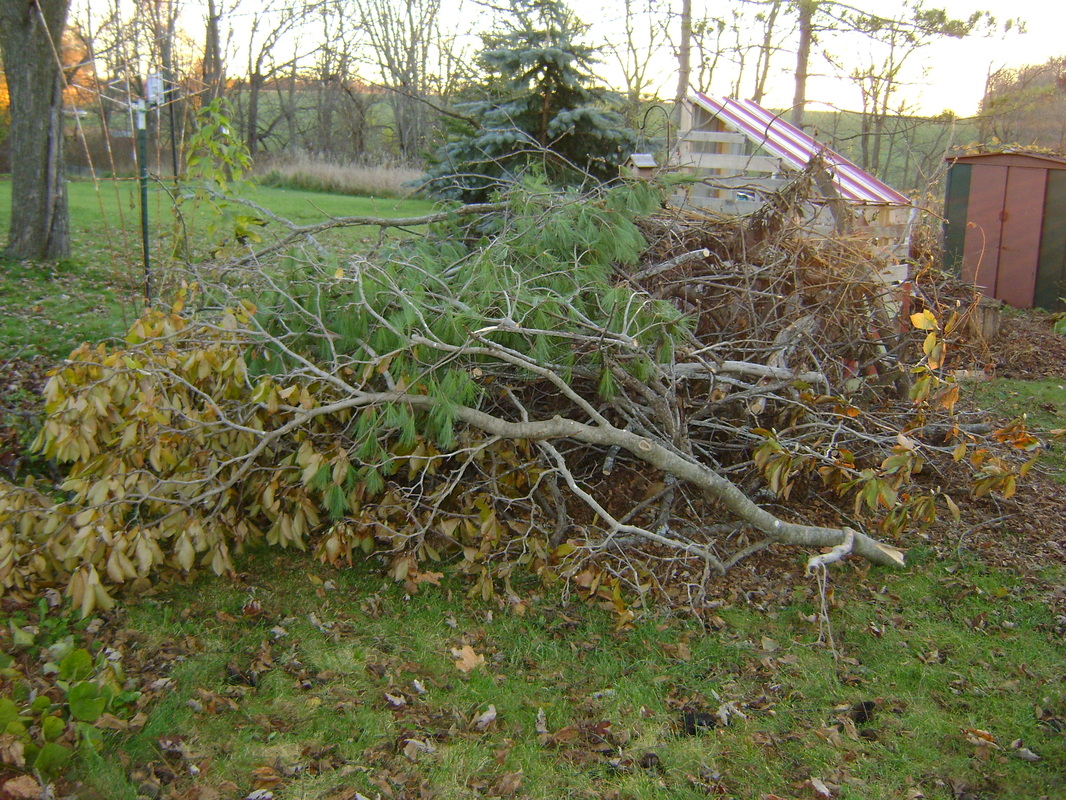
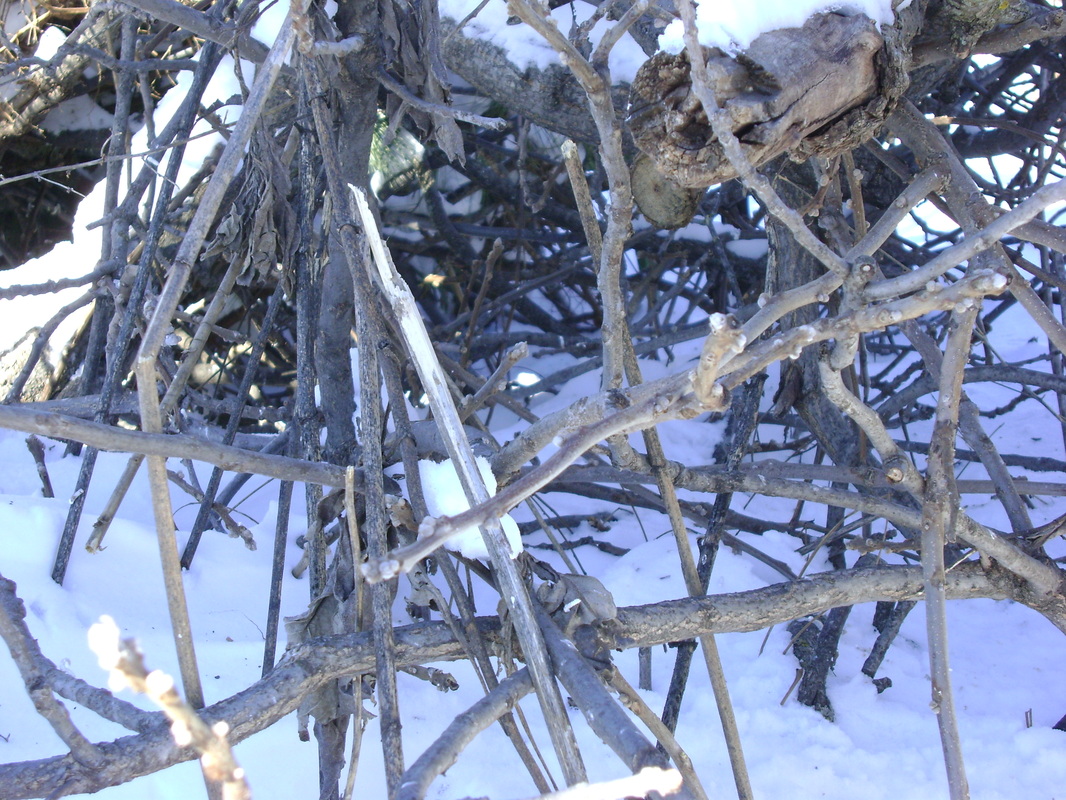
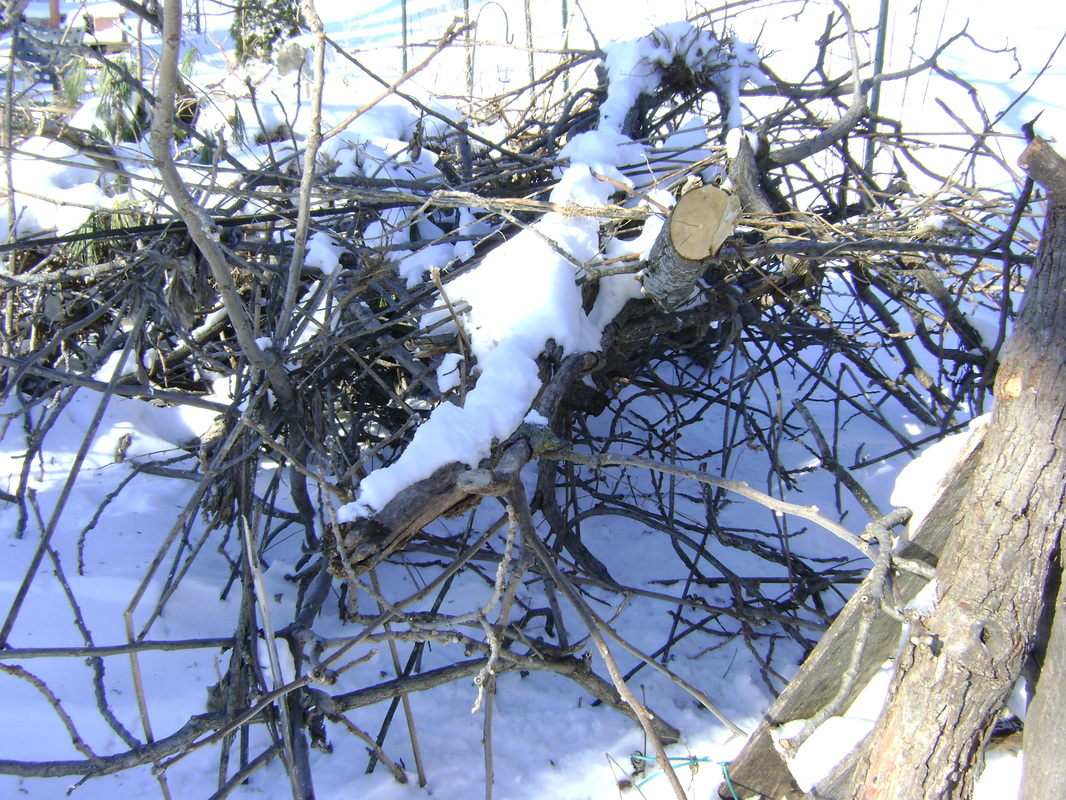
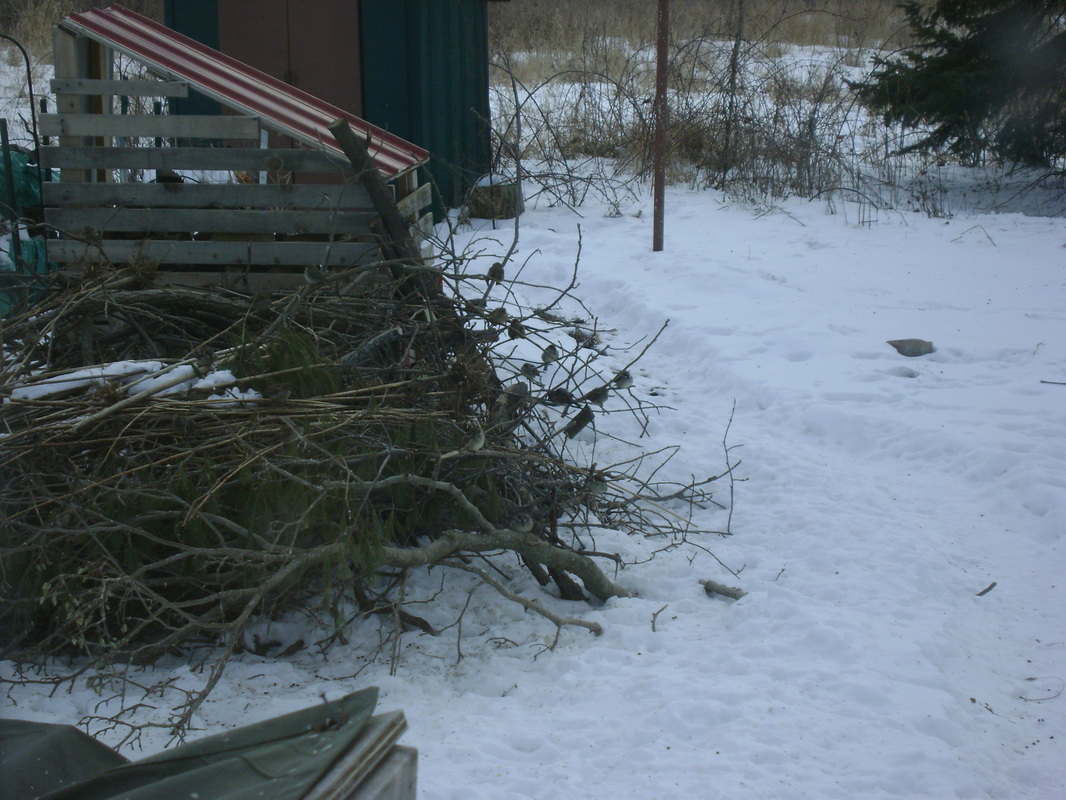
Our Accidential Brush Pile:
|
1. We trimmed some trees in the yard in the late Fall, and temporarily moved the cut limbs to this pile. We didn't attempt to arrange it in any particular way, nor did we plan to leave it there long. However, the birds took it over almost immediately, so we decided to let them keep using it.
|
2. When we harvested our sunchokes, we put the dry stalks over the top, which held some of the snow on top of the pile and provided even more shelter from the elements.

|
3. The back side of the pile ended up with lots of open spaces underneath.
This keeps the birds out of the wind since the pile backs up against one of our wood sheds.
This keeps the birds out of the wind since the pile backs up against one of our wood sheds.
|
|
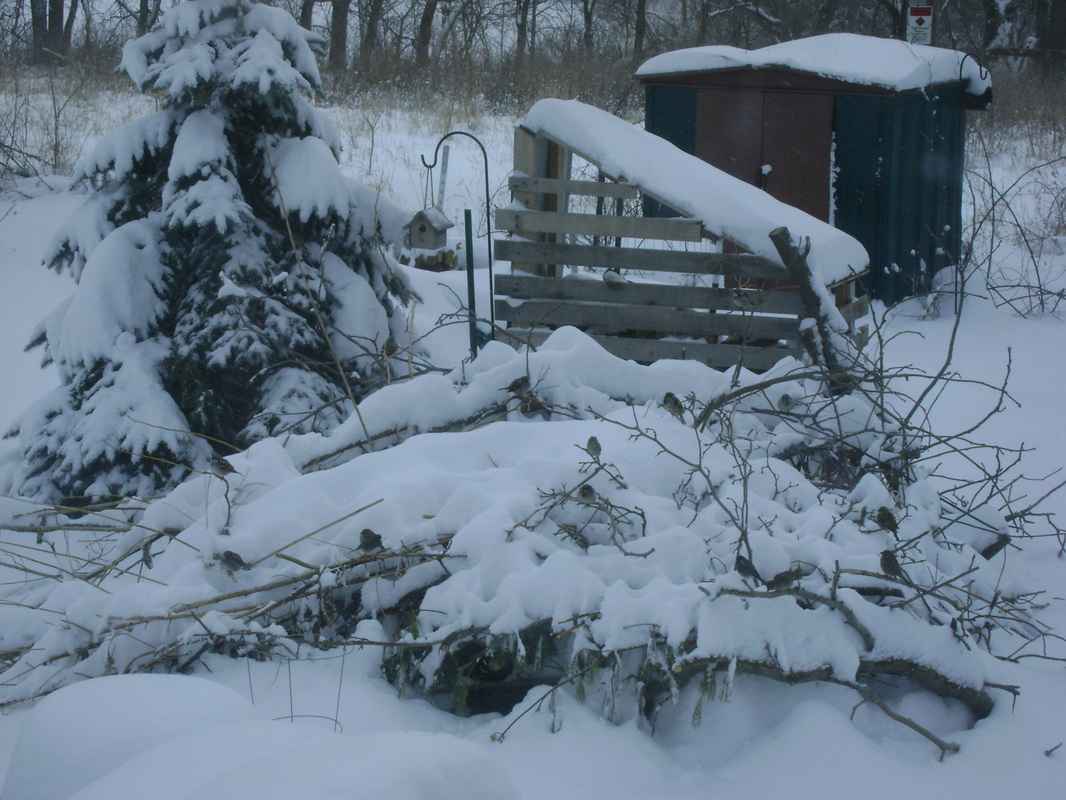
4. It's hard to go outside and take a picture of the brush pile without all the birds that are using it flying away, but here's a couple taken through our back door. Dozens of sparrows, goldfinches, and juncos shelter in the pile in between eating at our bird feeders.
IT REALLY DOES PROVIDE SHELTER:
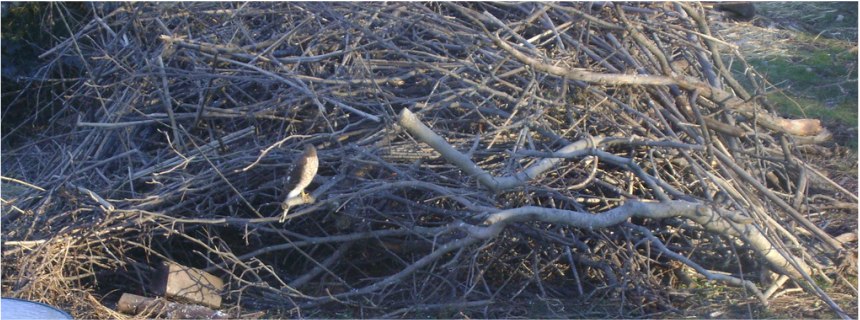
If you're wondering how a pile of twigs provides shelter, take a look at the image below. It shows a hawk sitting on the edge of the brush pile, looking for its next meal. It was too big to get into the pile, which was full of dozens of small birds at the time. The hawk sat there waiting until a few of the birds left the pile, and it was off after them. Then a few minutes later, a lot more birds left when it was safer.
If you're wondering how a pile of twigs provides shelter, take a look at the image below. It shows a hawk sitting on the edge of the brush pile, looking for its next meal. It was too big to get into the pile, which was full of dozens of small birds at the time. The hawk sat there waiting until a few of the birds left the pile, and it was off after them. Then a few minutes later, a lot more birds left when it was safer.
|
Other Types of Winter Wildlife Shelter:
|
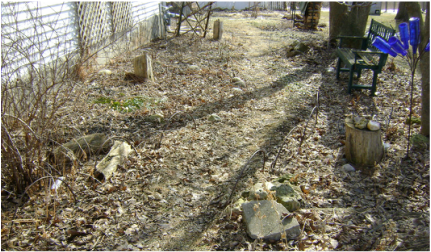
Leave the leaves where they fall, to provide shelter for wildlife over the Winter.
|
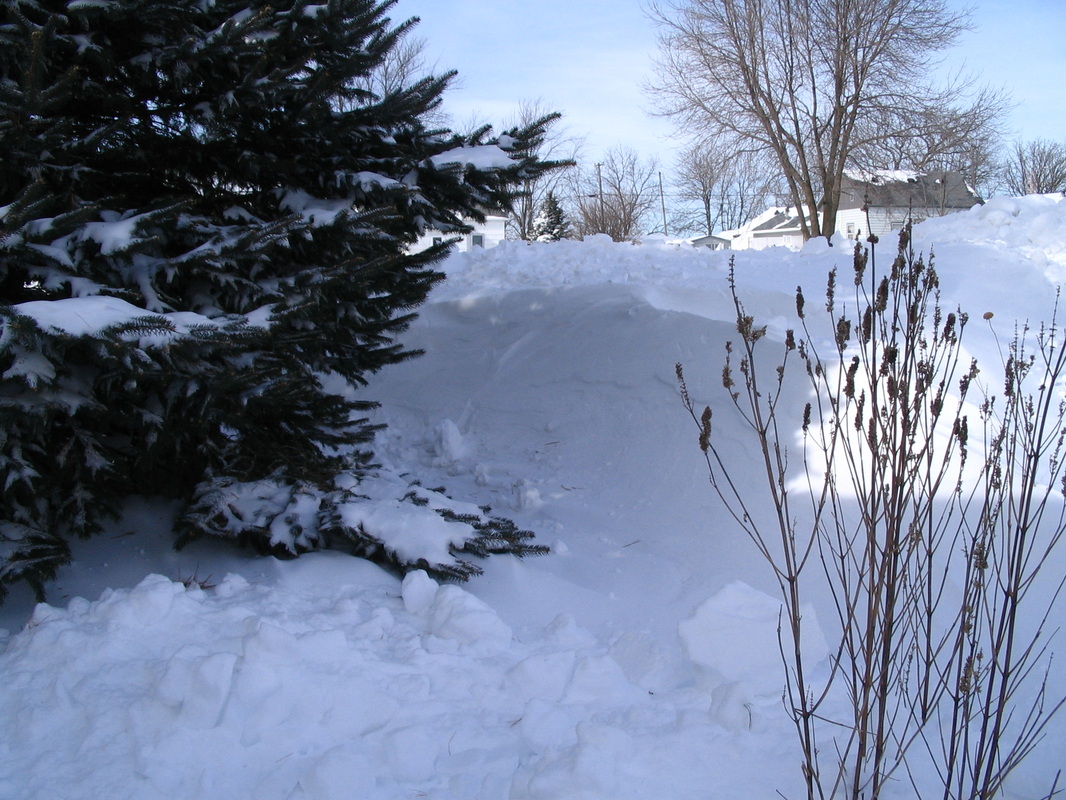
Evergreens shelter birds from the Winter wind.
|
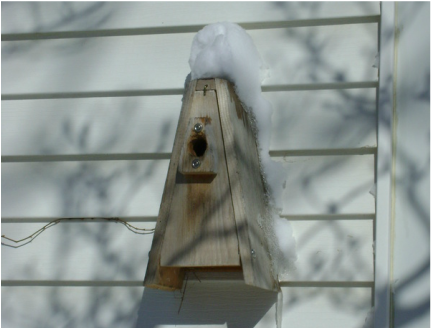
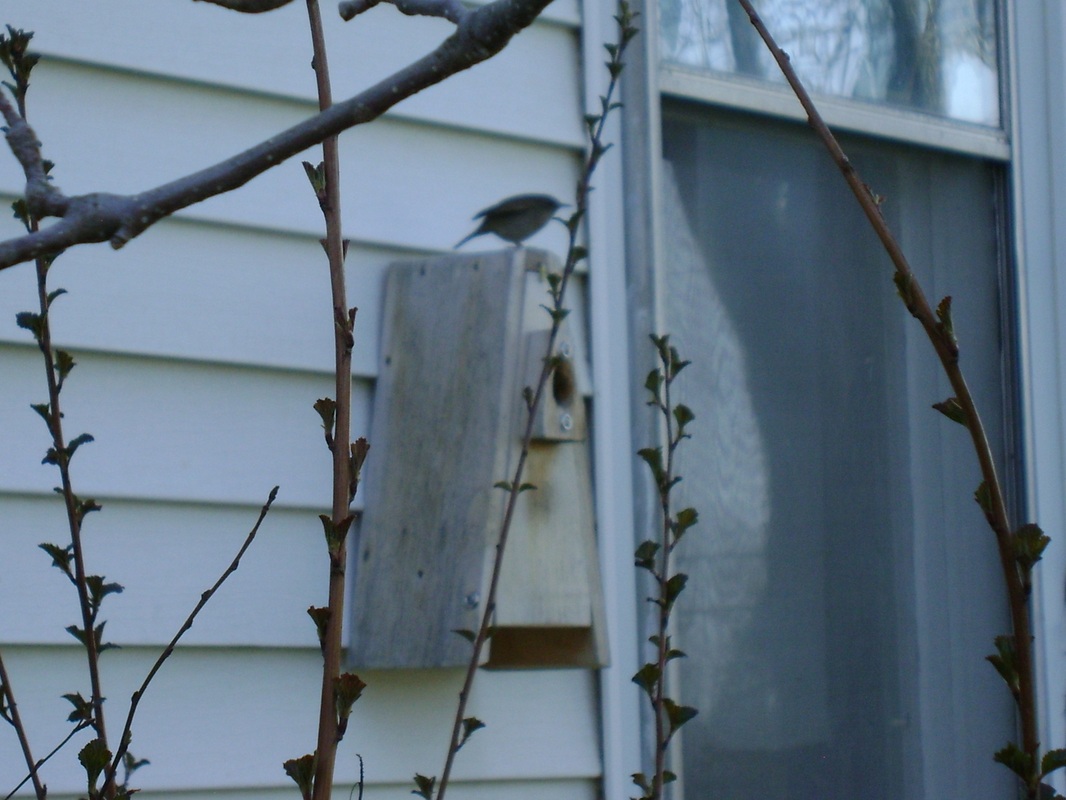
Birds may also use nesting boxes as shelter during Winter storms.
|
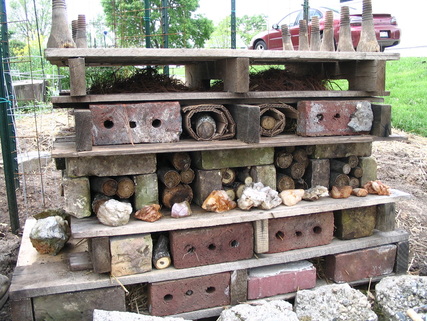
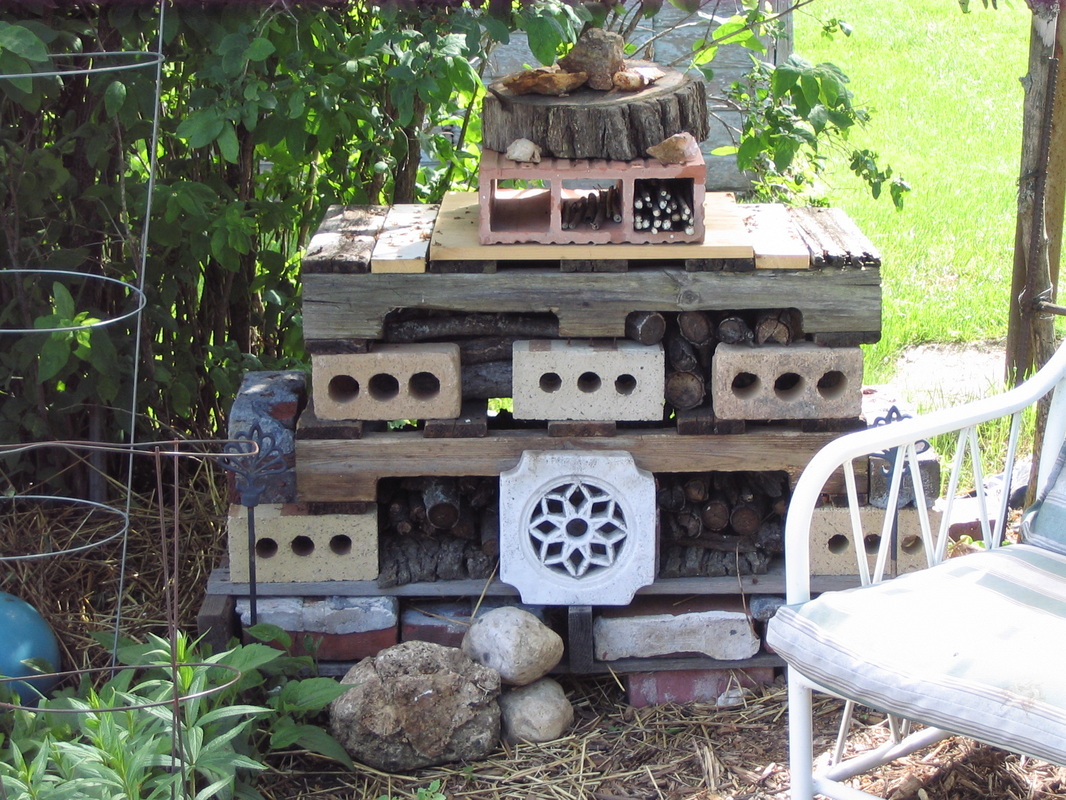
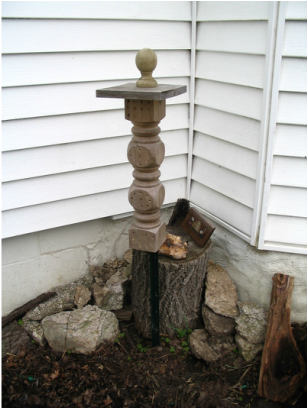
Building a Habitat Stack for Wildlife Shelter:
I learned about habitat stacks from some British gardening books. I think they might be popular there. I love to build them because they are both functional and artistic. They provide dry nooks and crannies that shelter various bugs and small animals during the Summer and provide hibernation spots during the Winter. I love the way they look in the yard.
You can create habitat stacks any way you like. The goal is to leave as many dry crevices in each layer as possible. We've used these layers to build two habitat stacks in our yard:
- Bricks make a stable first layer: Bricks will support the rest of the stack. Arrange them on the ground like a maze- leave tunnels in between the bricks for small mammals to use. Many of our chipmunks have been saved from cats by hiding in these tunnels.
- Pallets: We used pallets to create the upper layers in our habitat stacks. Each layer of pallet can be filled differently to provide different habitat: We filled ours with straw and leaves, or with corrugated cardboard rolled loosely into logs (which provides many layers of habitat- you can see this in the second to top layer in the left photo below).
- Small logs: Pallets can also be filled with small logs interspersed with bricks. If you drill some deep holes in the end of the logs, bees can use them to lay eggs (see more about bee nesting sites below).
|
|
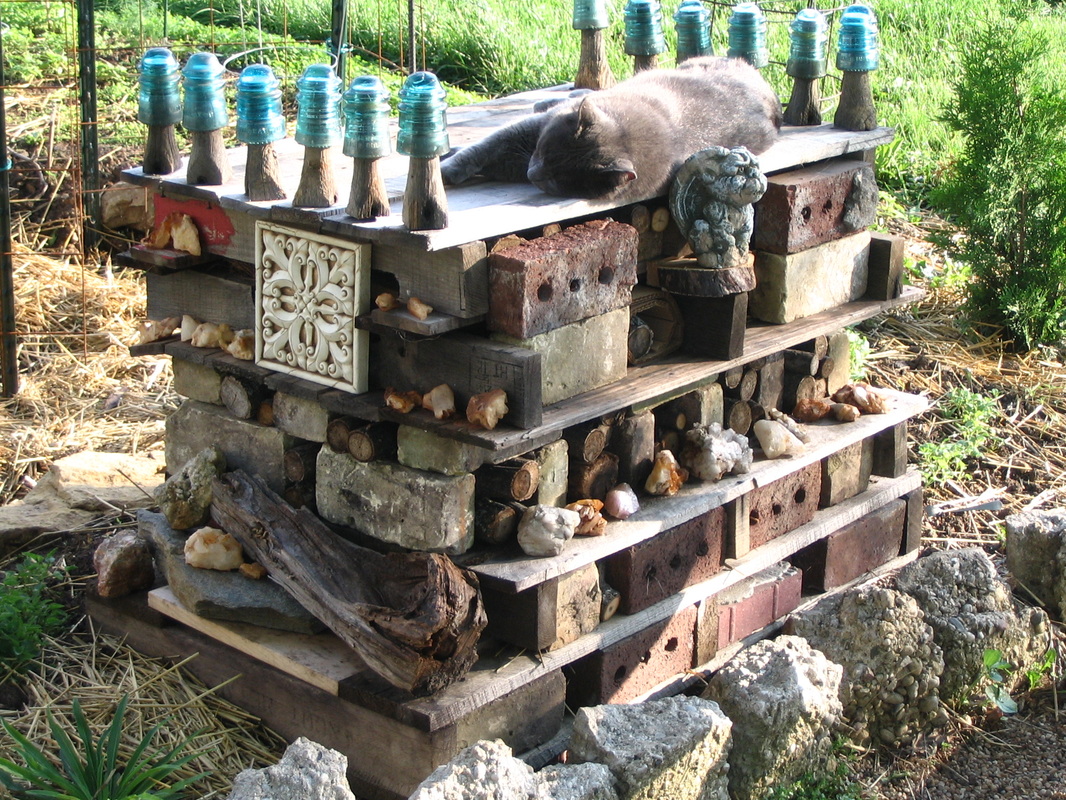
The top of the stack also provides a good sunning location for cats. I often find piles of walnut shells here too, from squirrels having a snack.
Save Our Bees
|
When bees fly from flower to flower gathering food for themselves, they are also pollinating 80% of our food crops,
so we need to keep them around. Many honey bees are dying from colony collapse disorder, the cause of which is still unknown, although pesticides and diminishing habitat are believed to play a role. You can help save the bees by providing the flowers and habitat they need. If you're wary of bees, consider these facts:
|
|
|
Build a Bee Nesting Box:
You can build a bee nesting site by drilling holes into a thick piece of untreated lumber, such as a 4'x4' or 4'x8'. Bees will lay their eggs in the tunnels in Spring and seal them with mud. The new bees will be born the following Spring. We made a nesting site out of the fancy second hand banister shown in the photo to the right. Here are the specifics:
|
|
Other Nesting Sites:
- You can also drill the holes mentioned above in any tree stumps you have in the yard.
- If you're not feeling handy, you can buy bee houses that have nesting tubes that can be replaced annually (this also protects from parasites). Check for these in garden catalogs.
- If you can leave bare ground on a south facing, gentle slope, it may be used by ground nesting bees. The year we put in our catio, the sloping ground inside it was bare from the construction. We quickly saw small bumble bees digging in the soil, making tunnels.
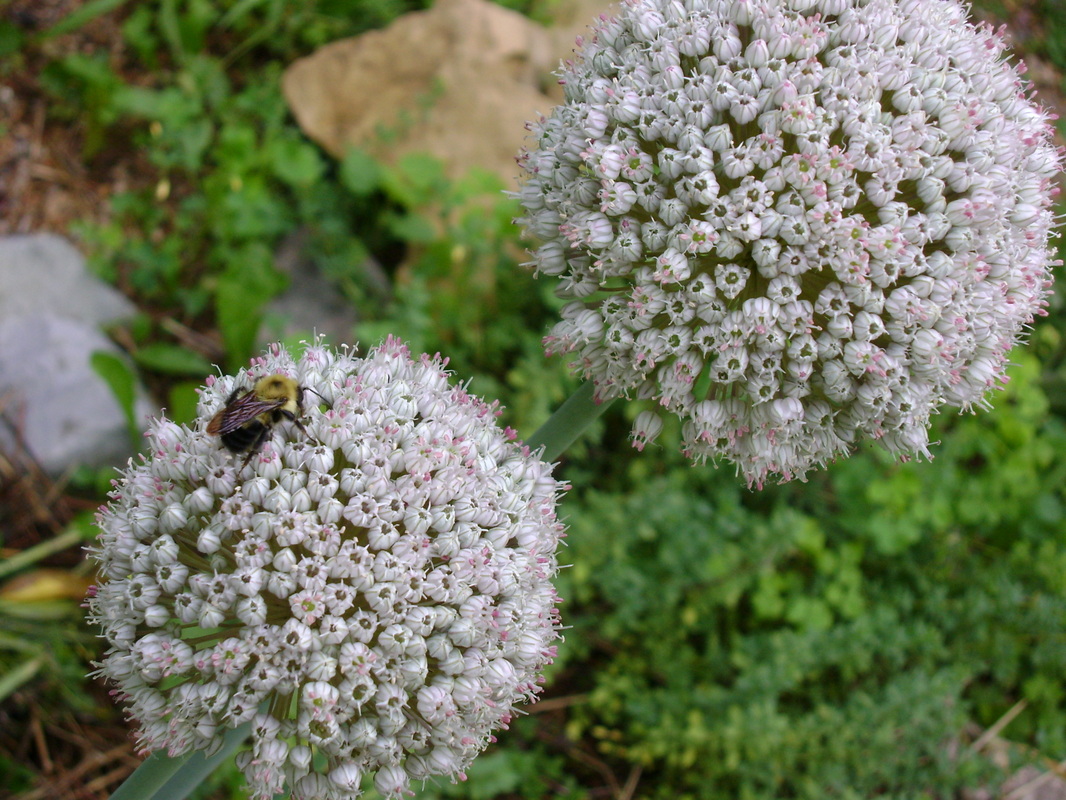
Planting Flowers for Bees:
I love being near flowers when they are so full of bees that I can hear the humming and watch all the movement. We have lots of bumble bees of all sizes in our yard. They remind of us small teddy bears that look so soft we want to try to pet them. They fly around so fast, landing on a flower, moving in a quick circle around its center, and flying on to the next flower. Over and over again... busy as a bee.
I love being near flowers when they are so full of bees that I can hear the humming and watch all the movement. We have lots of bumble bees of all sizes in our yard. They remind of us small teddy bears that look so soft we want to try to pet them. They fly around so fast, landing on a flower, moving in a quick circle around its center, and flying on to the next flower. Over and over again... busy as a bee.
|
Flowers with a single layer of petals provide the easiest access for bees. Here are the flowers that bees love the most in our yard (Zone 5):
In Spring:
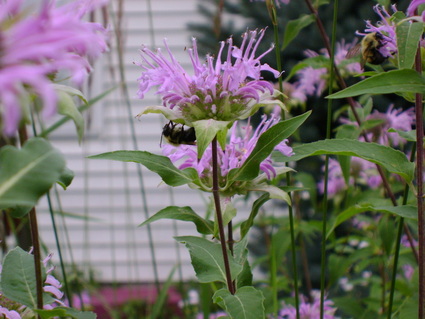
One morning I was outside at dawn and found bumble bees sleeping upside down under our bee balm flowers (above). I've also noticed them under onion flowers. I am trying to grow some maypop passionflower vines for the same reason- in addition to providing fruit for us to eat, bees are supposed to sleep in the flowers.
|
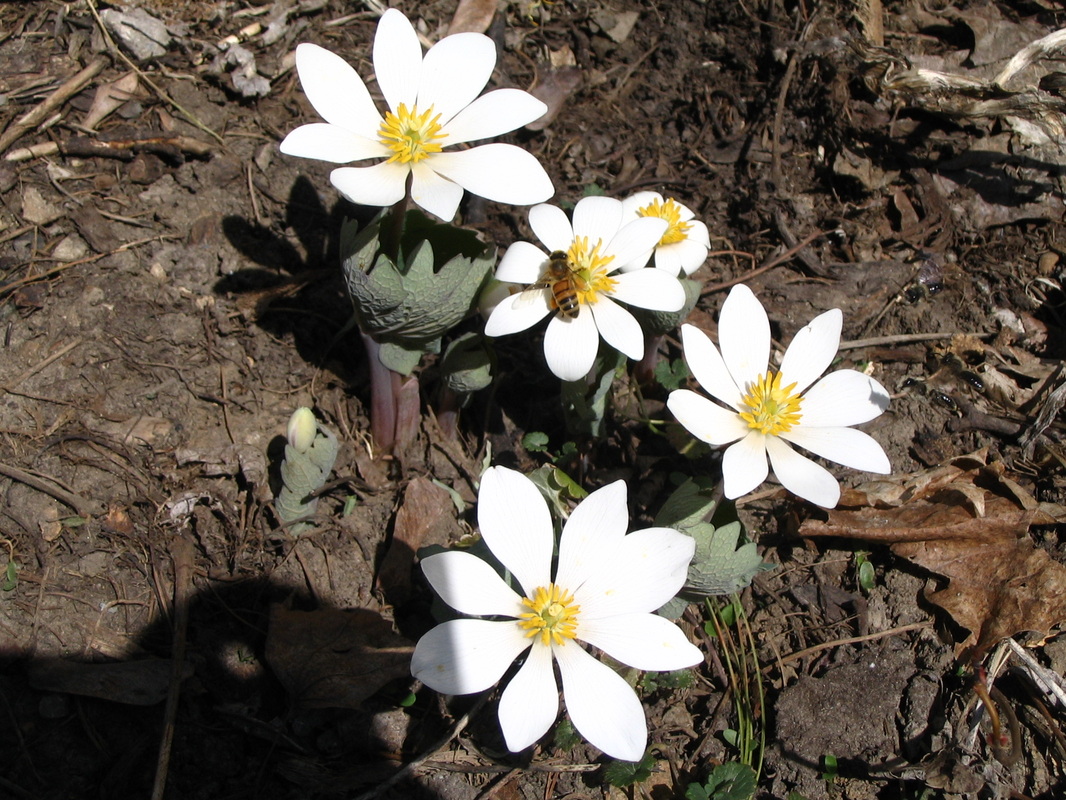
A bee feeds from blood root, one of the first flowers to bloom in our yard.
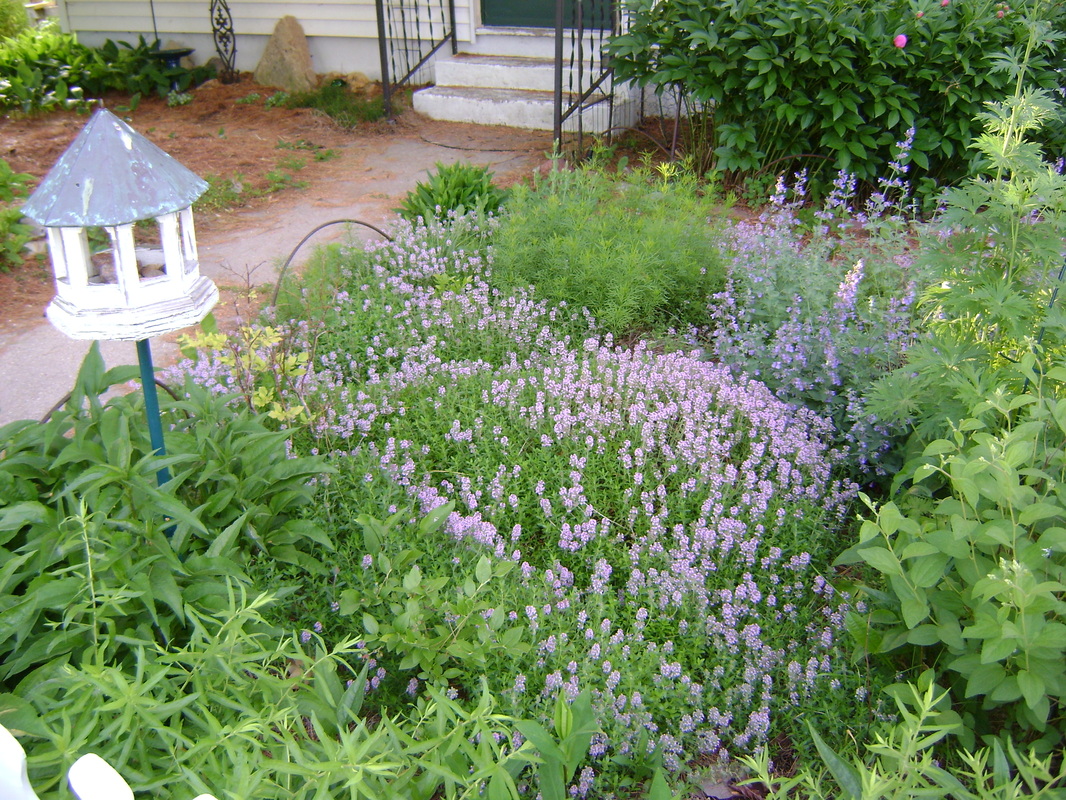
A carpet of thyme in our front yard, with catmint blooming behind it on the right, both of which are always full of bees.
|
See more suggestions on our Save the Bees page.
Gardening for Butterflies
|
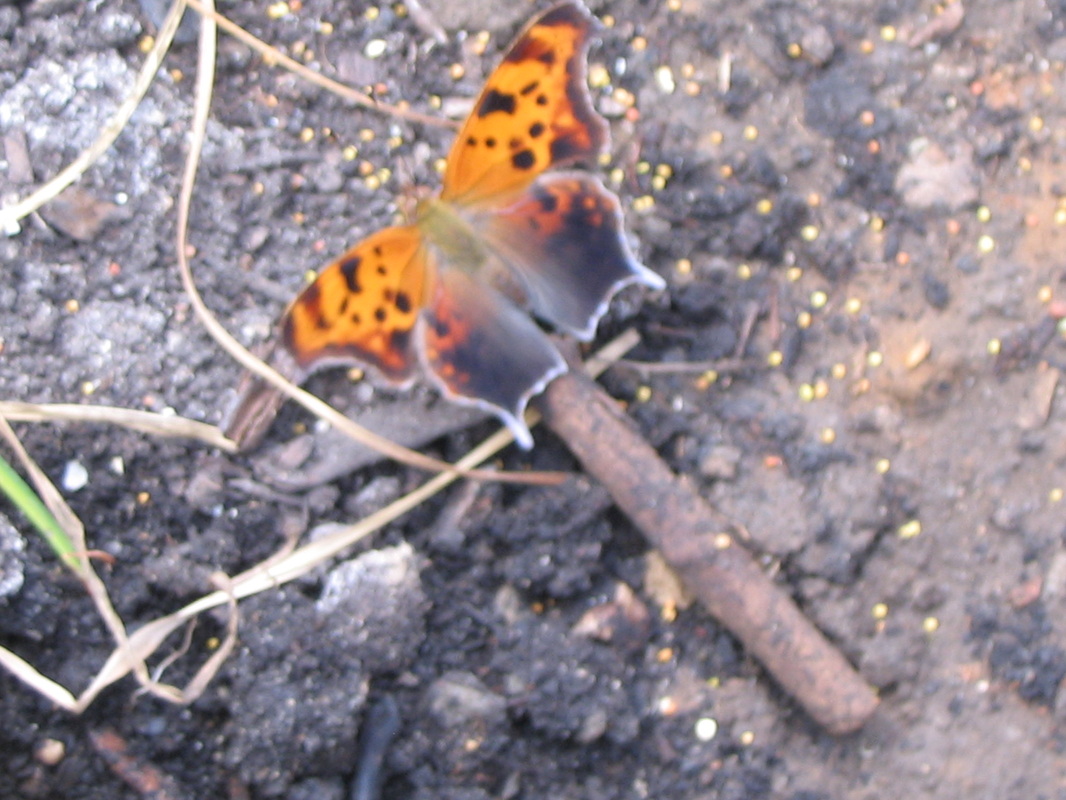
Butterflies are also fun to watch ambling around the garden. They add so much movement, it makes the garden seem even more alive. I find it very difficult to photograph them, though. They just don't hold still long enough. I seldom find them with their wings open as they are in the photo to the right, which is a shot that Bear was able to get. They're hard to identify for the same reason- it helps to see the markings on the top of their wings, but they seldom hold still long enough with their wings open.
|
|
Supplemental Feeding: Bird Feeders
|
In addition to growing plants that feed birds, you can of course also put out some bird feeders. I have feeders outside the windows by our dining table, which is a convenient place for watching them on weekend mornings. Here are some tips I've learned from years of providing bird seed:
Choose Feeders that are Easy to Clean:
Choose Dehulled Seeds:
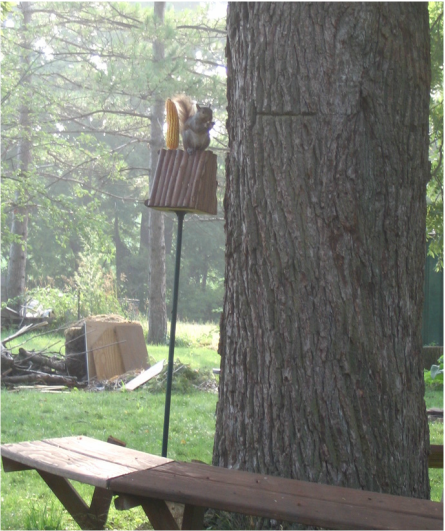
Some people only feed the birds during the Winter, but if you put out birdseed in the Summer too, parents will bring their babies to the feeders. You'll be able to see baby birds sitting right next to bird seed, begging for their parents to feed them, having not yet learned that they can pick up their own seeds. If you watch birds a lot, consider joining Project Feederwatch (Feederwatch.org) through Cornell University. People across the country report the birds that come to their feeders during the Winter and scientists use the data to track bird populations. I've seen similar citizen science projects for tracking mammals, bees, nesting birds, and plant flowering times. We're equal opportunity feeders in our yard, and don't care if the seed is eaten by the birds, the squirrels, the chipmunks, or the mice. In a different part of the yard I do put out corn for the squirrels (below) to give the birds more of a chance at the bird feeders. |
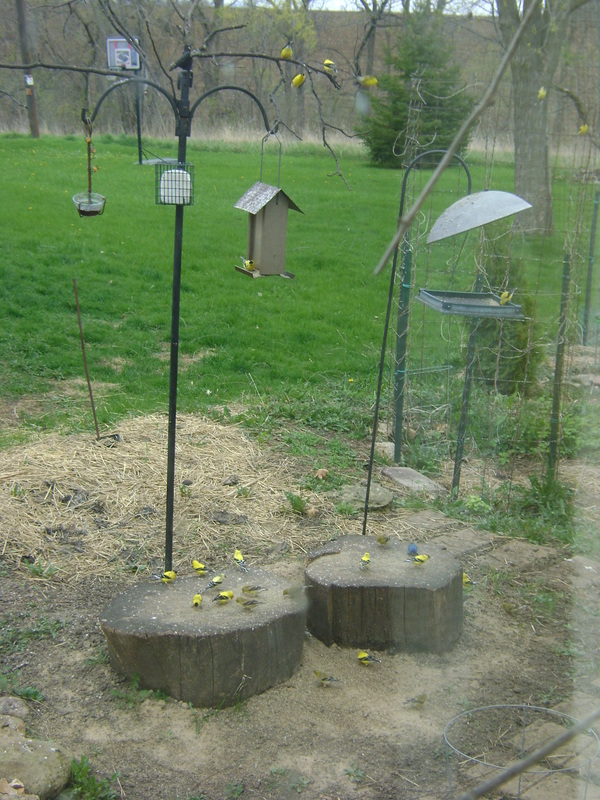
The bird feeding area in our yard in early Spring, with gold finches and one indigo bunting.
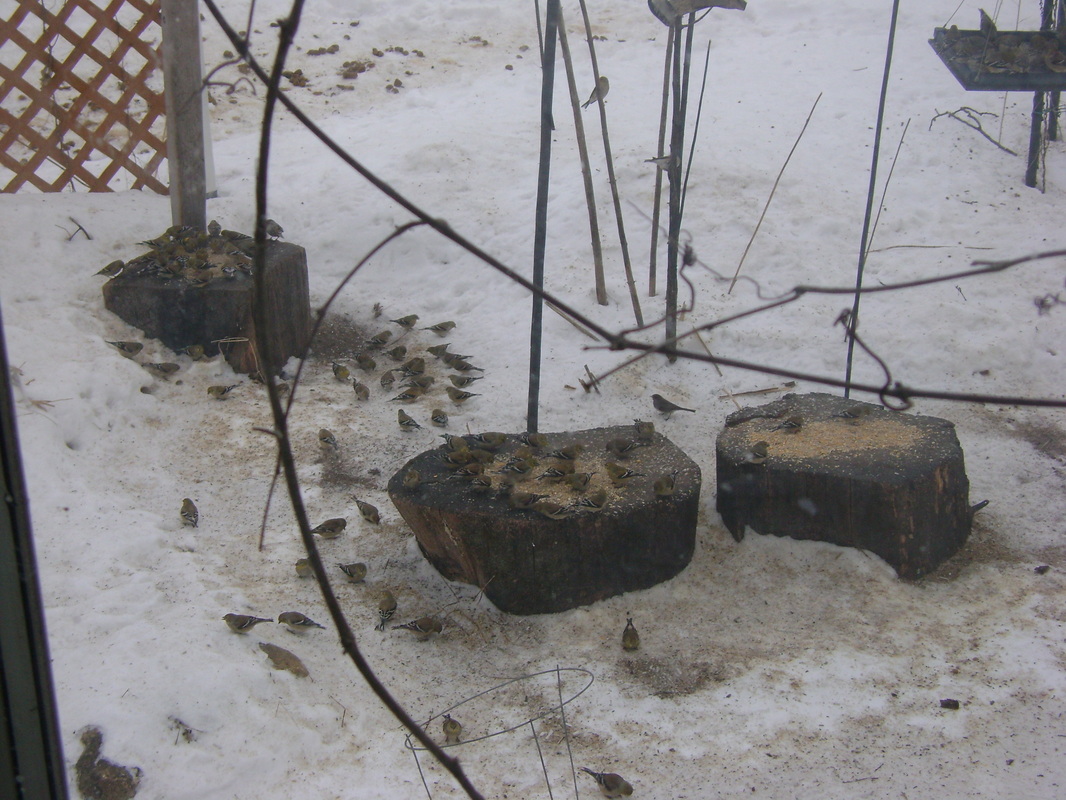
Here's the same feeding area during the Winter, with many more gold finches in their dull Winter colors.
|
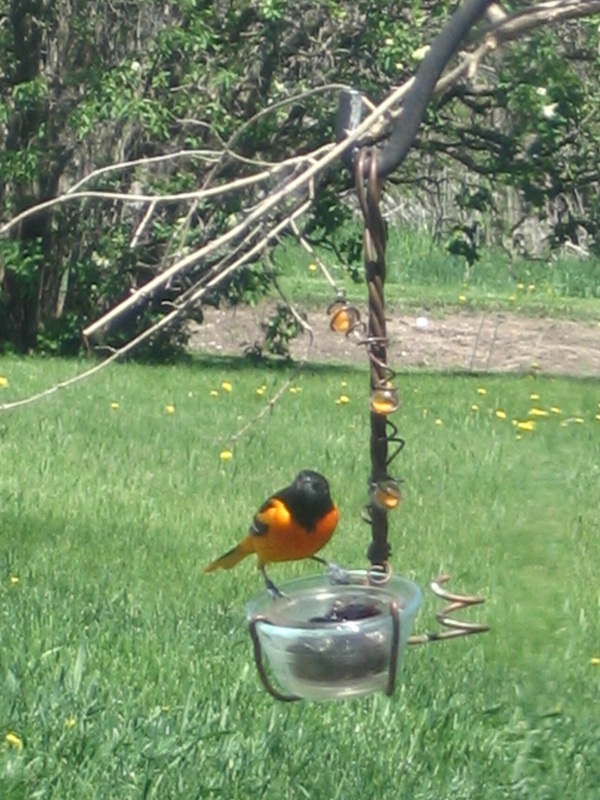
Baltimore orioles (the orange bird to the right) will eat grape jelly from this specially designed feeder in our yard. When the birds return each Spring, the local grocery stores sometimes run out of grape jelly.
|
|

You don't necessarily have to buy feeders. When there's a wind chill during Winter, I spread seed on our back porch steps,
which is sheltered from the North wind.
which is sheltered from the North wind.
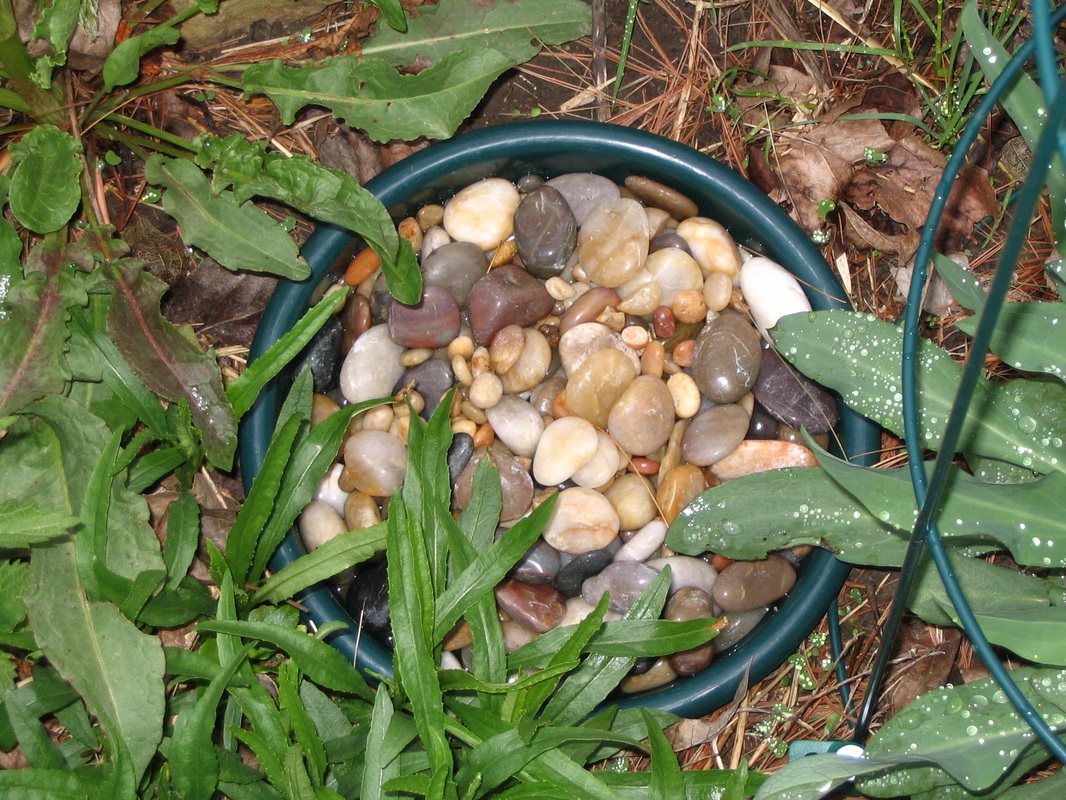
Providing Water for Wildlife:This may be the most important thing you can do for wildlife, because it may be the hardest thing for them to find in inhabited areas. As such, it may bring more animals to your yard than anything else you could do.
Possible ways to provide water:
|
|
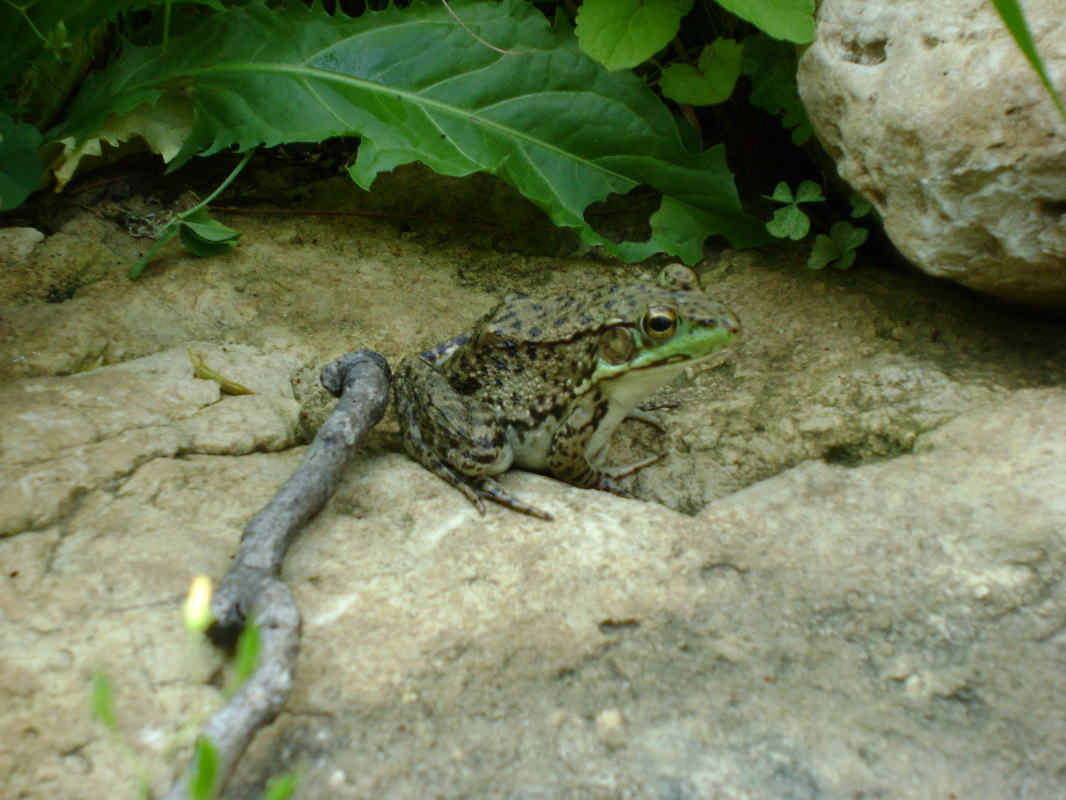
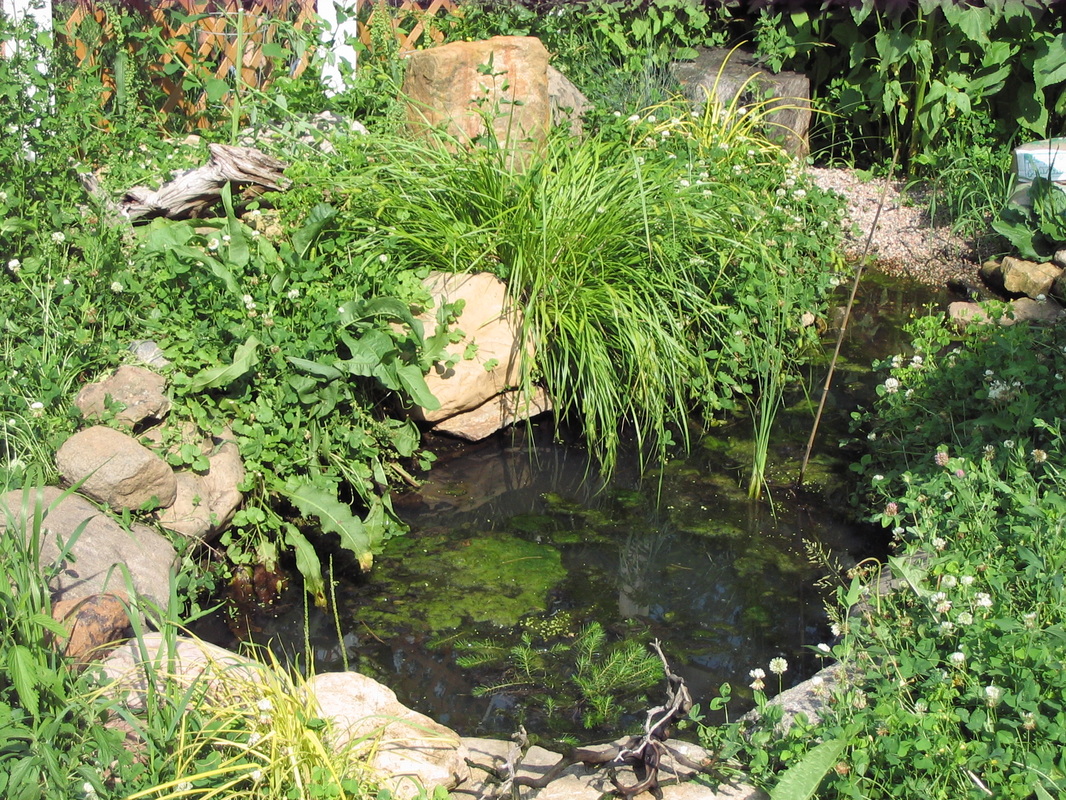
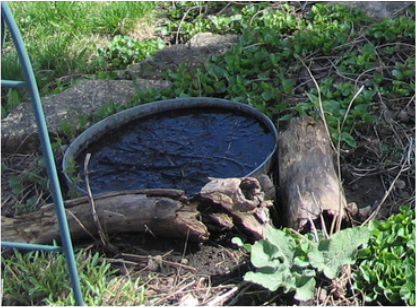
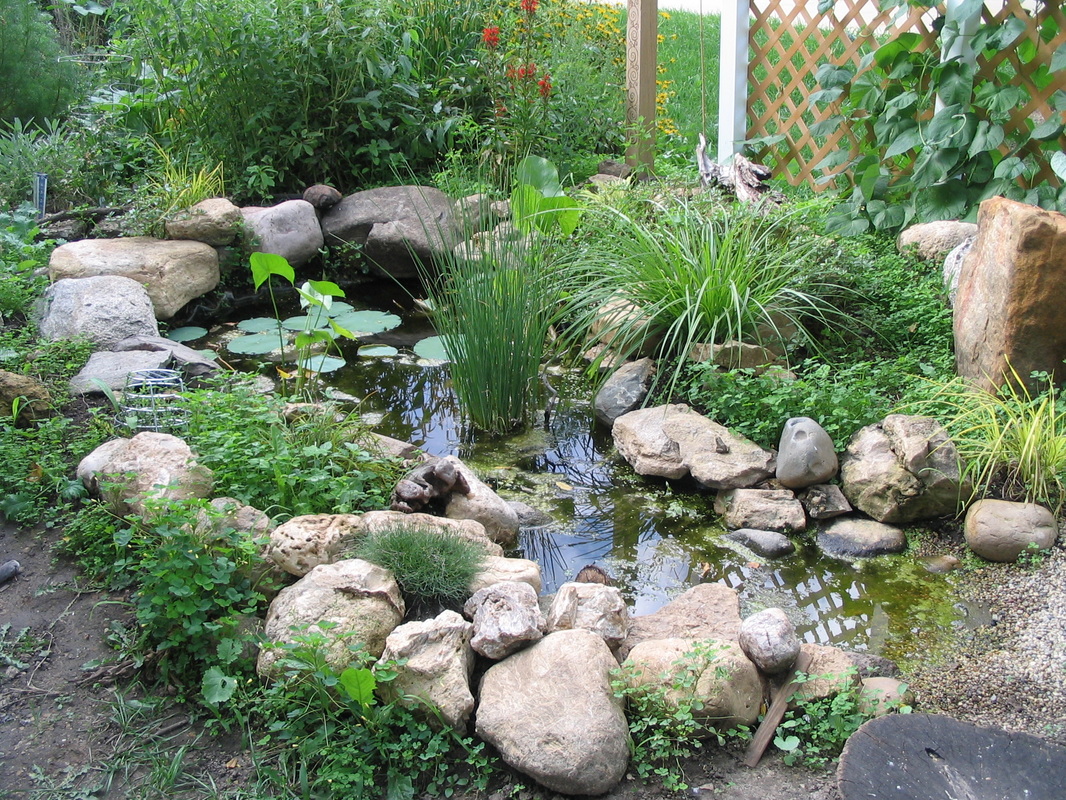
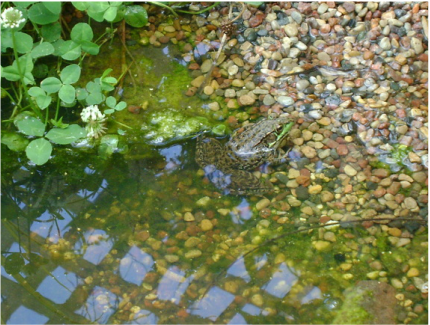
- It's a lot of work to fill a bird bath every day, and keep it clean. Eventually, we put in a small wildlife pond, which in addition to providing drinking water, has let frogs and dragonflies move into our yard. See how we built our wildlife pond.
|
|
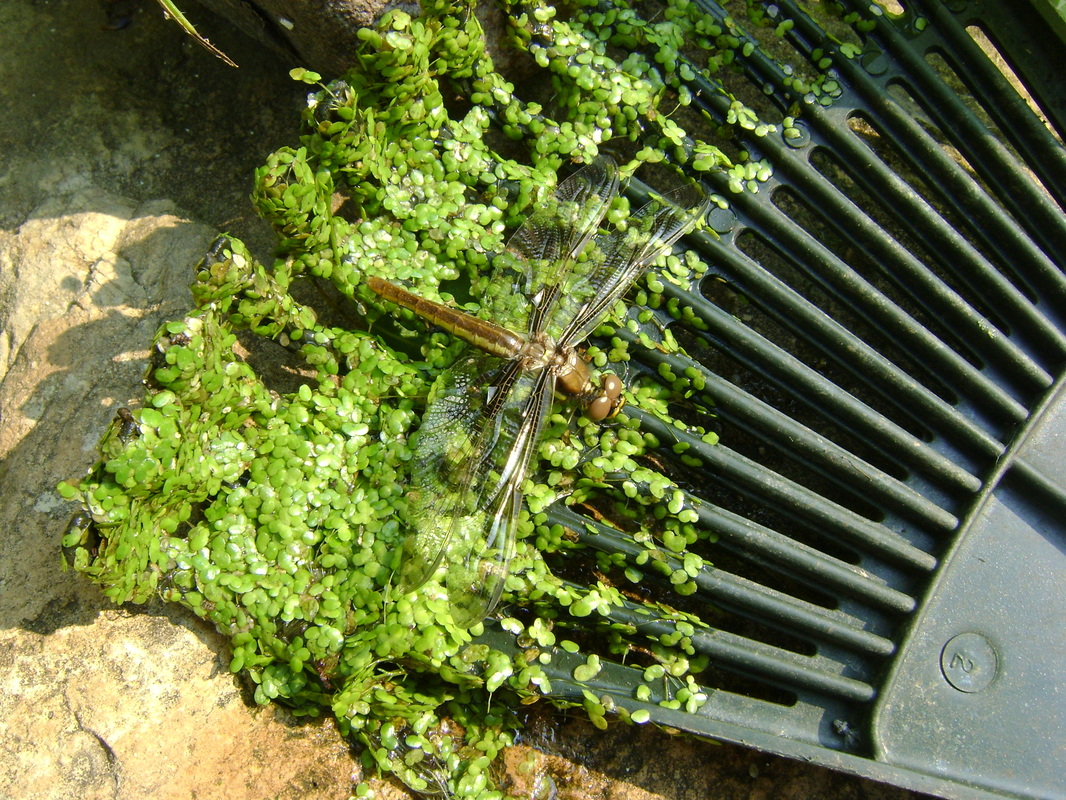
We saw dragonflies laying eggs in our pond within a couple weeks of building it.
Places to Raise Young:
Here are some suggestions:
|
|
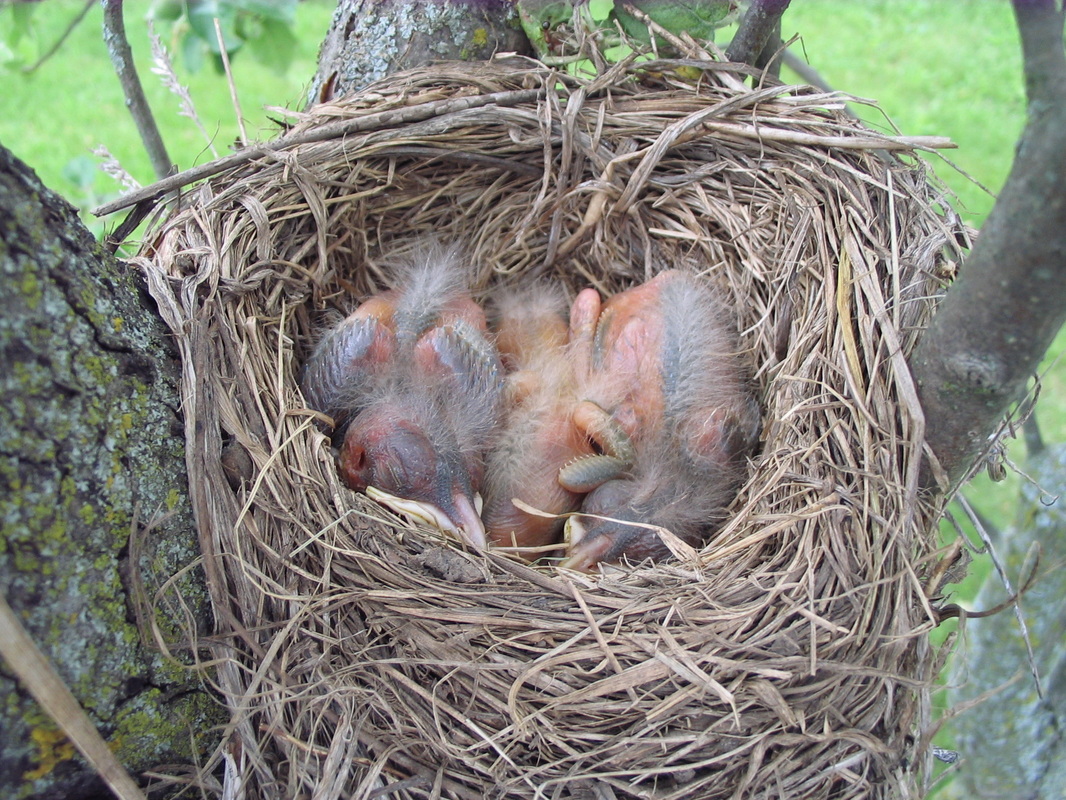
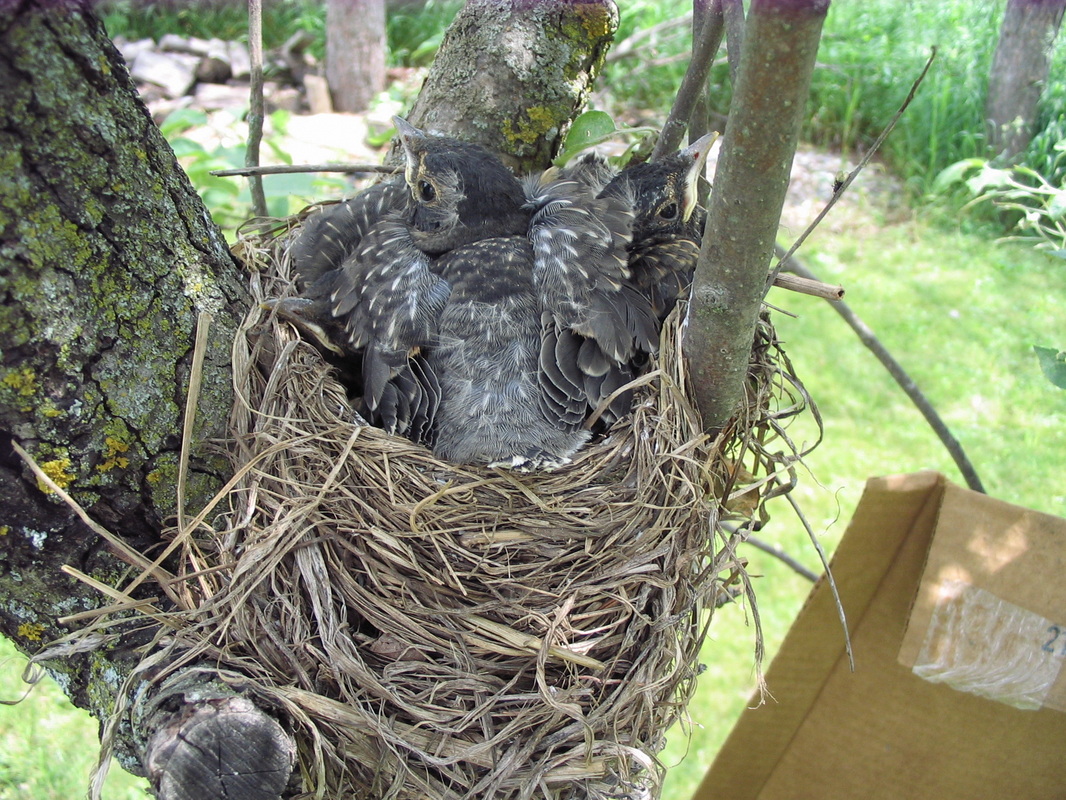
- Trees are preferred nesting places for many birds, so let's all plant more trees! Below is a robin's nest built in a fork of our neighbor's apple tree. It was very low to the ground, which let us take these great photos, but it would have been easy for a cat or racoon to walk right up to the nest and kill the birds. I tried tying some cardboard around the tree limb to block access, but it didn't survive in the wind. Fortunately, the birds stayed safe without my help, and eventually left the nest.
|
|
|
|
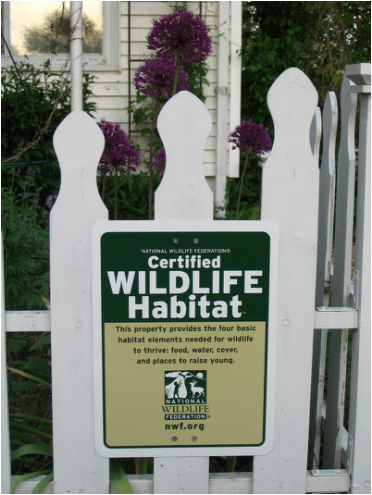
Certify Your Yard as Wildlife Habitat:
If you've gone to the trouble to include wildlife in your gardening plans, consider certifying your property as wildlife habitat through the National Wildlife Federation (nwf.org, see their wildlife gardening section). Then you can post this "wildly" popular sign in your yard and help spread the word that providing and preserving wildlife habitat is important. The certification program has been in place since the 1970s, and almost 200,000 properties were certified by this writing in 2015.
To become certified, you need to indicate that you are providing a certain number of things from the four necessary elements of wildlife habitat that we've discussed above:
You can apply online for certification. When I applied there was a $20 fee, which also makes you a NWF member for a year. You also need to buy your own yard sign. Different versions are available. This one cost $30+. Here are the criteria needed to certify your property as wildlife habitat as of this writing (3/2015): |
|
Food Sources:
Your habitat needs three of the following types of plants or supplemental feeders:
Seeds from a plant • Berries • Nectar • Foliage/Twigs • Nuts • Fruits • Sap • Pollen • Suet • Bird Feeder • Squirrel Feeder • Hummingbird Feeder • Butterfly Feeder
Water Sources:
Your habitat needs one of the following sources to provide clean water for wildlife to drink and bathe:
Birdbath • Lake • Stream • Seasonal Pool • Ocean • Water Garden/Pond • River • Butterfly Puddling Area • Rain Garden • Spring
Cover:
Wildlife need at least two places to find shelter from the weather and predators:
Wooded Area • Bramble Patch • Ground Cover • Rock Pile or Wall • Cave • Roosting Box • Dense Shrubs or Thicket • Evergreens • Brush or Log Pile • Burrow • Meadow or Prairie • Water Garden or Pond
Places to Raise Young:
You need at least two places for wildlife to engage in courtship behavior, mate, and then bear and raise their young:
Mature Trees • Meadow or Prairie • Nesting Box • Wetland • Cave • Host Plants for Caterpillars • Dead Trees or Snags • Dense Shrubs or a Thicket • Water Garden or Pond • Burrow
Sustainable Gardening Practices that Protect Wildlife:
You should be doing two things to help manage your habitat in a sustainable way:
Soil and Water Conservation: Riparian Buffer • Capture Rain Water from Roof • Xeriscape (water-wise landscaping) • Drip or Soaker Hose for Irrigation • Limit Water Use • Reduce Erosion (i.e. ground cover, terraces) • Use Mulch • Rain Garden
Controlling Exotic Species: Practice Integrated Pest Management • Remove Non-Native Plants & Animals • Use Native Plants • Reduce Lawn Areas
Organic Practices: Eliminate Chemical Pesticides • Eliminate Chemical Fertilizers • Compost
Resources for Creating Habitat & Choosing Plants that Benefit Wildlife:
Click on the images to buy these books from Amazon, or use the ISBN # to order them from your local bookstore:
 |
Wildlife-Friendly Plants: Make Your Garden a Haven for Beneficial Insects, Amphibians, and Birds
by Rosemary Creeser. 2004. ISBN: 1-55297-953-9 This is the first book I used to decide what to plant for wildlife in our yard. It includes a 100-page plant directory, with detailed information about how to grow each plant and what wildlife it benefits, as well as a full color photograph of each plant. |
 |
National Wildlife Federation: Attracting Birds, Butterflies and Other Backyard Wildlife
By David Mizejewski, Manager, Backyard Wildlife Habitat Program. 2004. ISBN: 1-58011-150-5 This is my favorite resource for inspiring ideas about creating wildlife habitat. It has lots of great how-to information and photographs, as well as details for getting your yard certified as wildlife habitat (although the NWF website has the most current criteria). |
 |
Landscaping with Native Plants of Wisconsin
by Lynn M. Steiner. 2007. ISBN-13: 978-0-7603-2969-6 If you live in Wisconsin, this book will help you integrate native plants into your home landscape. The descriptions of each plant include notes on which are beneficial for wildlife. |
 |
The Illustrated Practical Guide To Wildlife Gardening:
How to Make Wildflower Meadows, Ponds, Hedges, Flower Borders, Bird Feeders, Wildlife Shelters, Nesting Boxes, and Hibernation Sites. By Christine & Michael LaVelle. 2009. ISBN-13: 978-1-8461-148-7 This is the British gardening book that taught me how to make the habitat stacks described above. It's also full of great photos, lots of information about planning your landscape, and directories of common wildlife and the plants that benefit them. |
 |
Landscaping for Wildlife. Nongame Wildlife Program, Minnesota Department of Natural Resources.
By Carrol L. Henderson. 1987. Another good book that outlines the basics of what is needed to landscape for wildlife habitat, including applying it to larger properties. |
You might also want to take a look at these websites:
- Lady Bird Johnson Wildflower Center Native Plant Database (www.wildflower.org/plants/)
A database of native plants that can be searched by state and includes information about wildlife uses for each plant. - USDA Plants Database (http://plants.usda.gov)
Another database searchable by state that includes a wildlife tab for each plant describing how useful it is. - National Wildlife Federation Gardening for Wildlife pages (www.nwf.org)
As mentioned above, this website includes tips for creating wildlife gardens in your backyard, as well as lots of photos from people who've done it in their yard.