Wild Raspberries (aka... Black Caps)
From Bear
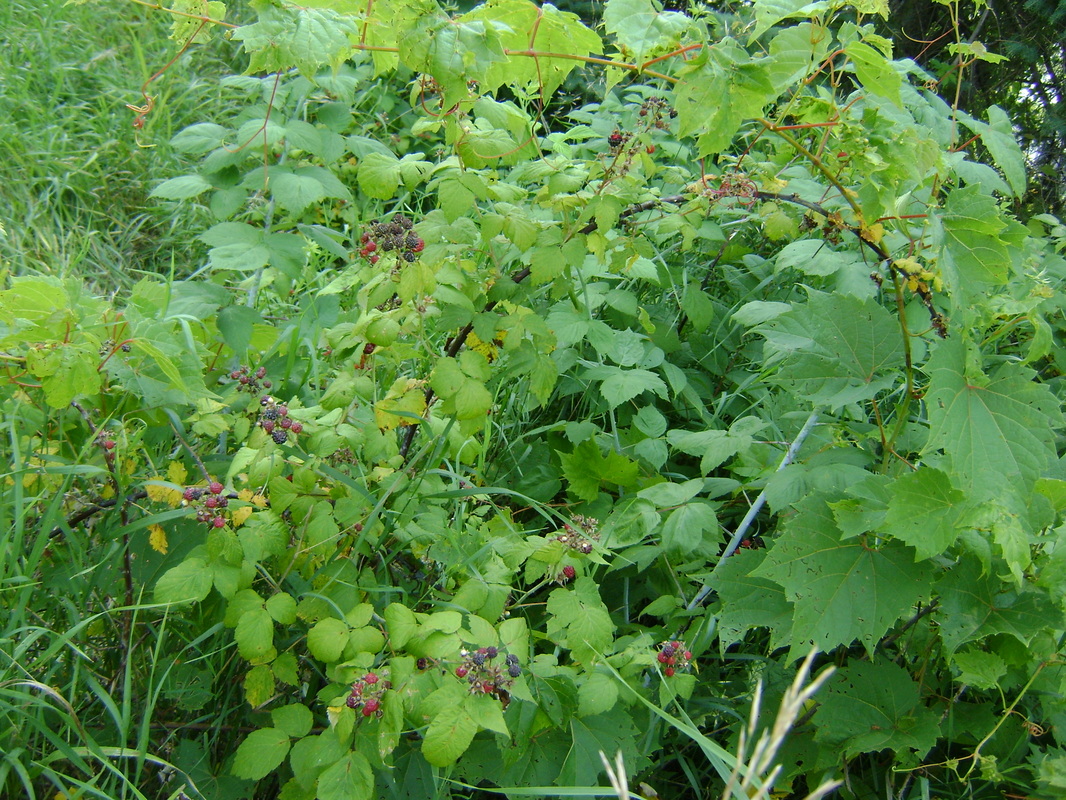
The wild raspberries growing in our backyard bramble.
|
Contents:
|
I am being slowly corrupted by my Nature girl wife, Theresa. She has got me eating fruits and berries. Before I moved in with her, I didn't like to eat any berries. With the last name of Berrie it seemed kinda...cannibalistic...don't ya think...? But, I've gotten over that and think some berries taste pretty good now, with enough sugar.
As a Shelf Chef, I am looking for a Summer ingredient that is cheap, tasty, and versatile (that's a Theresa word that means you can use it in many different styles of recipes). So... she got me to start picking wild raspberries. In Wisconsin these are called black caps, because they start out red, but are ready to eat when they turn deep purple or black. When harvested, the small white core of the berry stays on the stem and you remove and eat the "cap." We were lucky enough to have a patch of them growing in our back yard when we moved in. We can also pick them on nearby public DNR land and public bike trails.
As a Shelf Chef, I am looking for a Summer ingredient that is cheap, tasty, and versatile (that's a Theresa word that means you can use it in many different styles of recipes). So... she got me to start picking wild raspberries. In Wisconsin these are called black caps, because they start out red, but are ready to eat when they turn deep purple or black. When harvested, the small white core of the berry stays on the stem and you remove and eat the "cap." We were lucky enough to have a patch of them growing in our back yard when we moved in. We can also pick them on nearby public DNR land and public bike trails.
Black Caps 101 (Growing and Harvesting):
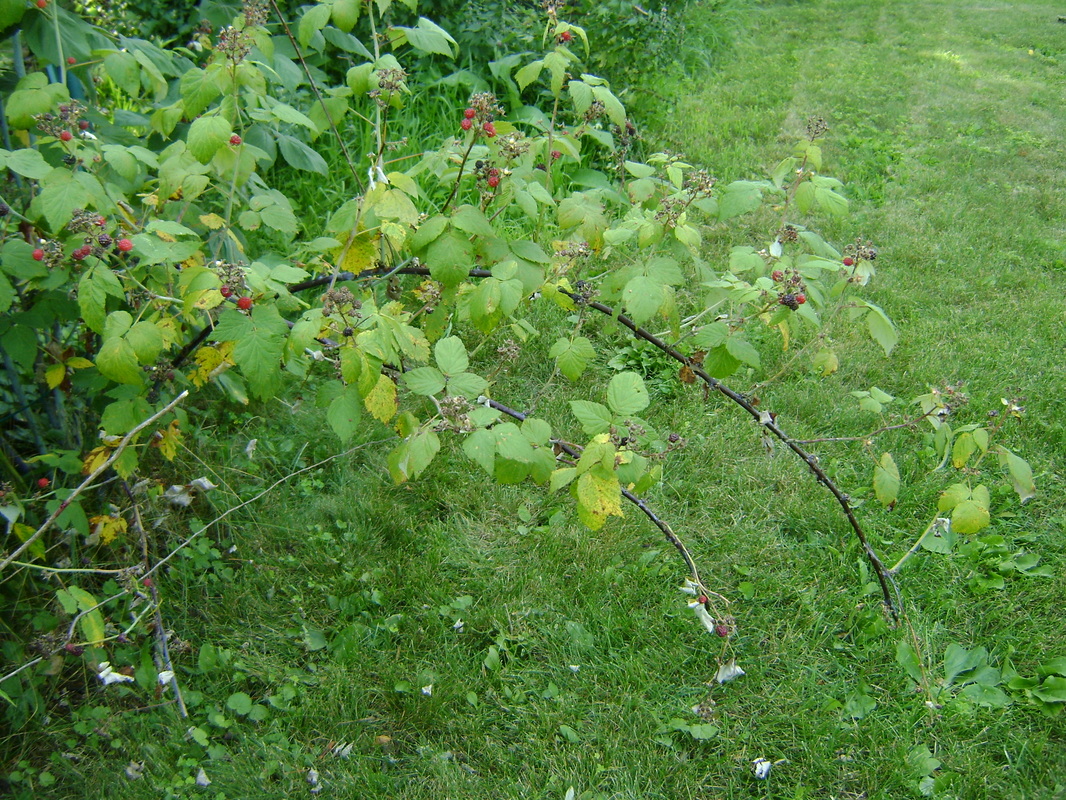
These second year wild raspberry canes show the typical arching.
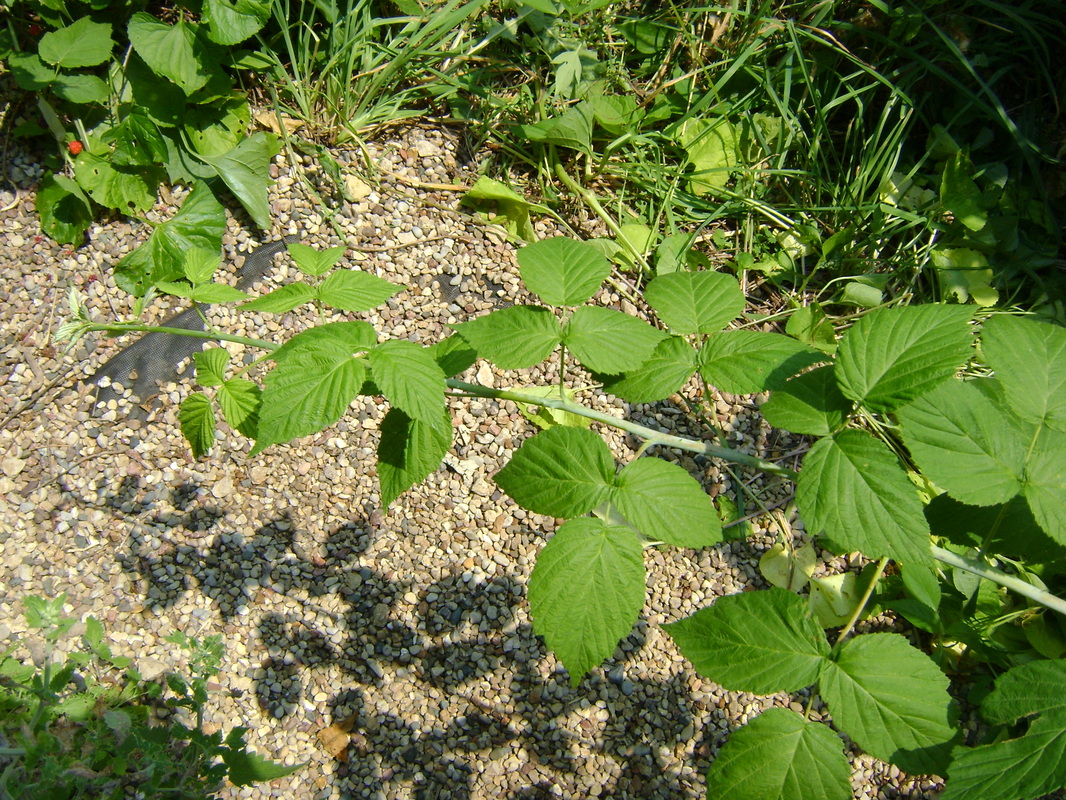
The first year, green raspberry cane that doesn't produce berries.
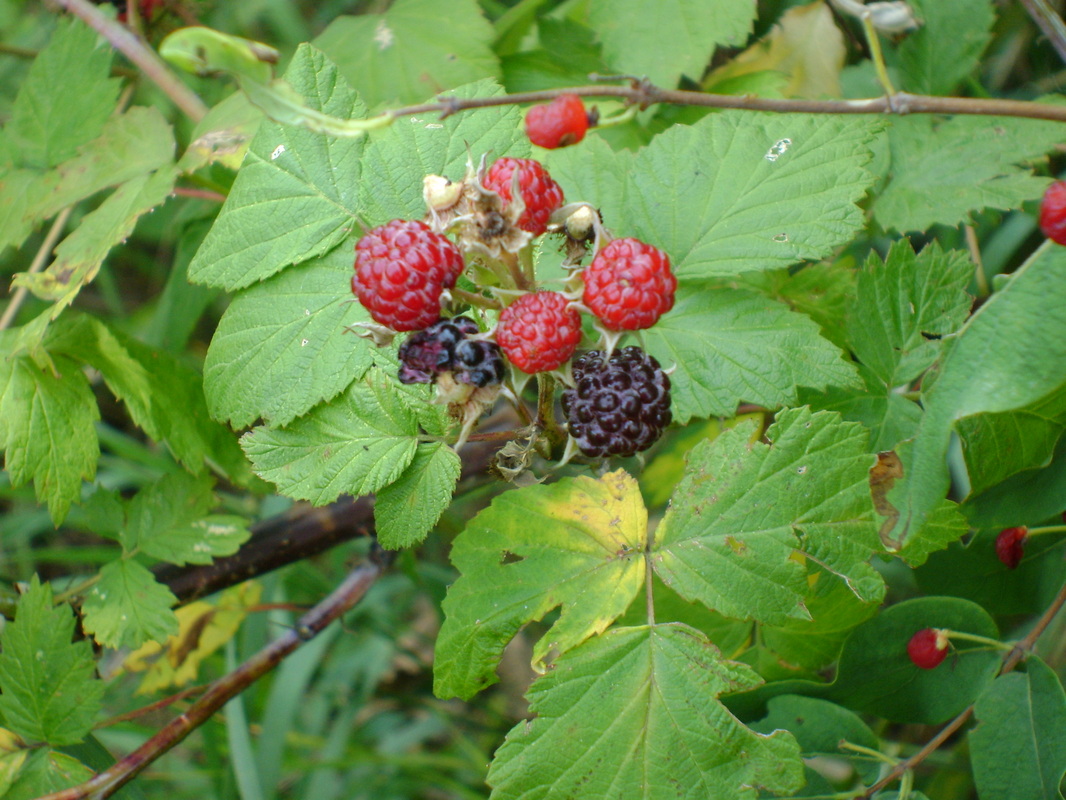
These dark purple or black berries are ready to eat. The red ones are not yet ripe.
A caution about foraging: remember to be safe and make absolutely sure you've identified a plant correctly before eating it. My field guide says that raspberries don't have any poisonous look-alikes, but you should double check your own sources.
|
Theresa says that black caps differ from cultivated berries in several ways. They are smaller than cultivated raspberries and have a lot of tiny seeds, but they are much easier to grow. She likes them because they can live in the part-shade near and under our black walnut trees, and require little maintenance. We do not have room to grow the cultivated varieties that require full sun. We also could not afford to buy large quantities of cultivated raspberries from the farmer's market, which cost $3-$4 per half pint (that's a cup)!
In Wisconsin, black caps seem to grow all over the place. The seeds are spread by the birds that like to eat the berries. The seeds grow into thorny, arching raspberry canes (stems). If the other end of the arch touches the ground, it will root. Many canes rooted on both ends can create an impenetrable briar patch or bramble. I've heard many people complaining about having them on their property (for some reason they want lawn instead of food). Theresa says that wild raspberries are biennials, meaning each cane only lives two years. The first year they have green canes that can grow taller than her and look like particularly nasty, thorny weeds. (The first year in our house she cut them down, trying to make room for the raspberries to grow...oops). If you scrape a finger along the stem of a green raspberry cane, it makes a darker green smear, which you can use to identify it. No raspberries grow on first year canes. Canes on second year plants turn brown over the course of the season. They will flower in the Spring and fruit during the Summer. In the Fall, the second year canes are completely brown and start to die off. To help maintain your raspberry patch, you can cut out the brown canes in either late Fall or early Spring to give new canes room to grow. That's the only maintenance Theresa does. Sometimes I help... Wild raspberries are usually ready to harvest in our area in early July. Wear clothes you don't care about much when harvesting, because the thorns can rip cloth and the raspberry juice can stain. Black caps don't all ripen at once, so you can go back for several harvests. When picking, take only the dark berries that are easy to pull from their stem. If you have to tug hard to get them off, they aren't completely ripe. Red berries are not ripe at all. It can be a challenge to reach all the ripe berries through the thorns, but it's worth the work and occasional scratch. 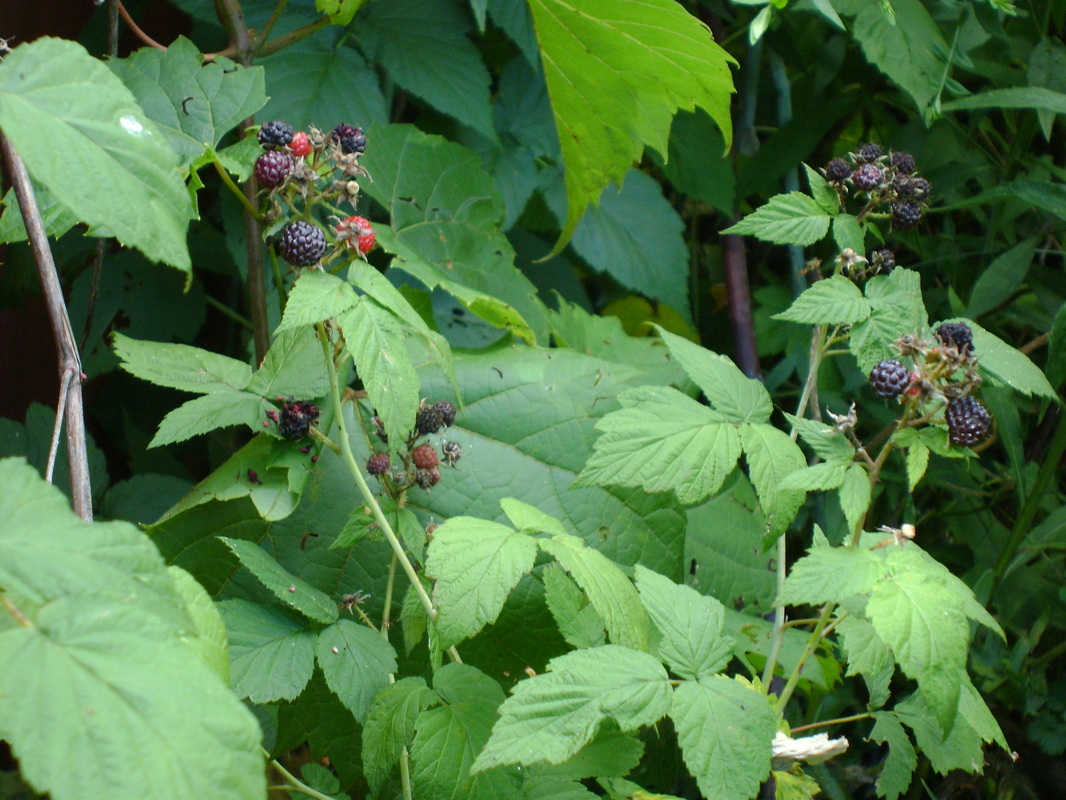
|
Ways to Consume (Recipes)
In keeping with my Shelf Chef style of cooking, I have harvested my ingredient, so now I want to use it in many different ways.
It's time to get inspired by reading some cookbooks and talking to some people. Then I get creative and experiment....
Ok... now that's done... it's time to show others the results of my experiments:
It's time to get inspired by reading some cookbooks and talking to some people. Then I get creative and experiment....
Ok... now that's done... it's time to show others the results of my experiments:
Experiment 1: Eat them Straight Off the Vine

|
Inspired by: Theresa and all the other people who talk about going into the fields to pick food and want a little snack to keep them going...
"Recipes:" Just pull the berries and eat em...Duh... or add them to cereal or yogurt. Results, Tips, and Ideas: I used to think all ripe berries were sweet like sugar. Cooking with Theresa, though, has taught me that the fruit in jams, jellies, or pie fillings usually has added sweeteners. So raspberries straight off the vine were not as sweet as I was expecting. But the taste is not bad... there are lots of tiny seeds that add a little crunch, but they are easy to overlook because of the great flavor. |
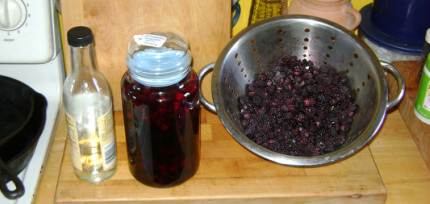
Experiment 2: Black Cap Flavored Brandy
|
Inspiration: My friends Holly and Rowan introduced me to some damn fine homemade cordials (aka liqueurs or flavored booze). We like the book, Cordials from Your Kitchen, by Patty Vargas and Rich Gulling. Here I've adapted their blackberry recipes to our black caps.
Recipes: Theresa says in a tone of exasperation that I am seldom satisfied making only one version of a recipe at a time. I grin. As a Shelf Chef, I like to experiment. I prefer to have variety, so I can compare flavors. Here's how to make two different types of black cap brandy at the same time: Ingredients:
|
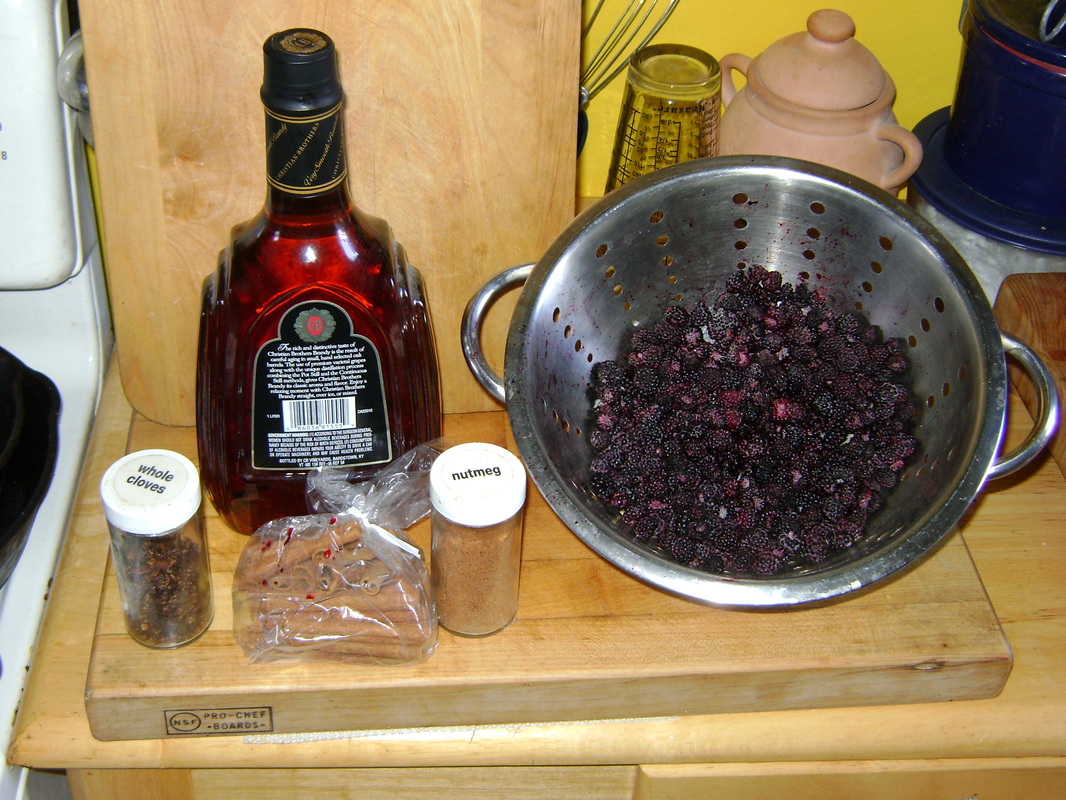
Ingredients for making spiced black cap flavored brandy.
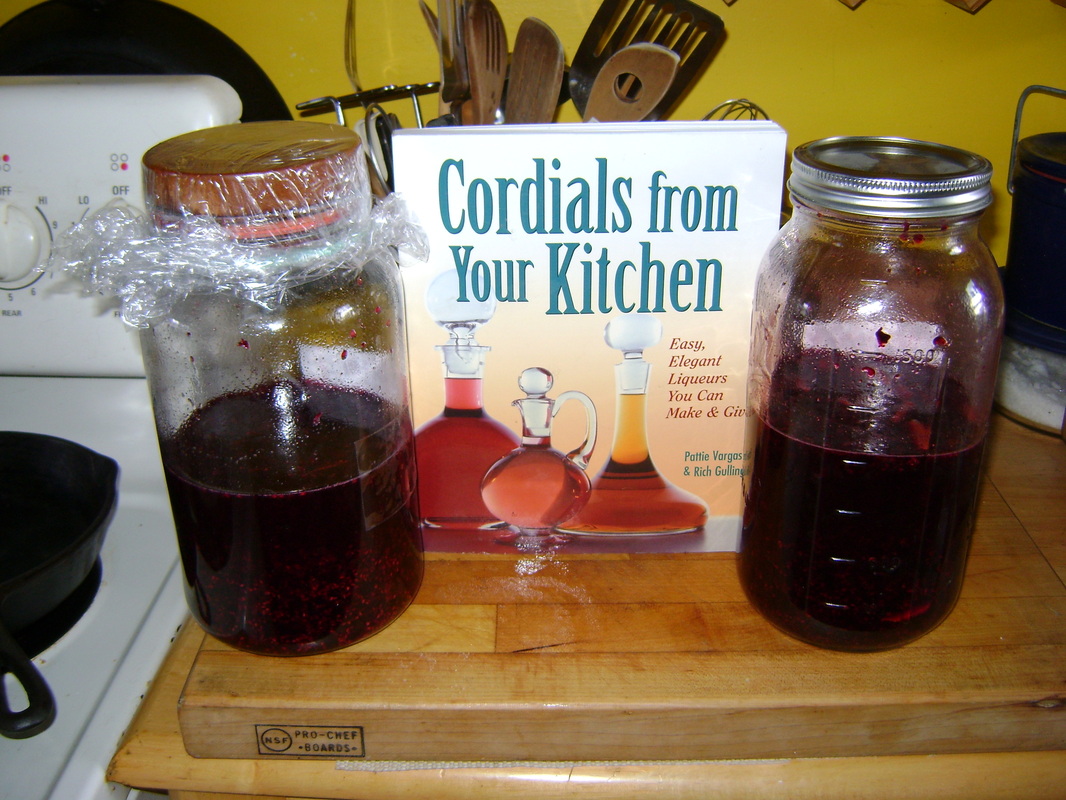
The finished brandy and the book that inspired them.
(Recommended by little old ladies... Hi Holly, Hi Rowan) Results, Tips, and Ideas:
|
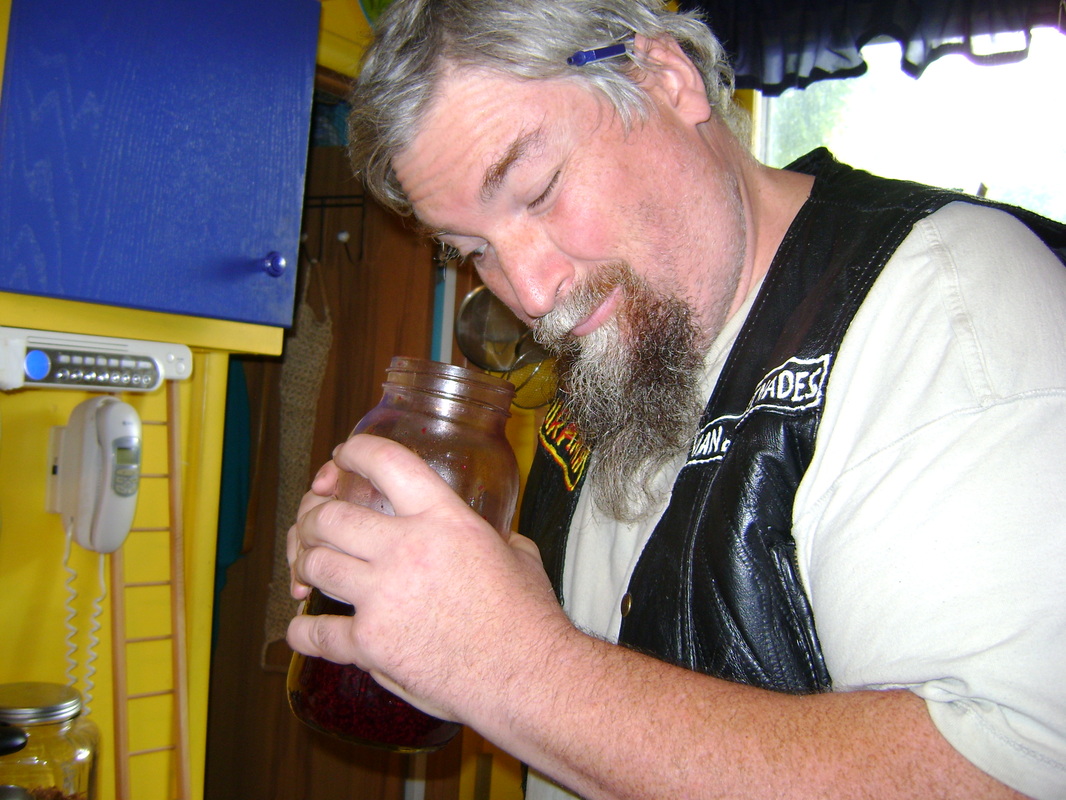
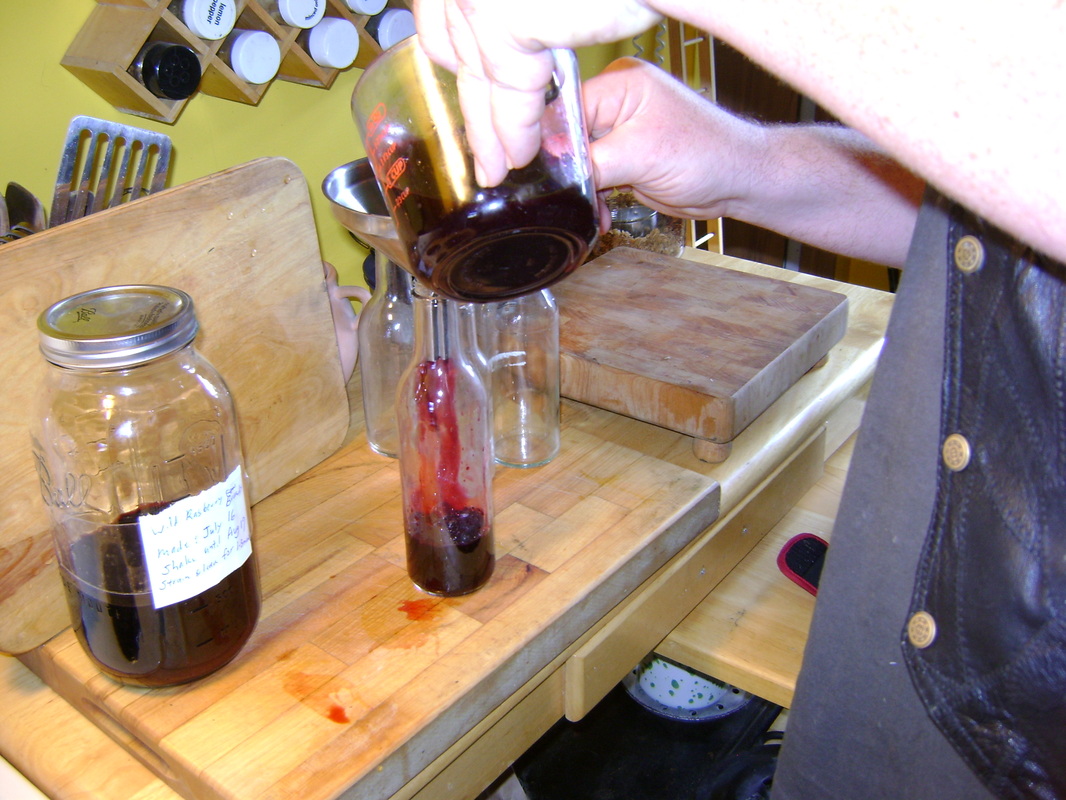
OK... after more than a month of waiting, we have pictures to go with steps 5, 6, and 7. Hope they help.
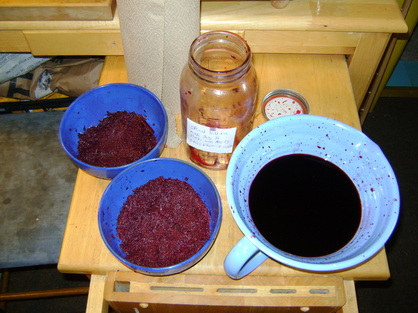
Step 5. After a month, strain out the solids and let the juice sit for one day. I strained the cordial twice. I was going to use a wet coffee filter in the strainer the second time but it was way too slow.
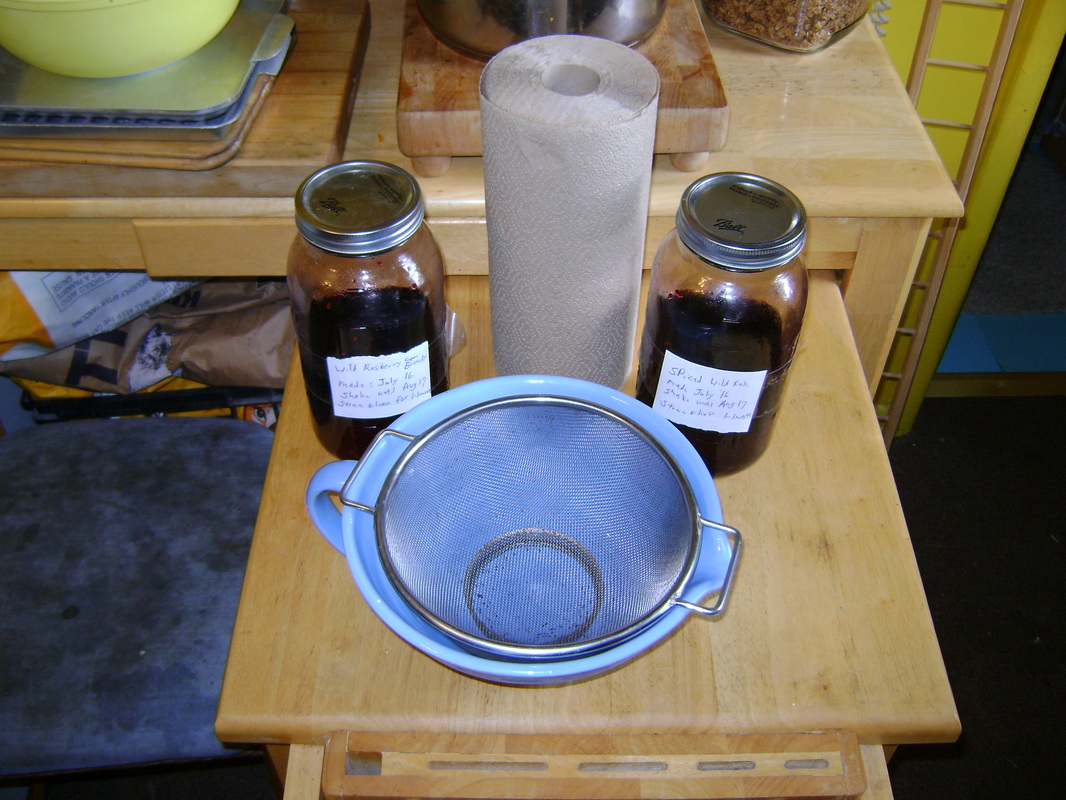
Ready to strain out the solids.
|
This could, be good.
|
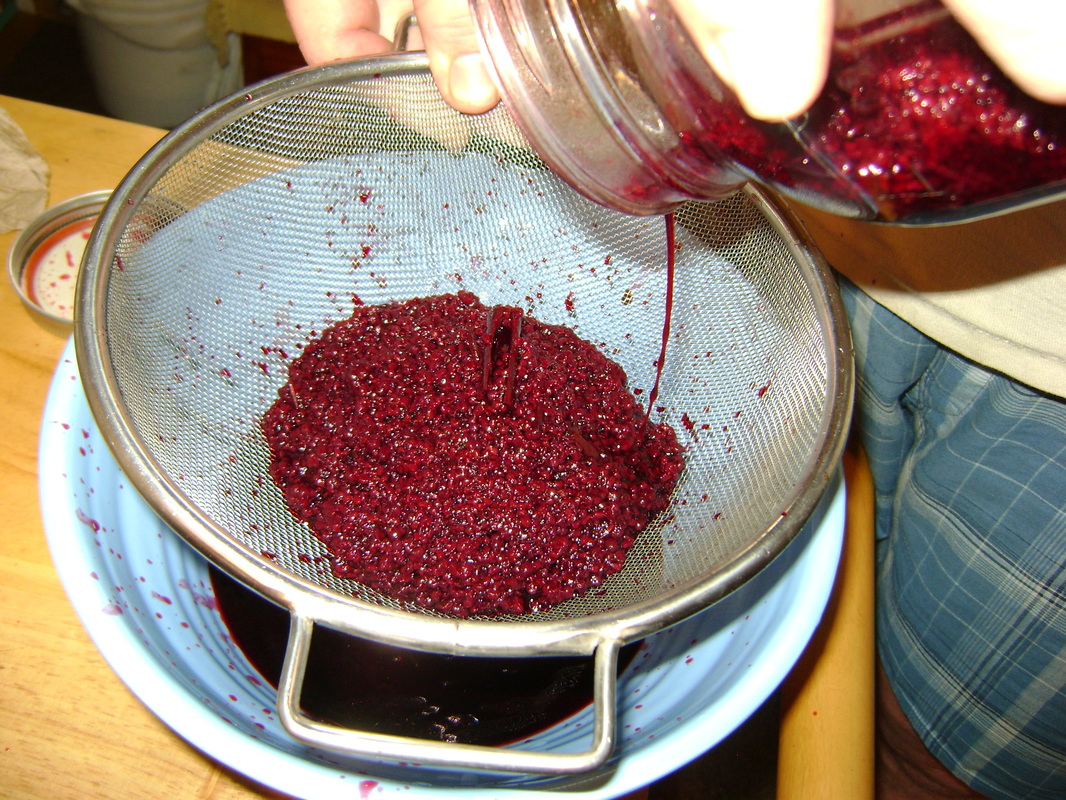
First strain gets the big chunks and lots of seeds from the berries.
Second strain, for luck.
|
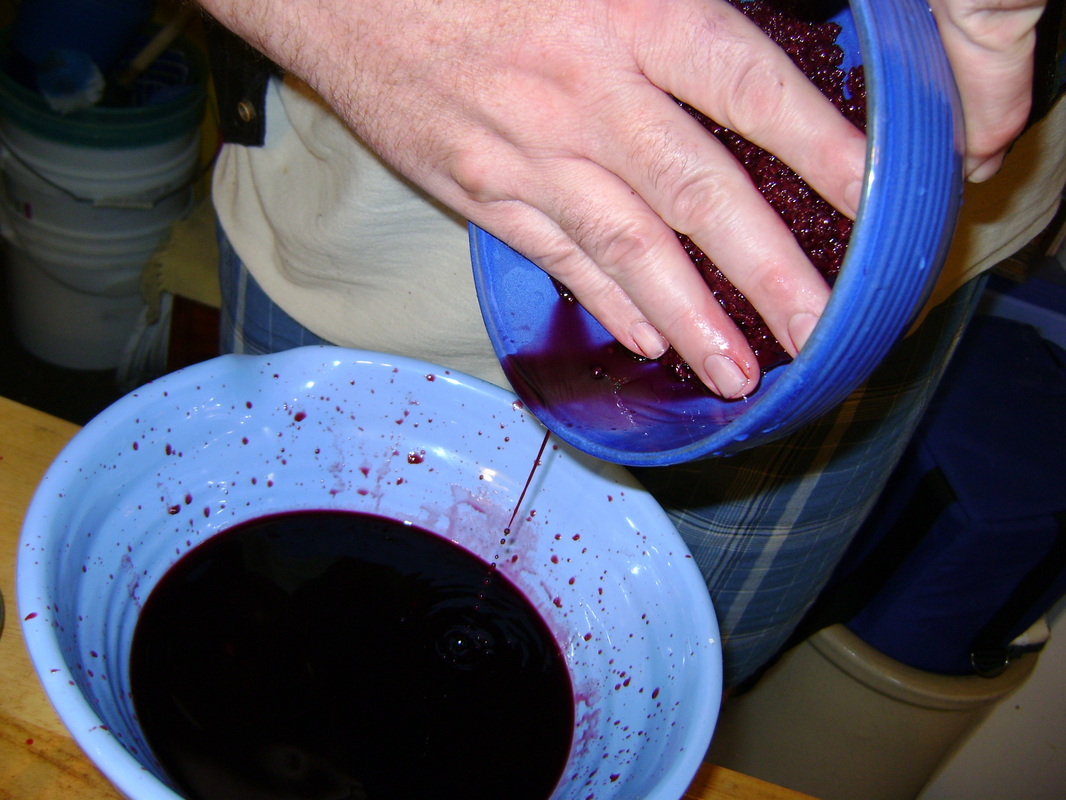
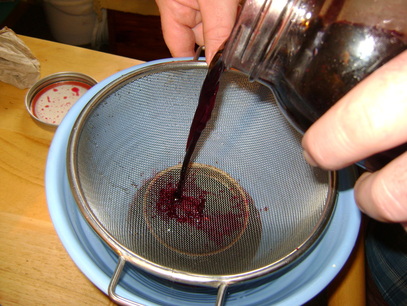
Press the solids to get all the liquid out.
Any ideas for using the seeds and skins? I had an idea to make bread and flavor it with the leftovers but chickened out because I didn't want "seedy" bread. Now regretting that.
|
Time for a Taste Test:
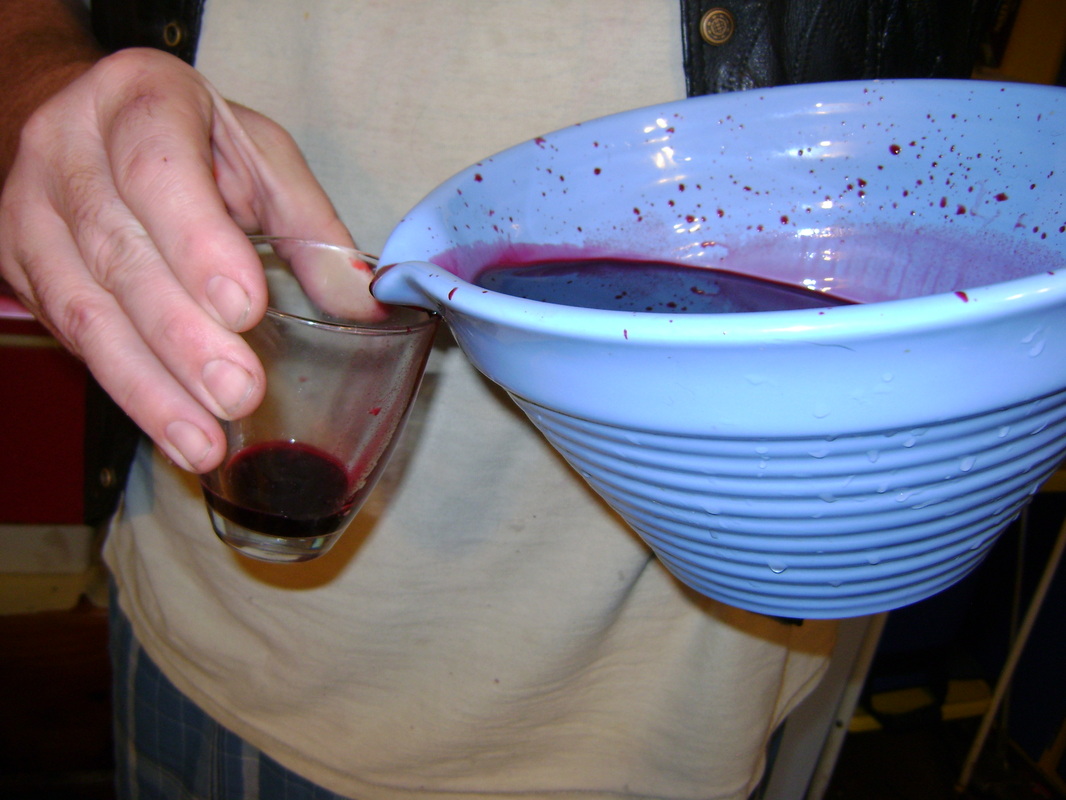
Get a small sample...
|

Was I supposed to share?
|
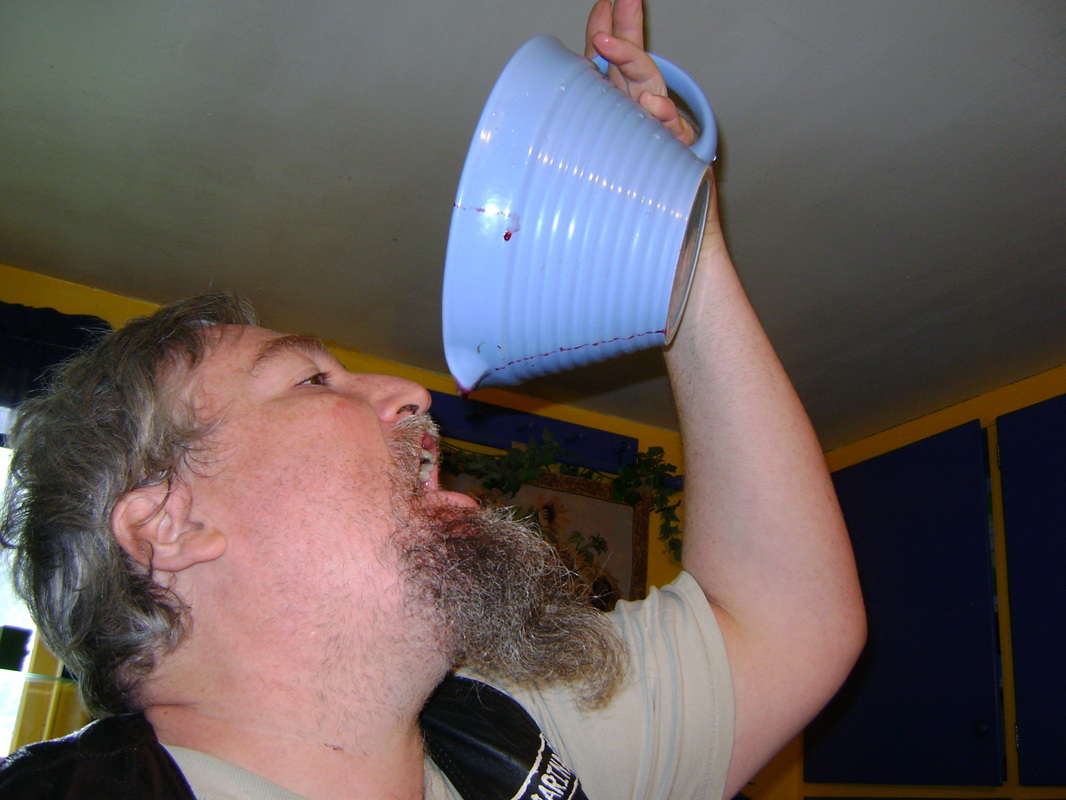
Fine... I'll get my own. Mmmm... dregs...
|
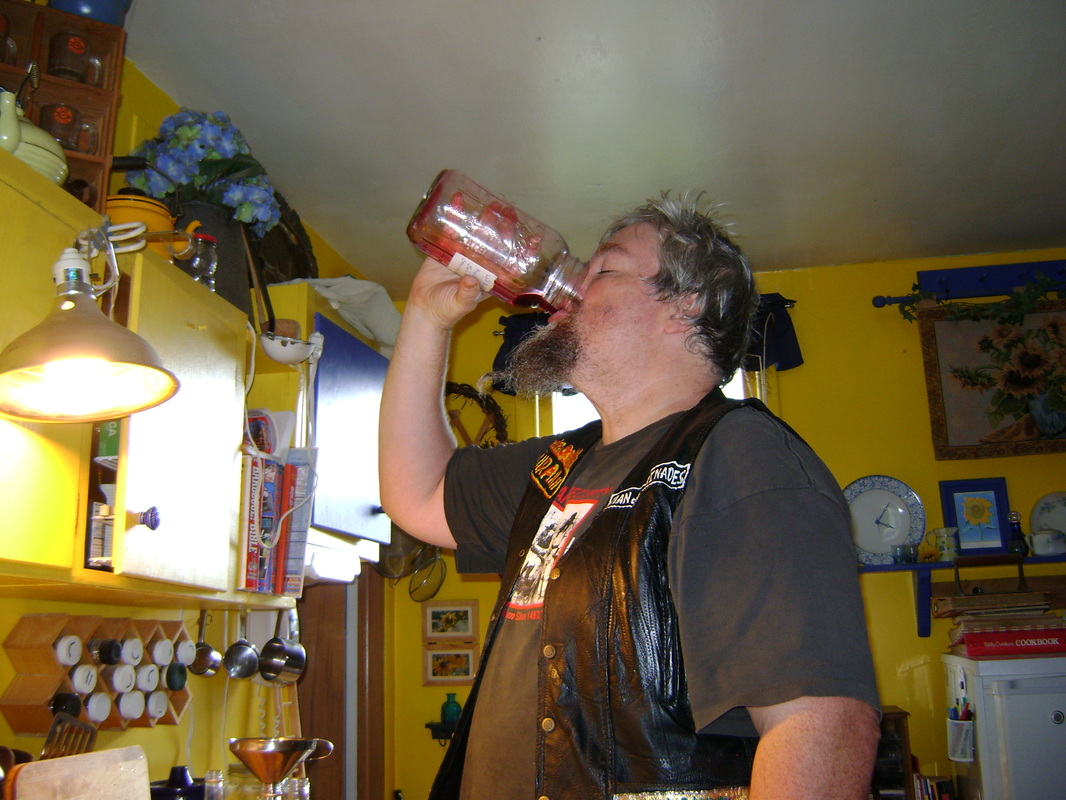
I don't drink straight brandy because it's too harsh for me, but this was already smooth enough to drink. Normally you let cordials sit for several months to get rid of the alcohol burn, so I'm still going to let this sit for a while to see if it gets even better. You can test the drink once a month until it tastes right to you.
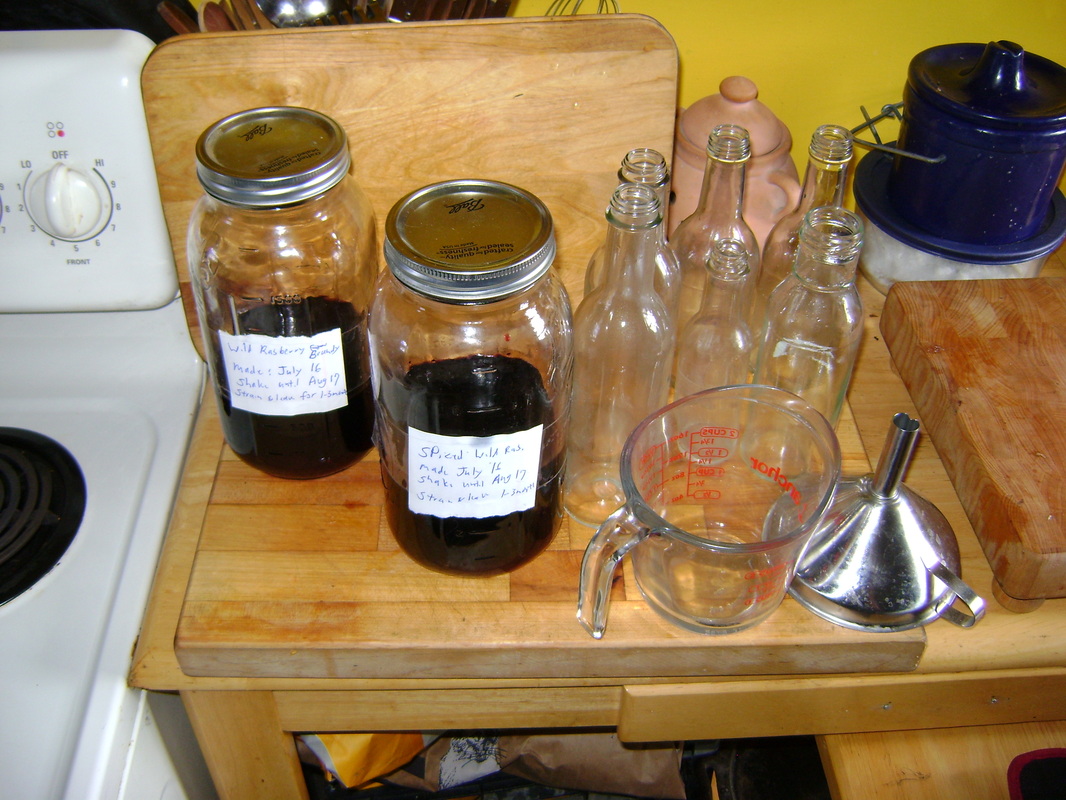
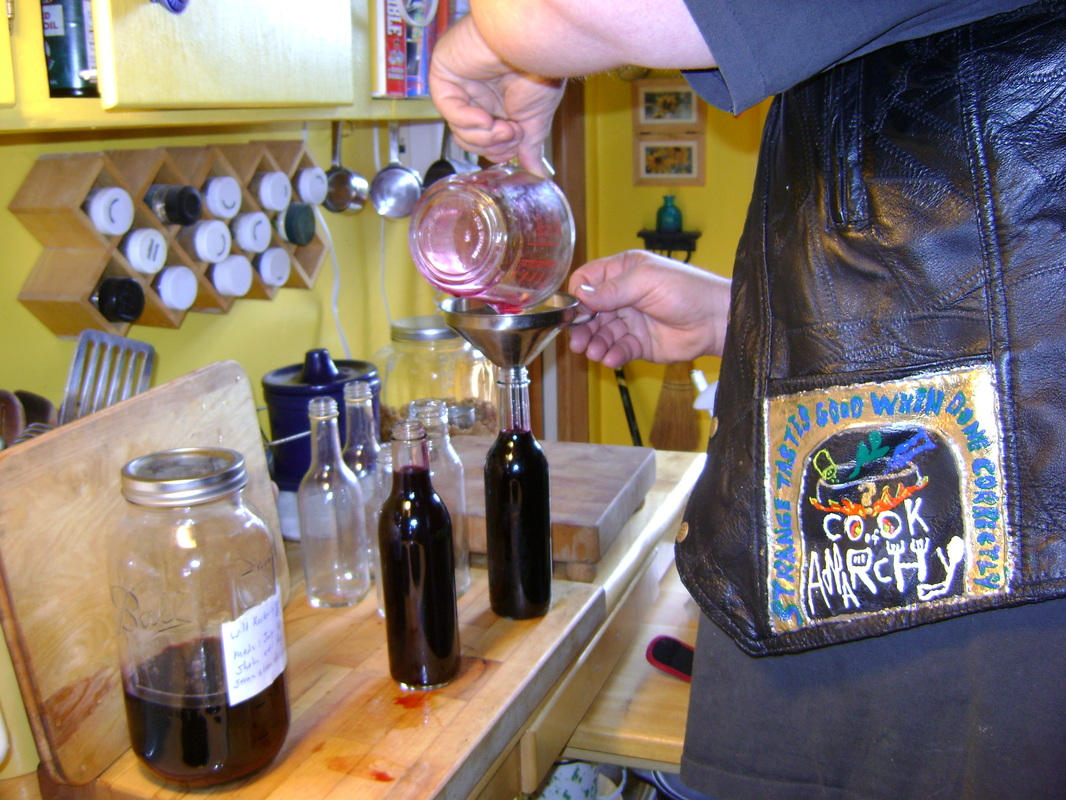
Step 6. Put cordial in sterilized, labeled bottles. Racking may reduce sediments but I am lazy and didn't have any tubing. I poured it into a measuring cup so I would make less of a mess when I poured it into the bottles. I stopped pouring when I saw dregs going in.
The lab is clean and the tools are ready.
|
Hmm? Looks like I'm making Trueblood...
|
You can tell it's a good lab-bottles & spices!
|

Heh, heh, heh... more dregs...
|
Time for clean up.
|
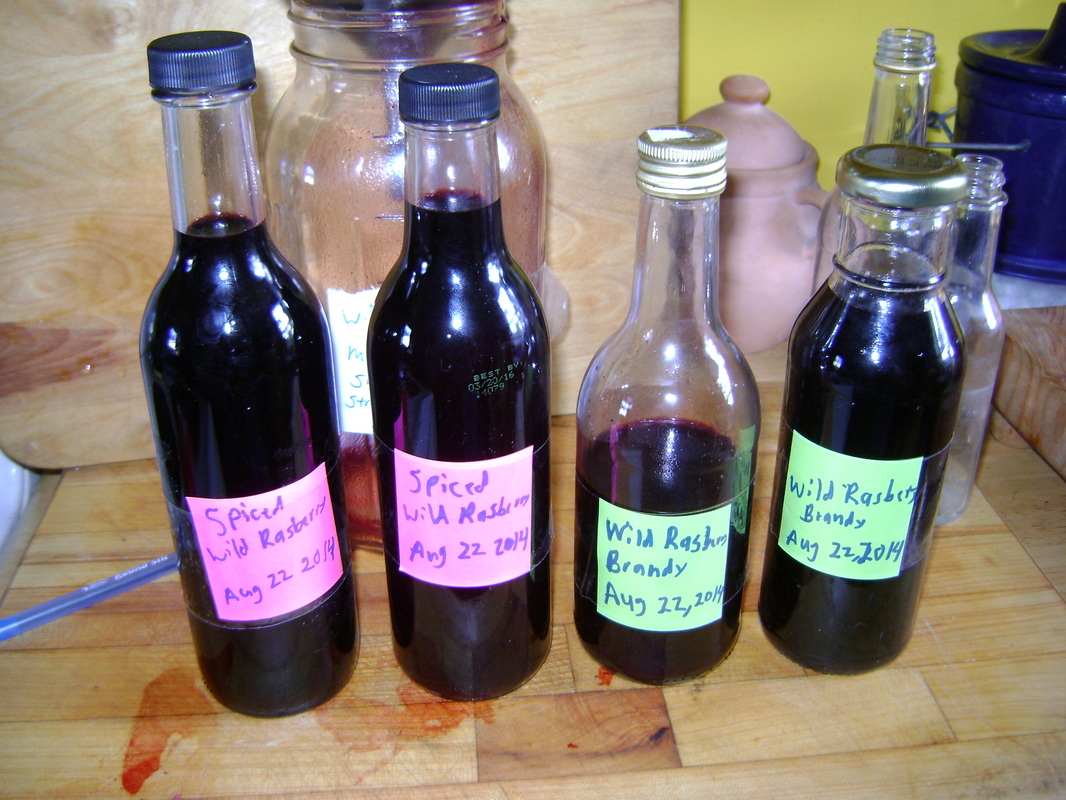
High tech labels... Quite cunning, don't ya think? Now the hard part, step 7, put them in a cool dark place and wait one to three months.
Experiment 3: Raspberry Flavored Vinegar & Salad Dressing
|
Inspiration: This is an experiment that Theresa did.
Recipe: see Theresa's page on how to make flavored vinegars. Raspberry vinegar (in the middle of the photo on the left), is made by soaking black caps in champagne or white wine vinegar. Results and Tips: She uses the raspberry vinegar to make salad dressing. See her raspberry vinaigrette recipe. |
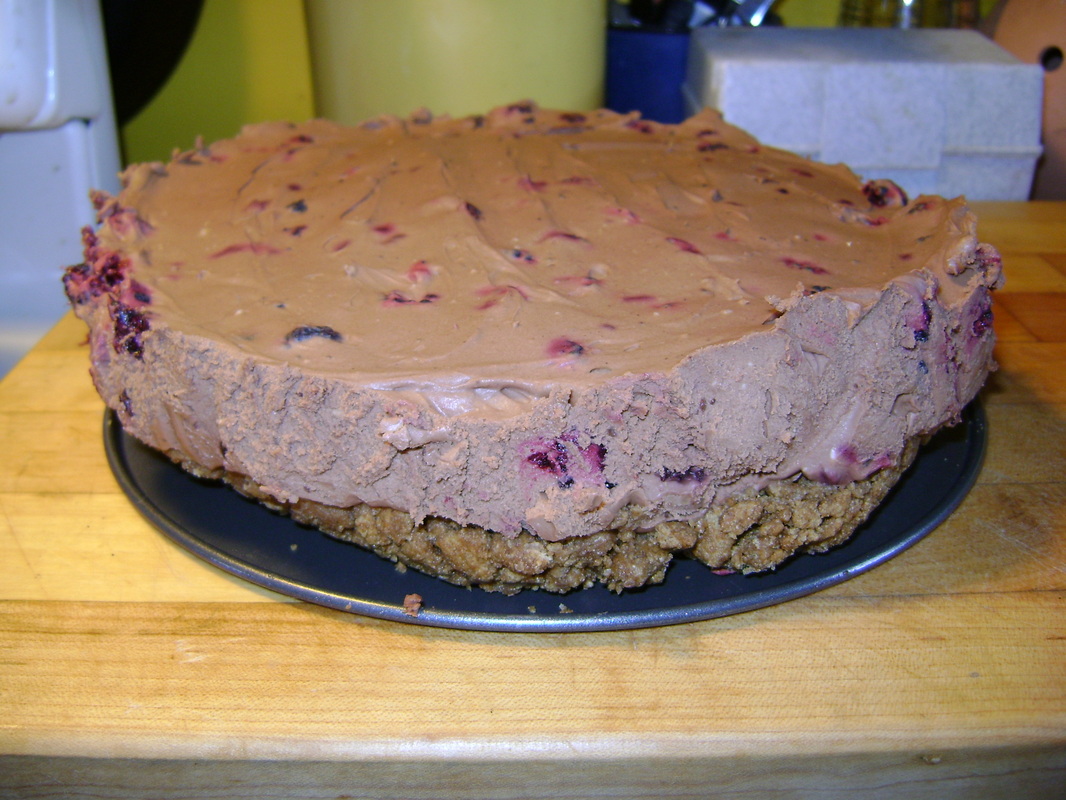
Experiment 4: No Bake Black Cap Cheesecake
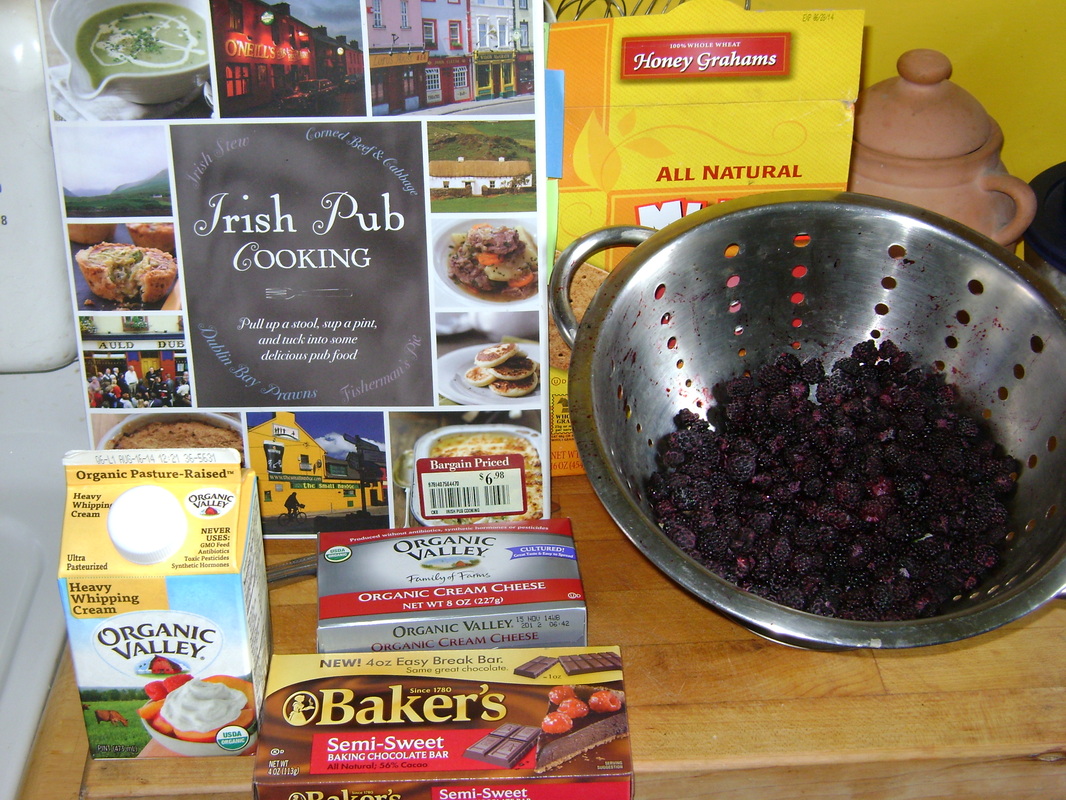
Everything you need for cheesecake
that's a lot easier than the baked kind. 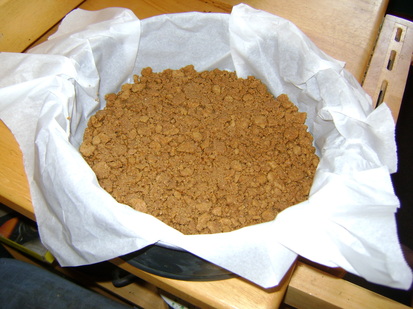
OK ... Not so fine this time...You should crush the graham cracker better than this.
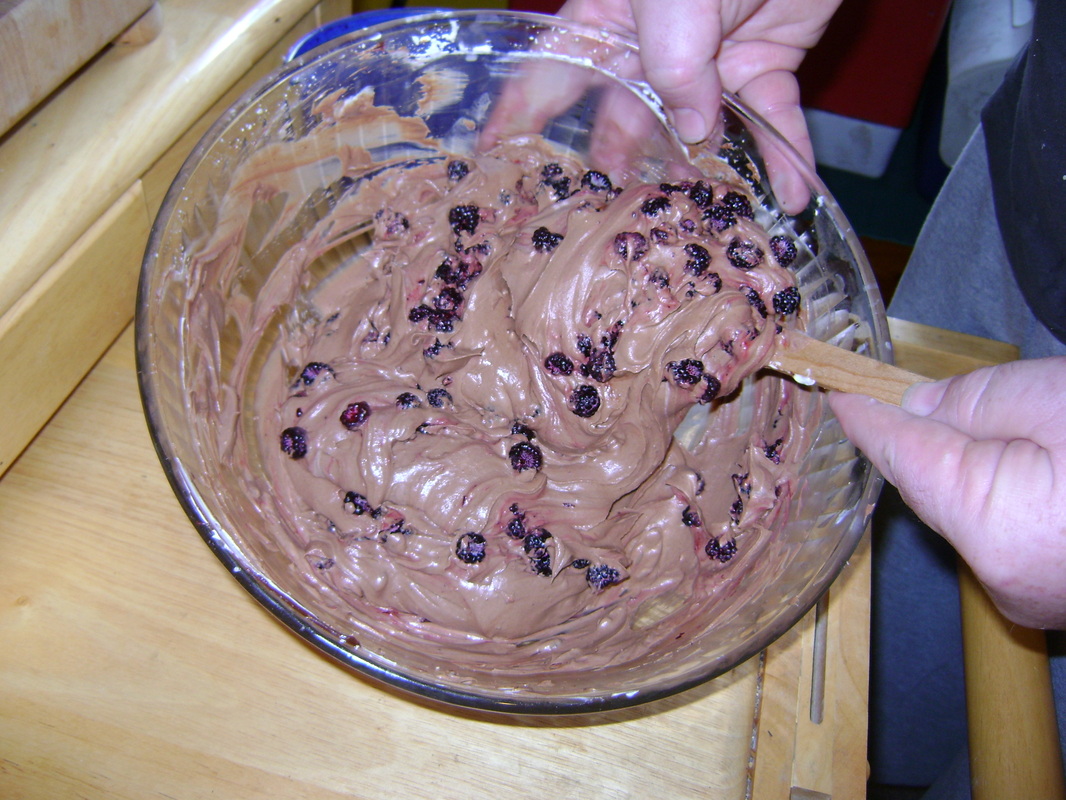
The finishing touch- mixing the whole black caps into the filling.
|
Inspiration: I have used the recipe from Irish Pub Cooking (at left) to make several traditional no bake cheesecakes with chocolate and Irish cream. Now it's time to experiment with something new.
Recipe: You'll need:
For crust:
For filling:
Step 1. Gently melt the butter, then mix well with the crushed graham crackers (if crackers seem dry melt and add more butter). Step 2. Put parchment paper in spring pan. Put cracker and butter mixture in pan, level, and press down until crust is solid. Then put crust in refrigerator for an hour. (If you are in a hurry put it in the freezer for 20 minutes.) While crust is chilling, make the filling: Step 3. Melt chocolate on the stove on medium heat, stirring a lot so it doesn't burn. When melted, remove from heat and let cool to room temperature. Step 4. With a blender, beat the cream cheese until fluffy, then beat in the sugar. Step 5. In a second, larger bowl, whip the cream until it is semi-firm. Then add cream cheese and sugar mixture to whipped cream. (Use blender if you need to, to get them mixed well.) Step 6. Fold the melted and cooled chocolate into the whip creamed mixture until the filling is all one shade of brown. (If you want to be traditional now is the time to stir in 3 or more Tblsp of Irish cream liqueur). Then stir in the whole black caps. Step 7. Pour filling over cooled crust in spring pan and level. Refrigerator for 2 hours or overnight. (If in a hurry use the freezer for 1 hour.) |
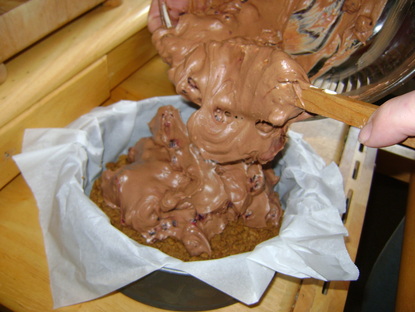
Glop it in... then smooth it out and chill.
|
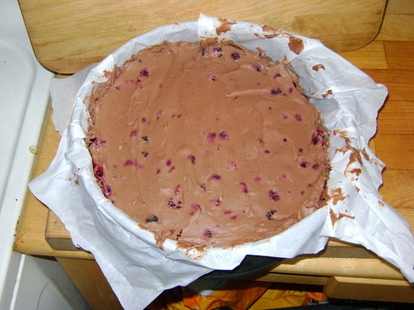
Smooth, chilled, and ready to unwrap.
|
|
|
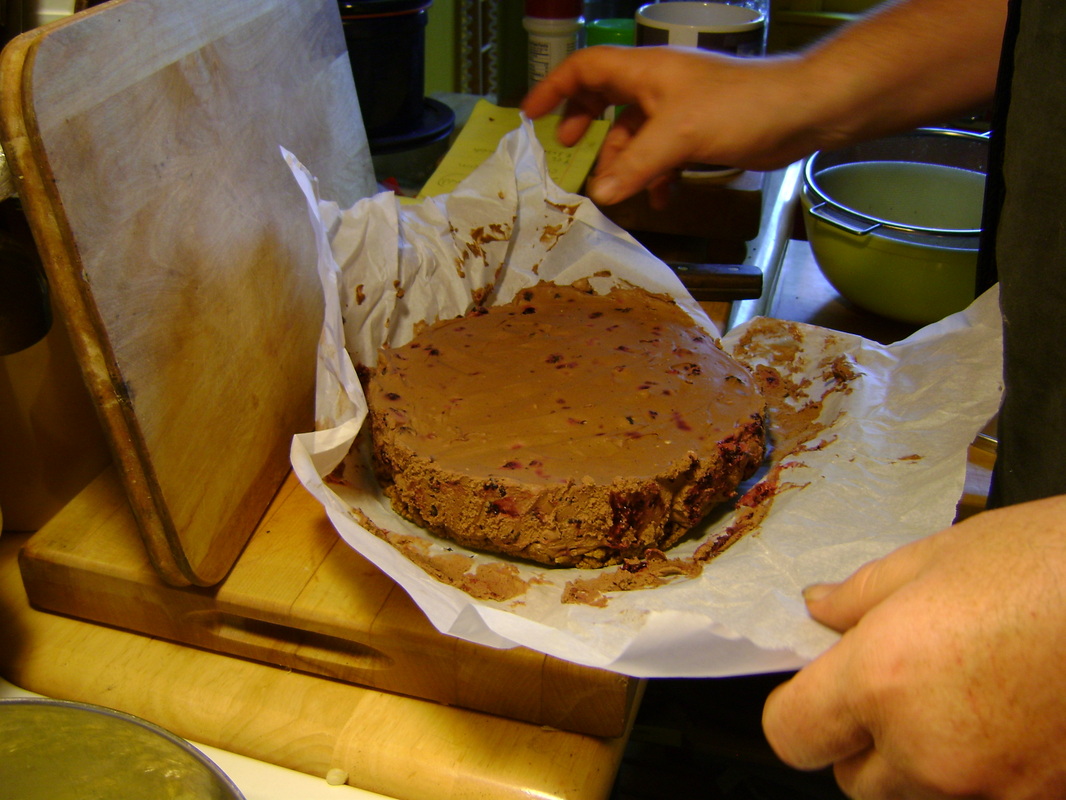
OK... This is where it gets ugly... getting the paper off and finding out how smooth or unsmooth the crust is. I removed the side of the pan, then slid a large spatula under the chilled cheesecake, while pulling the parchment out from under it.
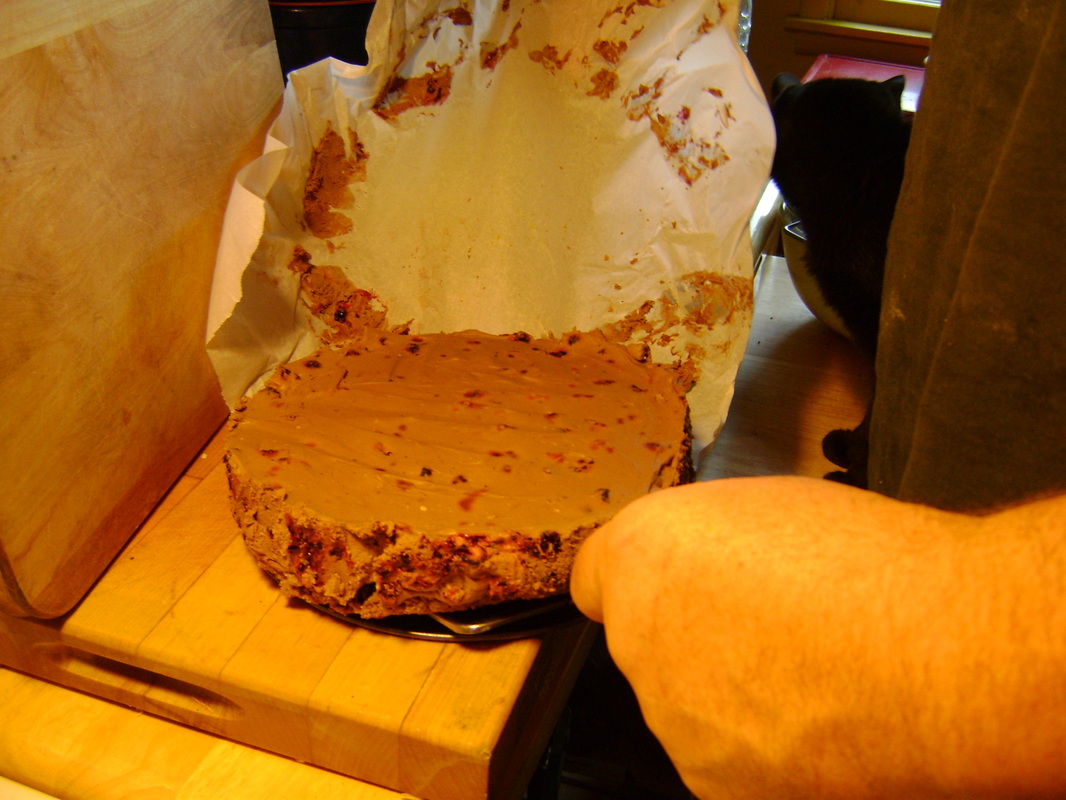
Like I said... ugly.
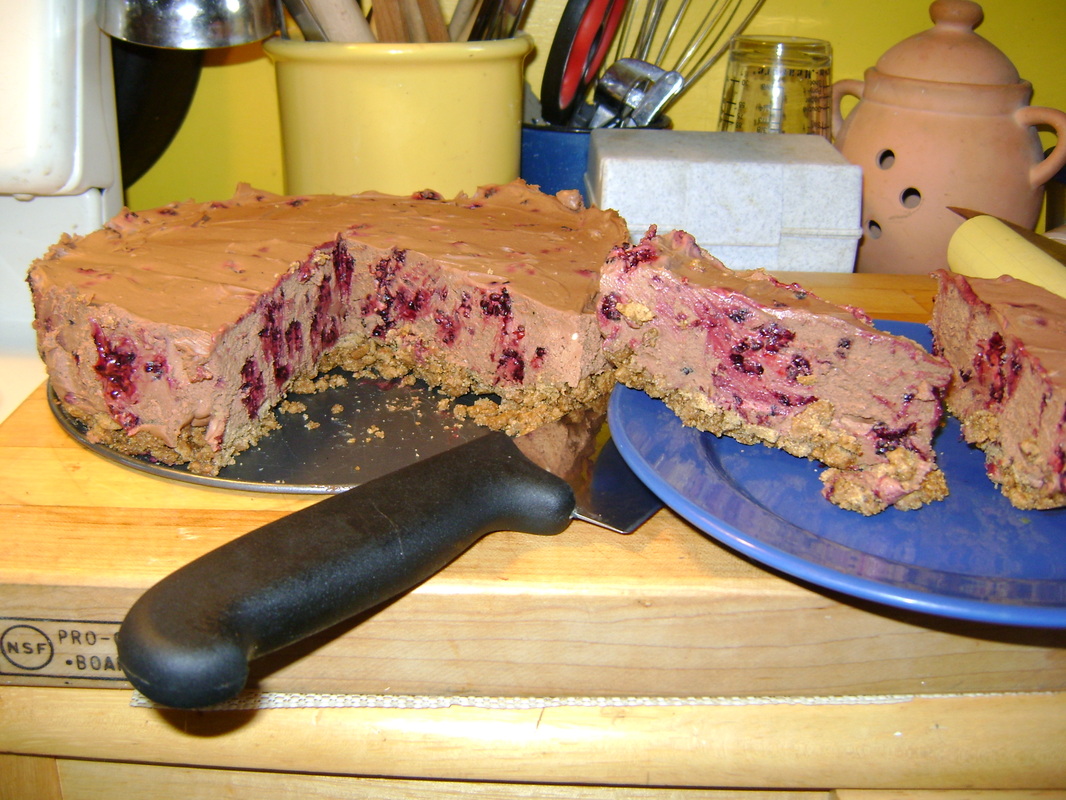
This one tasted a lot better than it looked...
I figured Theresa could have the two pieces on the right and I would have the one on the left... THAT didn't work... |
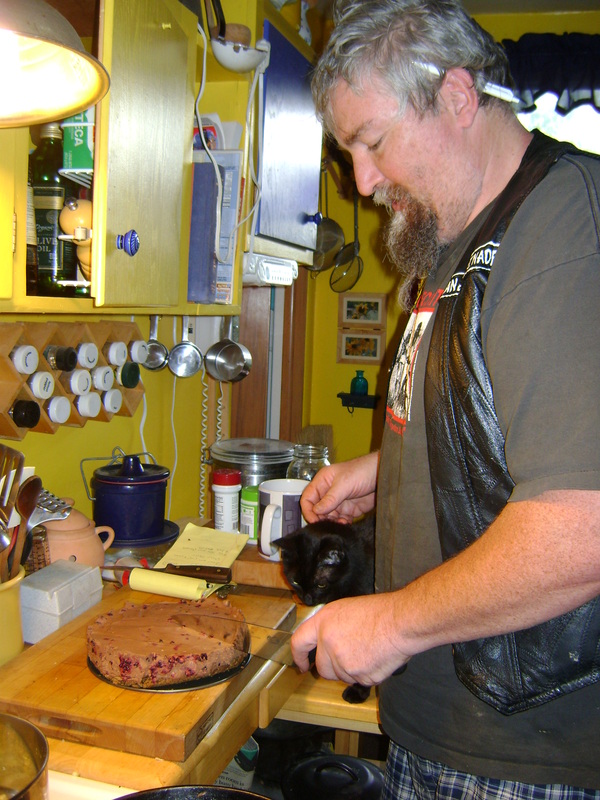
Safety inspector Ivy... keepin' it real and observing my technique...
|
Experiment 5: Black Cap Cobbler
Inspiration: Our friend Holly made us an extremely yummy blueberry cobbler when we visited her once (that same night she introduced us to homemade cordials- it was a good night). She gave Theresa a copy of her cobbler recipe, which works with any fruit you may have on hand, so Theresa tried it with black caps.
Recipe: Any standard cookbook should have a blueberry cobbler recipe. Theresa thinks of it like a big muffin- it's basically self-rising flour, butter, milk, and sugar with fruit added on top. Then the flour mixture expands as it bakes and covers the fruit. Yummy.
Results, Tips, and Ideas:
Recipe: Any standard cookbook should have a blueberry cobbler recipe. Theresa thinks of it like a big muffin- it's basically self-rising flour, butter, milk, and sugar with fruit added on top. Then the flour mixture expands as it bakes and covers the fruit. Yummy.
Results, Tips, and Ideas:
- This is a very quick dessert. Theresa can mix it up in less than 15 minutes, although then you have to wait for it to bake...
- We thought we took a picture of the last one she made, but we can't find it... sorry.
- For something different, instead of cobbler, make a "crumble" (mix brown sugar with chilled butter), dot it over the black caps, and bake (you might add apples, you might not).
- Editorial note to Bear- doesn't a crumble have flour or something else in it too? We should check.
- OK...I checked. There is also flour in crumble... In Gordon Ramsay's book Home Cooking, he also mixes in some granola. (I'm sure he has lawyers so if you want the specifics, buy the book or look for his cooking class on Youtube.)
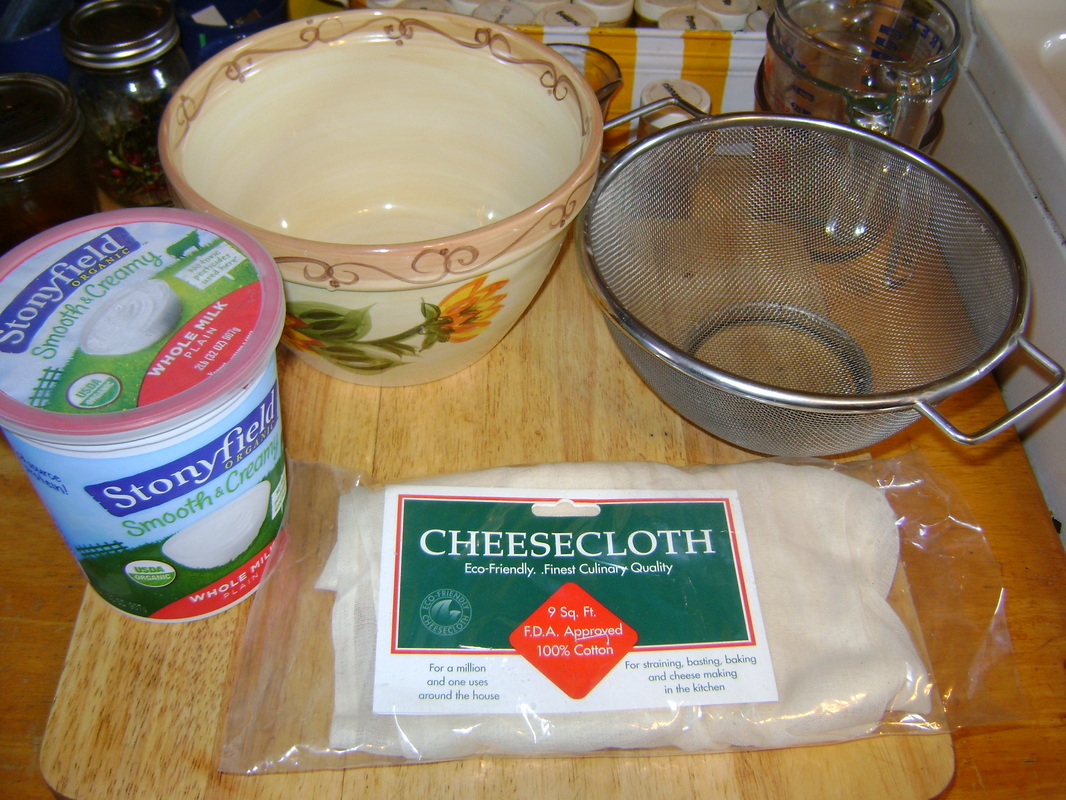
Experiment 6: Black Cap Yogurt Cheese
Inspiration: Theresa makes this dish with various fruits when they are in season. It works well with black caps. Here's her recipe:
|
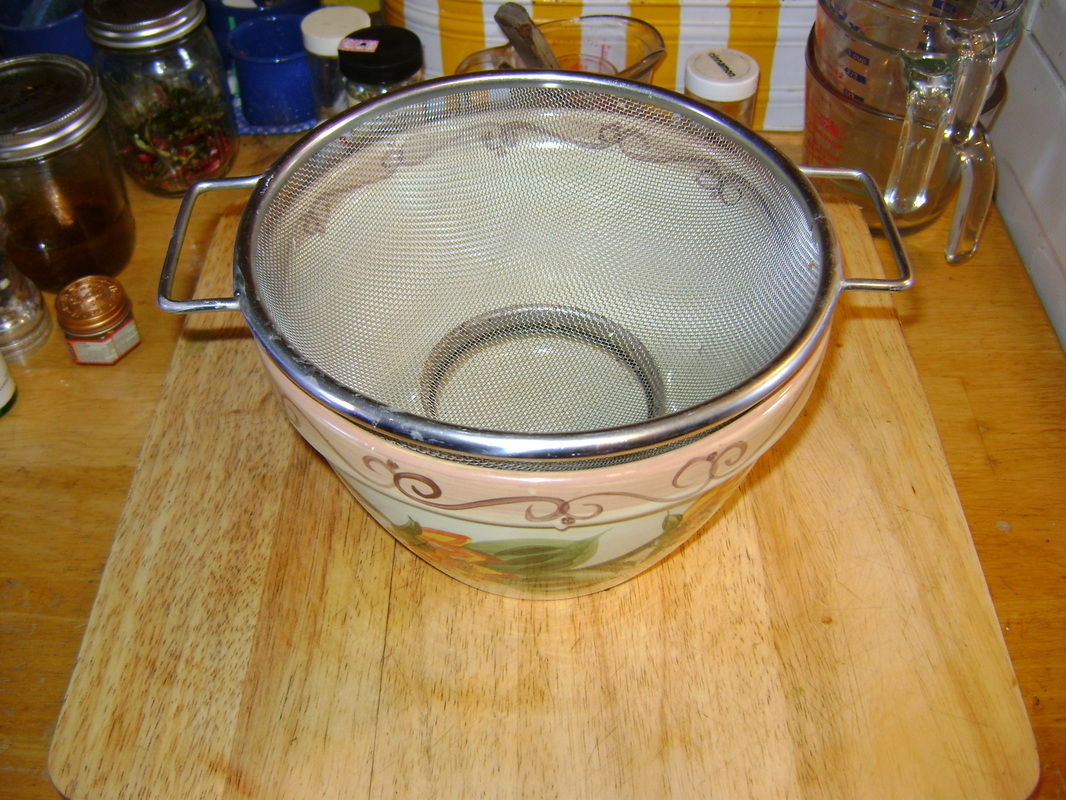
1. You'll need a container of plain yogurt, a bowl, a strainer, and some cheesecloth.
|
2. Nestle the strainer in the bowl. It needs to be the right size so that it doesn't touch the bottom of the bowl.
|
|
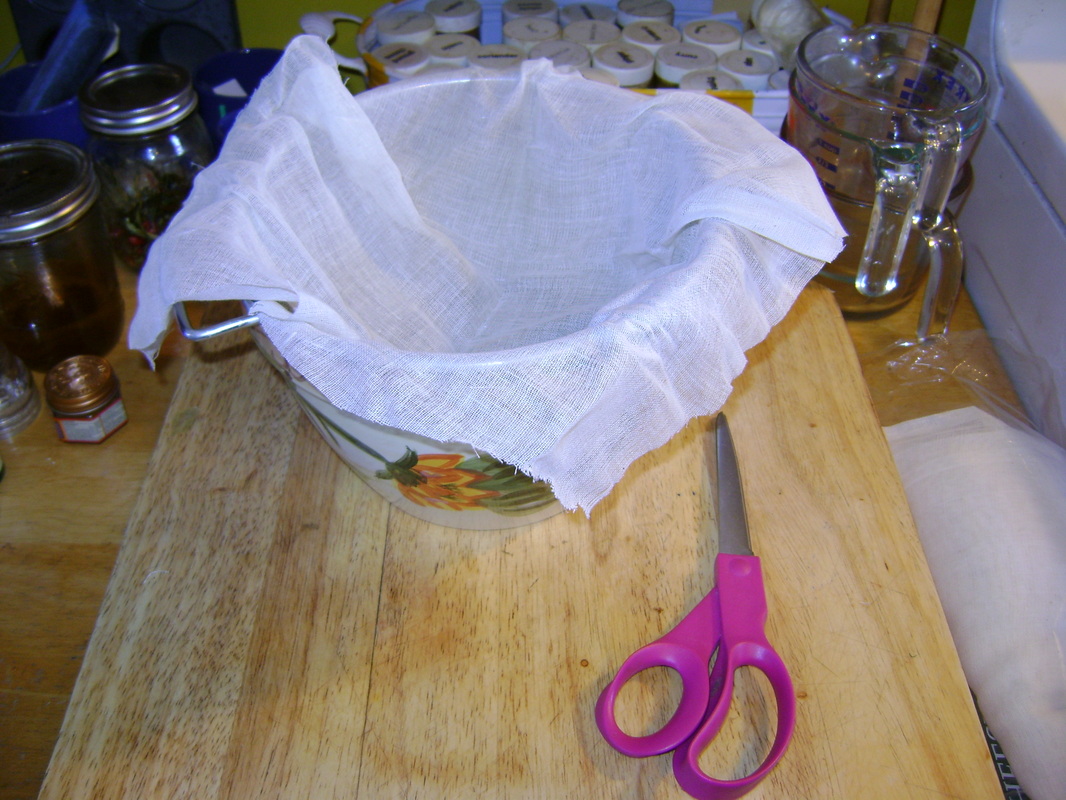
3. Cut a piece of cheesecloth bigger than the width of the bowl. The cloth should still be hanging over the edges of the bowl when you push it down into the strainer.
|
4. Pour the container of yogurt into the cheesecloth. Let it sit overnight in the refrigerator. The liquid whey will separate from the yogurt and drip through the cheesecloth down into the bowl.

|
|
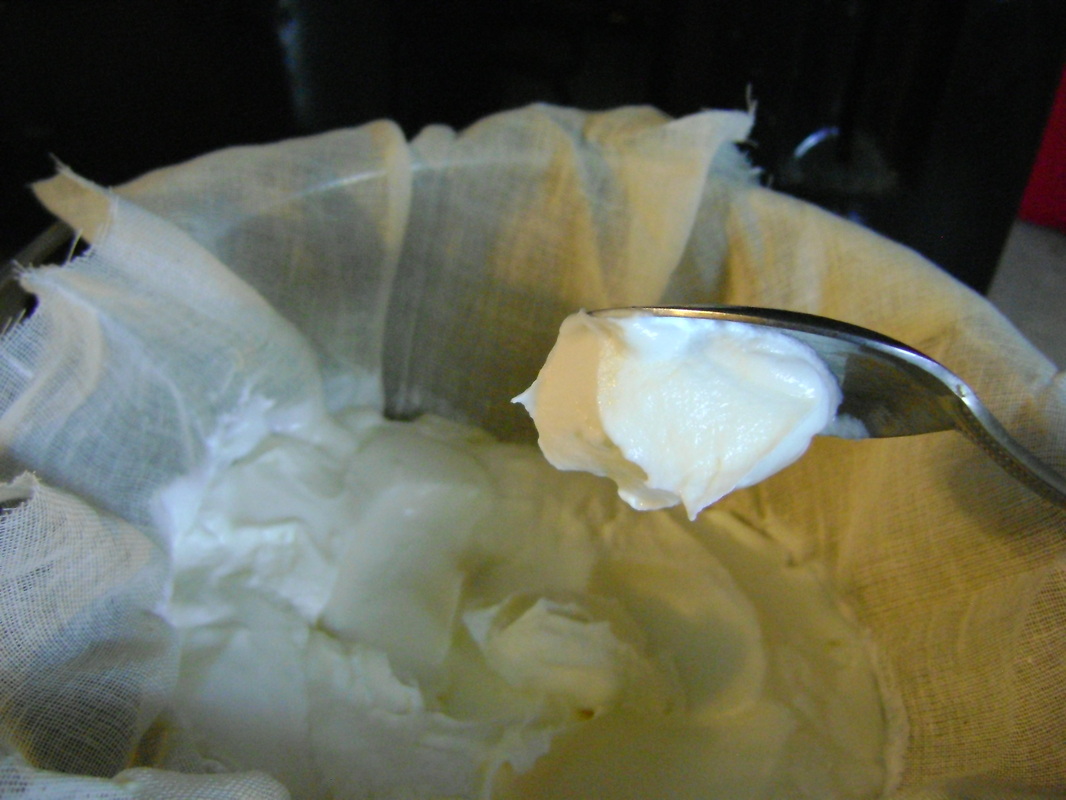
5. The next day, the yogurt will be much thicker. You've made spreadable yogurt cheese that can be flavored any way you like.
|
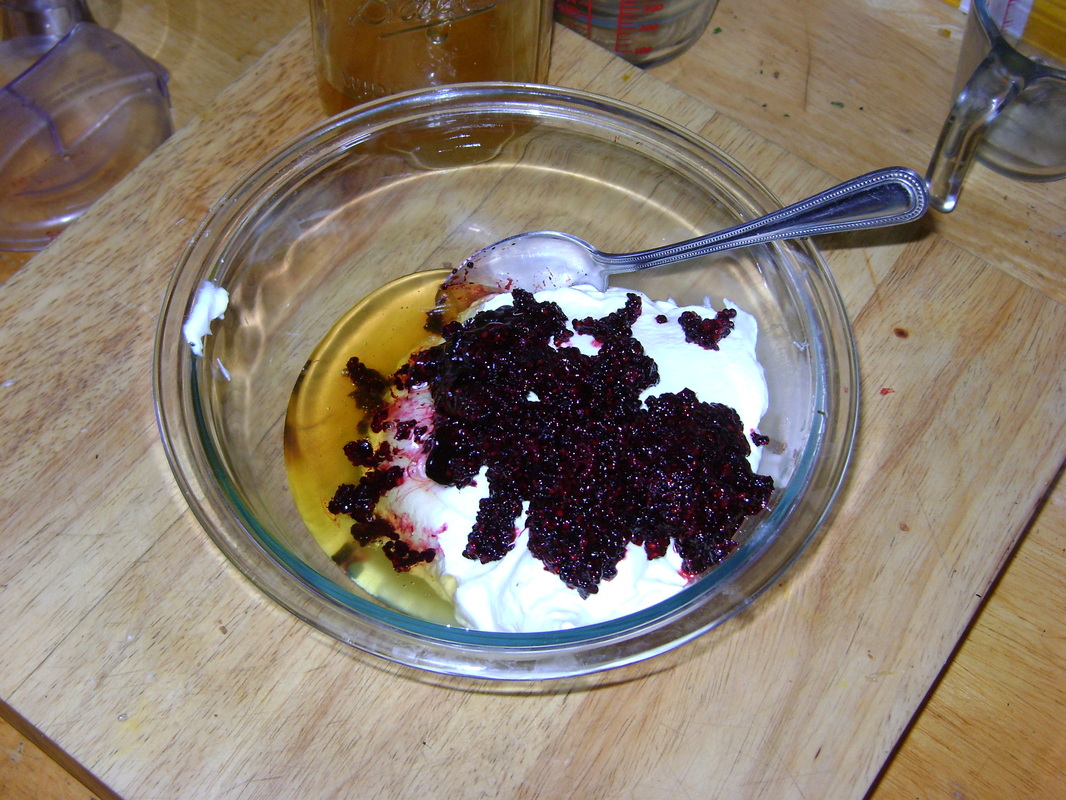
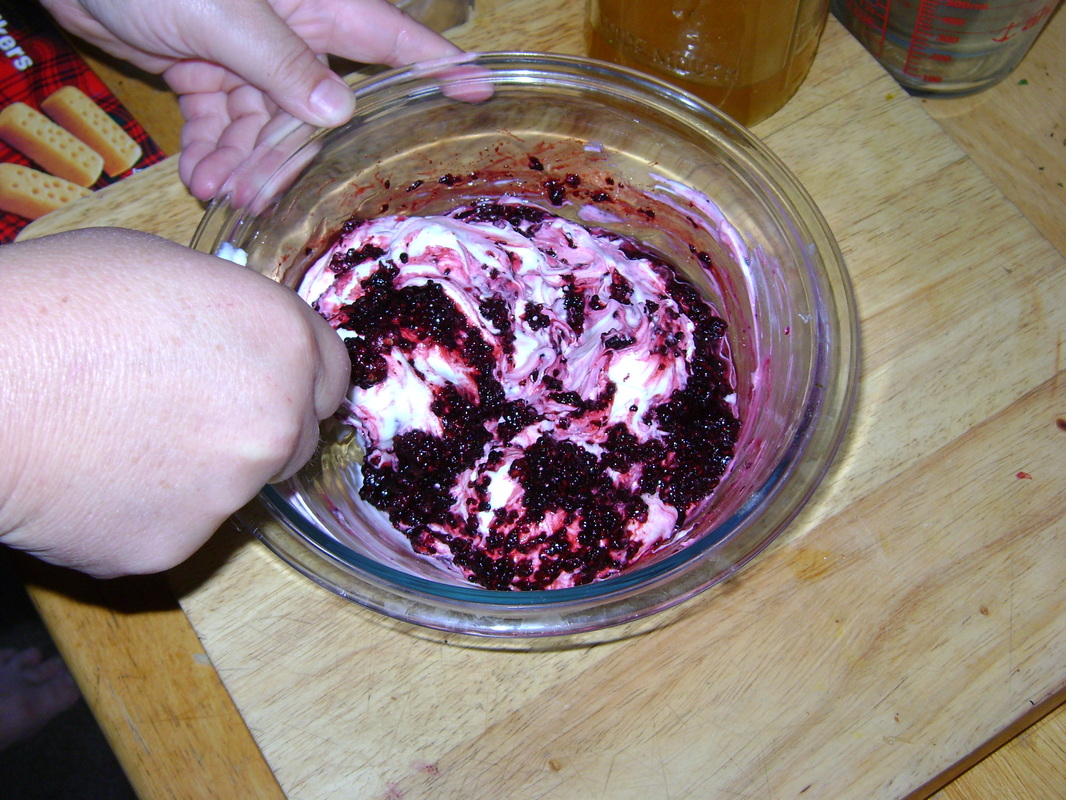
6. We added honey and black caps that had been crushed in the food processor.
|
|
7. Stir and adjust amount of honey and black caps to taste.
|
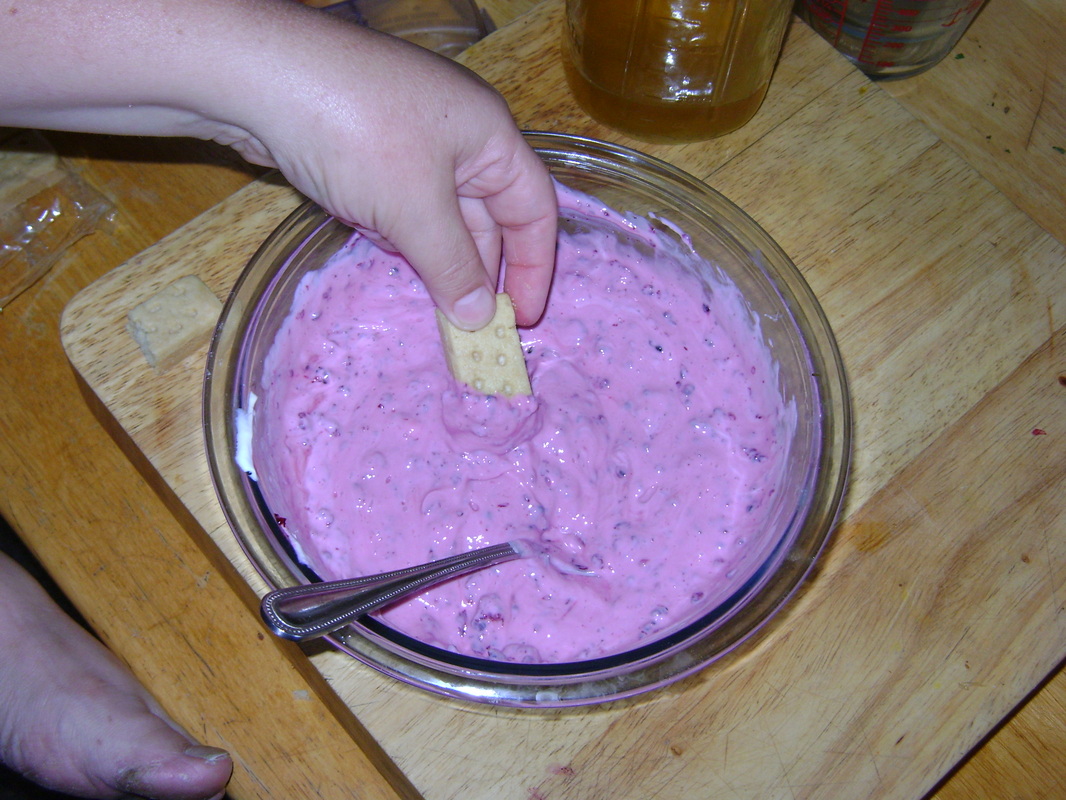
8. The finished product is a shocking pink, but still mighty tasty. This is proof that neon can be yummy.
|
Results, Tips, and Ideas:
You can eat the black cap yogurt cheese straight, or use it as a dip for your favorite plain cookies, such as shortbread or graham crackers. I ate what Theresa made and started to think it would also make a really good pie filling over a graham cracker crust...
You can eat the black cap yogurt cheese straight, or use it as a dip for your favorite plain cookies, such as shortbread or graham crackers. I ate what Theresa made and started to think it would also make a really good pie filling over a graham cracker crust...
Experiment 7: Black Cap Creamy Drinks
I recently learned how to make lassi- a drink served with Indian meals. I combined techniques from that and good old fashioned milk shakes to create the creamy drink below.
|
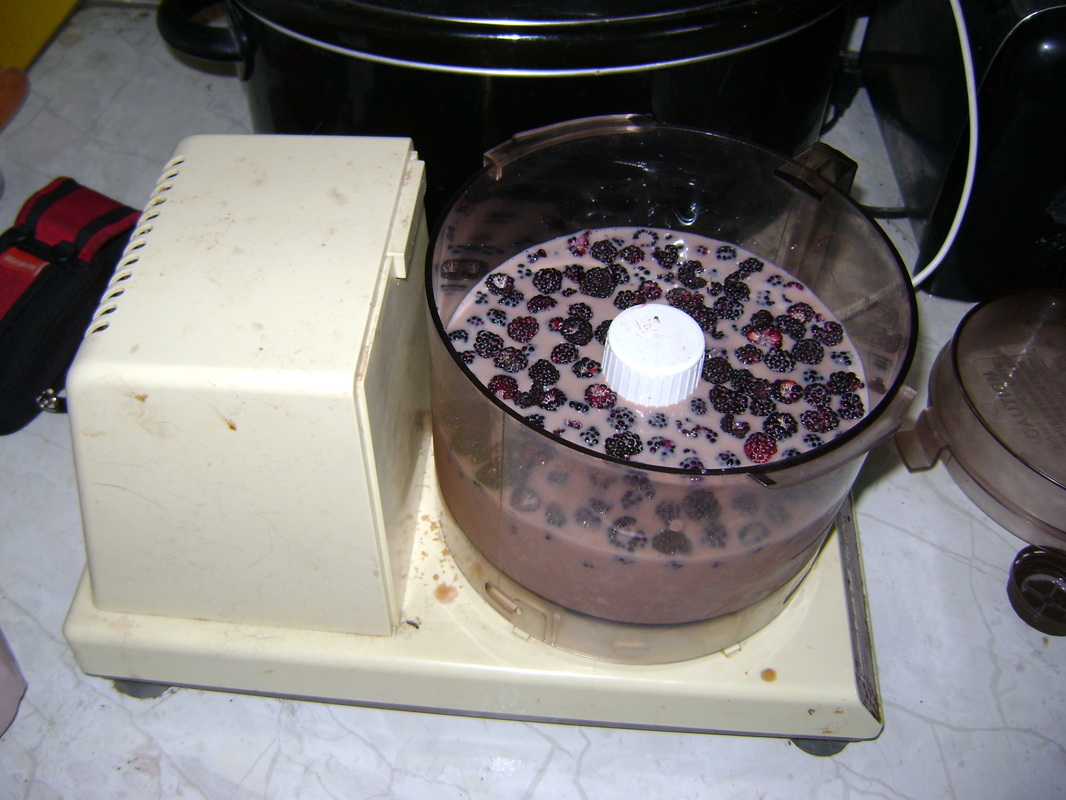
1. Today's ingredients: chocolate milk, vanilla ice cream, black caps, more sweetener if needed.

|
2. Blend the milk, berries, and sweetener (if using- I didn't) in the food processor.
|
|
3. The milk foams up, so be sure that you don't put in so much that your food processor overflows.
|
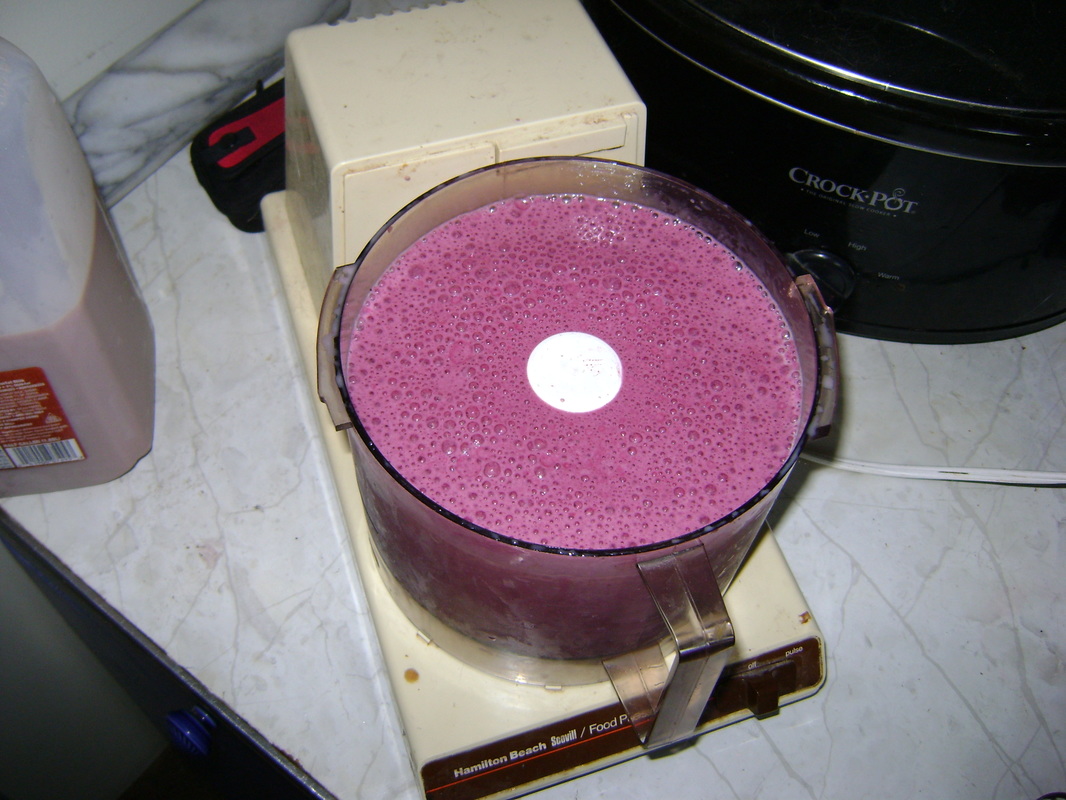
4. If you prefer your shake crunchy, skip this step. If not, strain out the seeds and skins.
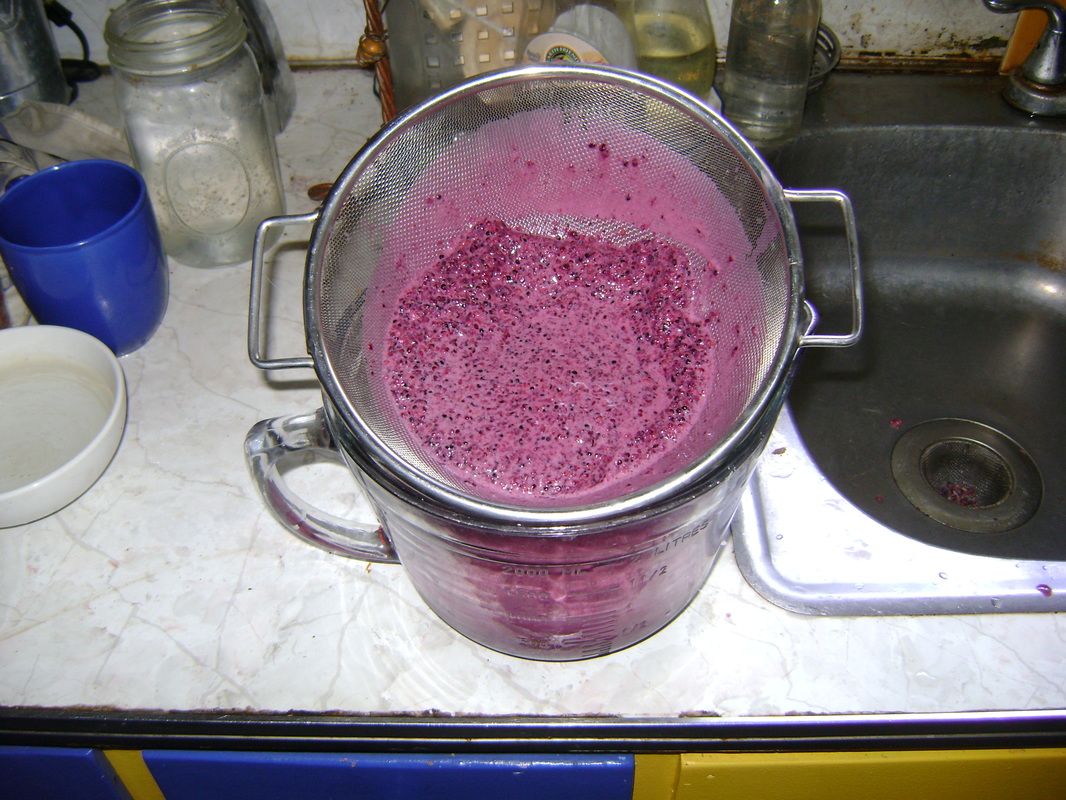
|
|
5. Return the milk and wild raspberry juice to the food processor.
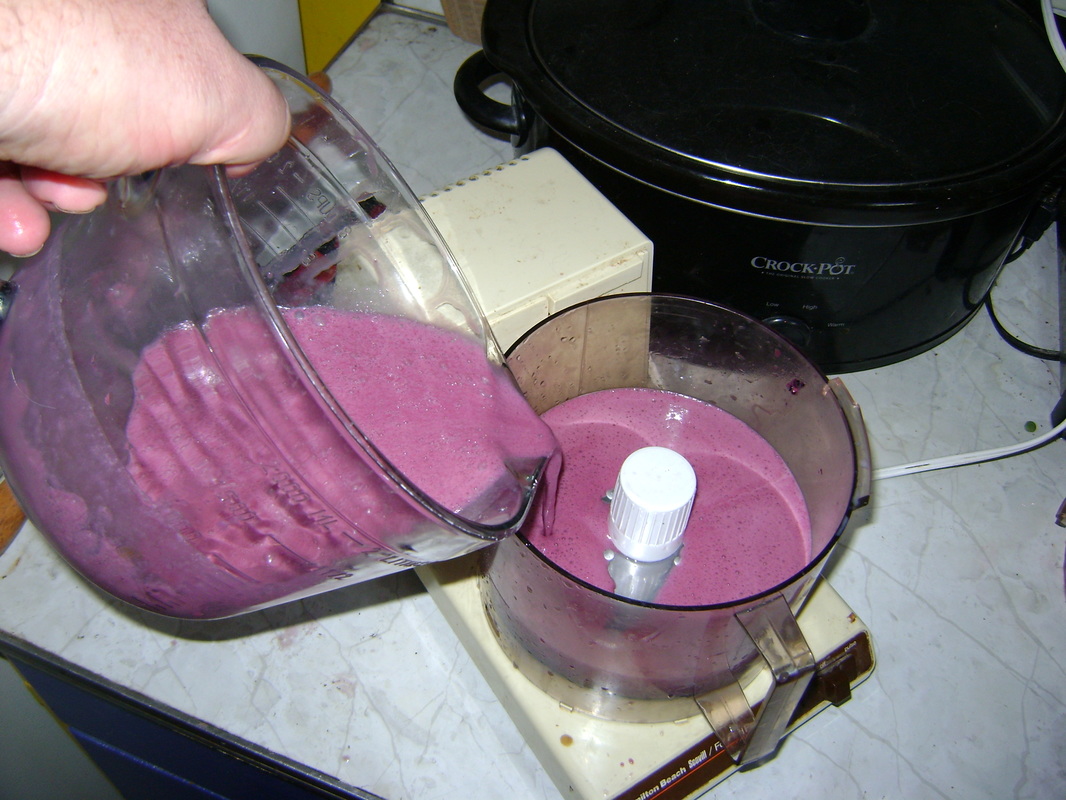
|
6. Add ice cream and blend.
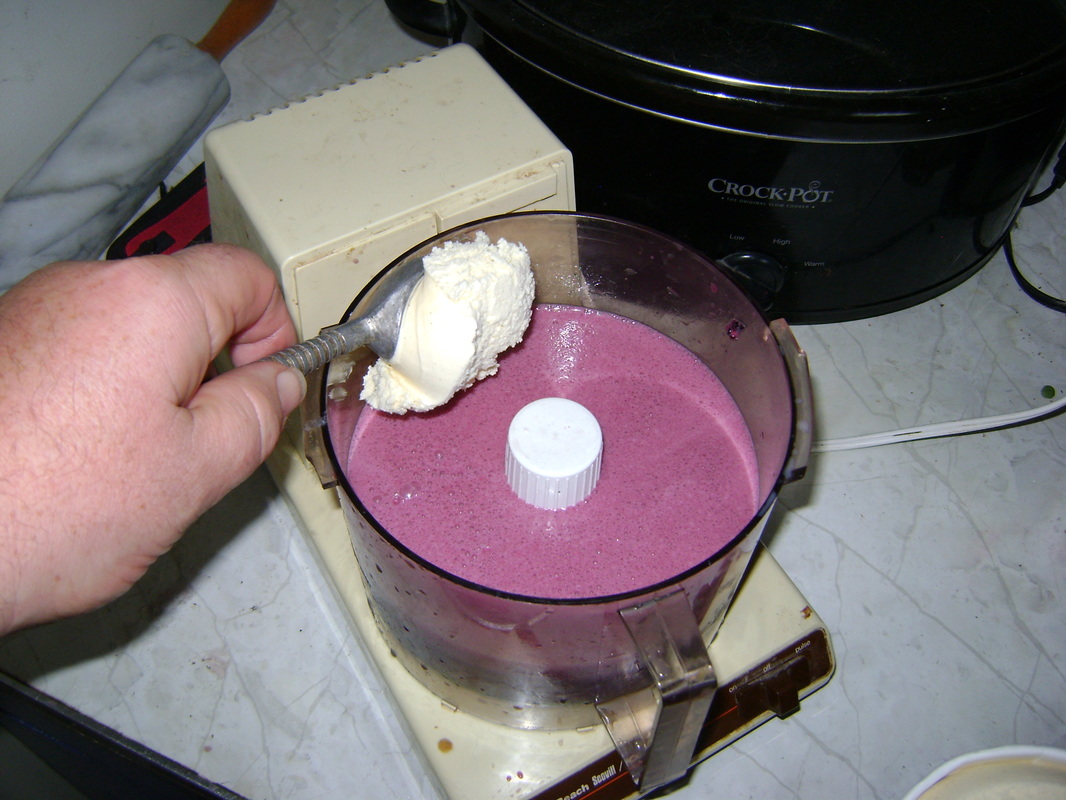
|
|
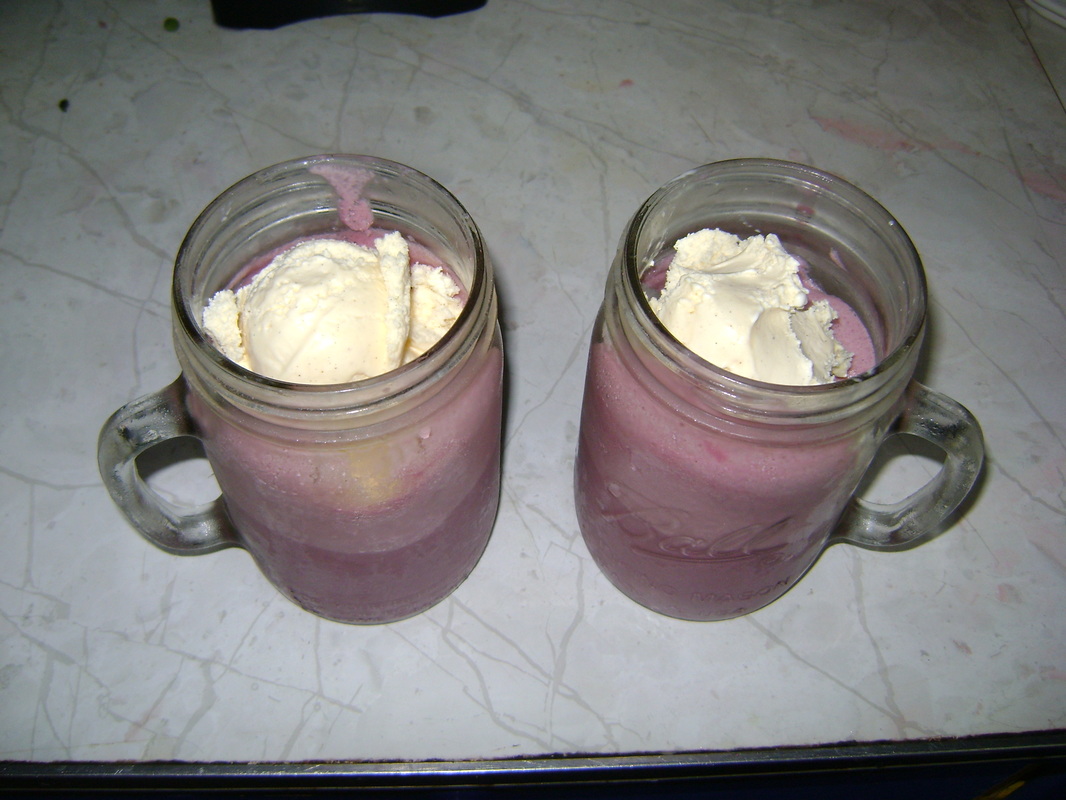
7. Pour into stylish containers, store in the freezer while cleaning up your mess so that they stay cold. Here you have a creamy drink...
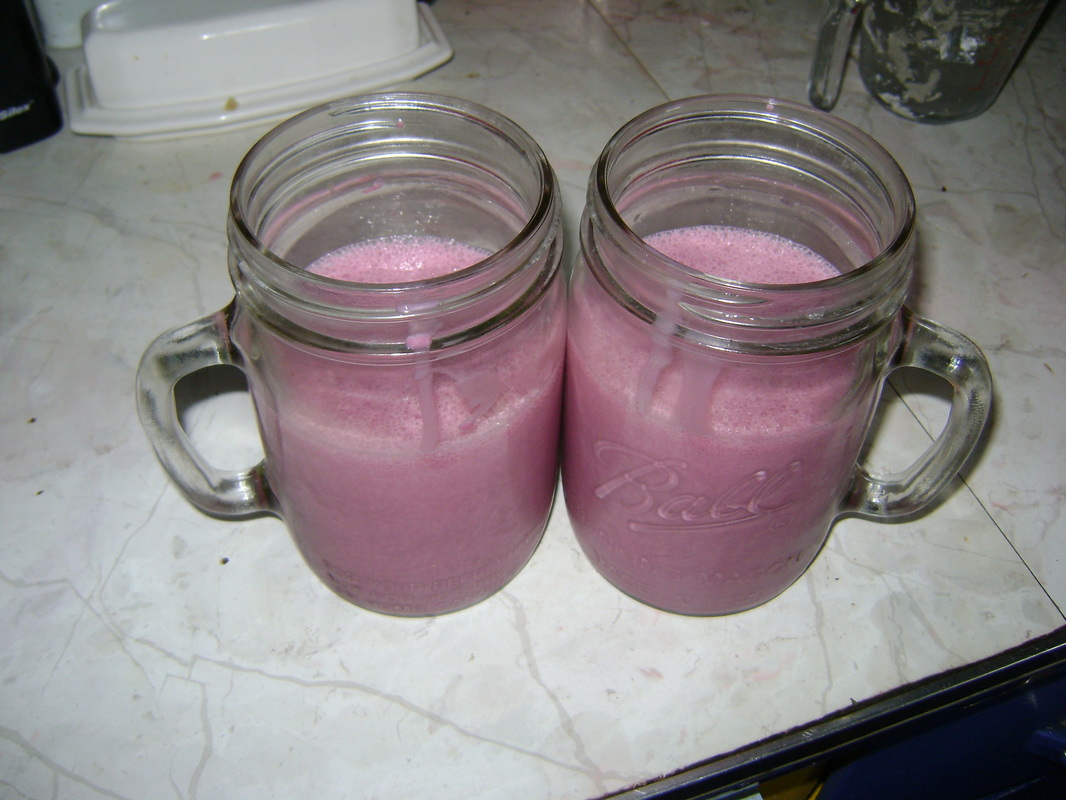
|
8. ... or add more ice cream to make a black cap float.
|
Variations:
- For the lassi Indian drink, you use 1 cup of milk, 2 tablespoons of yogurt, 1-3 tablespoons of sweetener (I use brown sugar), and the flavoring of your choice, such as 1/2 cup of black caps (traditional lassi is usually mango or cinnamon).
- Use milk and ice cream of your choice, vanilla, chocolate, or whatever you think would go well with the black caps.
Other Experiments to Try:
- Make black cap jam. A classic, but we haven't gotten enough black caps at a time yet... and there were too many other experiments to try.
- Add black caps to home made ice cream (I'm not sure if I will be able to handle pink ice cream, but I will give it a try).
- In one of my books I am told that some cultures mix fruit with meat and spices to flavor sausage. I have done that with pomegranates. If I get brave maybe I will try it with black caps.
- Freezing Black Caps:
If you're done experimenting and you still have black caps left over, or you want to save some to experiment with or eat over the Winter, they are easy to freeze:
- Line a cookie sheet with wax or parchment paper and spread the fruit in a single layer over the paper.
- Put the cookie sheet in the freezer. This may sound difficult, but it's usually possible to balance it on top of the other food you might have in there- it doesn't need to be flat. It doesn't take long to freeze.
- You can then pick up the paper, and use it to funnel the black caps into a freezer storage bag (I double the bag to help reduce the freezer burn).
- This method of freezing the raspberries individually before putting them into a bag lets you be able to remove them from the bag individually too. If you just froze them directly in the bag, you would end up with one large chunk of frozen raspberries that you would need to unthaw all at once.