Eatin' at Samhain:
Don't Fear the Reaper, He is in All of Us
From Bear
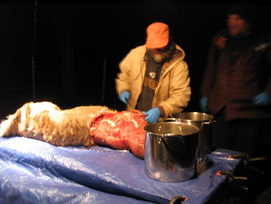
A dear friend helps butcher a deer.
|
Samhain (Oct. 31st) is the Celtic celebration of the final harvest. It is the time when the farmers butcher the herds and the hunters test themselves in the wild. Root vegetables are gathered and stored for the Winter. I understand that something has to die, be it animal or vegetable, if I want to survive the Winter. The Reaper must be a part of me.
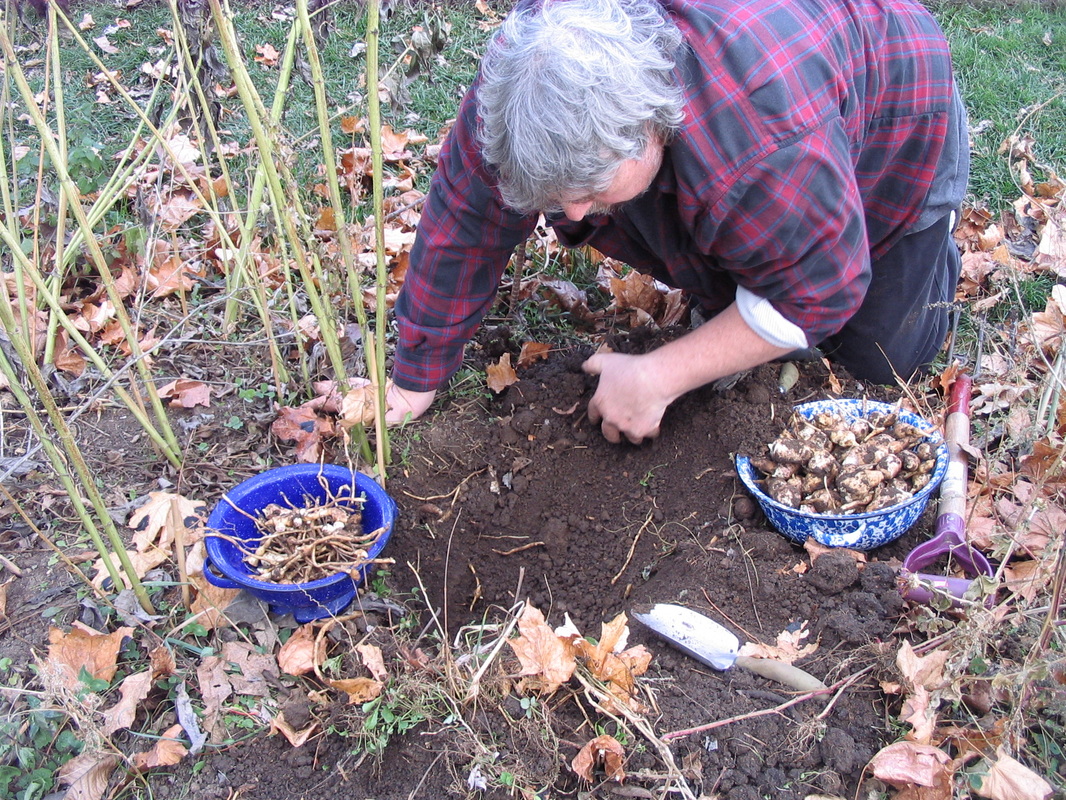
In my yard I gather over 50 lbs of sunchokes before the ground freezes each Fall (right). A few years ago Reed helped me butcher my first deer (left). |
You can't hide from the Reaper.
|
Breaking down the deer was enlightening. On the table was a body, and I was going to cut it up so we could eat it. It wasn't neat and packaged like the meat at a market. I had to remove the hide to get to the meat and I had to cut the meat I wanted off the bones. I got to really see where the meat came from and my skills decided how good the finished product looked. (Reed's haunch was a better looking cut than mine.) When I get another deer I will take pictures of the butchering process and add the different venison cuts to this page, along with other meats.
One meat I can show you now is chicken. Breaking down a chicken is a skill that will save you money and give you more options in preparing it. For example, spatchcocking a chicken is taking the breastbone and the backbone out so the chicken will lay flat on the grill (see How to Grill by Steven Raichlen for instructions or wait until I post pictures). You can also cut the bird in half, in quarters, or in eighths.
I have read a lot of books and seen a lot of videos about how to cut up chickens, but have found that I learn more in person. I was lucky to take hands-on classes at Madison Area Technical College, their Culinary Kitchen Basics Series, which is geared toward teaching home cooks professional skills that can be applied in the home setting (at this writing, they currently have Saturday classes on various topics planned through Spring of 2015). In one class, Chef Kevin Appleton demonstrated how to cut up a chicken, and then watched and corrected me as I did it. Below is what I remember of the method after waiting a week to buy some more chickens to practice with. (My teacher can't get me for plagiarizing cause I'm sure I forgot some of what he said.)
How to Break Down a Whole Chicken
Job 1, get your knife sharp and your cutting area ready (notice the towel on the carpet because Bear is sometimes a sloppy boy).
|
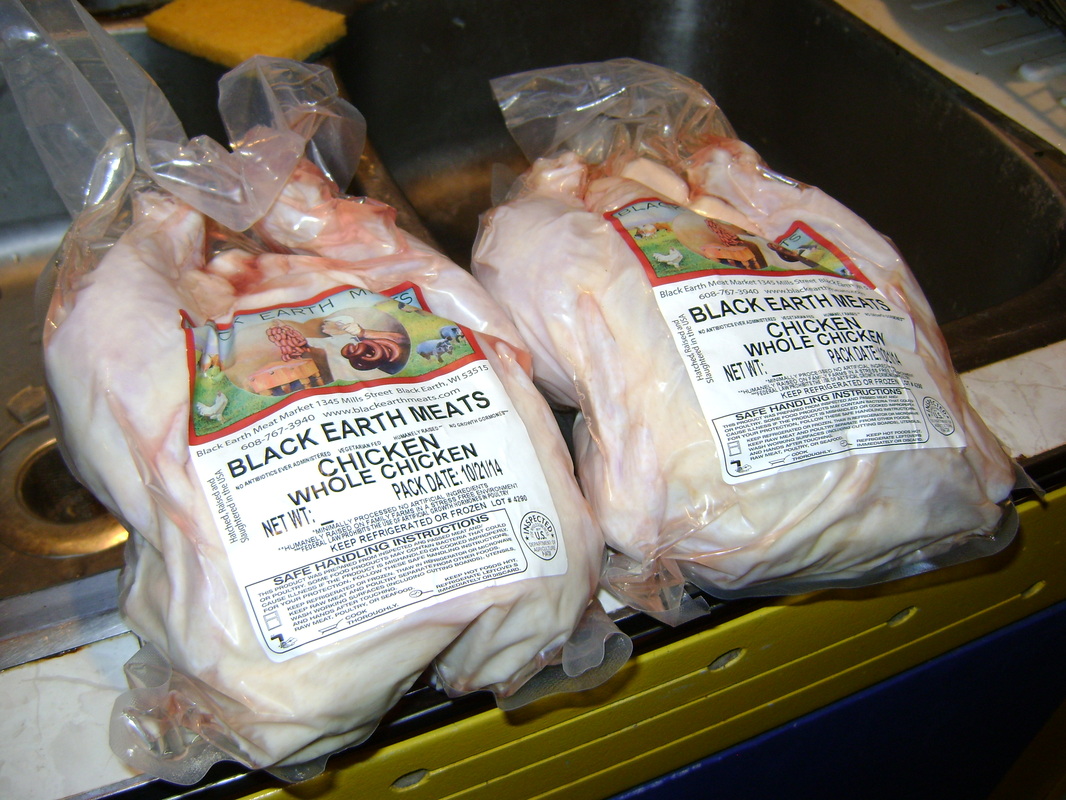
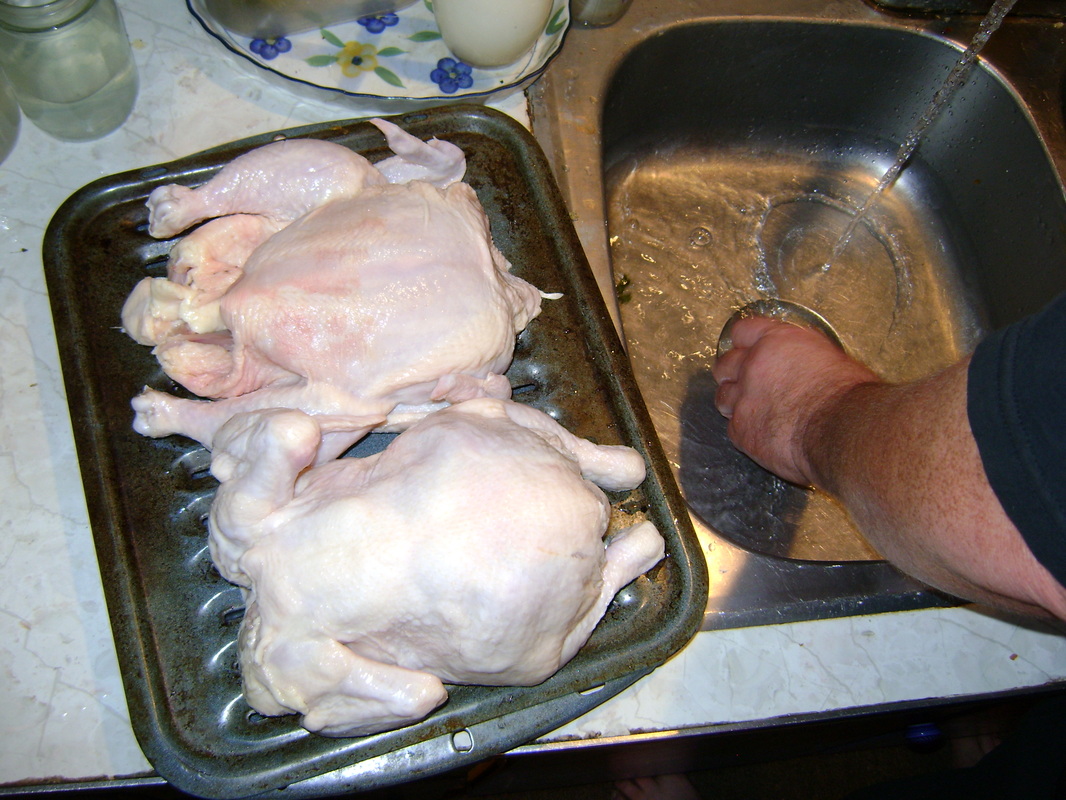
Next, have the chicken ready. It is best to buy a non-frozen chicken. If you want to freeze what you break down, thawing and refreezing a chicken may give it a weird flavor.
|
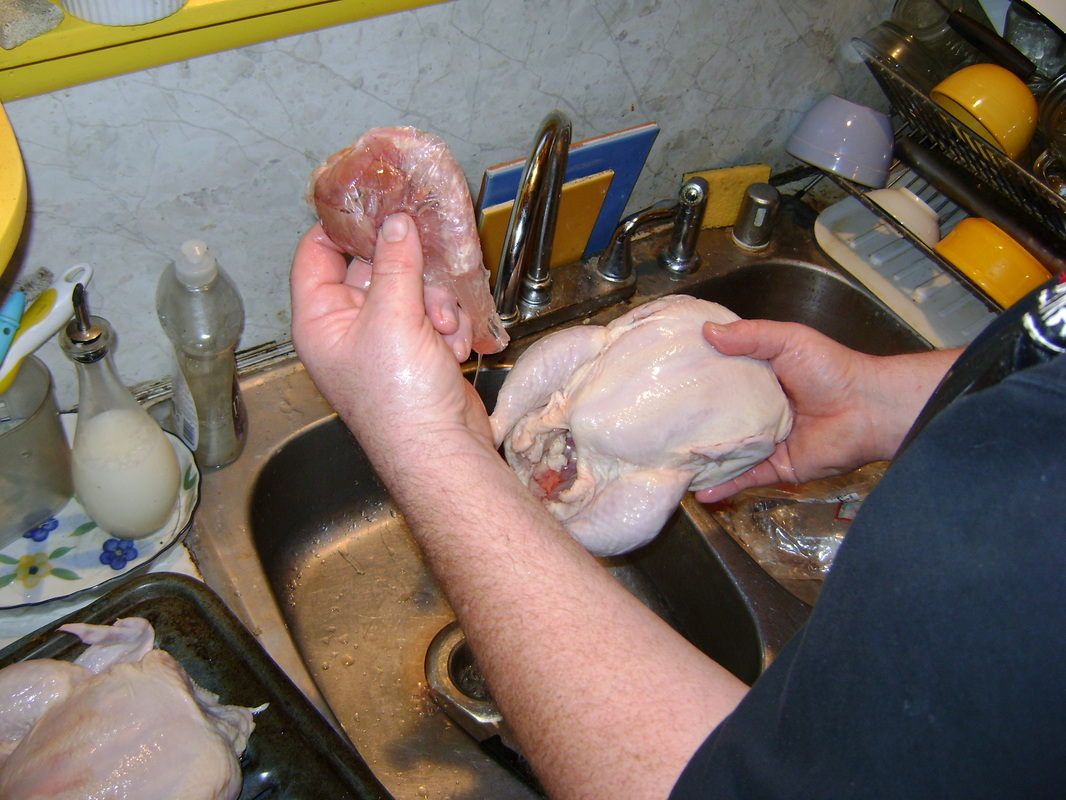
Wash the chicken under cold running water and check both ends to see if giblets or other bagged parts are in the bird. Then pat dry the inside and out with paper towels.
|
Let bird sit for a few minutes to dry while you clean out the sink so nothing gets cross contaminated, including household cats. On to cutting...
|
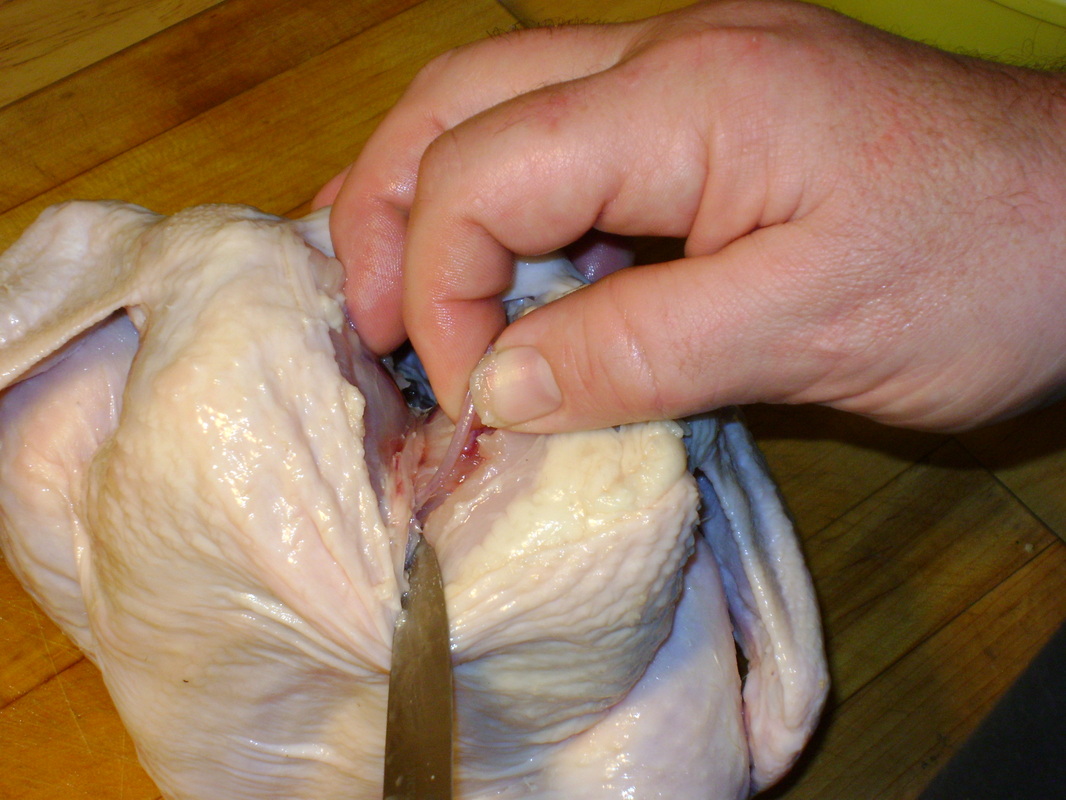
Find the wishbone on the neck end of the bird. Scrape the knife along the bone until you can get your finger behind the bone, then work it loose and pull it out.
|
The bone is easy to break and you want all of it out so you can't cut yourself on it as you break down the rest of the bird. Out of four chickens I was only able to pull out one unbroken wishbone. On to the wings...
|
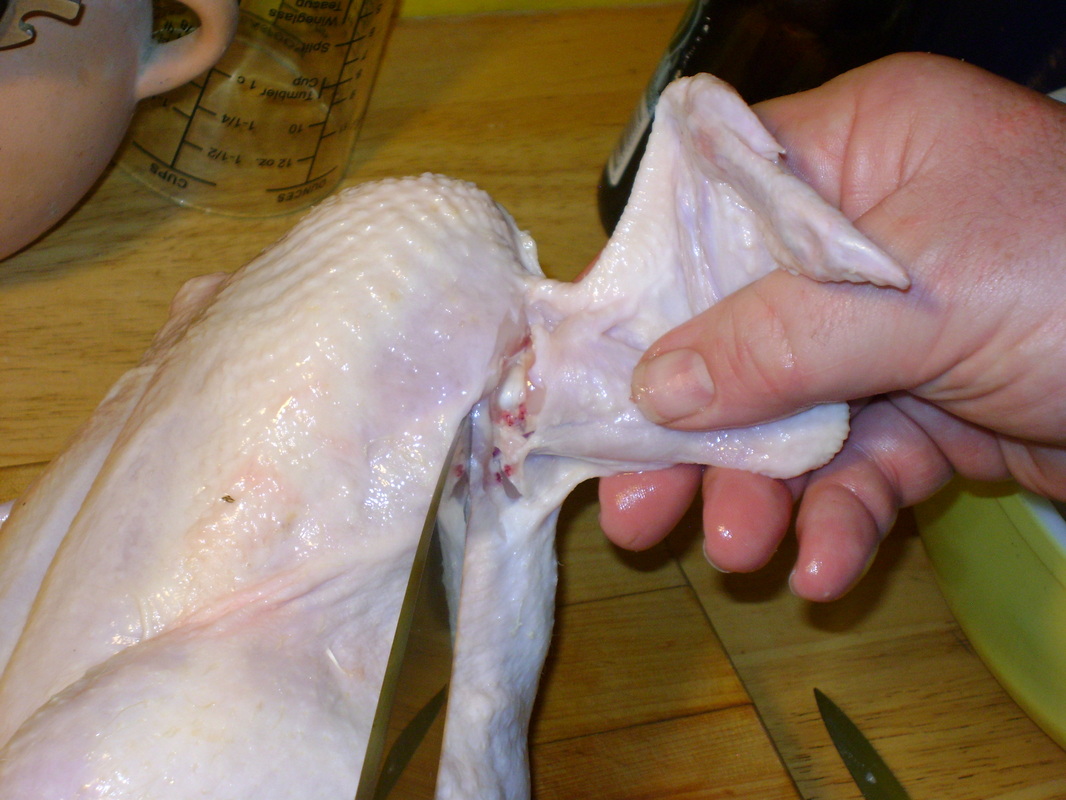
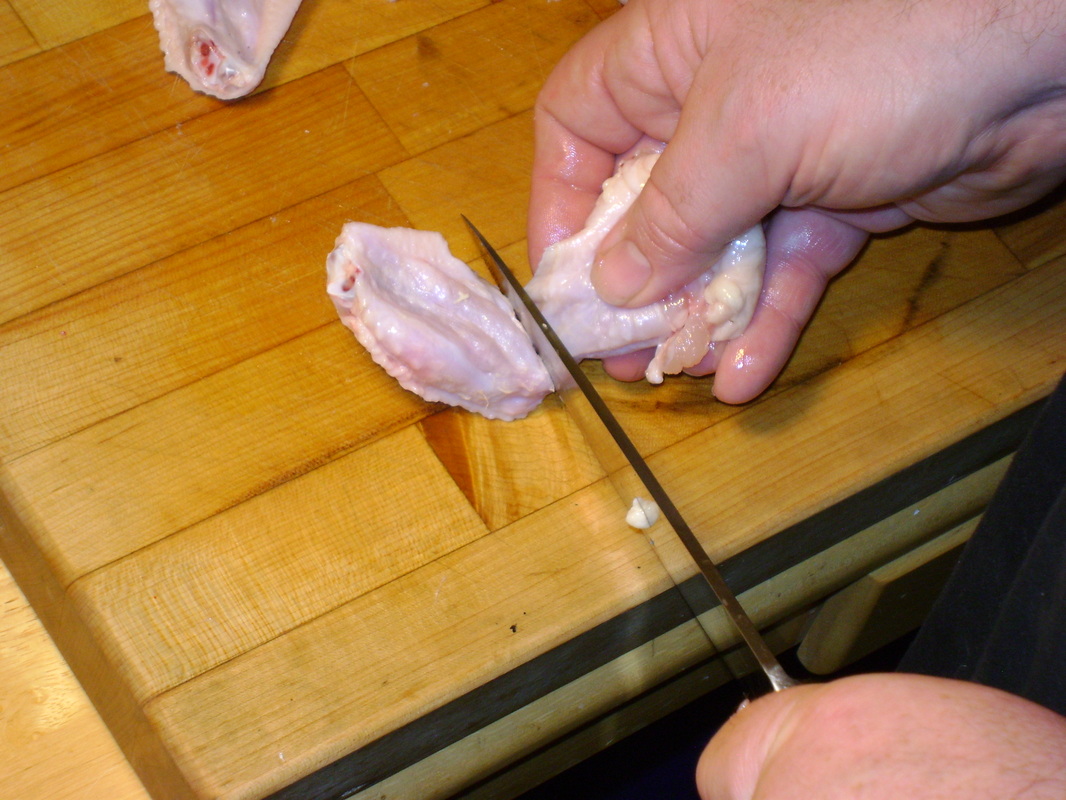
Pull the wing away from the body and lightly cut the skin at the base of the wing.
|
Bend the wing until the joint pops out of the socket.
|
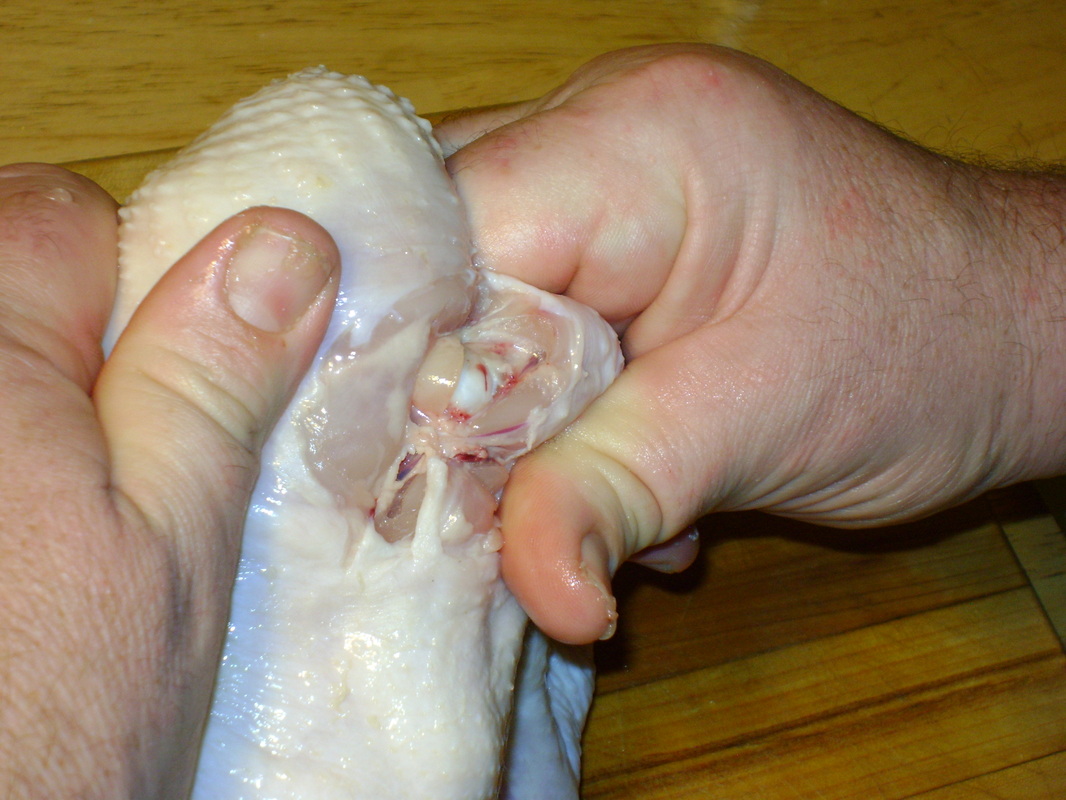
Cut between the socket and the wing bone. You now have a full wing. To break it down further you...
|
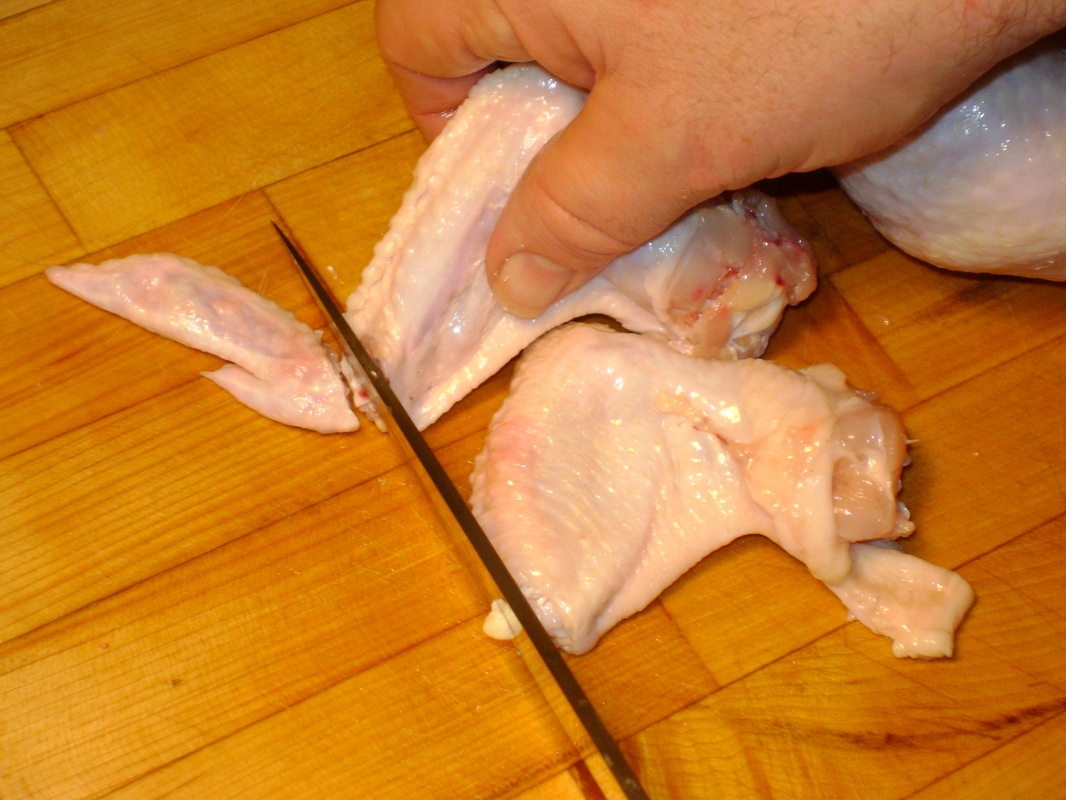
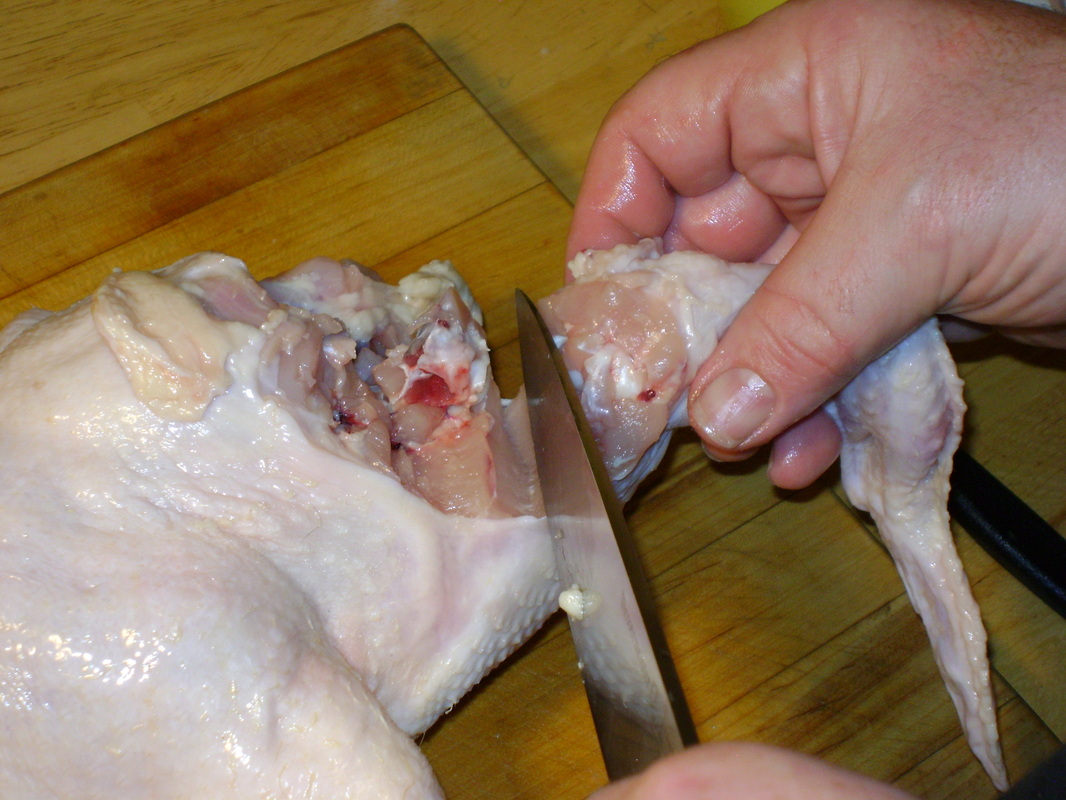
Pop the joint at the wingtip then cut the tip off (the tip can be saved to make stock). You can grill or deep fry the wing as is or break it down more...
|
For buffalo style wings, just pop the next joint and cut between the socket and bone.
|
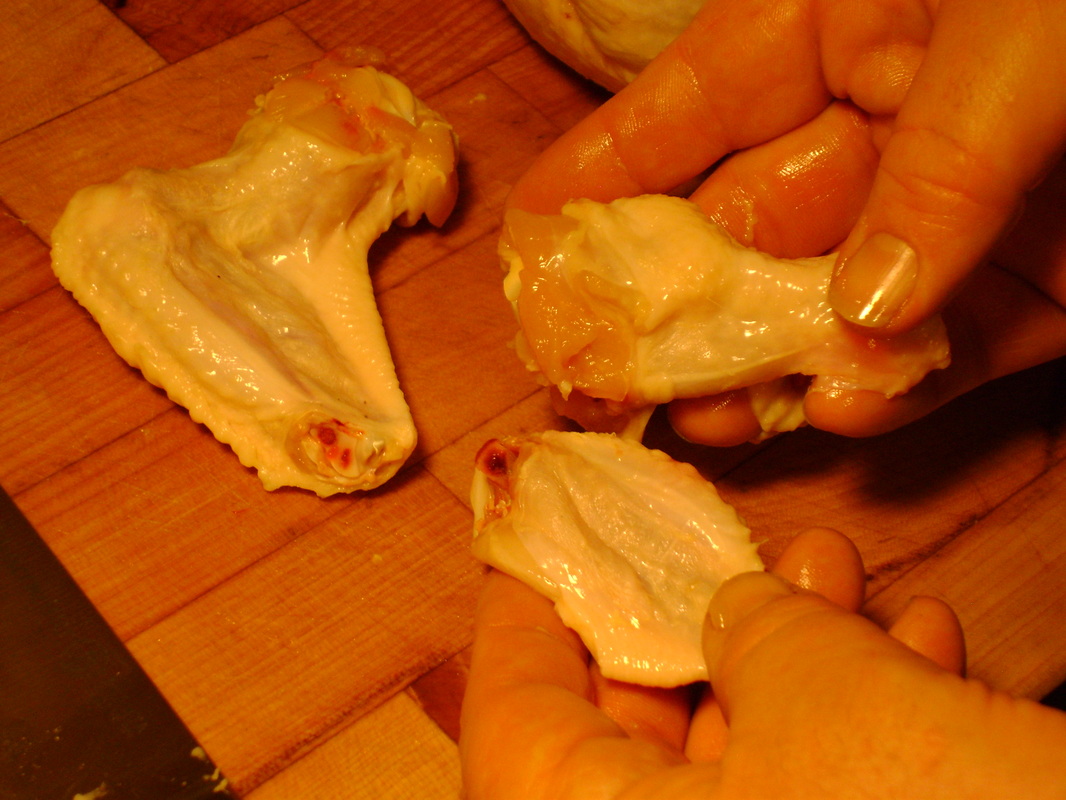
I now get why some of the wings looks like small legs when I order them at a restaurant. Go figure.... On to the legs...
|
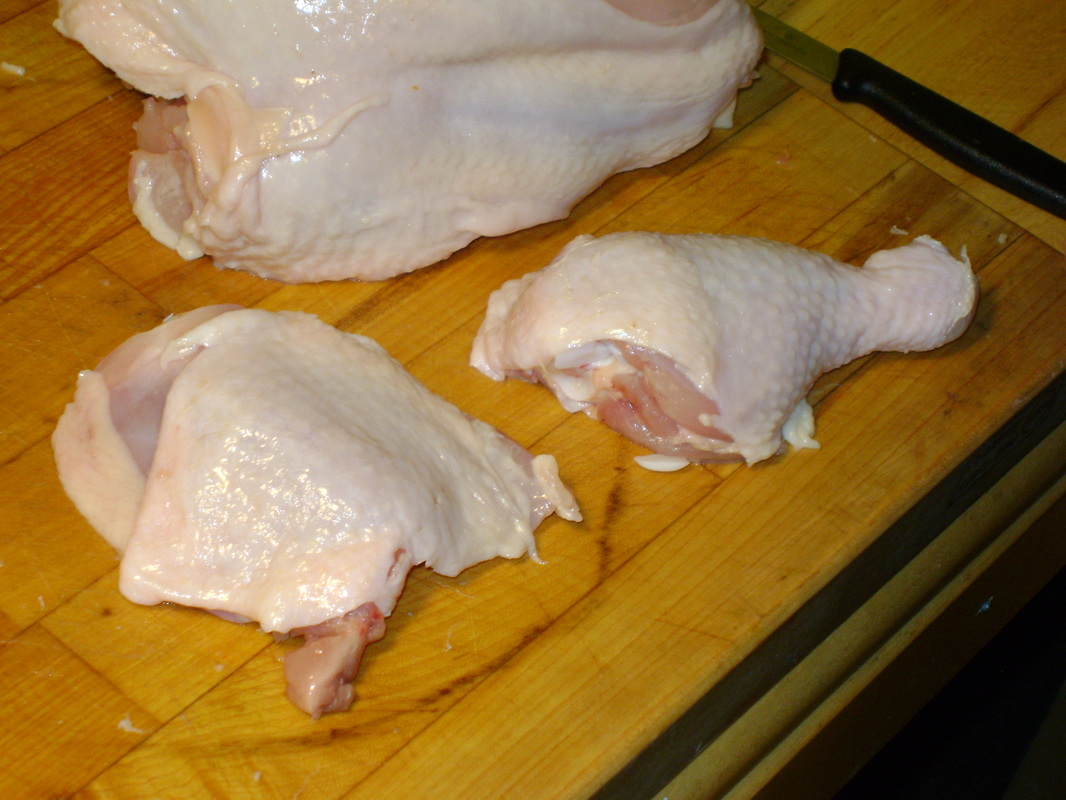
The process is the same as the wings, only at the other end of the bird. Pull the leg away from the body while cutting only the skin.
|
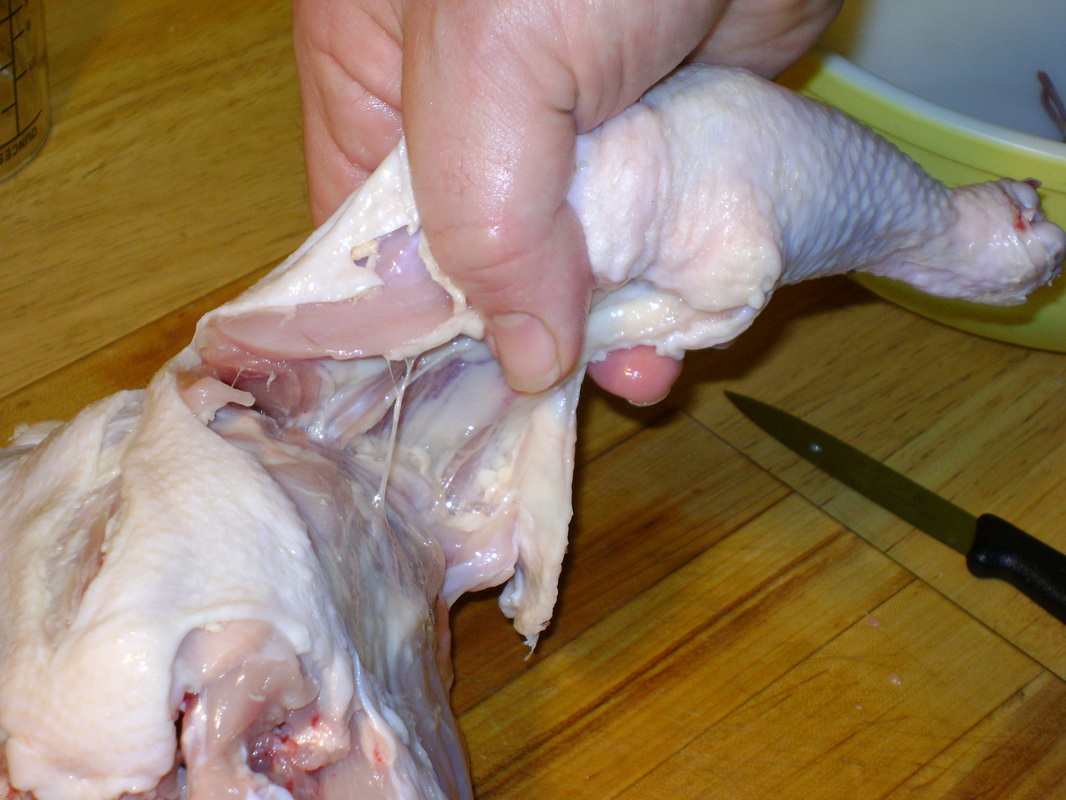
The leg bone is connected to the thigh bone and the thigh is connected to the main body.
|
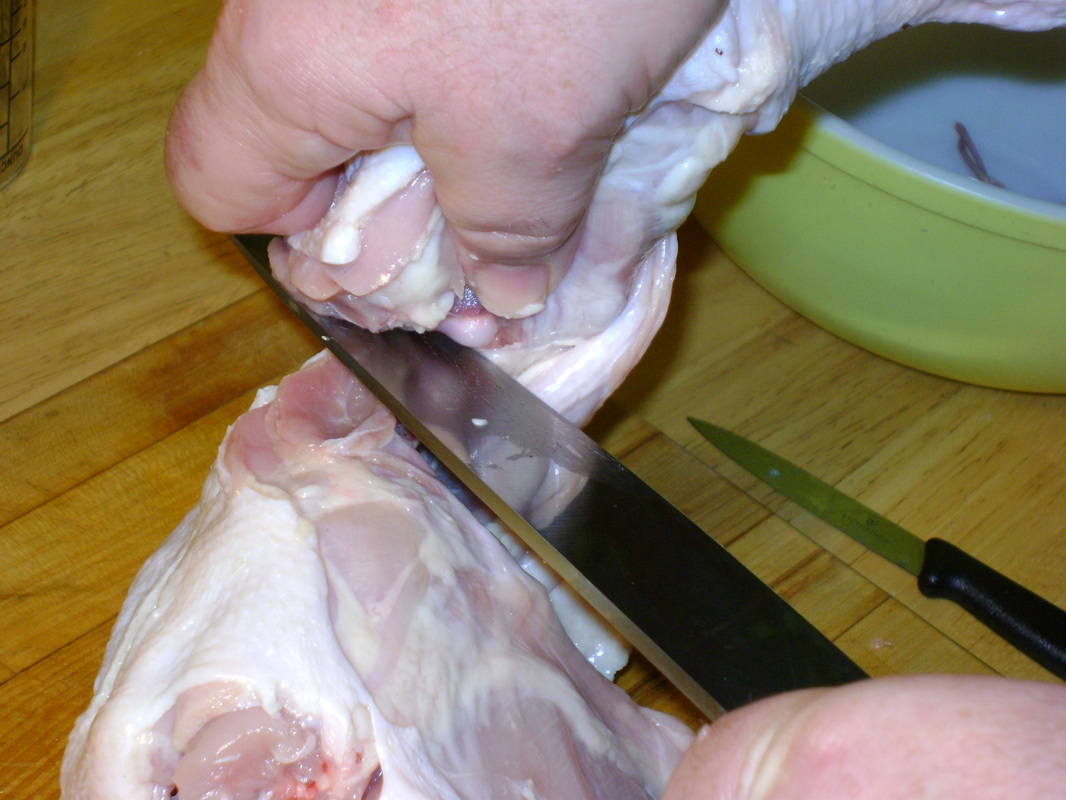
Pop the thigh bone from the body socket then cut between.
|
Here is another view from the other thigh and leg.
|
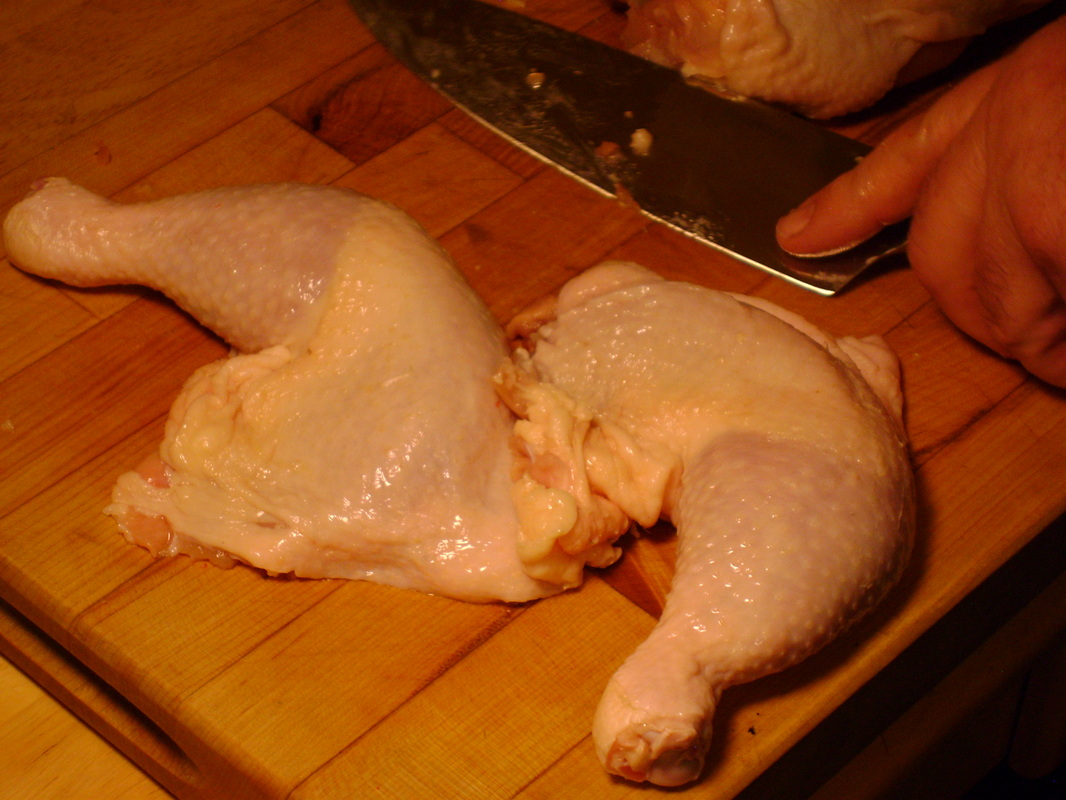
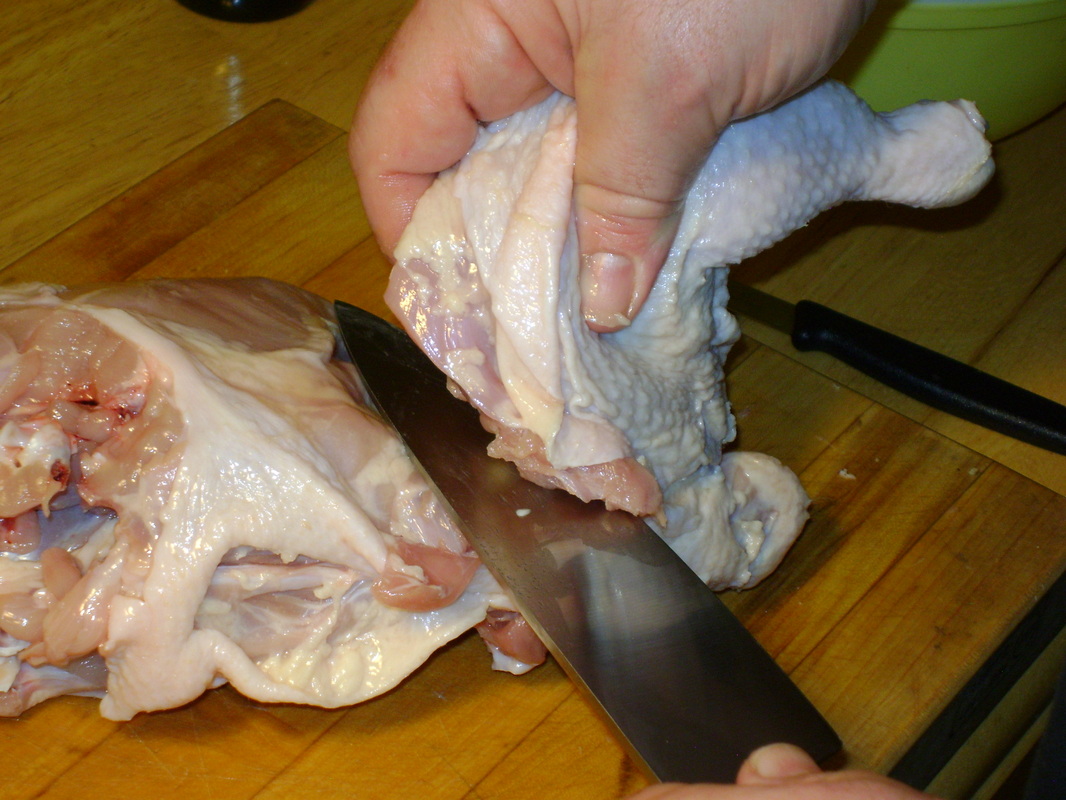
You can leave 'em like this for frying or grilling or you can separate the leg from the thigh.
|
To separate, flip them over and look for a line of fat between the thigh and leg.
|

Pop the joint between the thigh and leg and cut along the fat line. If you want boneless thighs, I think you cut along the other fat line then pull the bone out (that wasn't covered in class).
|
Cooking with the bone in adds flavor. You can pull the skin off if you want to save calories. On to the light meat...
|

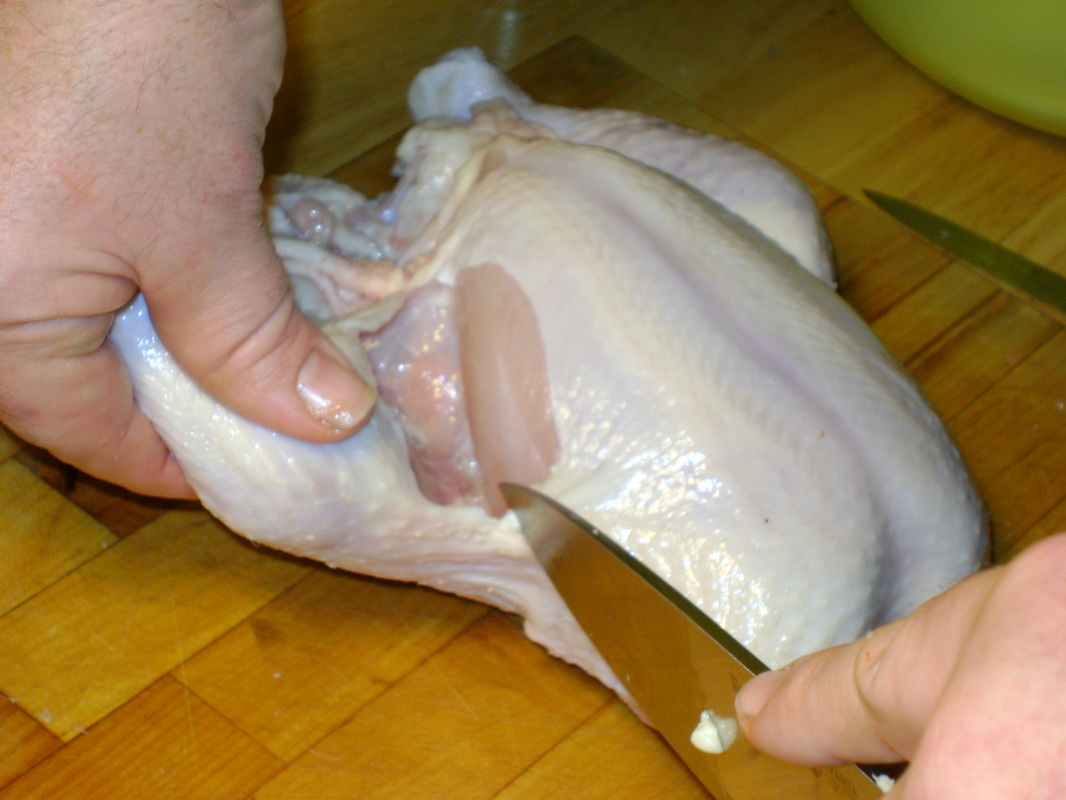
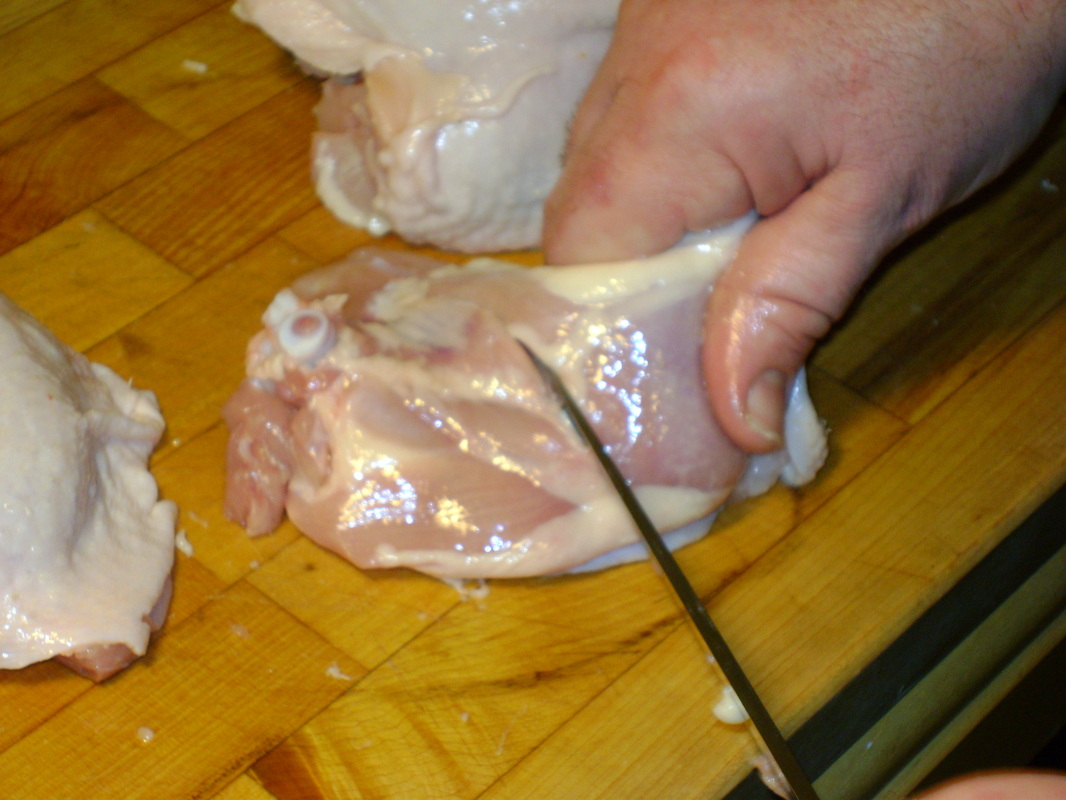
The long bone between the breasts is called the keel bone. Expose the bone then scrape and cut along it to remove the breast meat. Sounds easy, right?
|
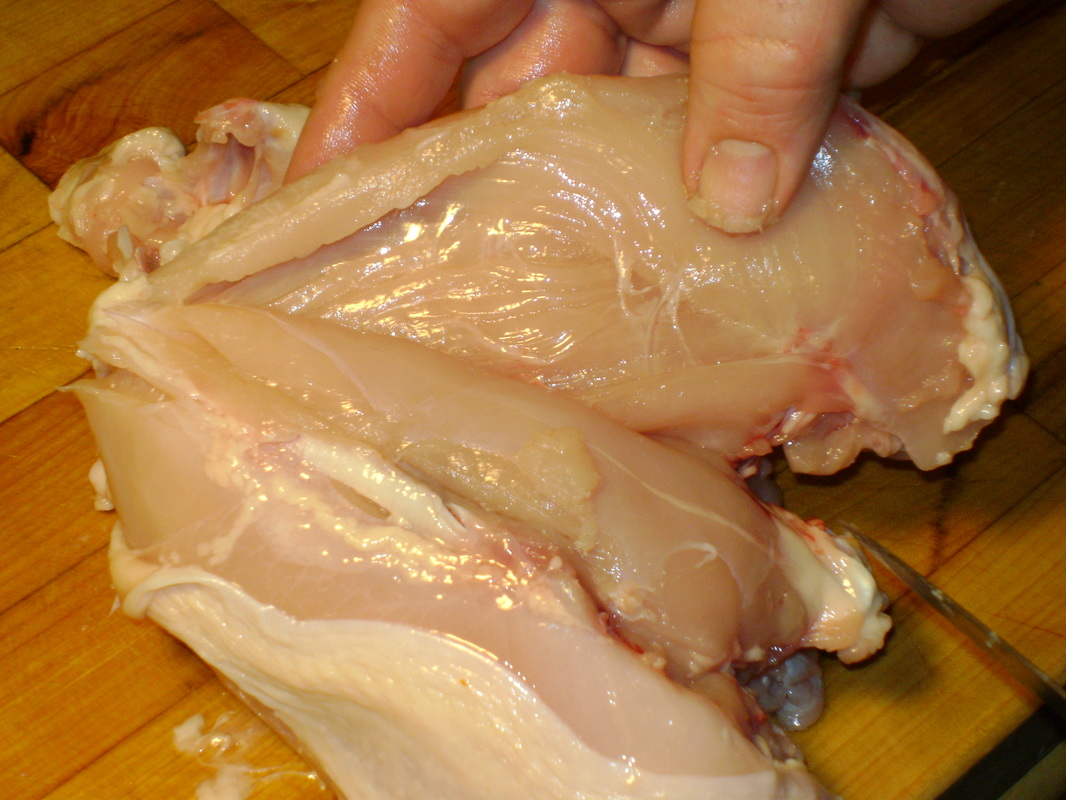
Nope... If you pull too soon the breast comes away from the tender. (The tender is still next to the keel bone above.)
|
You need to take your time and get as close to the keel bone as you can.
|
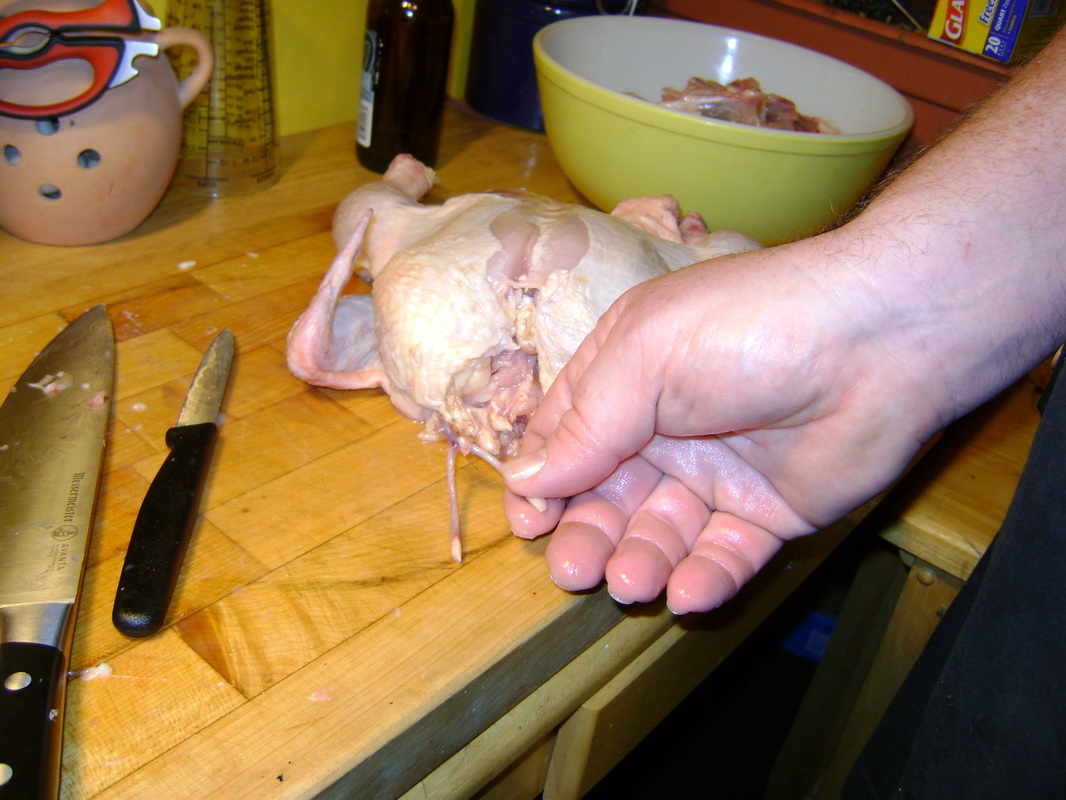
Good thing we don't eat skin on chicken breasts... I didn't exactly leave it intact. The carcass at top right looks pretty bare and is ready to be used in making stock.
|
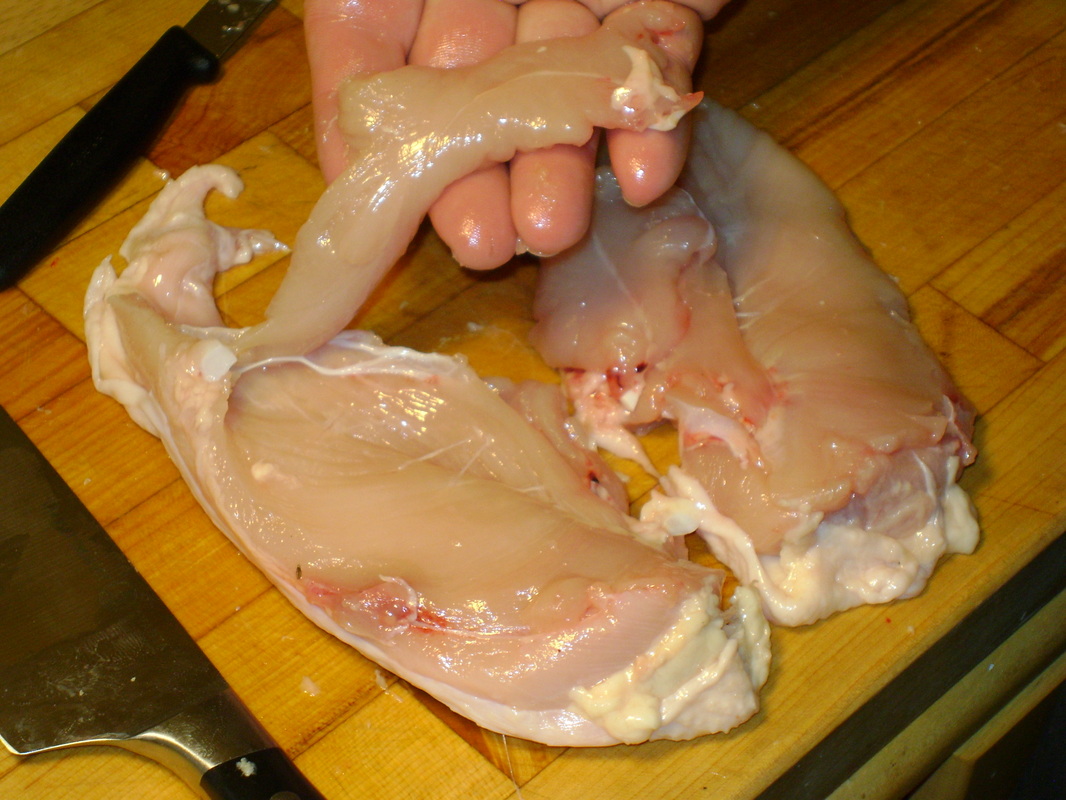
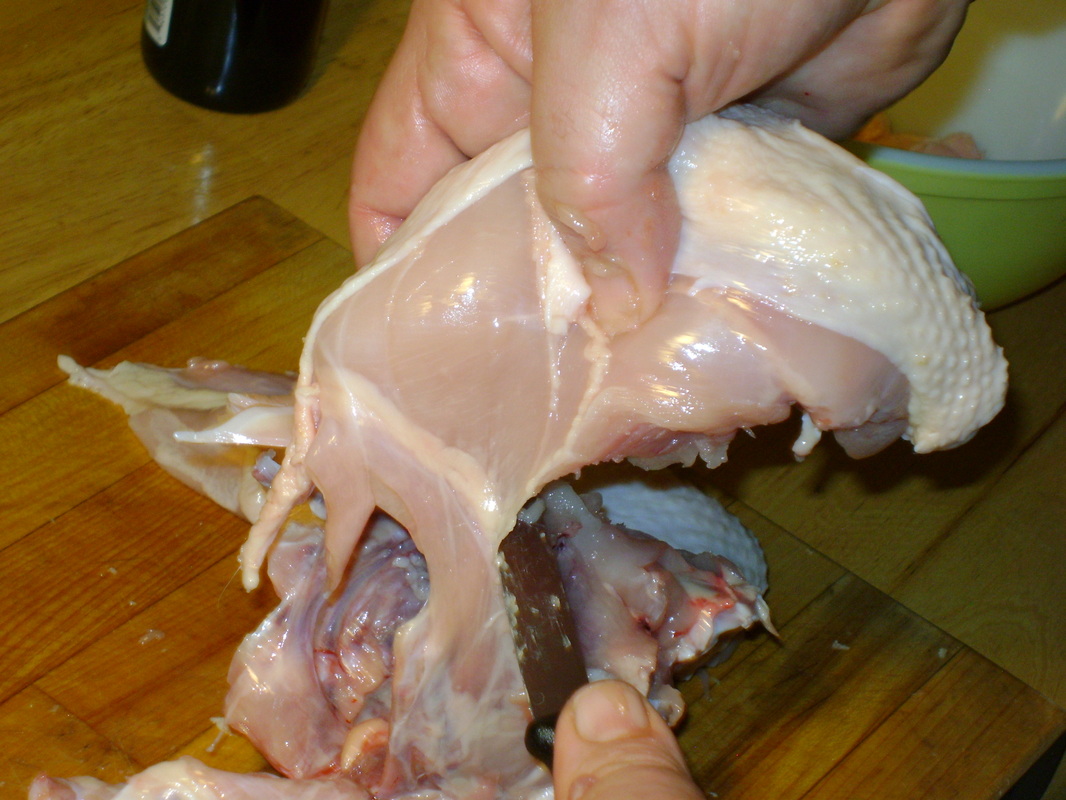
Now this gets ugly... the tender is a small strip of the breast that should be removed and eaten separately. I was somewhat confused as to which was which. On some of the birds I may have cut some breast off that I thought were tenders.
|
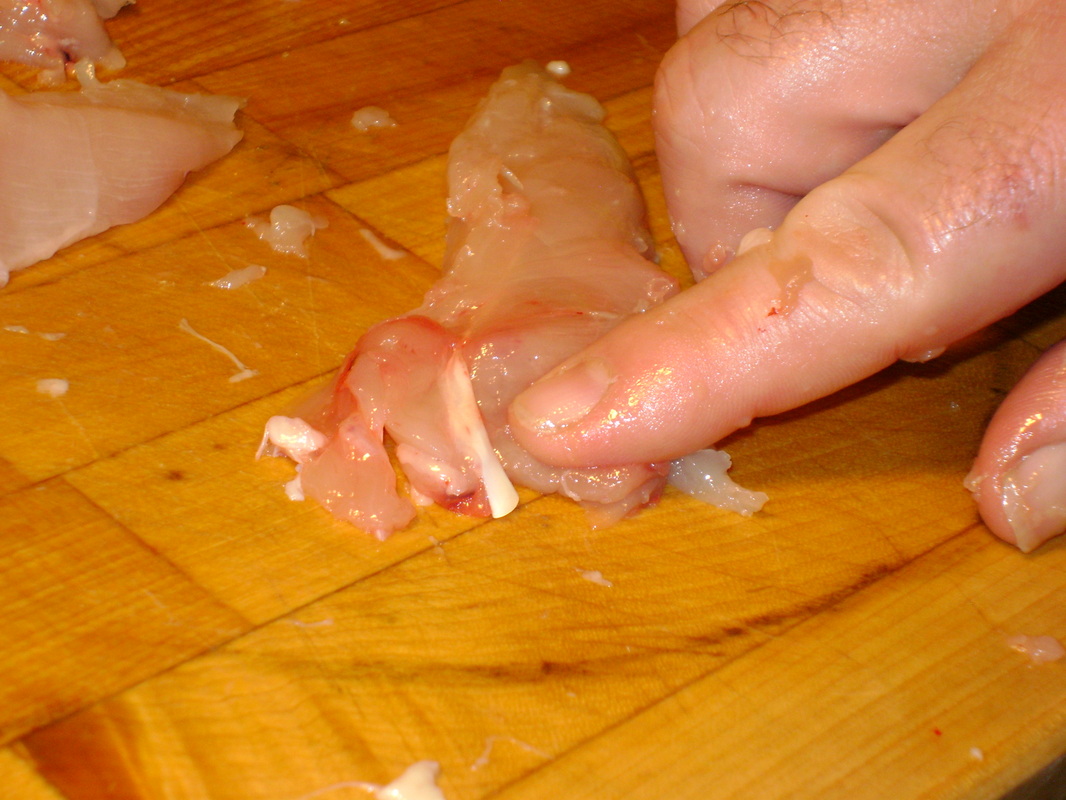
I do know the white thing (a tendon?) is a part of the tender that isn't edible.
|
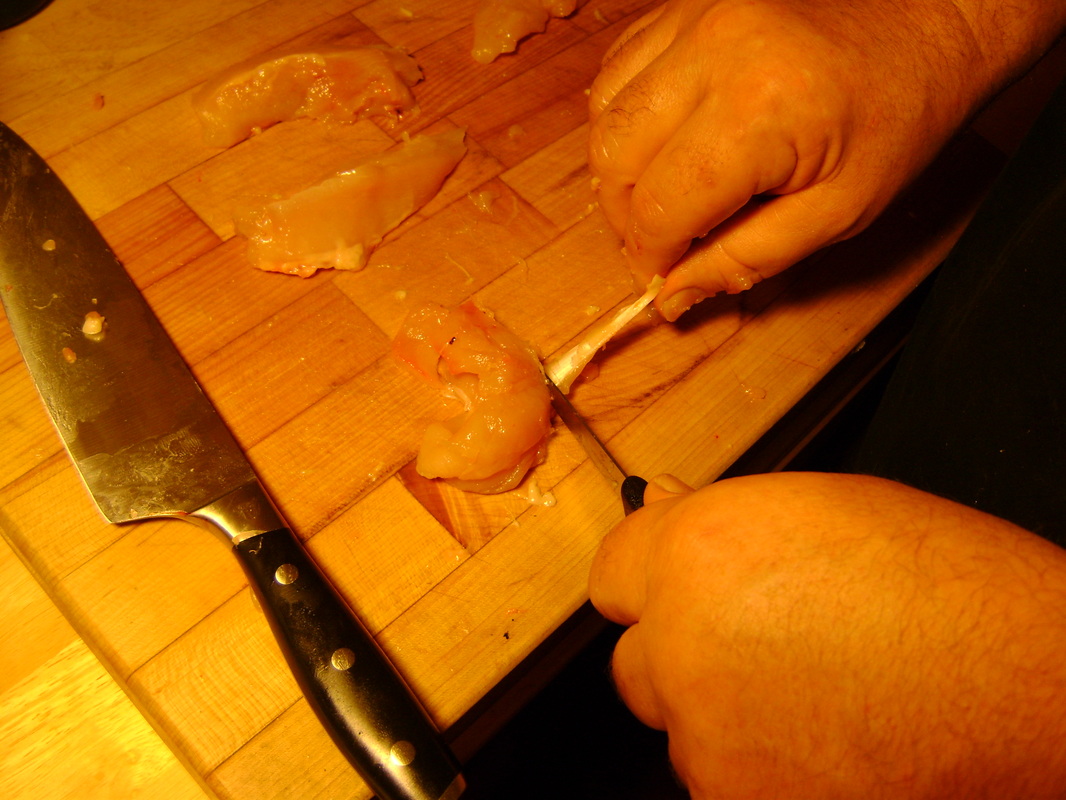
Use the knife and pull to strip that sucker out of there and I am done.
|
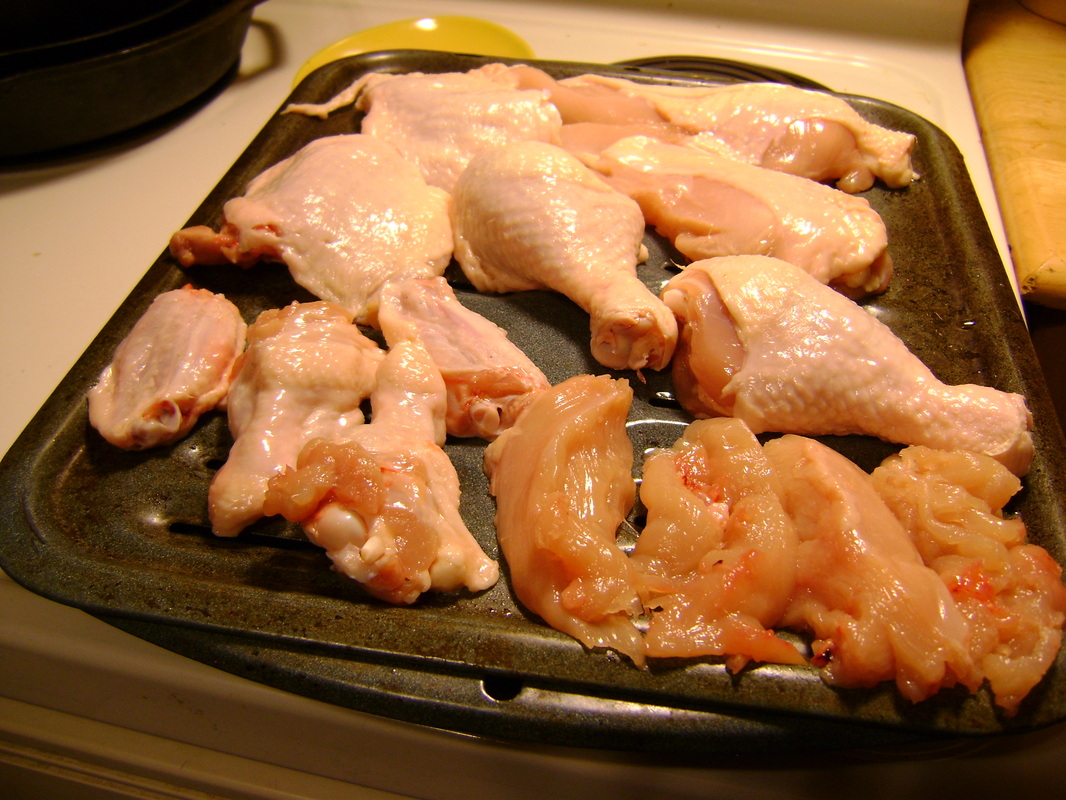
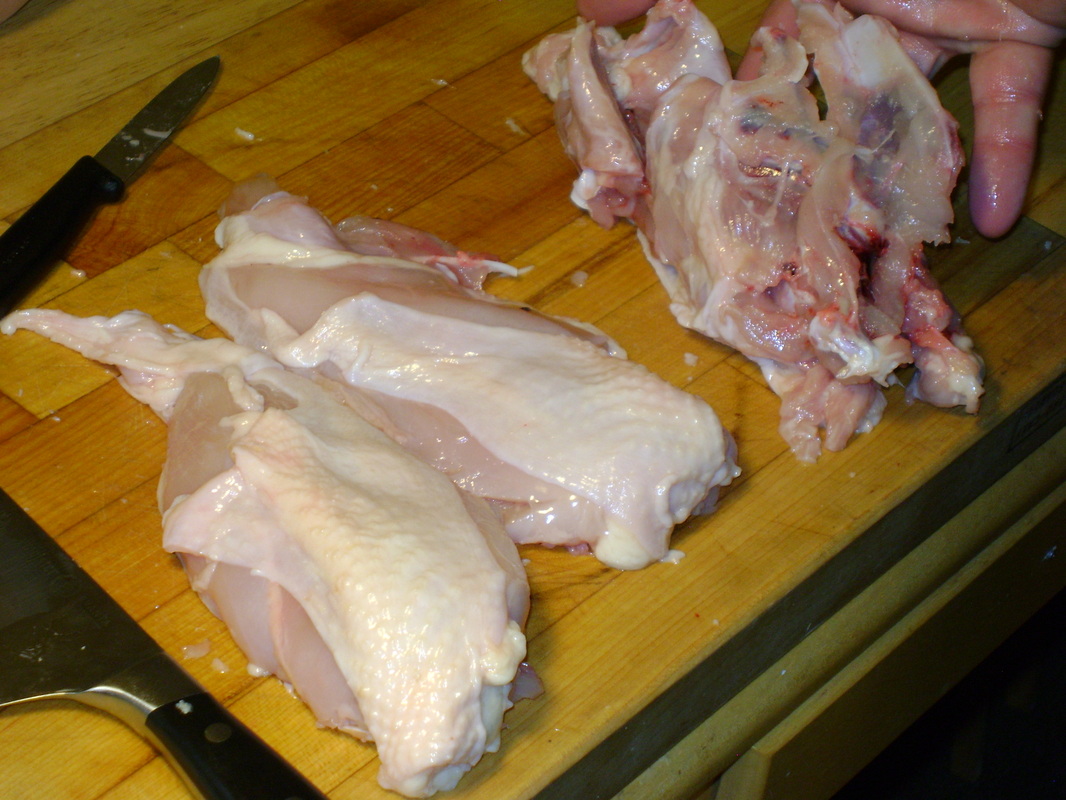
I now have a pan of chicken pieces to cook or freeze.
|
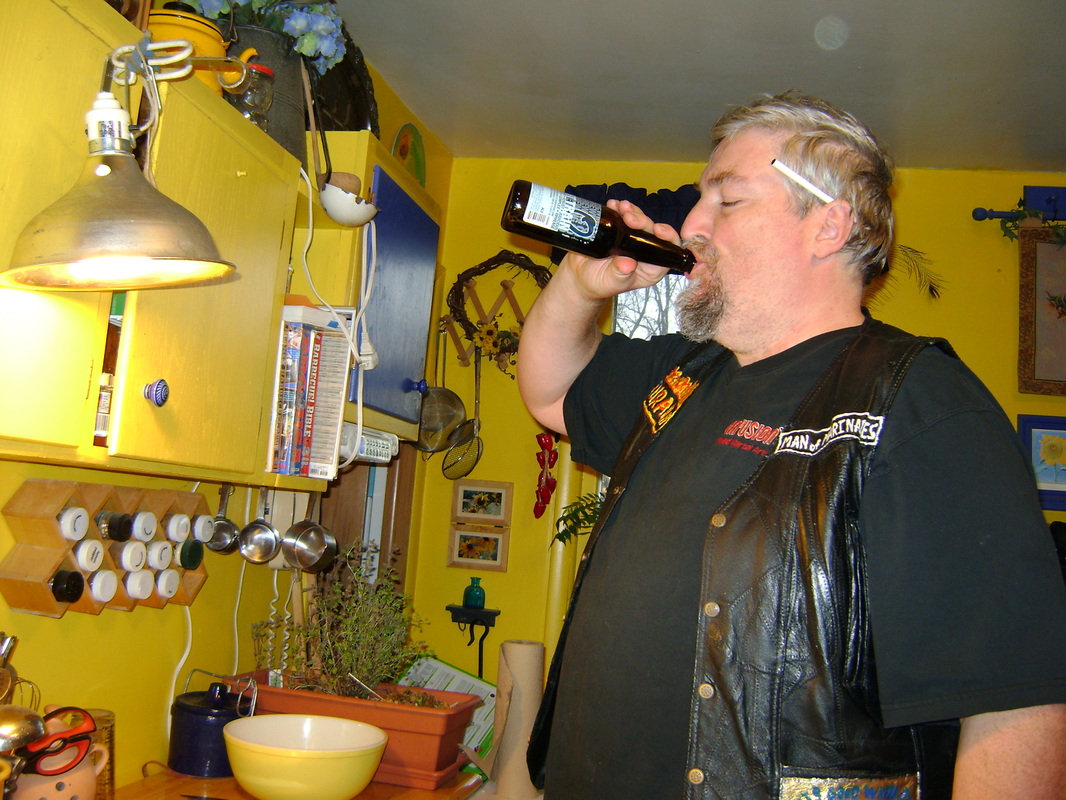
Clean the hands then raise a bottle to my future lunch or dinner....
|
It's Done... Now What Do I Do With It?
Man of marinades strikes again.
|
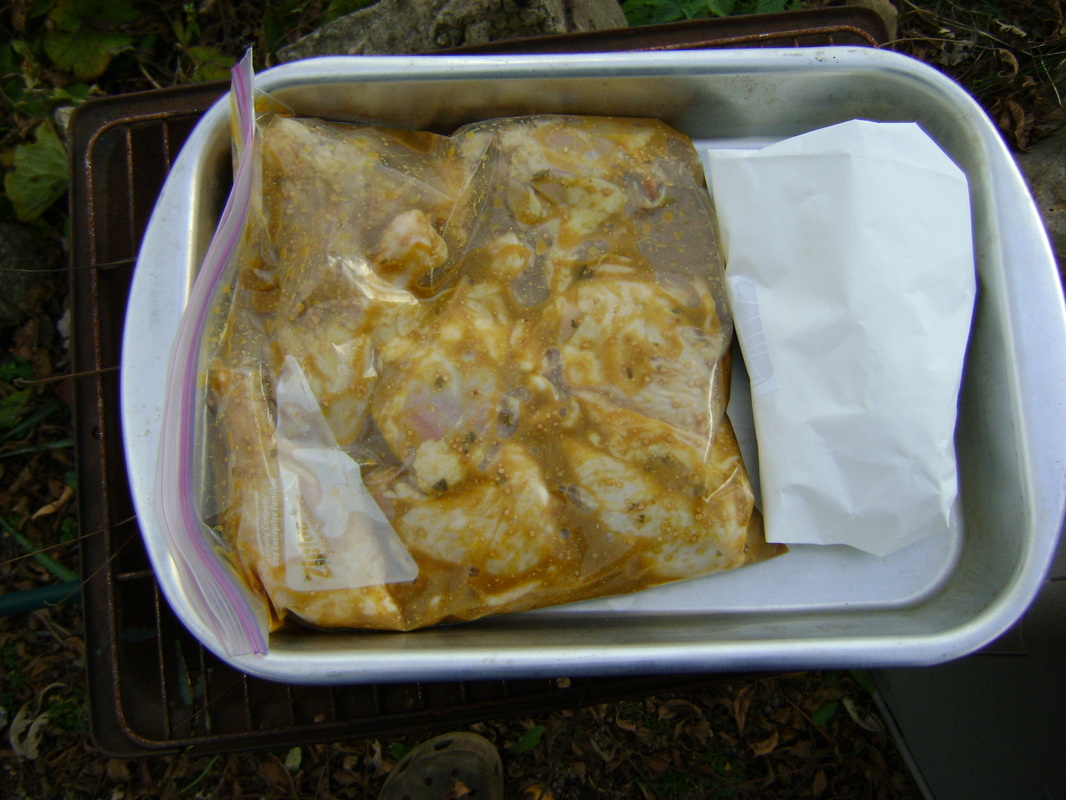
Option 1: Cook It!This is MY favorite option. Frying, roasting, or braising indoors are good when the Fall weather is rough. I got lucky, I was able to grill these legs and thighs outside.
I soaked the meat overnight in the refrigerator with a marinade of:
|
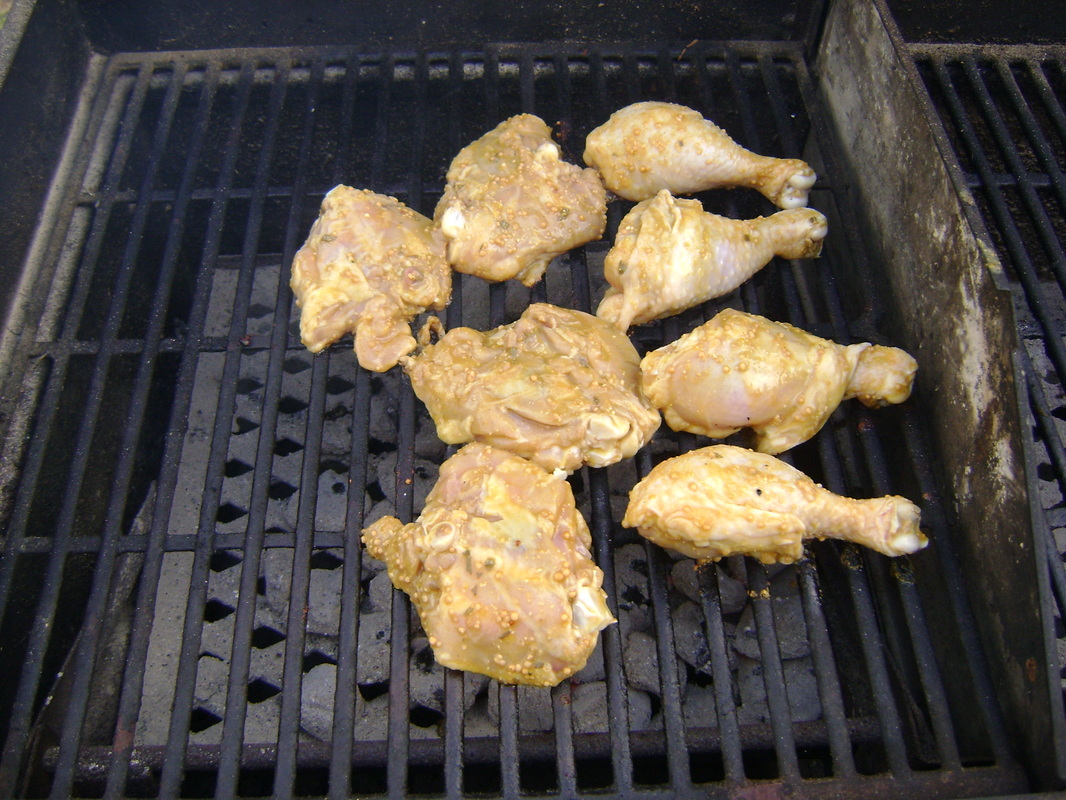
Be aware of hot zones in your fire and I found out the thighs cook faster than the legs.
|
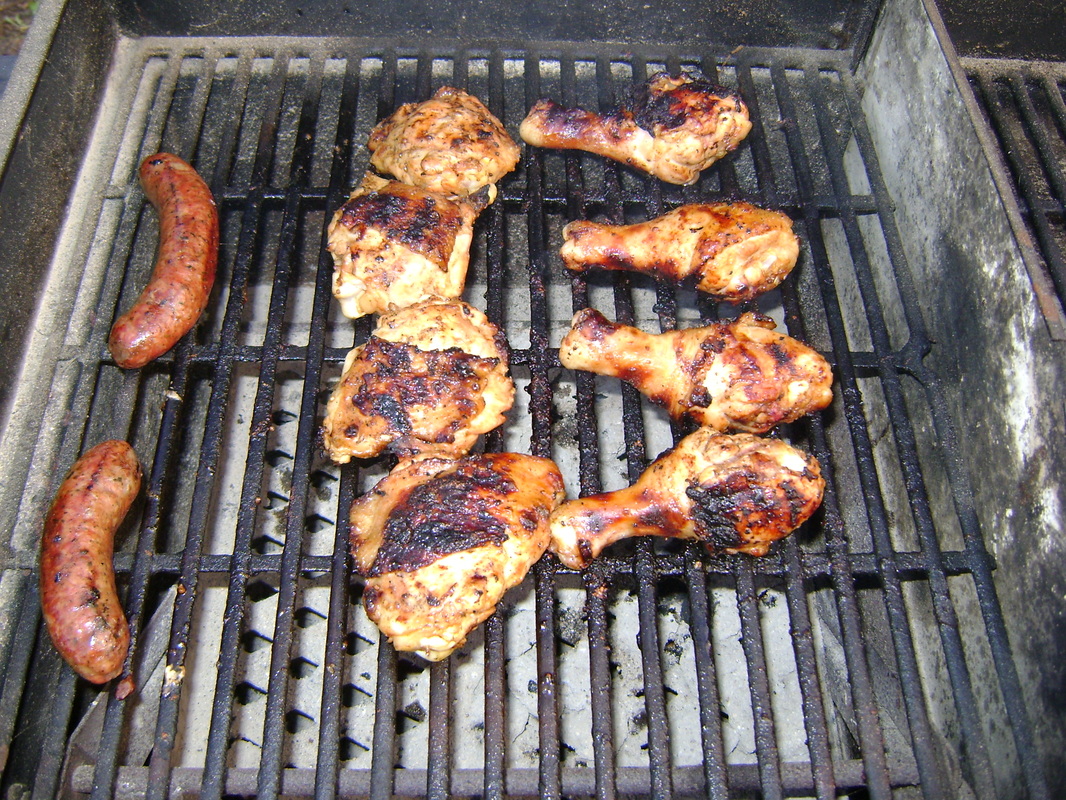
Who let the dogs in...
|
|
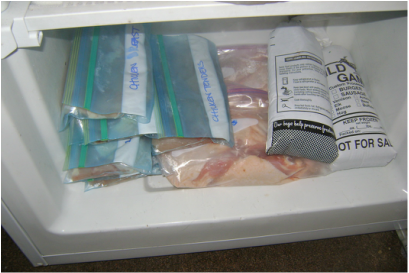
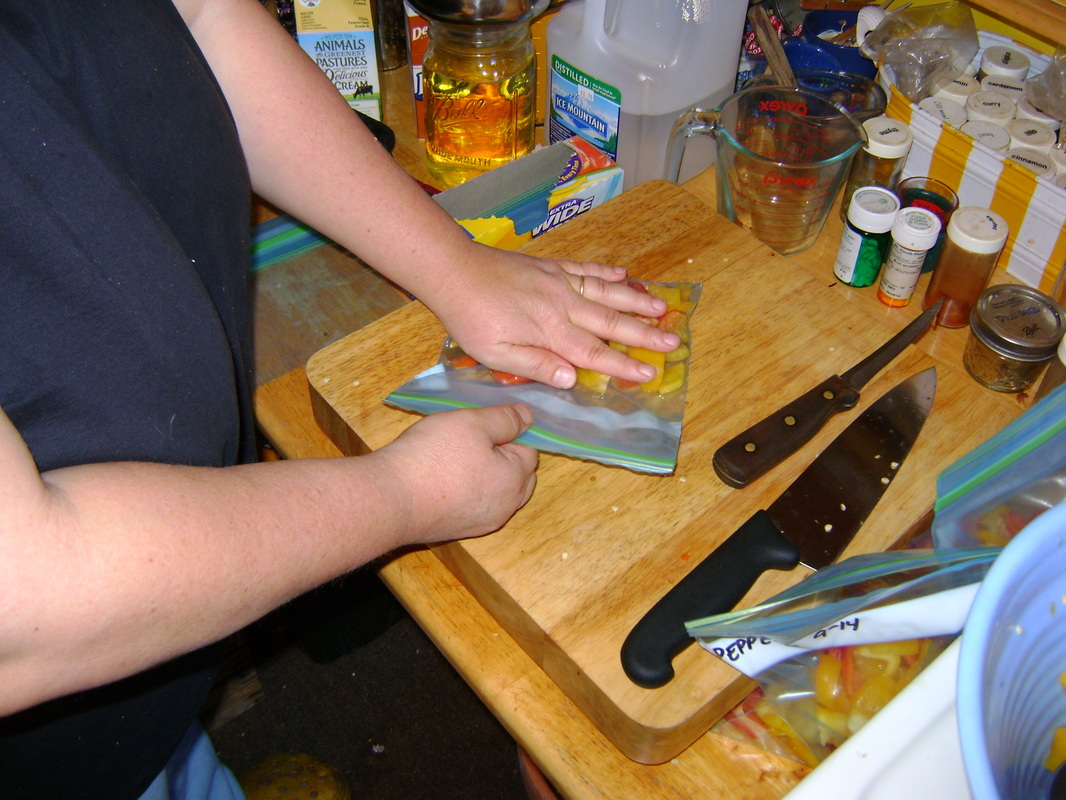
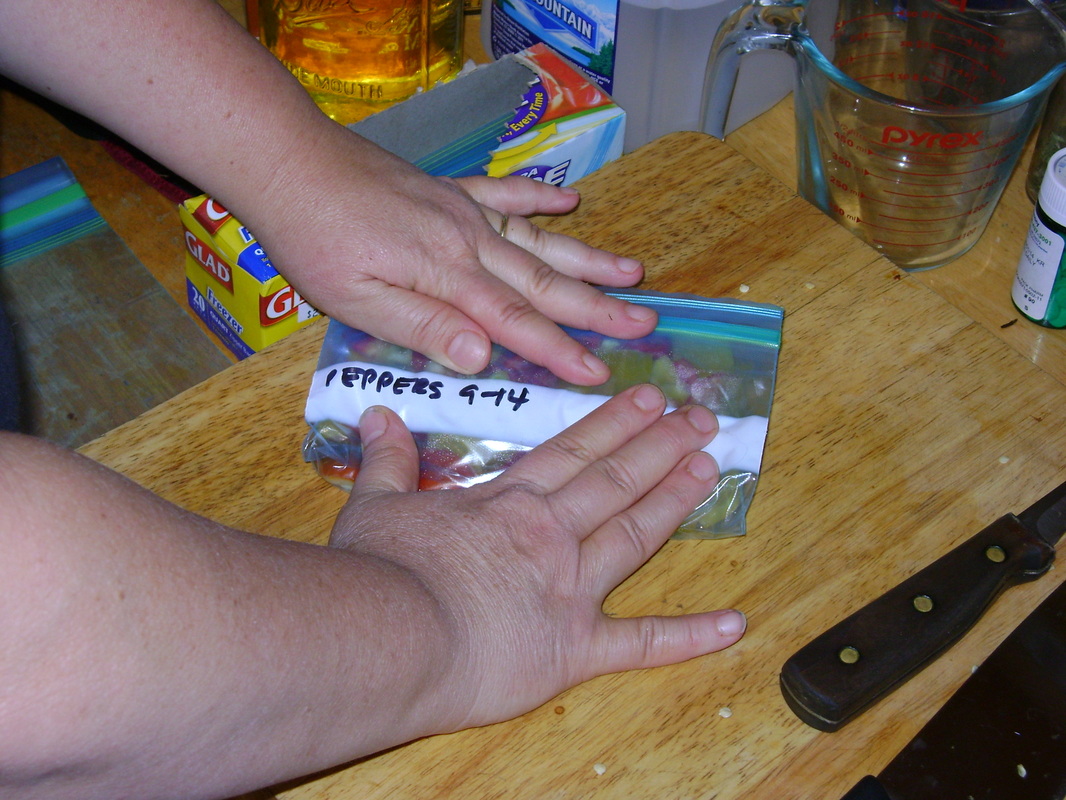
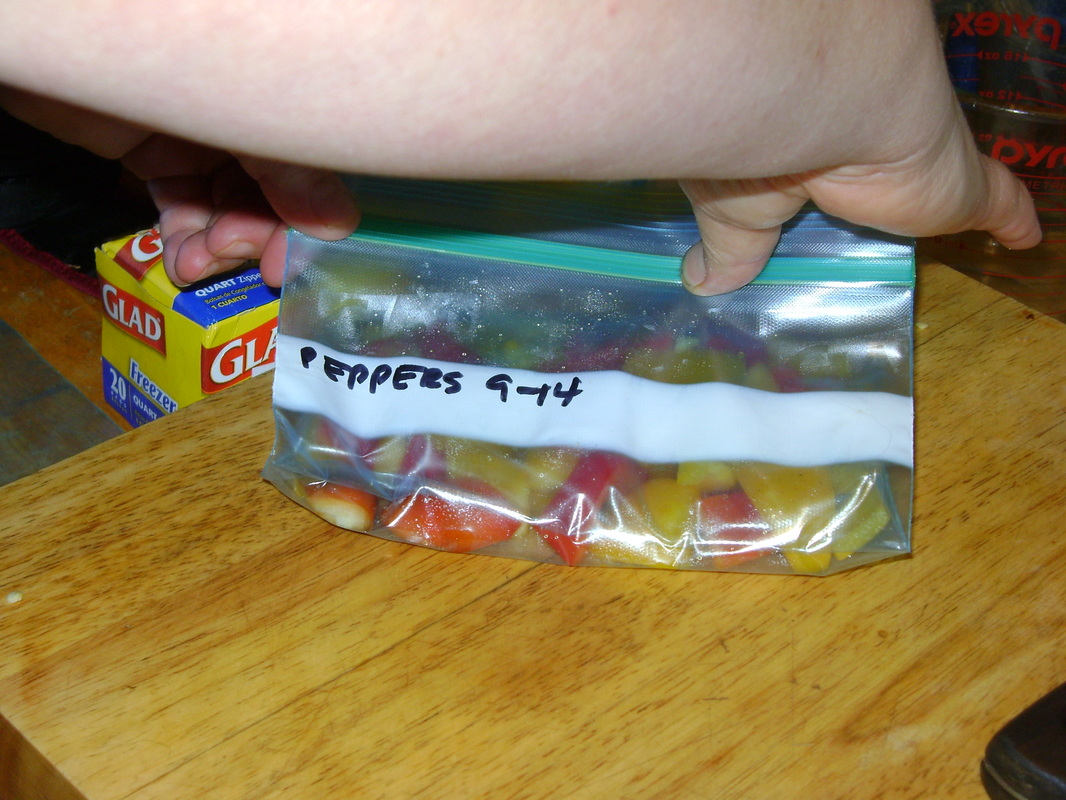
Option 2: Freeze ItSince Theresa wouldn't let me cook all four chickens at once (pesky diet), we froze the parts I didn't get to eat right away. Here are her tips:
|
- After inserting the chicken parts in the freezer bags, try to get a much air out the bags as you can. Theresa does this by shaking the meat to the bottom of the bag, laying it flat, and pressing on it to squeeze out the air. Then she folds the empty top part of the bag up over the bottom part of the bag that is full of meat up and squeezes out the air again before zipping the bag shut. Here are some pictures of her doing this with chopped peppers:
|
|
|
Option 3: Make Stock
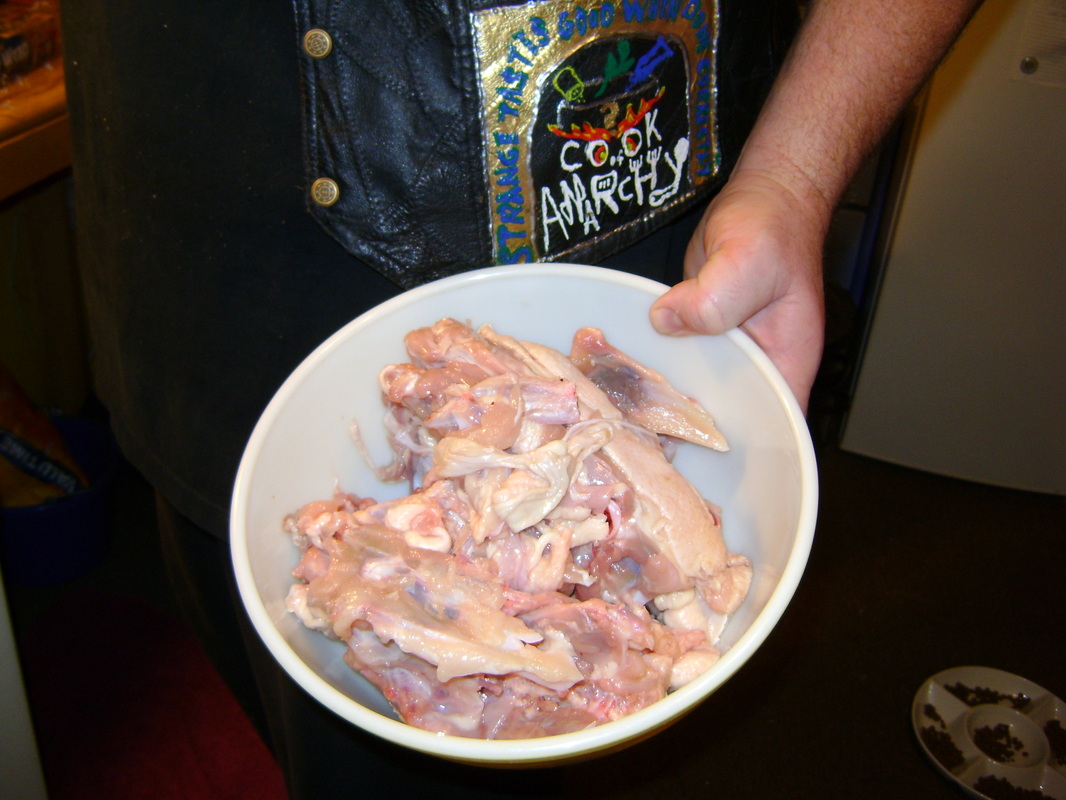
What about the leftover nasty bits? Respect the bird, use everything. My four bird carcasses made some excellent stock.
|
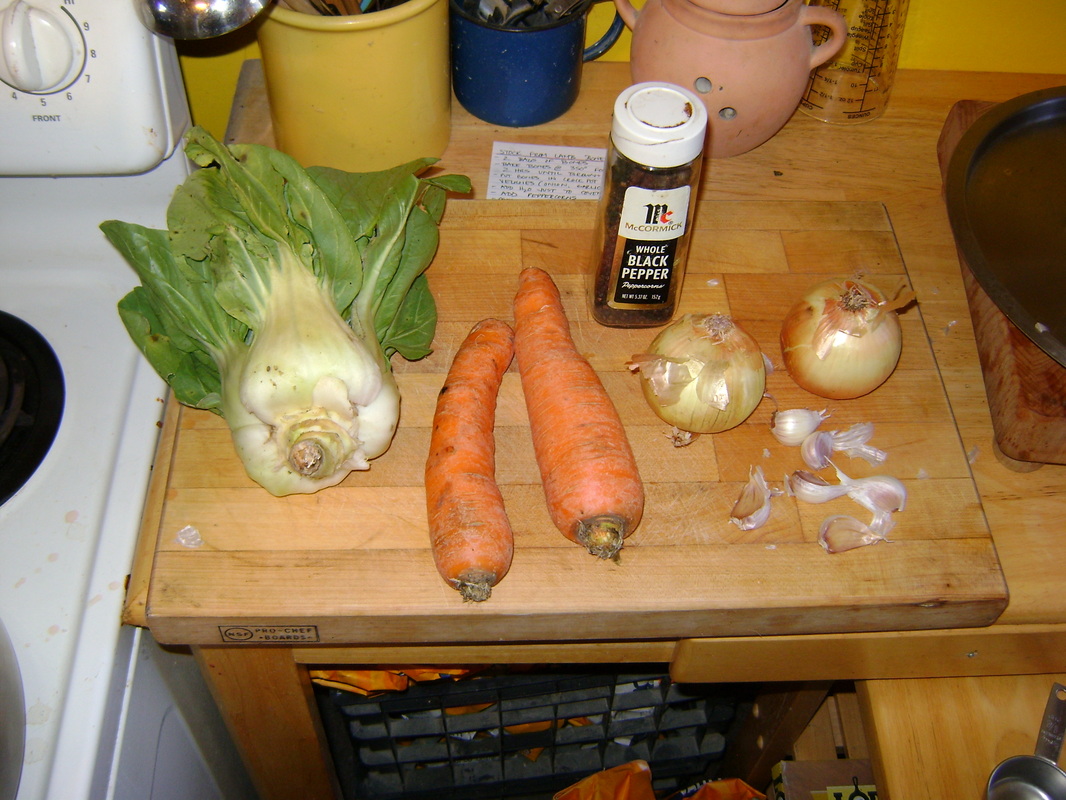
Chop up any vegetables you may have on hand to add to the stock. I used a head of bok choy, 2 large carrots, 6 cloves of garlic, and 2 onions, as well as a 1/4 cup of peppercorns somewhat cracked in a mortar and pestle.
|
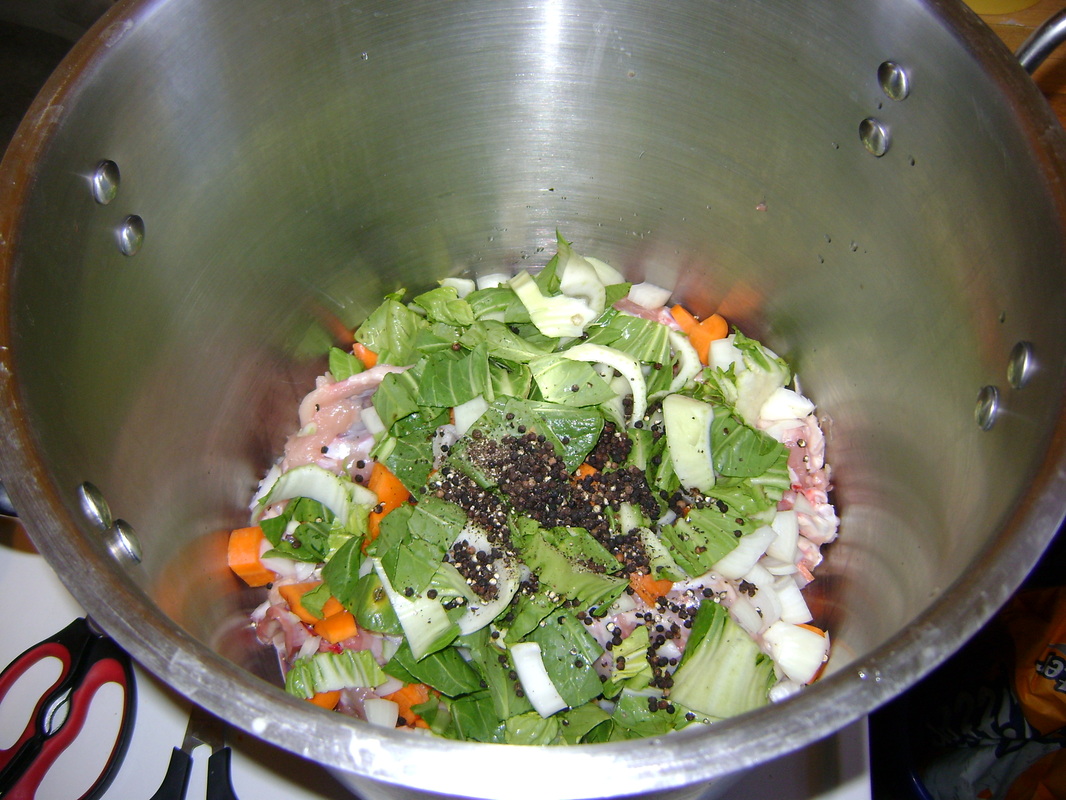
Combine everything in a large pot and cover with cold water. Mine needed around 18 cups.
|
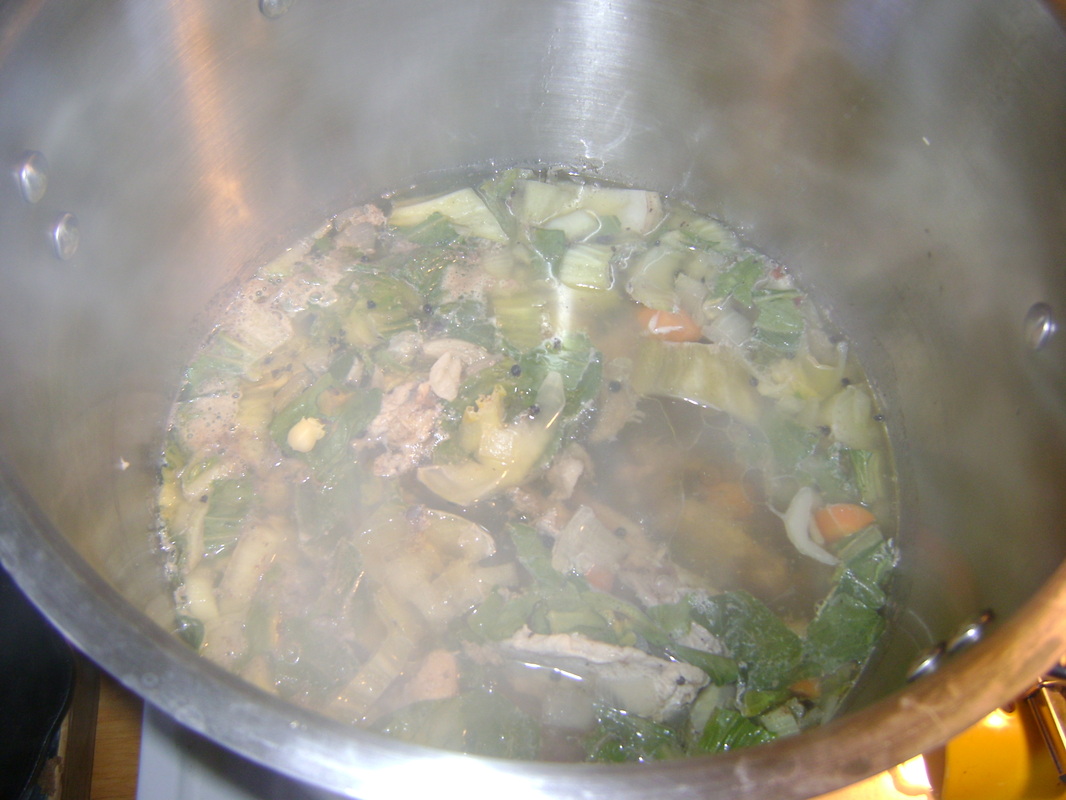
Bring to a boil over high heat. Reduce heat and simmer uncovered for about 4 hours.
|
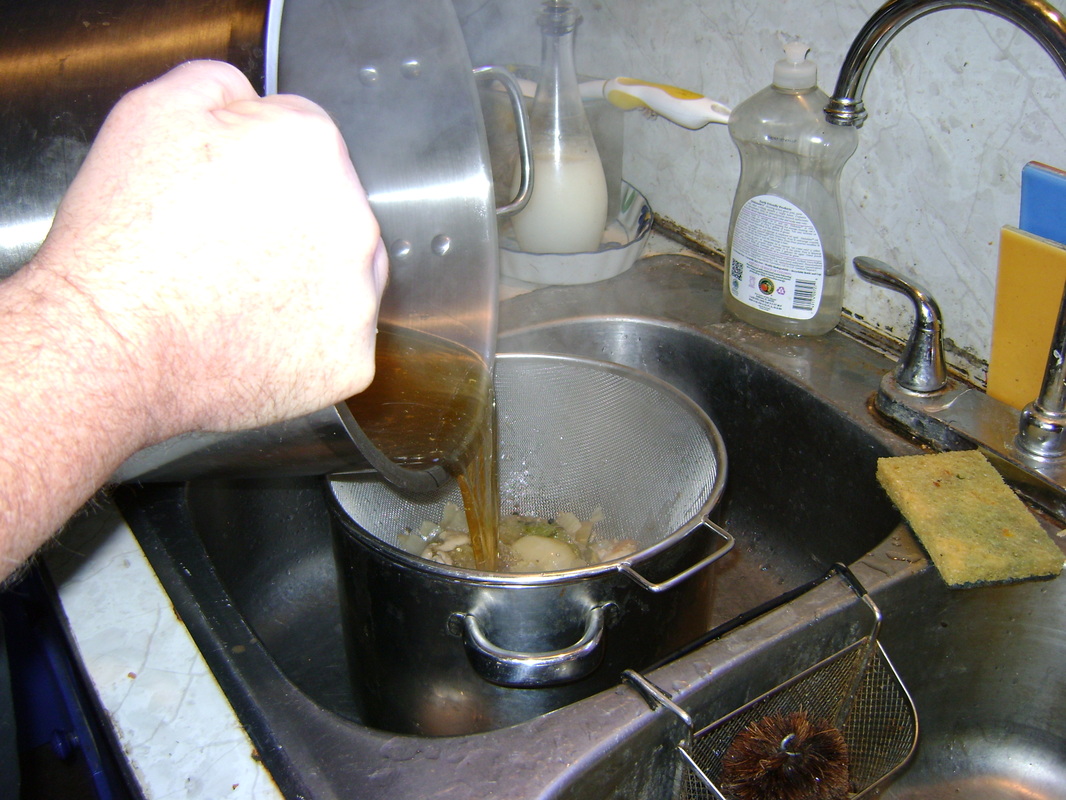
Strain the stock (we did it twice) and pour the liquid into clean quart canning jars. Let them sit until cool enough to put in the refrigerator overnight if you're tired. In the morning, if you were successful, the cooled stock should have turned into jiggly gelatin. Freeze until you're read to use.
|
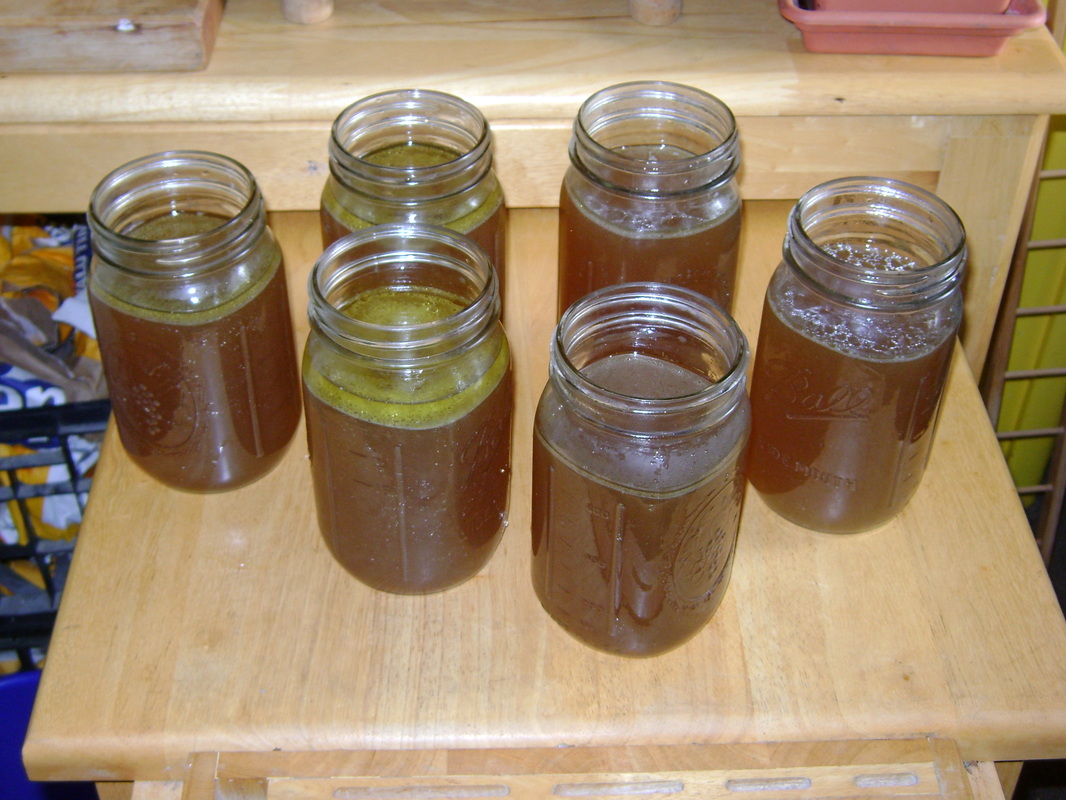
Sometimes our stocks becomes gelatin, and sometimes not so much, but even then it adds more flavor than plain water to soups, rice, or whatever you want to poach.
|