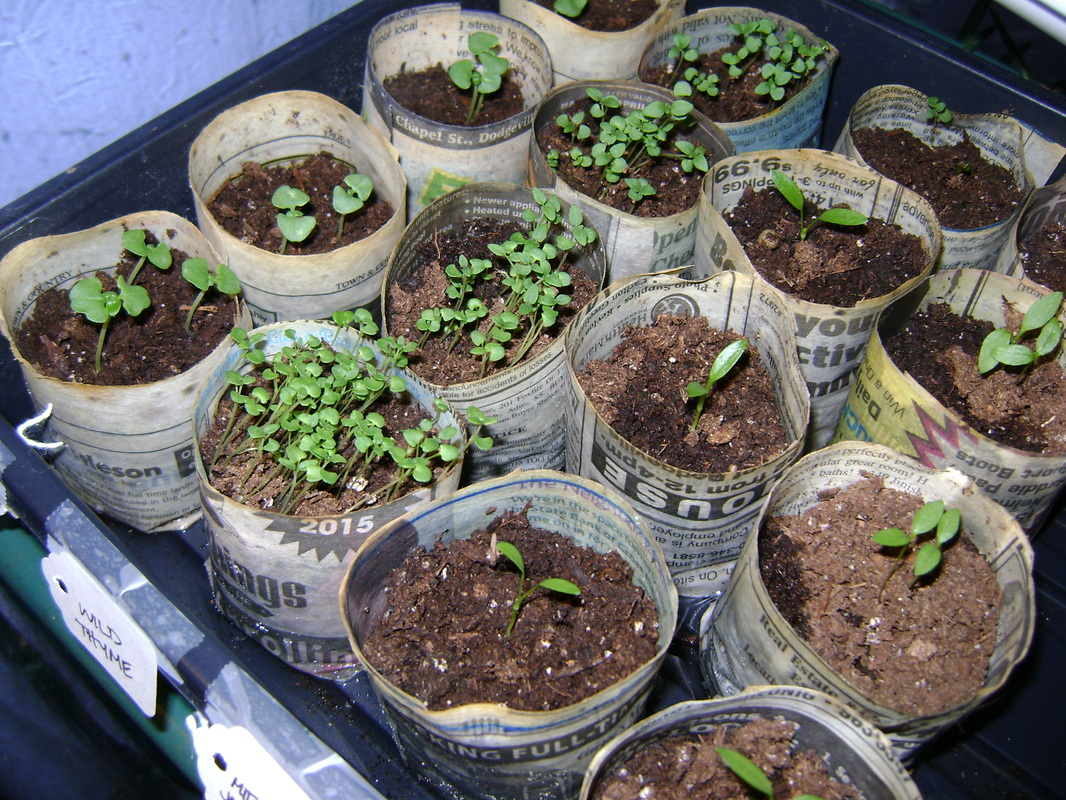
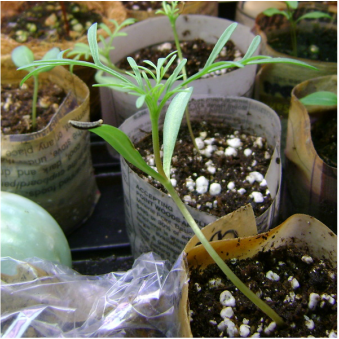
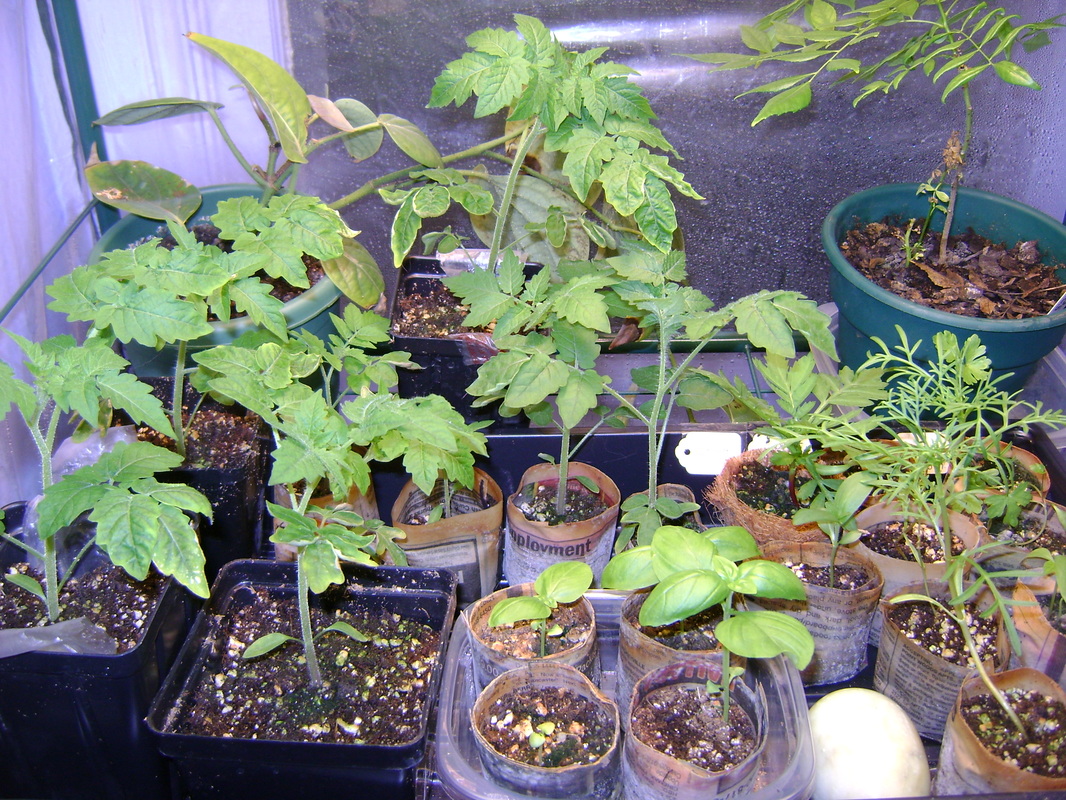
Our Tiny Homestead
  • Home
  • Inside
    • Buy Nothing Challenge >
      • 2014
      • 2015
      • 2018
      • 2019 & Debt-Free
    • Our Wood Stove
    • Laundry
    • Prepare for a Power Outage
    • Renovations
  • Outside
    • Theresa's Gardening Goals
    • Permaculture 101
    • Perennial Vegetables
    • Eat Your Wild Yard
    • Seed Starting
    • Walnut Syrup
    • Gardening for Wildlife
    • Wildlife Pond
    • Save Our Bees
    • Our Gardens >
      • Celtic Cross Garden
      • Catio Construction
  • Cooking
    • Wood Stove Cooking
    • Shelf Chefing >
      • Bear's Shelf Chefing
      • In Shape Shelfchefing
      • Wild Raspberries
      • Grilled pizza
      • Celebrate Seasonal Eatin >
        • Samhain - Late Fall
      • Cook of Anarchy grilled cheese
    • Haybox Cooking
    • Heat wave solar cooking
    • Division of Labor
    • Recipes
  • Pantry
    • Pantry Intro
    • Pantry Cooking
    • Yearly Harvest List
    • Preserving
    • Making Staples
    • Growing Sprouts
    • Building Our Pantry
  • Celebrate
    • After the Pandemic
    • Winter Solstice
    • Mid-Winter & Imbolc
    • Spring Equinox
    • Late Spring & Beltane
    • Summer Solstice
    • Fall Equinox
    • Late Fall & Samhain
  • Our Books
  • Our Videos
  • Blog
  • About
  • Contact
  • Resources
Picture
Tomato Seedlings
Picture
Picture

STARTING PLANTS 
​
FROM SEED - ​INDOORS
from Theresa

Contents:

- Introduction
- My Seed Starting Greenhouse
- Plant Lights - An Expensive Necessity
- Make Your Own Pots
- Pre-Soak Your Seeds before Planting
(and Other Seed Preparation Techniques)

- Planting Seeds
- Put the Seeds in the Greenhouse
- Watering Seedlings
- Fertilizing Seedlings
- Hardening Off
- When Do You Start Your Seeds?
​- Photo Inspiration
 

Introduction:

Early in my gardening career I did not try to grow any plants from seed. Since I don't have much space for annuals, it was easier to buy the few plants I wanted from the garden center.

Eventually, though, I realized starting plants from seed would be helpful for two reasons: ​
  • It would save me money. Seeds are relatively cheap. 
    ​(For instance, I wanted to grow enough basil plants to freeze lots of pesto, and the cost would add up if I bought several basil plants from the garden center).
  • It would greatly expand my growing options:  
    ​The varieties of grown plants at garden centers are limited, but the varieties of seeds available for purchase is vast. For instance, the Seed Savers Exchange catalog has over 500 pages of mostly annual plant seeds. 
My Experience:
  • My first attempts at starting plants from seed where unsuccessful and I gave up for several years.
  • Then I found myself wanting to grow tomatoes that would withstand the blight that seems to be endemic in our yard, and those varieties were only available as seeds.
  • I also realized the same was true of many of the unusual perennial vegetables I wanted to grow- I could only get them as seeds.
  • So eventually I read a couple short books about seed starting and realized my earlier attempts didn't succeed because I was missing some key equipment and important steps in the process. After discovering this, I have been able to pretty easily grow whatever I want.
  • Below is what I've learned. Hopefully it will help you expand the types of plants you're able to grow, too.
Picture
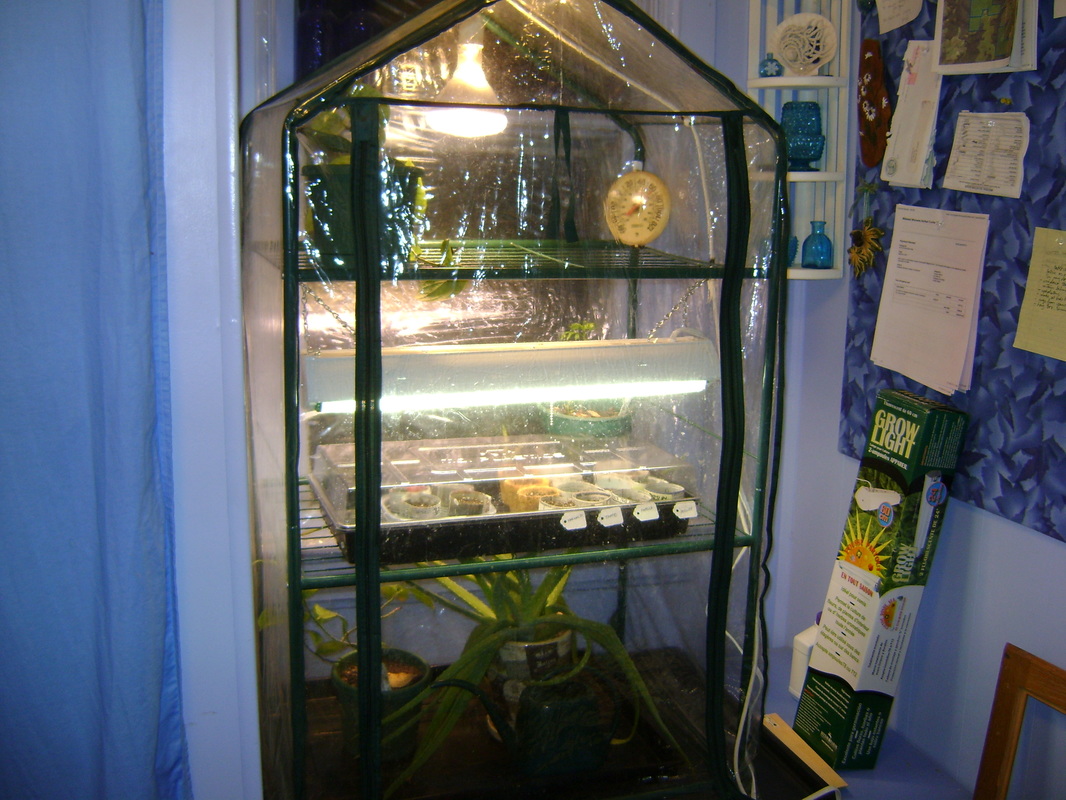
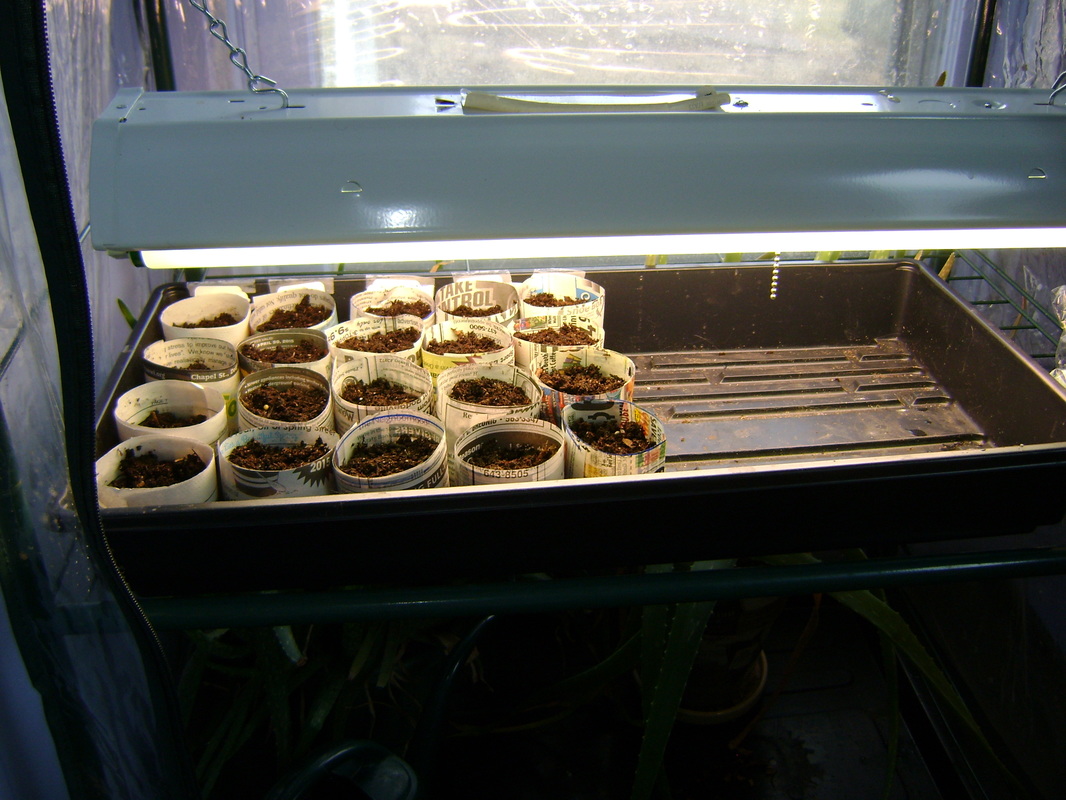
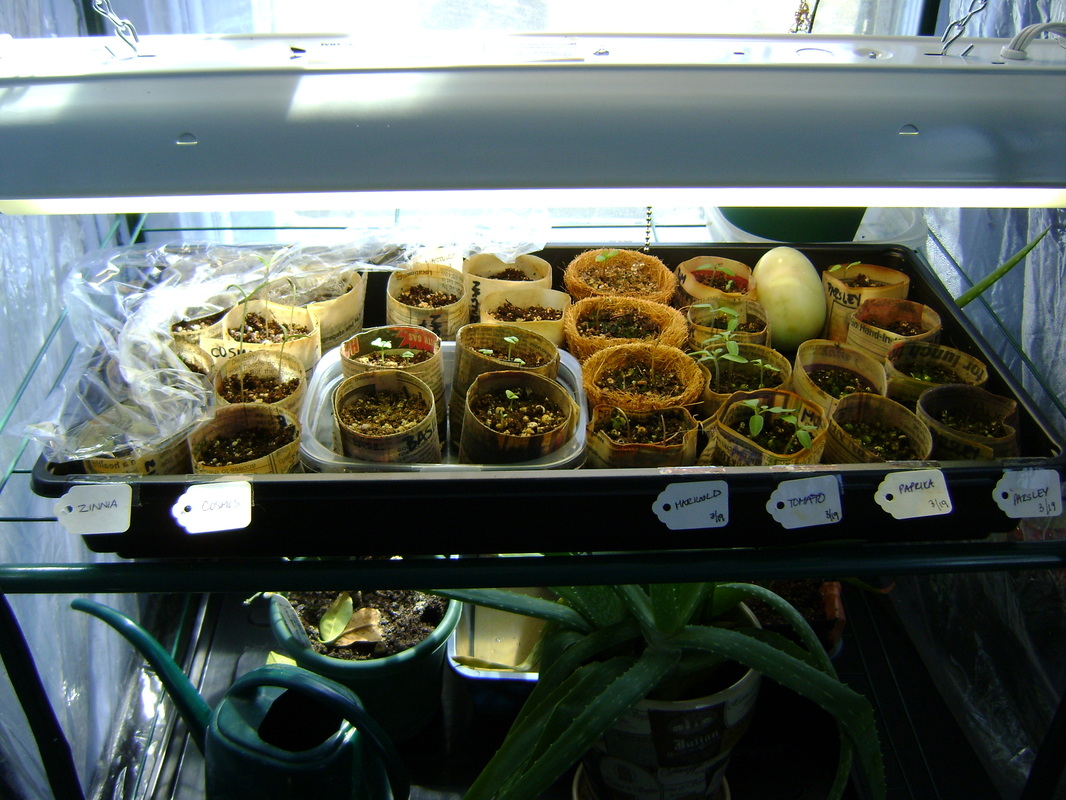
This seed starting greenhouse was only $25.
Picture
Keep a tray filled with water in the greenhouse to increase humidity.
Picture
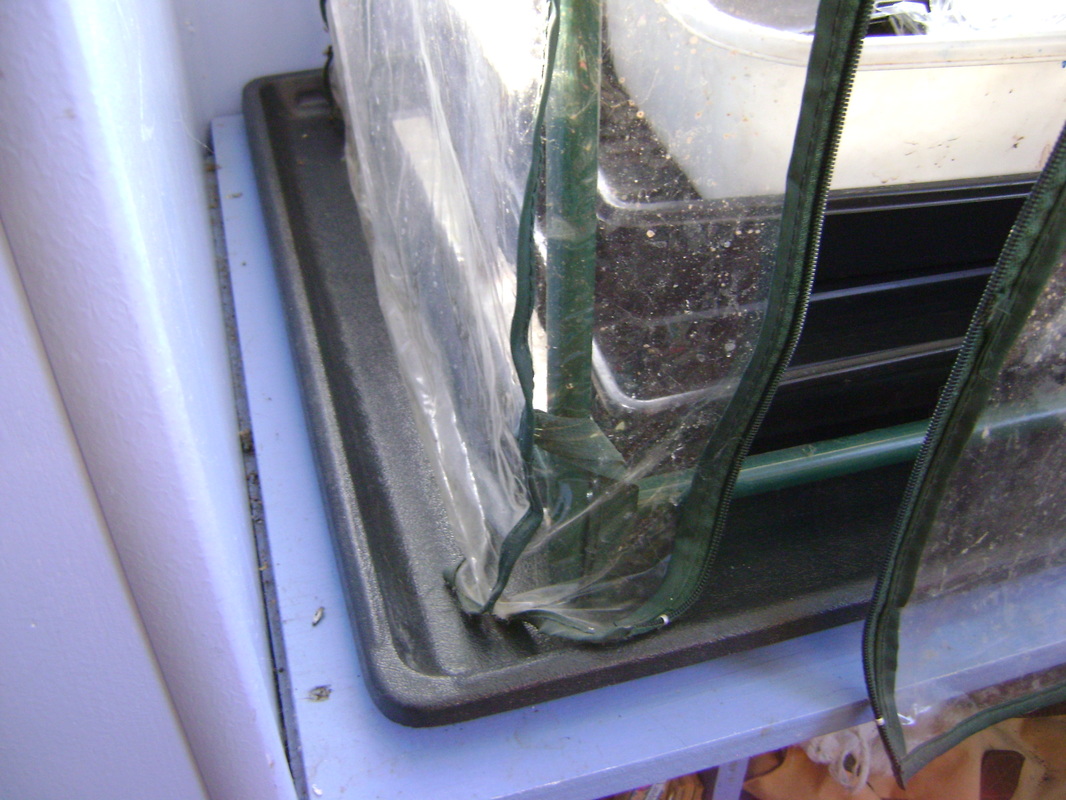
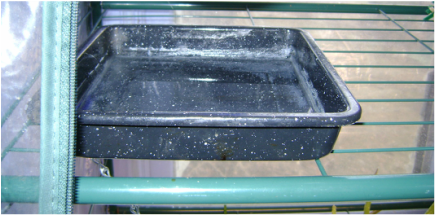
Our greenhouse is elevated on a wooden bench and is sitting on a big tray that catches any dripping water.
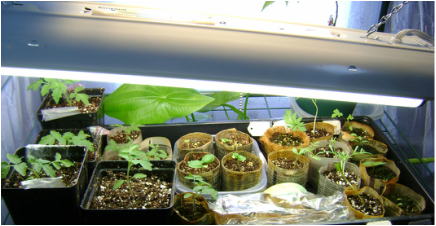
 

My Seed Starting Greenhouse:

To grow, seeds need adequate:
  • warmth
  • light
  • moisture
I use a small seed starting green house (left) to provide these necessities. It has several benefits:
  • I was surprised by how inexpensive it was (only $25).
  • The plastic walls of the greenhouse hold in the heat. 
    ​
    We keep our house thermostat at 58 degrees (F), which is not warm enough for tender seedlings, but the plant lights inside the greenhouse can raise the temperature to as much as 80 degrees on some days (I keep a thermometer on the top shelf so I can monitor the temperature).
  • It increases humidity: If you add a pan of water to the greenhouse, the water will evaporate and increase the humidity in the air, which helps the seeds germinate and grow. Shallow pans with more water surface area will evaporate the most water (left middle photo). You'll need to keep refilling it, of course.
Greenhouse Modifications:
  • ​Raise it up: This greenhouse is short, so I have it sitting on a built in window seat in my craft room, which raises it to a height that is more comfortable to use.
  • Include a plastic tray underneath (left bottom photo): It's bigger than the bottom of the greenhouse, to catch any water that is spilled and protect the wooden bench underneath it. The tray is actually the bottom of a dog kennel, which are sold separately from the kennels in various sizes. (We buy ours from Farm & Fleet.)
  • Cut a vent on top:  I have cut a small flap in the top of the greenhouse plastic that I can open or close to help me regulate the temperature and moisture levels (sometimes it gets so hot that moisture condenses on the walls and drips down). I tape it closed when not in use.  
Picture
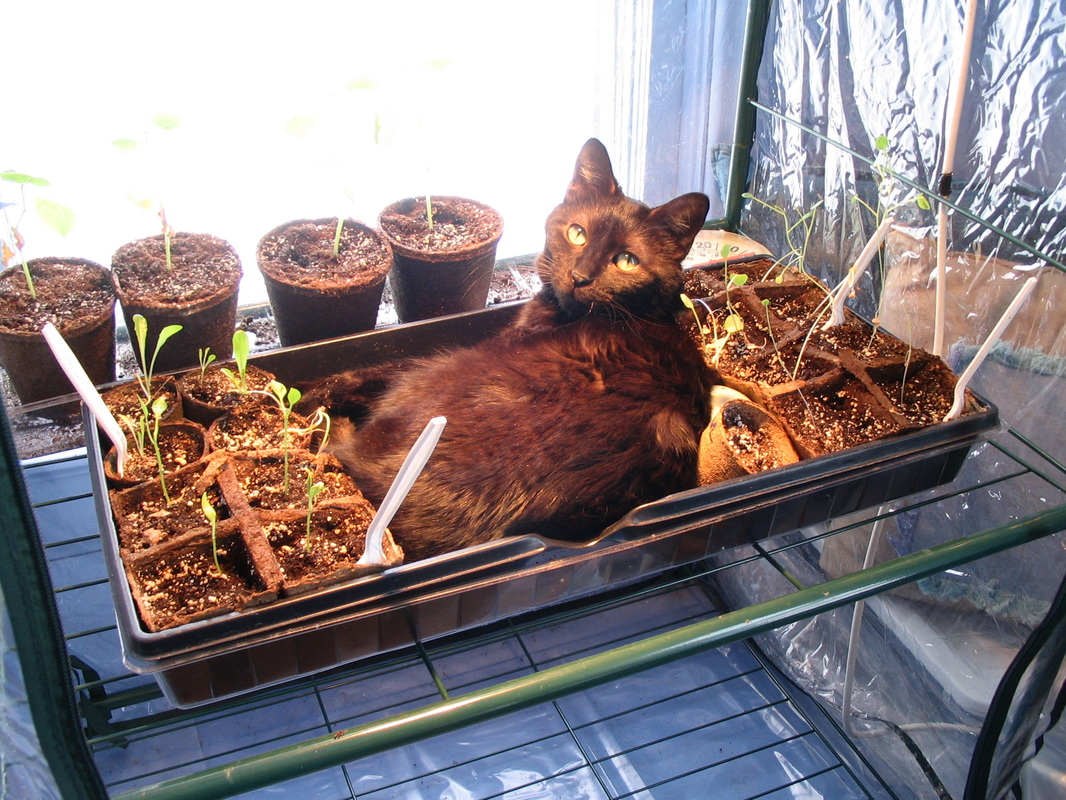
NOTE: This type of greenhouse is not very strong.  
​The shelves are made of thin wire and cannot hold very much weight. It works fine for starting seeds, and can hold some small mature plants, but could not support large plants in heavy pots. Additionally, the shelves are relatively close together, so that tall plants do not have enough room to grow.

But it will hold small cats!  At our homestead, the greenhouse is a necessity because it keeps the cats away from the seedlings. Once I forgot to zip the door shut, though, and Ivy climbed inside (she politely wedged herself between the plants without hurting them). She is so skinny, she was seeking warmth too!

Picture
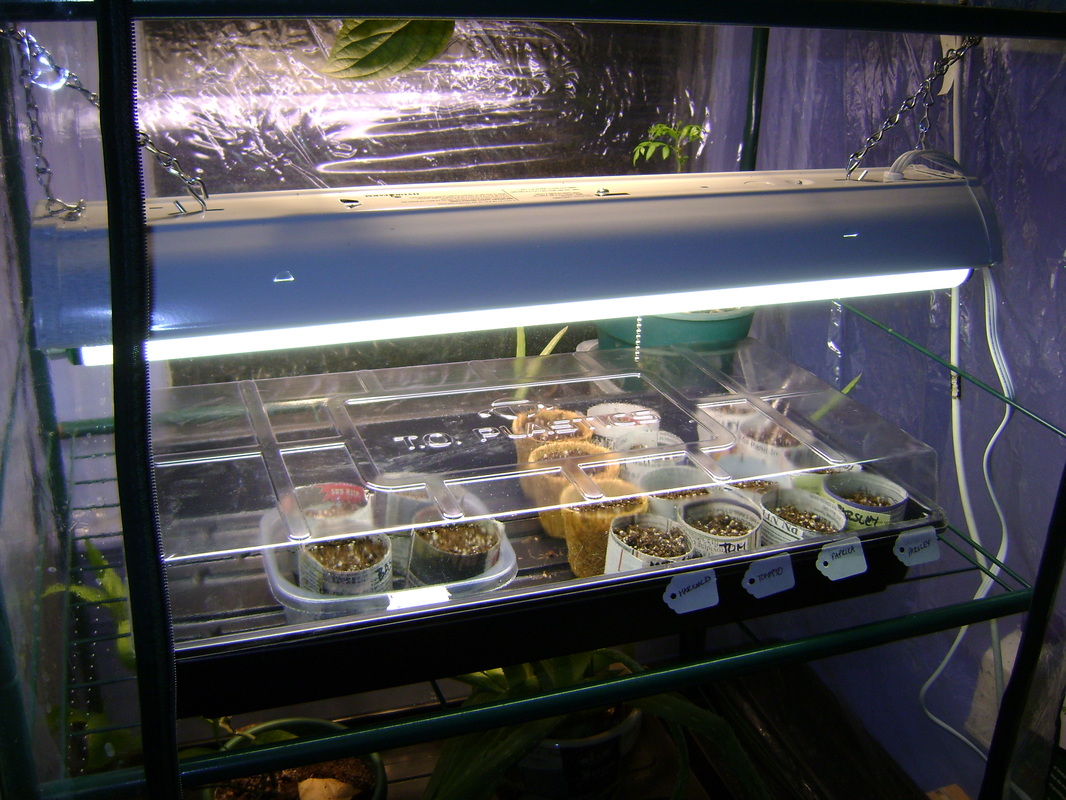
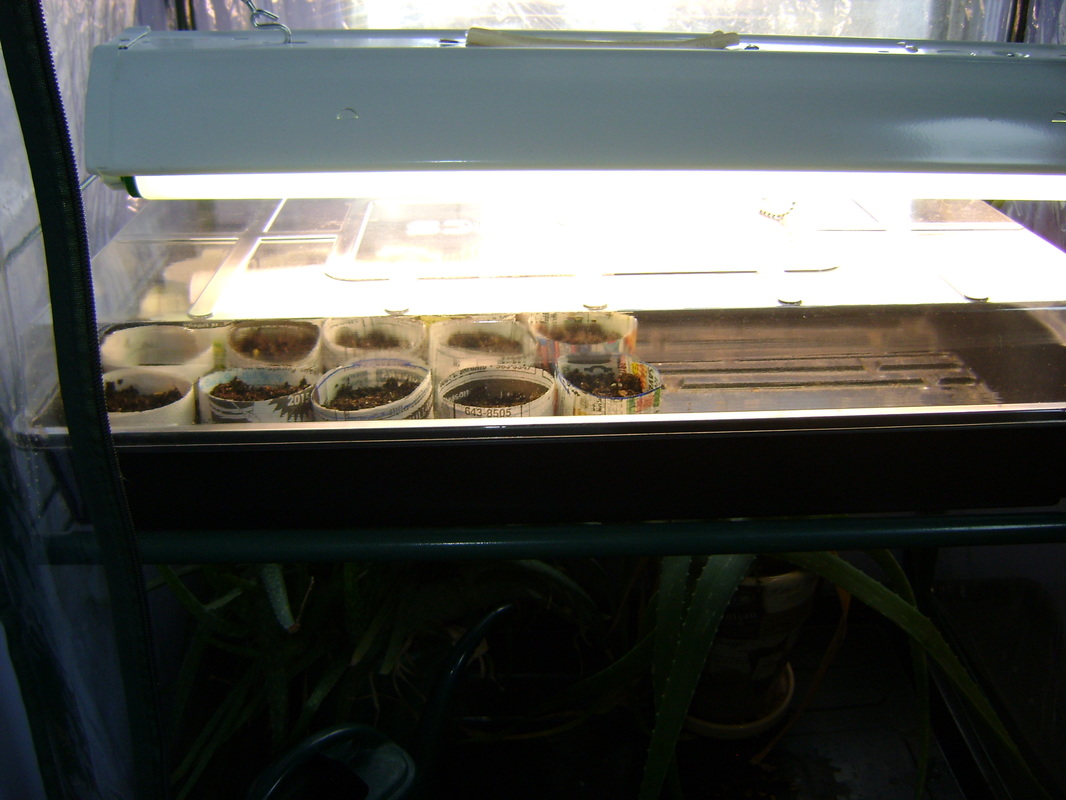
Plant light hanging from adjustable chains.
Picture
These types of lights can be hung crookedly if some seedlings are taller than others.
Picture
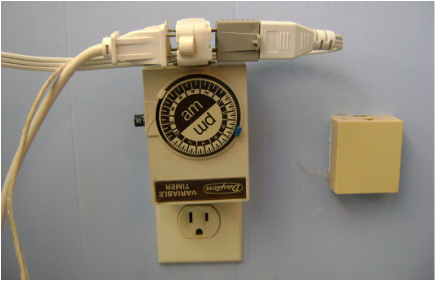
This timer has three plant lights plugged into it so they will turn on and off automatically.
 

Plant Lights - An Expensive Necessity:

  • The main reason my early attempts at seed starting failed was because I did not have enough light in the greenhouse.
  • If your seedlings get leggy- meaning they get too tall and may fall over before they develop- it is because they need to reach too far to get adequate light.
  • This is what was happening to my seedlings when I only had one small, round plant light hanging from the top of the greenhouse.
  • So instead I bought the two foot light fixture shown to the left, which hangs from adjustable chains so that I can move it up as the plants grow. It holds two fluorescent bulbs.
  • These plant lights are expensive (this one was $35 without the bulbs) but they are necessary.
  • I found the cost very irritating because you could use shop lights instead, which are sold in many hardware stores for around $15, except they are all at least 4 feet long. Our greenhouse can only hold a 2 foot light, so I needed to buy "plant lights," which are the same thing as a shop light but apparently more expensive. 
  • I told myself it was a one time expense, and I also found a second, cheaper plant light at a garage sale.​
For best results:
  • Fluorescent Bulbs: Use two 40 watt bulbs in your light fixture. You can buy the more expensive plant light bulbs, or imitate them by using one warm white and one cool white bulb.
  • Lights should be 2 inches above the tallest seedling. Note in the middle photo to the left that I have the plant light hanging crookedly because the seedlings on the left are taller.
  • I put the plants lights on a timer. The timer plugs into an electrical outlet on the wall. The lights are plugged into the timer, and will turn off and on at whatever time you set.
  • Timers are sold at hardware stores and aren't very expensive.

Lighting:
  • Until the seeds germinate (sprout), the light should be on 24 hours a day.
  • Seedlings need 16 hours of light a day.
Picture
 

Make Your Own Pots:

I've tried several types of pots for growing seedlings and have not liked most of them:
  • Not Recommended: Pots made from peat or fiber (peat pots are shown in the photo above of our cat in the greenhouse). It has been my experience that these pots cannot be planted directly in the ground as advertised, after which they are supposed to dissolve. I have found peat pots pretty much intact months later, which stunts the growth of the plants. 
  • Recommended: Pots made from newspaper. I really like making my own pots from newspaper using the PotMaker device shown to the left. They were developed by Richter's, but I see them for sale in lots of garden centers. I'v also seen them at lots of garage sales, which made me suspect that they probably didn't work very well since so many people were getting rid of them, but I finally bought one and found that it works great for me.
Newspaper pots have several advantages:
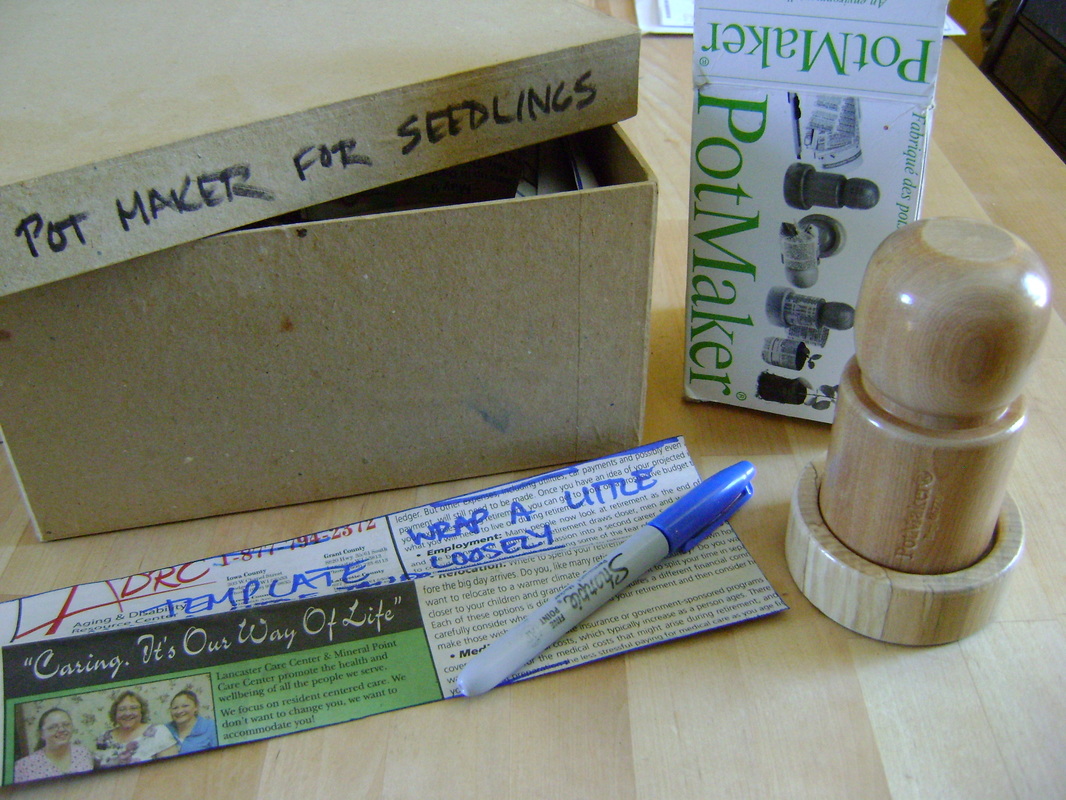
  • Once you've bought the PotMaker (less than $15 new) you can make as many  pots as you want for free with old newspapers.
  • You can plant them directly in the ground or into bigger pots and they really will dissolve. It is also easy to peal parts of the pots away without hurting the plants right before you put them in the ground (assuming the newspaper is damp). This gives the roots plenty of room to grow right away.
  • They can stand up to repeated watering. I worried that the pots would fall apart before I put the plants in the ground, since the newspaper should stay continually damp to keep the soil moist, but this has not been a problem. Initially, I doubled the newspaper, but found that this wasn't really necessary either. It is necessary to be careful when you move the pots. Lift them from the bottom so the newspaper doesn't tear.

PotMaker Instructions:

The PotMaker box has instructions on it, but they are brief.  They could benefit from some more details and photos:
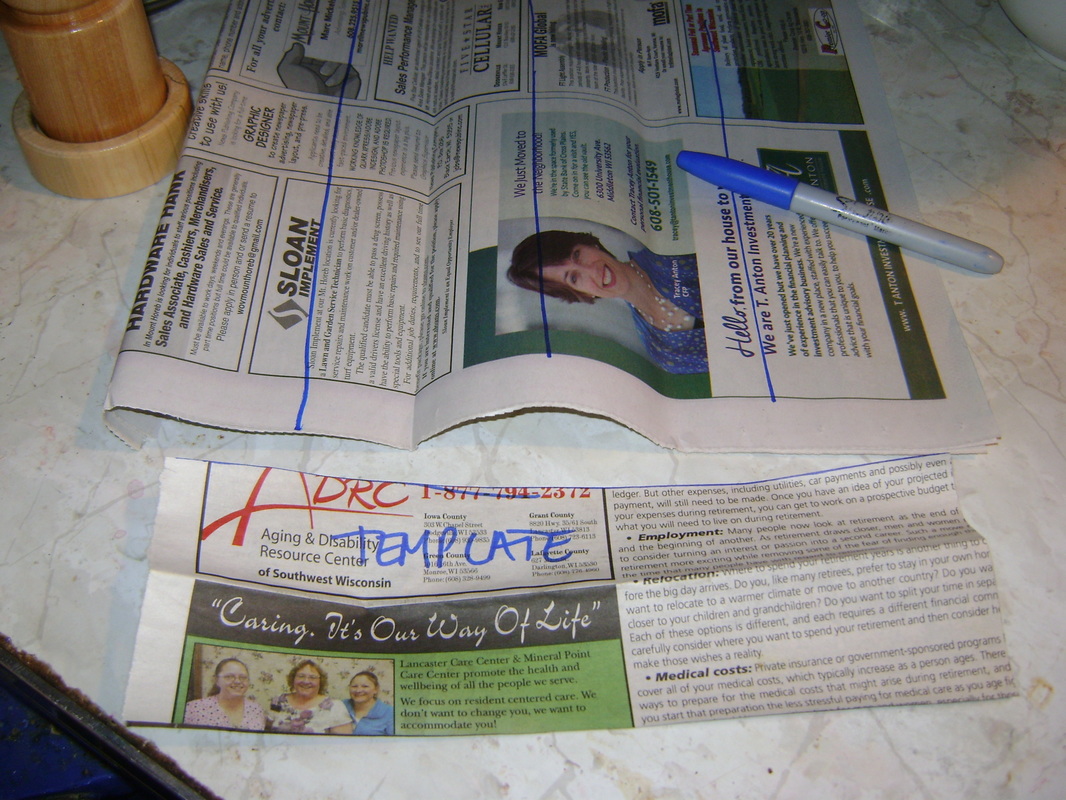
1. I created a template to help me cut the strips of newspaper to the right size. The box says the strips should be 3.5" by 10" (9 cm by 25 cm). I like to cut mine a bit taller, maybe 3.75". You can see where I've drawn the blue cutting lines on the newspaper below.​
​
Picture
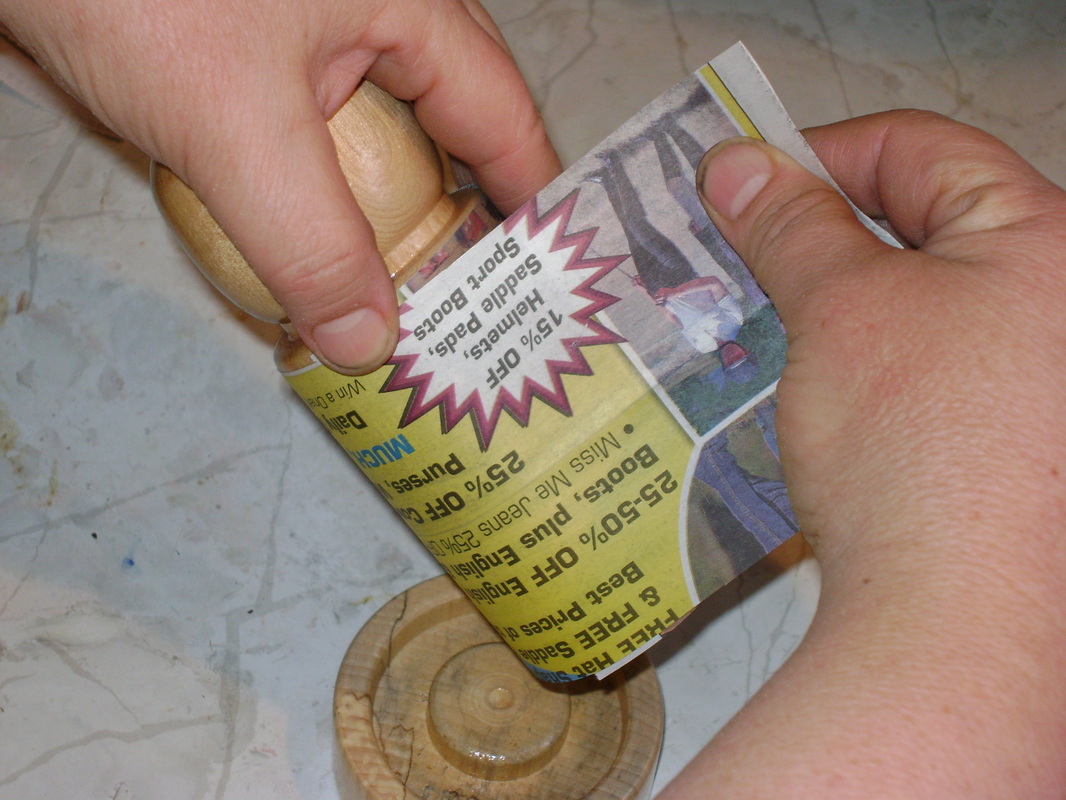
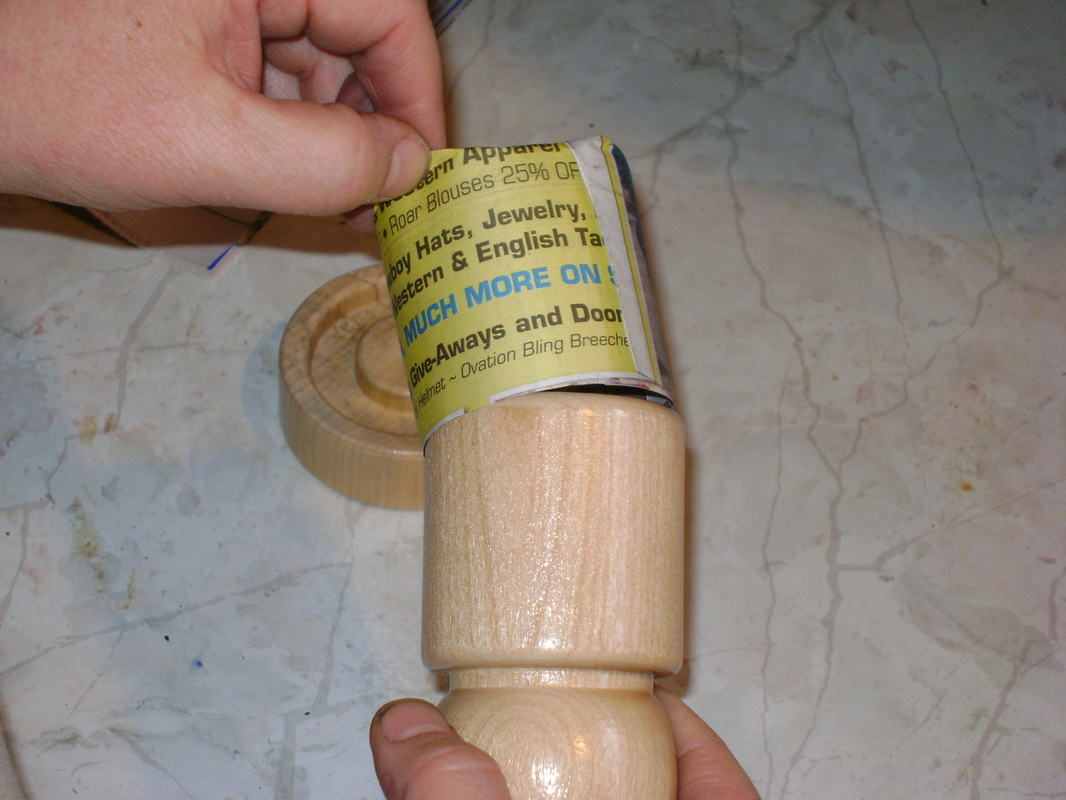
2. Grasp the larger, top part of the PotMaker by its round handle and wrap one strip of newspaper around the flat, bottom half of it. The newspaper will overlap itself and extend beyond the bottom of the PotMaker. Do not wrap it too tightly, or it will be hard to remove the finished pot later.
Picture
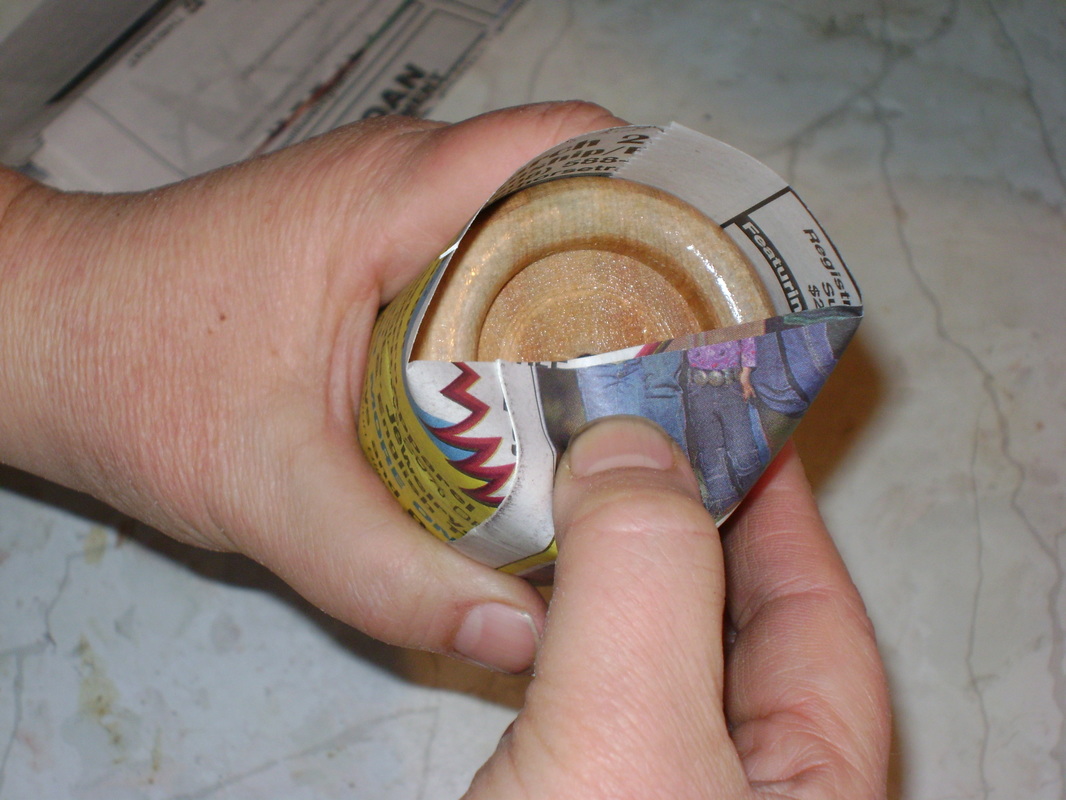
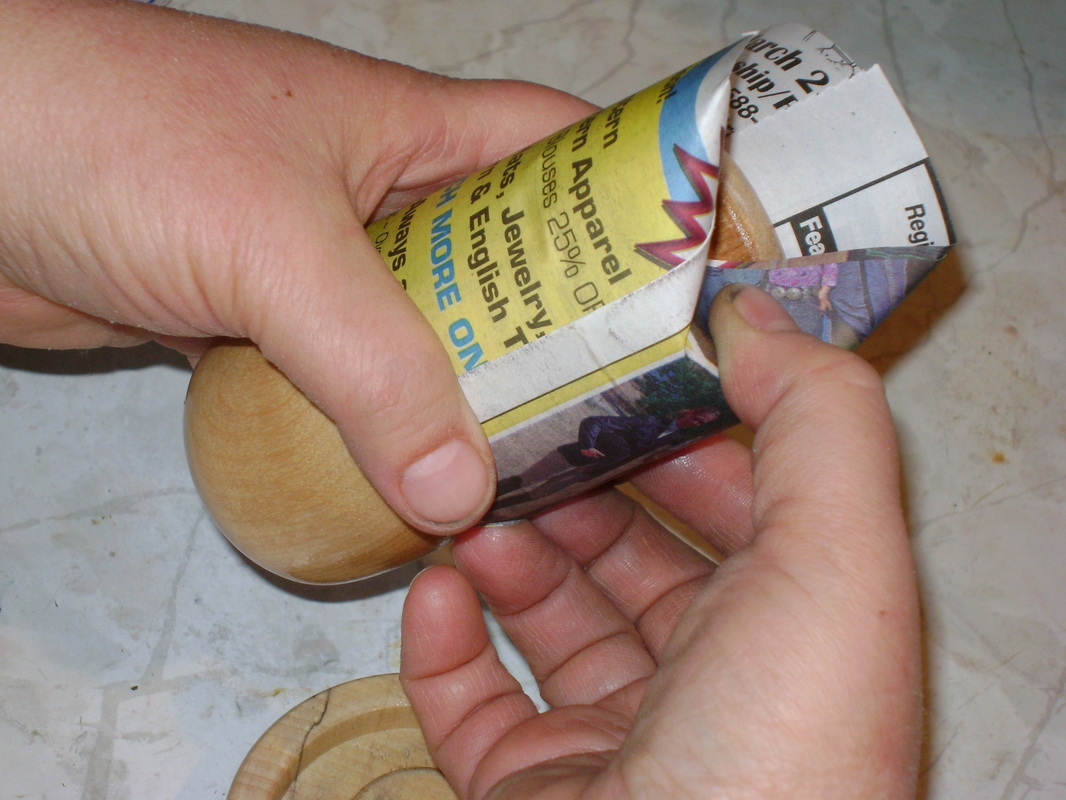
3. Turn the PotMaker upside down and fold the excess newspaper down toward the center.
This creates the bottom of the pot. Continue around until the entire bottom is folded in:
Picture
Picture
Picture
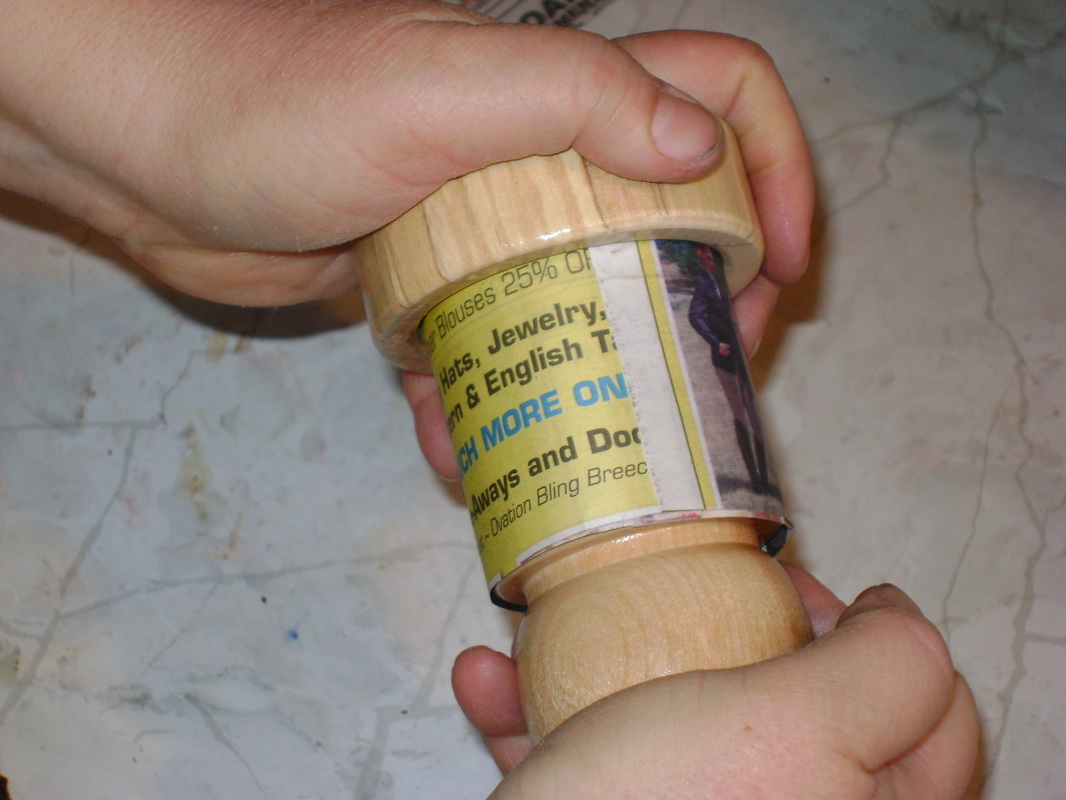
4. Take the pot you've just created on the top part of the PotMaker and press it into the bottom, disc-shaped part. Press firmly and twist a bit. This is the step that holds everything together.
​
Picture
5. Remove the finished pot from the PotMaker. This part can be tricky and sometimes I tear them if they are too tight and have to start over. I gingerly grasp a tiny bit of the bottom and pull gently. 
Picture
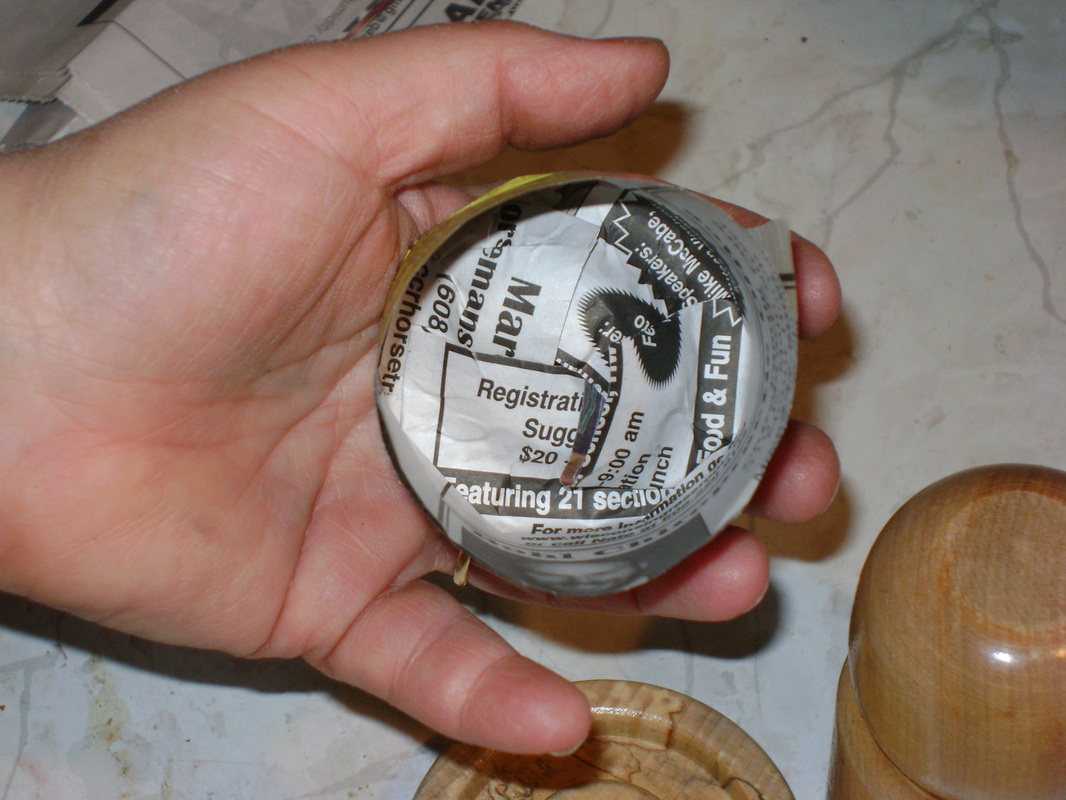
6. Here's what the inside of the finished pot looks like. If it worked correctly, there is no need to use tape or anything else to hold it together.
Picture
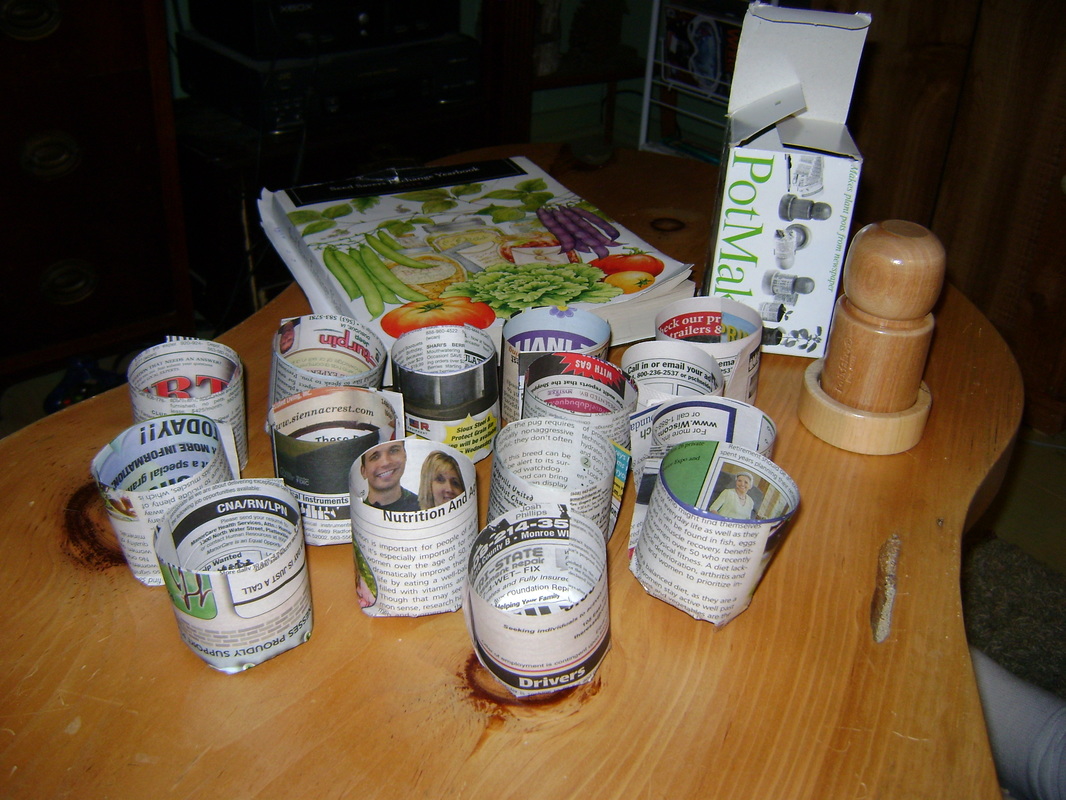
7. Once you've gotten the knack of it, it's easy to cheaply make lots of seed starting pots:
​
Picture
Picture
 

Pre-Soak Your Seeds Before Planting:

  • All seeds need to be moist in order to germinate (sprout).
  • Therefore, I soak all of my seeds overnight in warm water before planting them.
  • This gives them a head start because they don't have to absorb as much water from the surrounding soil.
  • I soak each type in it's own small jar. I tape these paper price tags (left) to each jar to identify the seed.
  • Don't fill the jars with too much water, because it can make removing small seeds harder.
  • You'll learn that some seeds require overnight soaking (like morning glories), but I find it is helpful for all seeds.
  • Don't soak seeds longer than overnight, however, because they might get too damp and start to rot.
Other Seed Preparation Techniques: 
Check the instructions on your seed packets. Some seeds require these advanced preparation techniques in order for them to sprout:
  • Seed Scarification:  This means to nick the hard outer shell of the seed so moisture can get in. You can use sand paper, a file, or nail clippers. Scar the outer shell just enough so that you can see the inner layer, which is usually a lighter color.
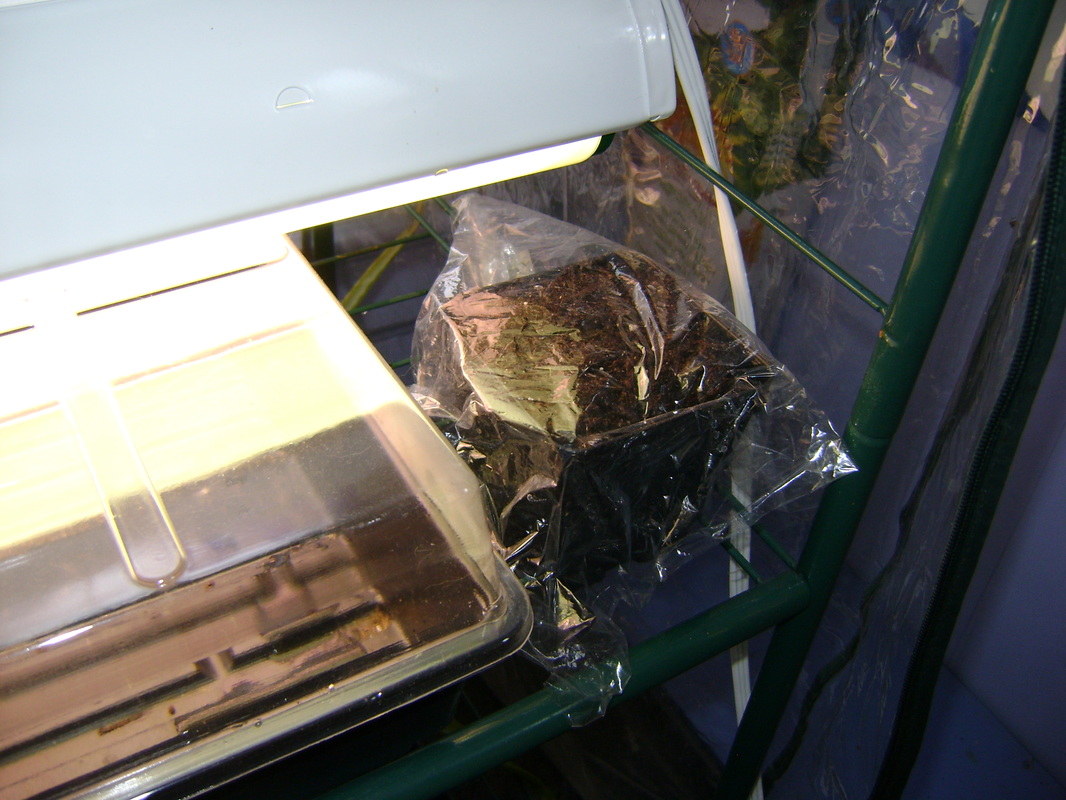
  • Seed Stratification:  This means that seeds need to experience Winter before they will germinate. Check the package for further instructions. I usually put the seeds into some damp potting soil within a ziplock bag, then place the bag in the refrigerator. Periodically check to see that the soil is still damp. Seeds may need to be stratified for several months, so you'll need to plan ahead.
 

Planting Seeds:

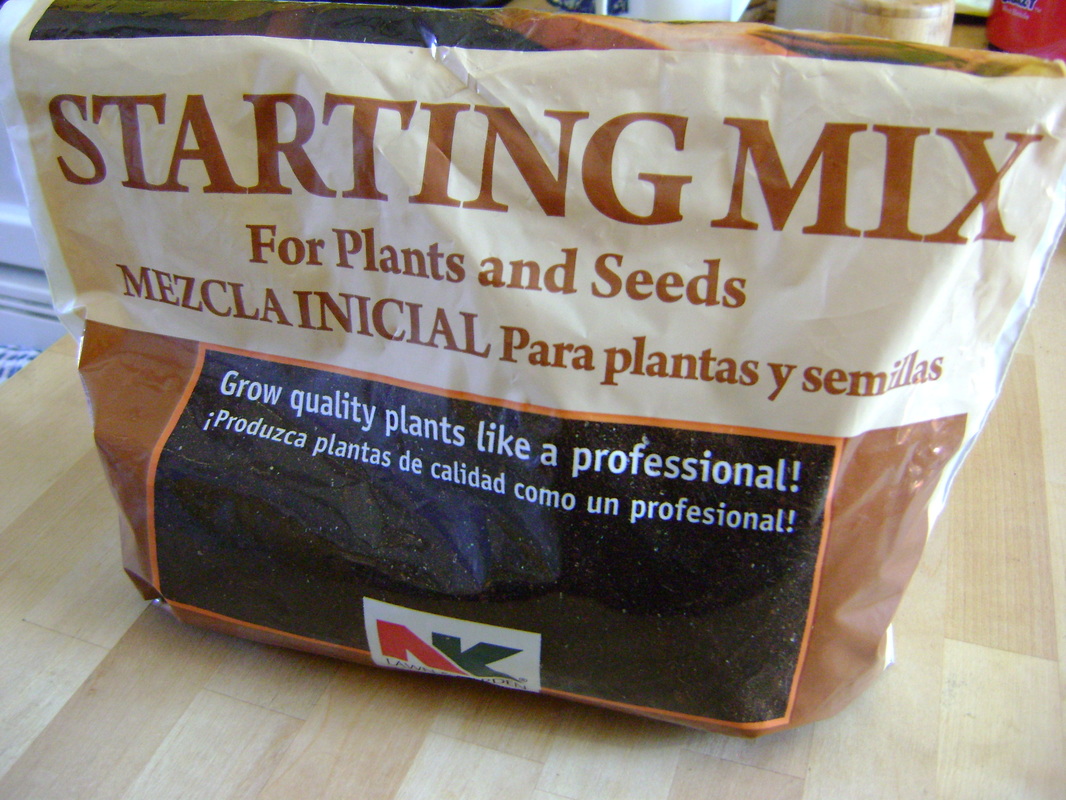
1. Choose the "soil" you will be using to grow your seedlings. You can mix your own, but since I don't use much, I just buy a bag. Seed starting "soil" isn't really soil like what we see in the garden. It is lighter, so the seeds have an easier time pushing through it to grow. This bag of seed starting mix includes: sphagnum peat moss, vermiculite, and perlite.
Picture
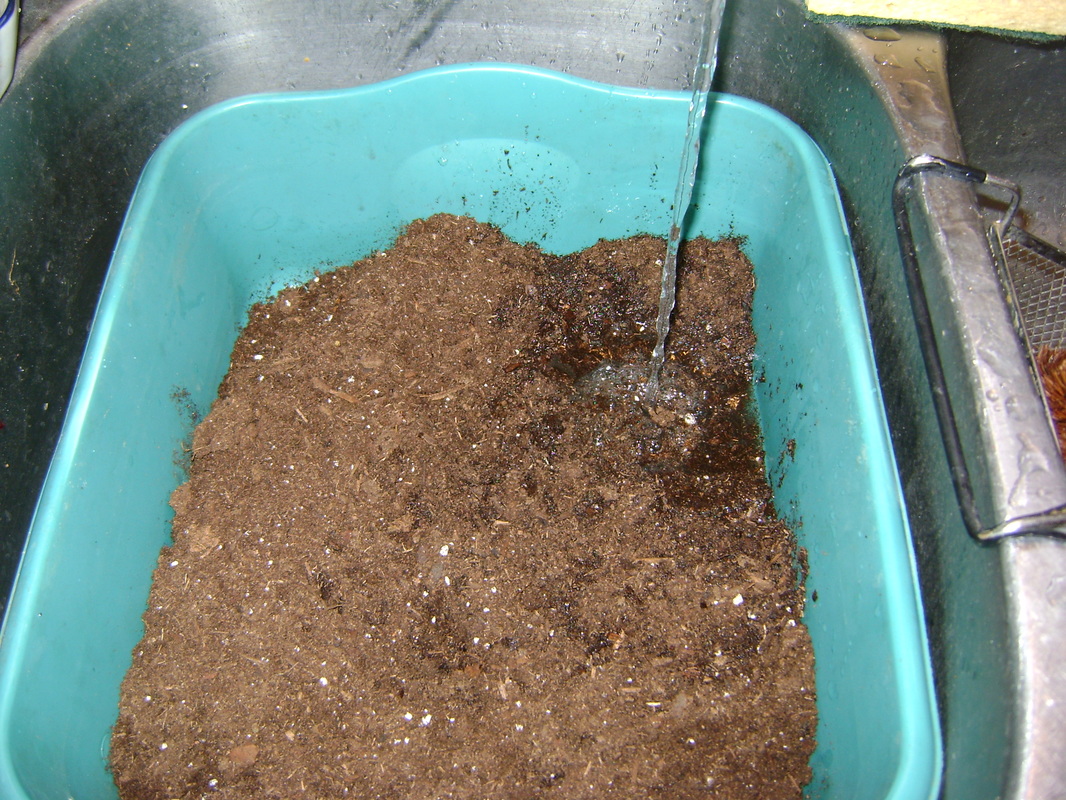
2. Put the potting mix into a tub and add warm water a little at a time.


Picture
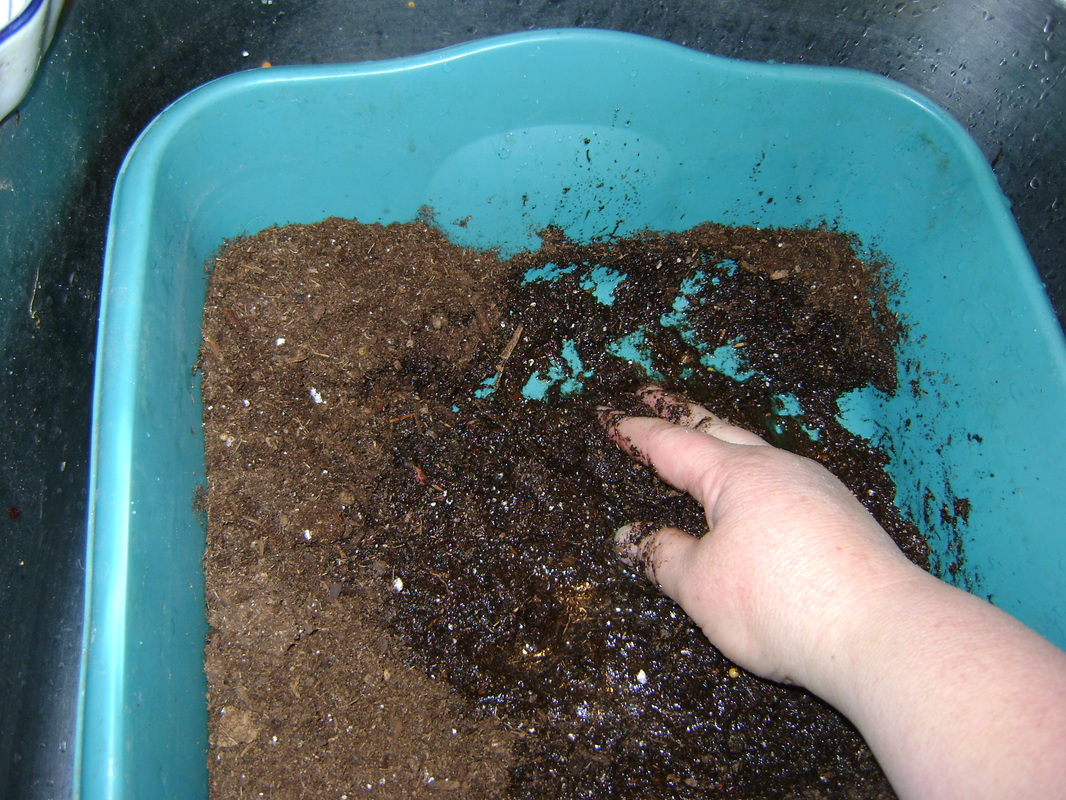
3. Mix the water into the soil. Repeat until all the soil is damp, but not too wet (you should not be able to squeeze water out of it).
Picture
4. Fill your pots with seed starting mix and add them to a tray.
​
Picture
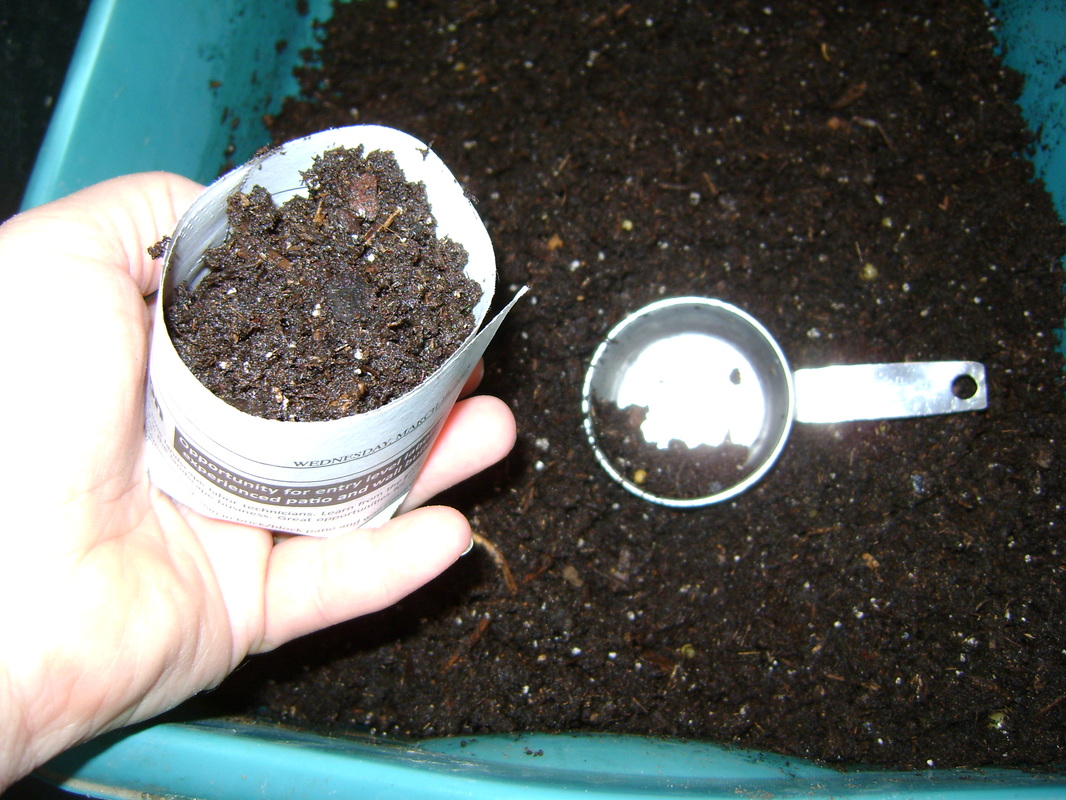
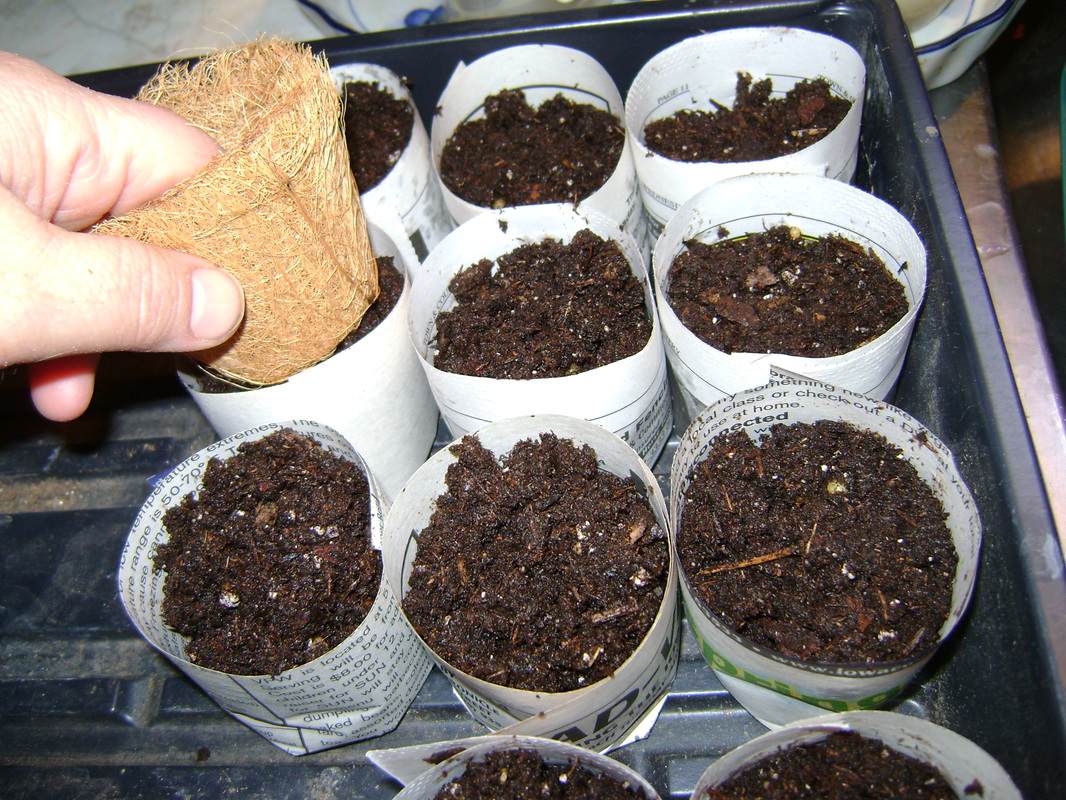
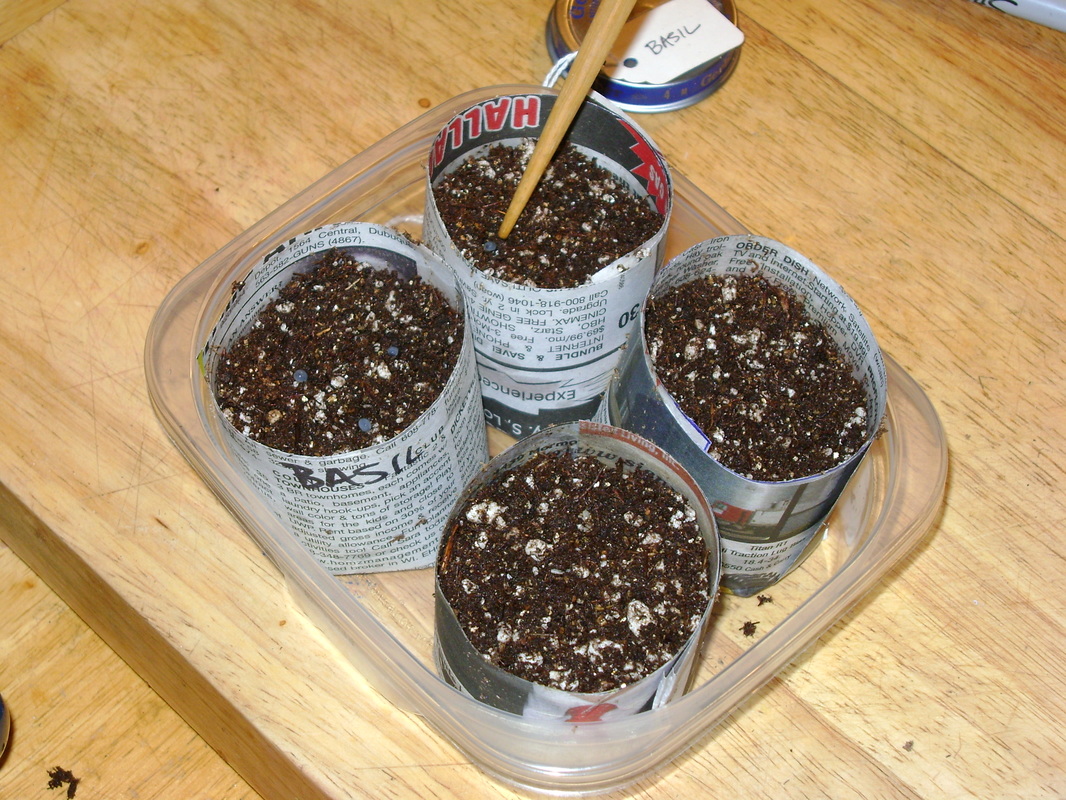
5. Tamp down the soil a bit to remove any air pockets. I use this fiber pot that is just the right size to fit within the newspaper pots. Then I use the tip of my finger or the wide end of a chopstick to make a depression in the center of each pot, in which I will plant the seeds.
Picture
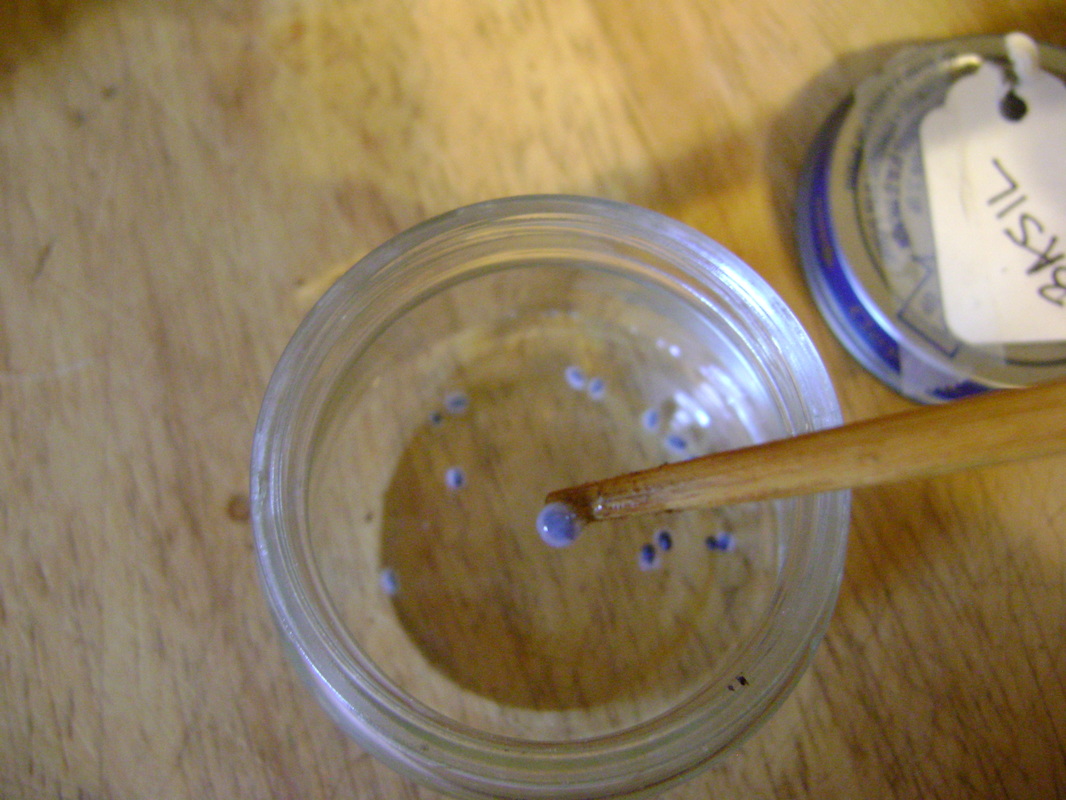
6. I use a chopstick to transfer small seeds to the pots. Notice that the seeds have developed a whitish outer coating after soaking in water all night (see above). The seeds will cling easily to the small end of a chopstick.​
​
Picture
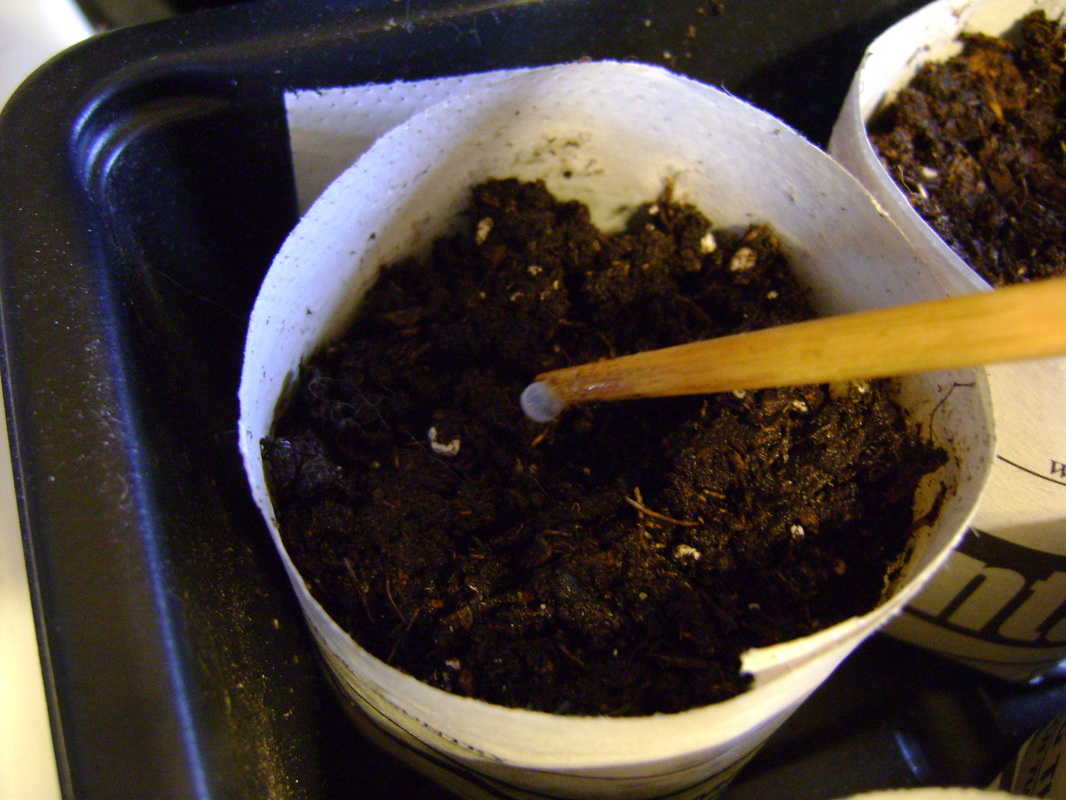
7. I gently place the seed in the depression in the pot...
Picture
8. ...then use the chopstick to cover the seed with soil.
Picture
Other Considerations:
  • In most cases I only put one seed per pot. This goes against conventional wisdom that says that not all seeds will germinate, so you should plant multiple seeds in one pot and then kill all but one of them. I find myself generally bad at killing a plant after it has put so much effort into sprouting. In some instances, such as with basil, I can eat the extra seedlings (after cutting them at soil level with scissors so as not disturb the remaining sprout), since they are essentially microgreens. But in most cases I take my chances with one seed per pot, and on the whole, they have mostly sprouted.
  • For larger plants, I put the seeds directly into big plastic pots. If I have room, I do this with any plants that I expect to outgrow the newspaper pots before I can plant them outside, such as tomato seedlings. 
 

Put the Seeds in the Greenhouse:

1. Transfer your newly planted seeds into your greenhouse. The plant lights should be on 24 hours a day until the seeds sprout (see above).​

​
Picture
2. I put all the pots onto trays to make moving them around and watering them easier. ​These seedling trays are sold with other seed starting supplies. They come with a plastic lid that helps hold in heat and humidity to encourage growth. It's good to keep the lids on until the seedlings get too tall.
Picture
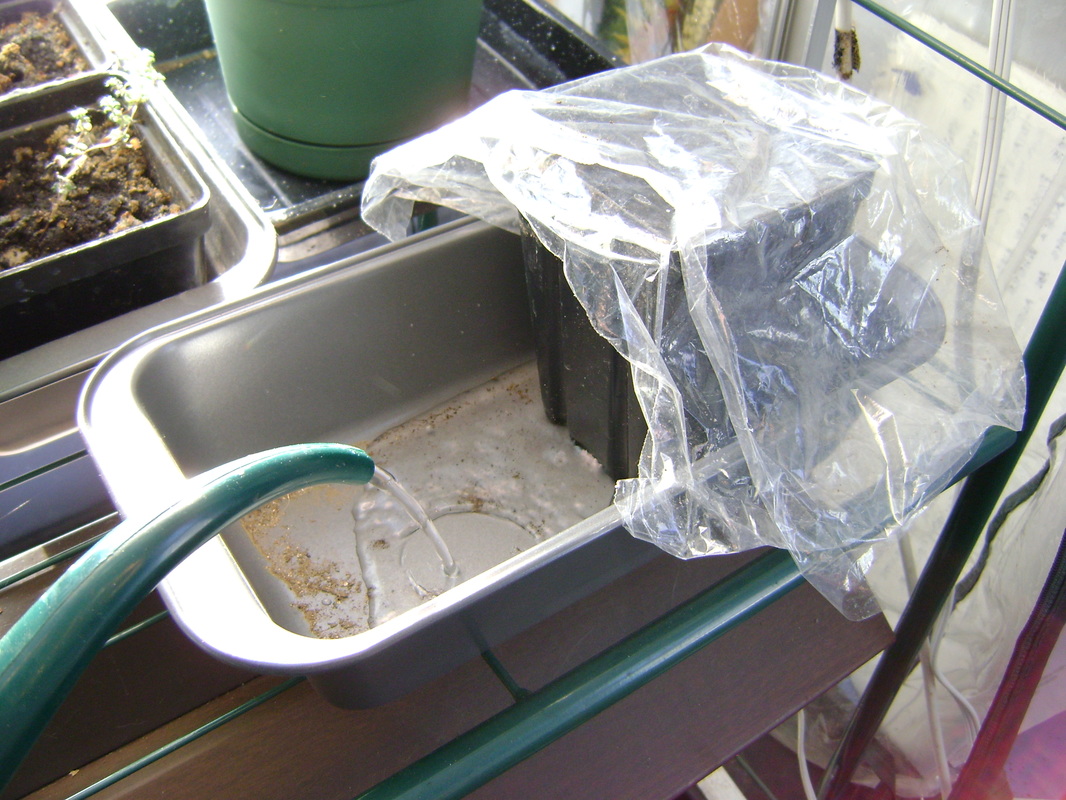
3. If you're using larger pots, you can cover them with plastic wrap to create the same effect. I just lay it over the top of the pot. Note that if you're careful, you can reuse the plastic wrap year after year.
Picture
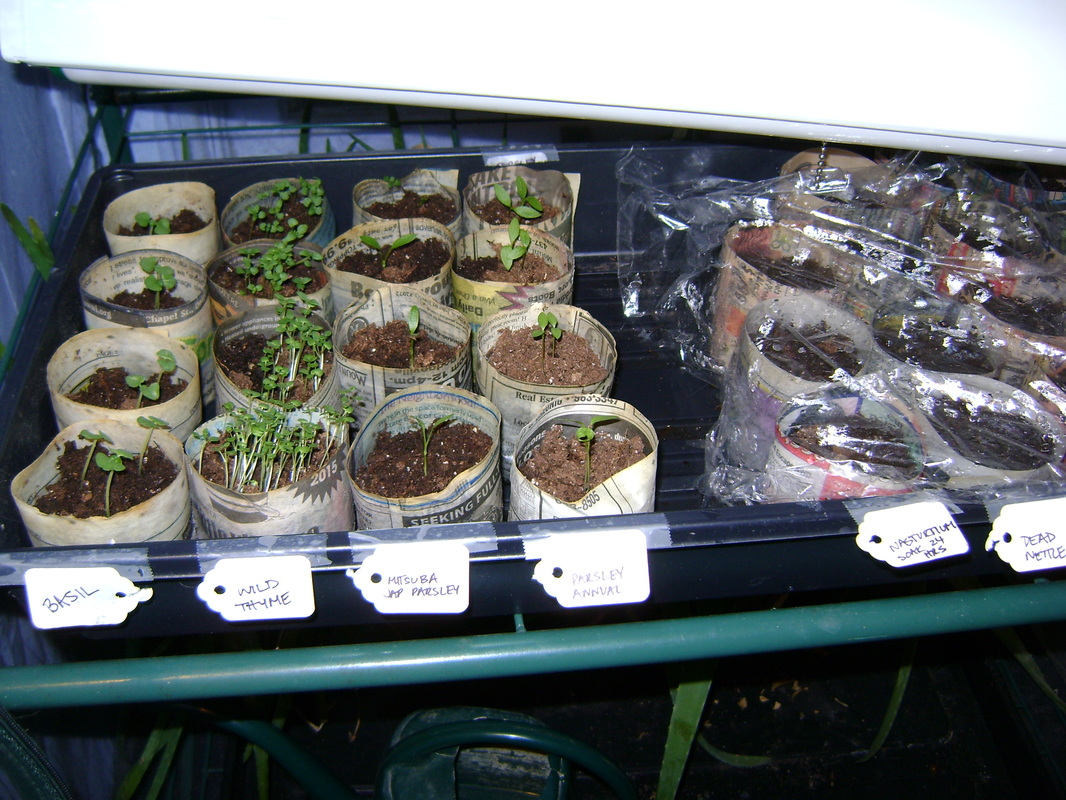
4. You can also use plastic wrap to cover part of a tray of seedlings, since if you're only planting a few of each type like I do, they often need to be planted at different times.​
Picture
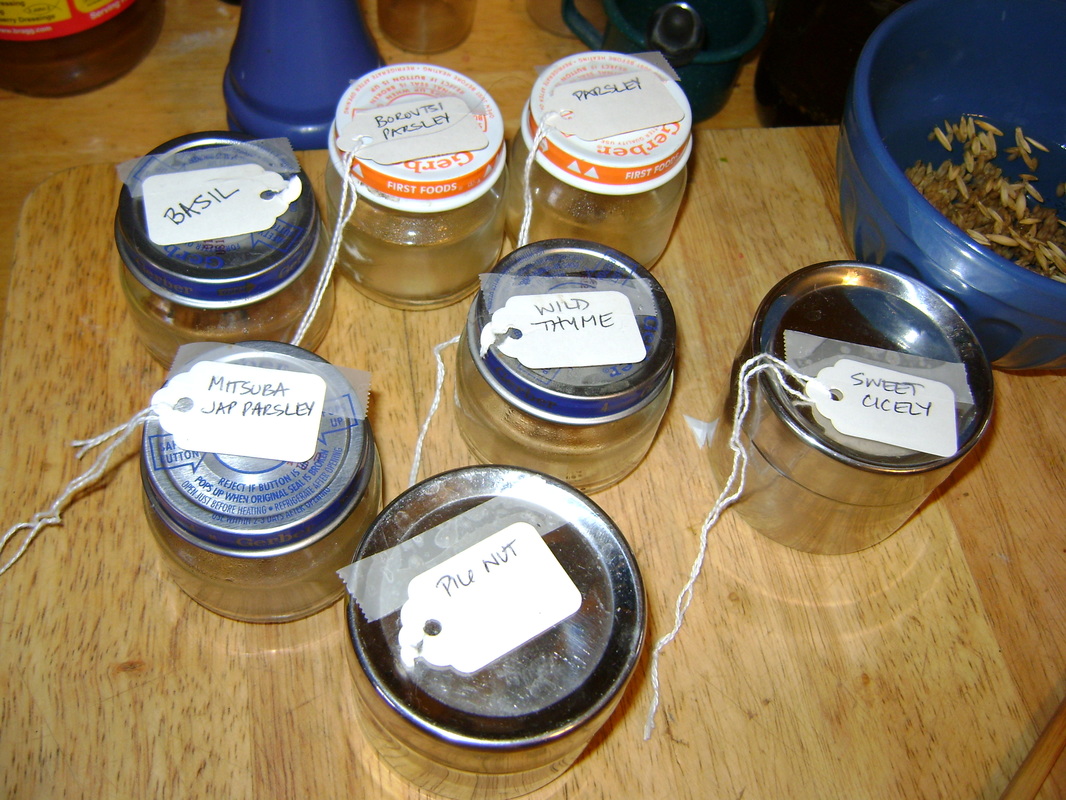
5. To identify seedlings, I transfer the price tags that I taped to the top of the seed soaking jars to the outside of the tray where they'll stay drier. I find that if I write on these tags with permanent marker, I can reuse them for several years too.
Picture
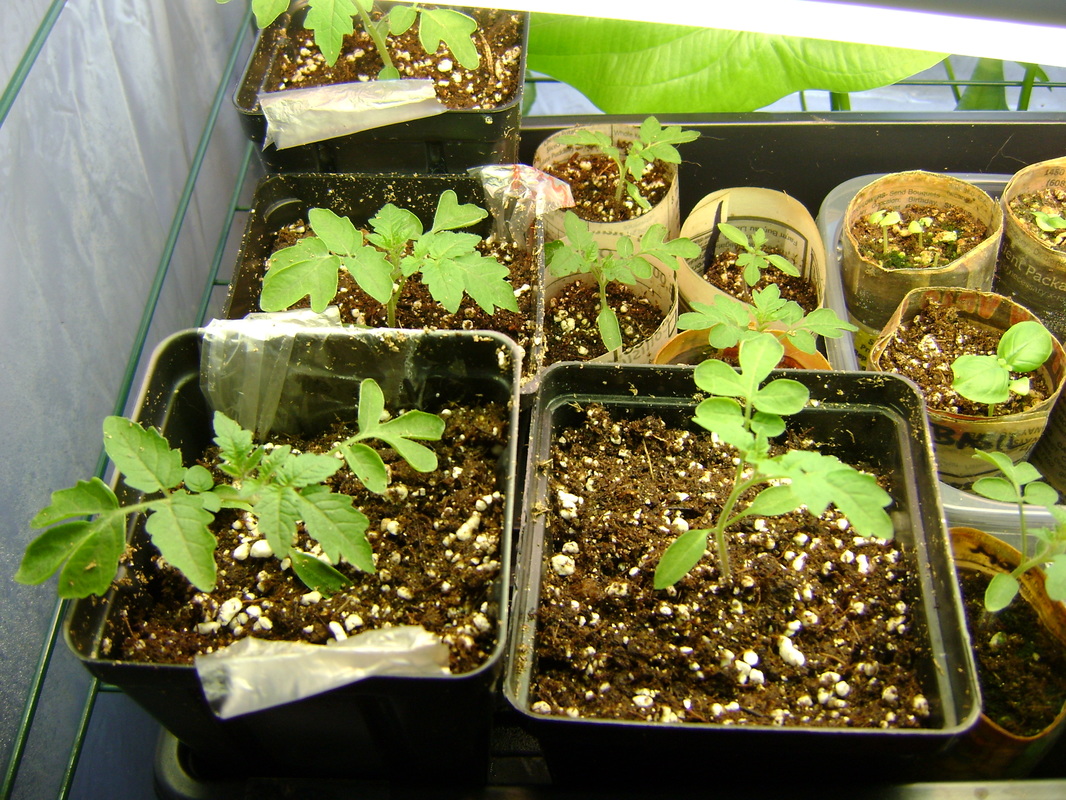
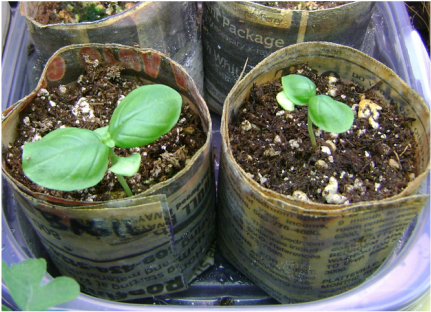
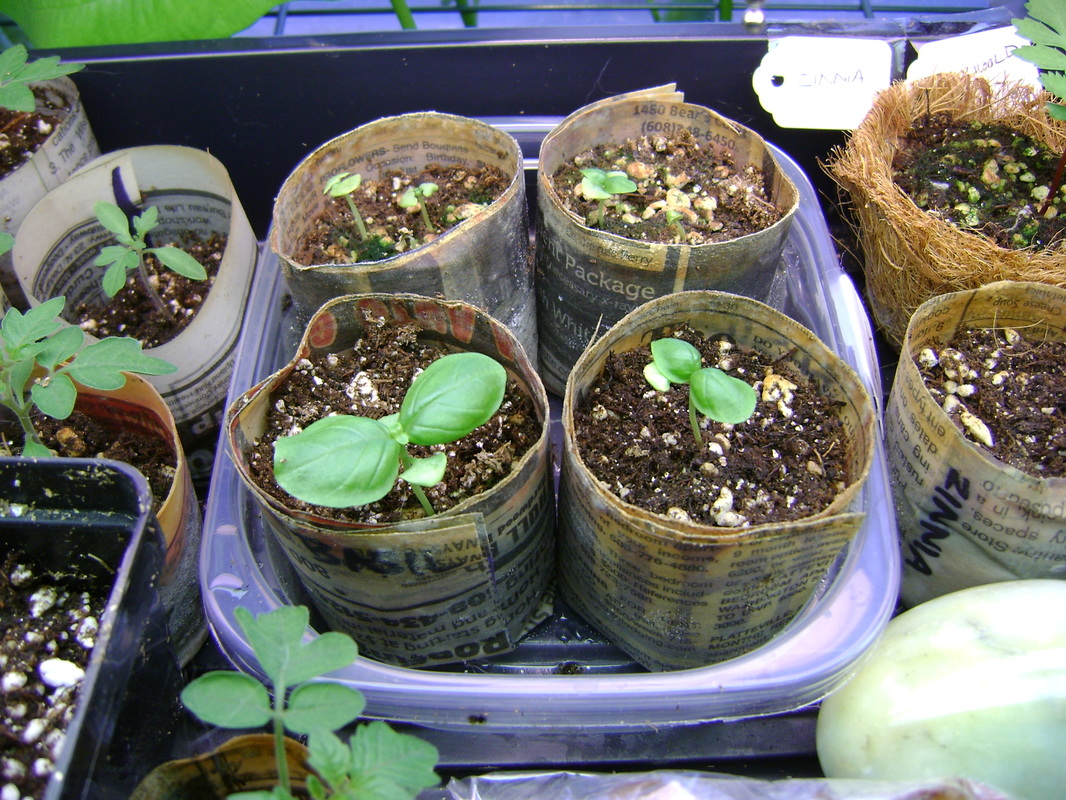
​6. It's also possible to use a thick permanent marker to write the plant name on the outside of the pots (see the "BASIL" on the left pot below). It does not smear when the pot gets wet.
​
Picture
 

Watering the Seedlings:

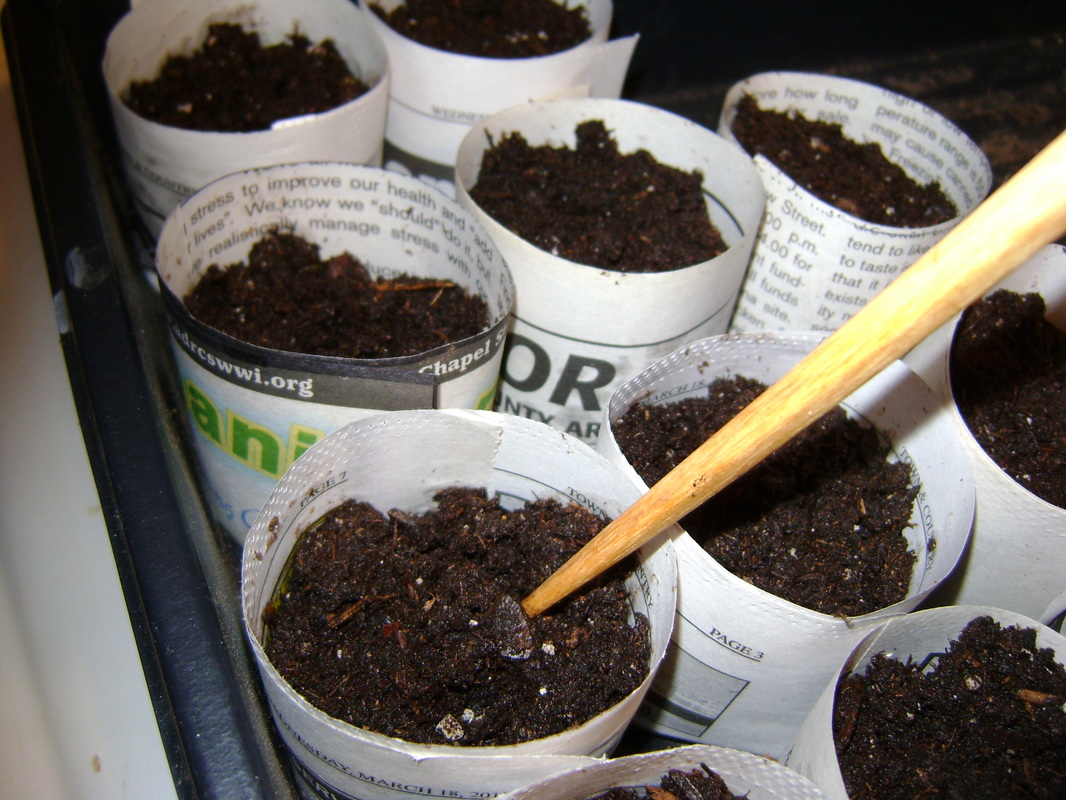
1. The soil should remain continually moist. You can see in the photo below that the soil in the pots on the right and nearer the front is a lighter brown than the others. I have let them dry out too much. If you're using newspaper pots, you know you should water whenever the paper has dried out, which generally happens before the soil becomes dry.


​
Picture
2. The best way to water is from the bottom. This is one of the problems I had when I first tried to grow plants from seed. When I poured water into the top of pots, it would swamp the fragile seedlings and sometimes knock them over. I tried spraying the seedlings instead, but it was very hard to spray them enough to keep the soil damp. Instead, I now pour water into the trays, and the pots soak up the water from the bottom without injuring the plants. Be careful not to over water with this method. If the soil and pots are both damp and there is still standing water, you've added too much.
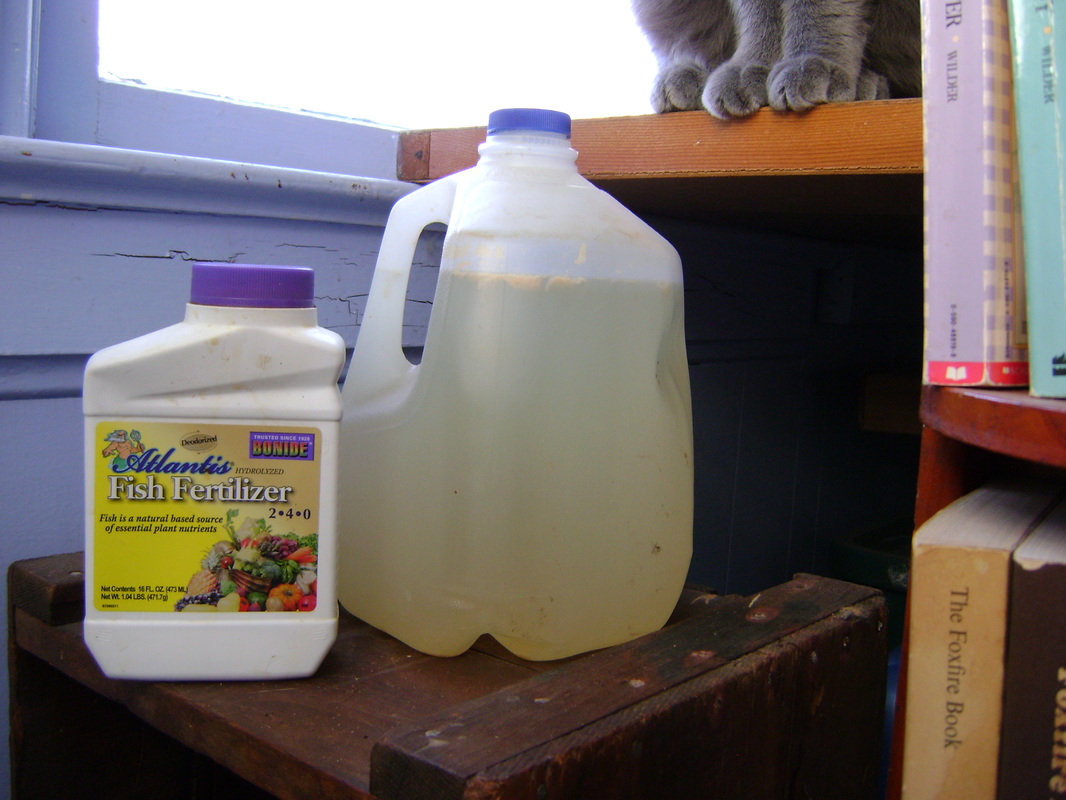
Picture
Picture
 

Fertilize Seedlings
when ​they get their first true leaves:

  • Your potting soil mix may come with fertilizer in it. Check the bag, or look for small white pellets in the soil, which are fertilizer.
  • If your mix isn't pre-fertilized, you should add fertilizer at half strength when the true leaves appear (see below).
  • I don't know a lot about store bought fertilizers so I asked for advice at a garden center and got the fish fertilizer to the left. I dilute a bit into a gallon of water and use it to water the plants.
  • Fertilize weekly thereafter.
Picture

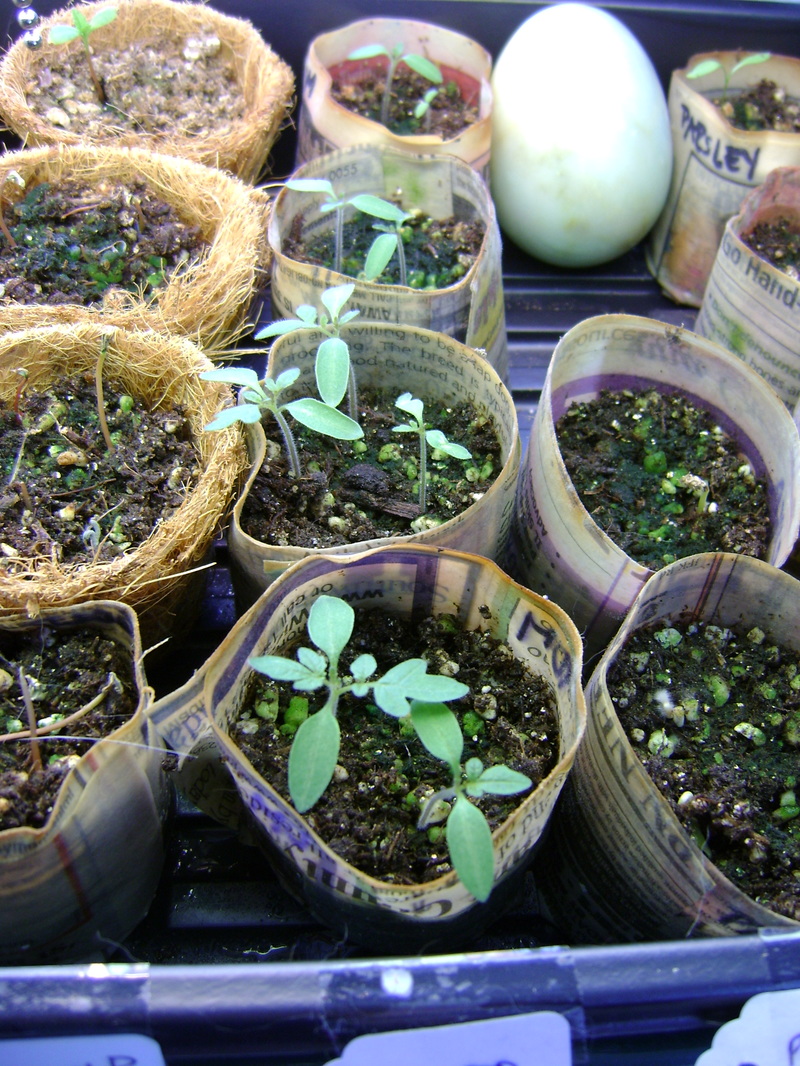
Examples of "True Leaves:"
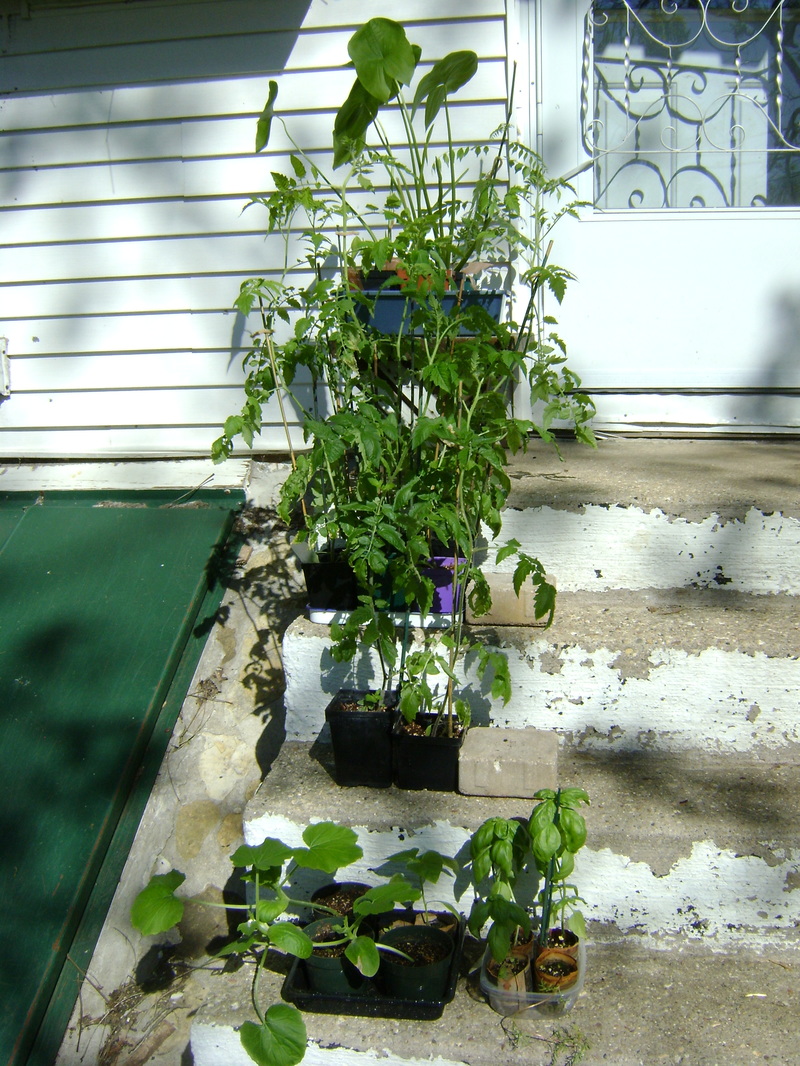
  • The first set of leaves that a seedling grows are not the "true leaves."
  • The first set of leaves often look alike on different plants, and normally don't look much like the leaves of the mature plant.
  • The second set of leaves are the true leaves, and are similar in appearance to the adult plant.
​
  • If you look at the cosmo seedling to the left you can see the first set of straight, undifferentiated leaves lowest on the stem (the seed casing is still attached to the left leaf). Above these are the true leaves, which have the more feathery appearance of the adult plant.
  • The photos below are basil seedlings. The left photo shows the first leaves and the right photo shows the second, true leaves, which are identifiable as basil leaves (yummy).
Picture
Picture
 

Hardening Off:

Picture
This is the hardest part of the process for me. In theory, it's supposed to work this way:
  • To harden off your plants, begin 2 weeks before you plant them outside.
  • On the first day, leave the plants outside for 1-2 hours,
    in a location where they are protected from wind & sun.
  • Then leave them outside a bit longer each day thereafter if the weather is good.
Plants need to be hardening off because:
  • They have been too sheltered in the greenhouse, where there's no wind and they get a steady amount of sun.
  • It helps the plants get used to variable outdoor conditions that they will encounter.
My process:
  • I carry my seedlings outside every day and put them on my back porch, which is shaded and somewhat protected from the wind.
  • Putting the seedlings in tubs makes them easier to transport in and out every day.
Problems I've encountered:
  • Tall plants may fall over if there's a wind, so I sometimes need to anchor the pots between heavy bricks.
  • It's difficult to find repeated days in which outdoor conditions are suitable for the tender plants, and since I'm at work all day it's hard to keep increasing the amount of time I keep the plants outside.  I do the best I can on evenings and weekends and so far it has worked.
Another suggestion: ​ To simulate wind, you can put a small fan in the greenhouse. I have a battery operated, handheld fan that I turn on for a few hours periodically, once the plants have grown to a reasonable size. It helps their stems stems grow stronger.
Picture
 

When Do You Start Your Seeds?

Click to download my Seed Starting Date List, which can be modified for your area and the plants you want to grow.
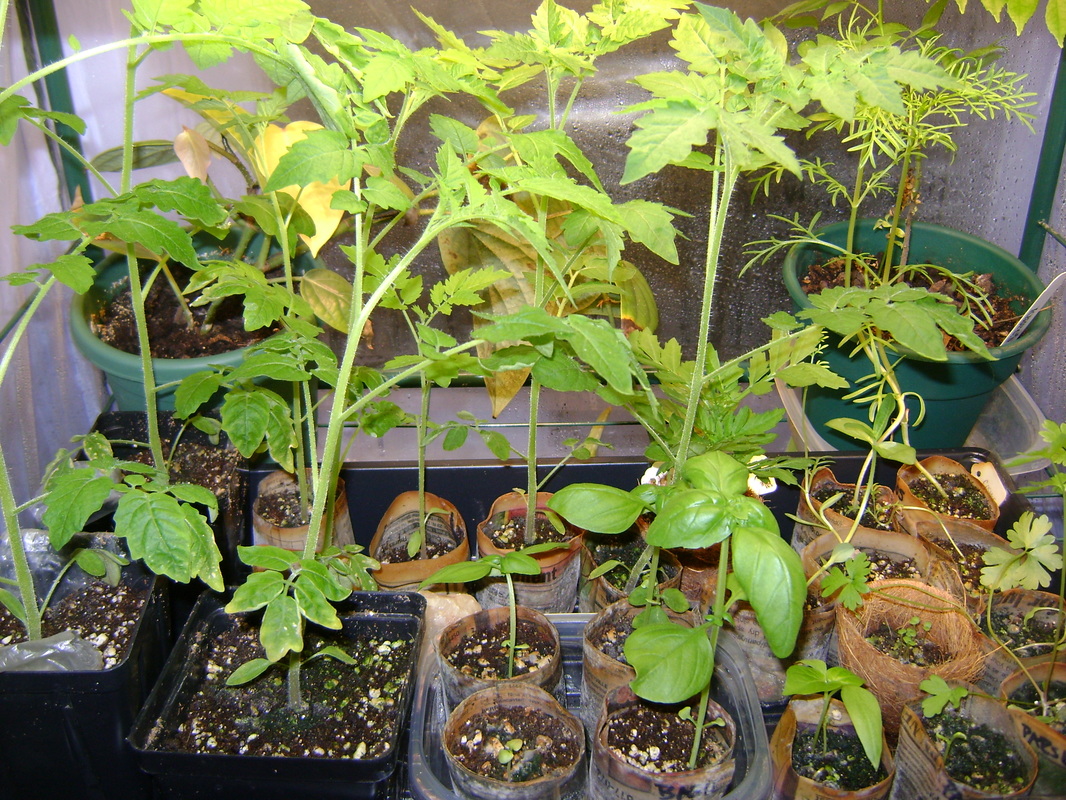
  • I developed the above seed starting date list on which I can list the seeds I'm starting in a given year and calculate when I'm supposed to start them. This chart is in a Word file, so you can download and modify it for your area. It also has a list of key seed starting points to remember from the above information on this page, which I use to remind myself how to start seeds every year. The second page has space for recording a list of seeds and plants you want to buy, as well as space to create your Spring garden to do list.
  • The dates on my seed starting chart were taken from various reference books. You'll see that I've noted that some of them don't seem to be early enough. Last year, the marigolds and marjoram I started from seed on the dates indicated on the chart were still small by the time the garden centers opened in the Spring. It was very frustrating to see their plants grown and in bloom while mine were still tiny. This year, I'm starting some seeds earlier.
  • Also check your seed packages for planting dates. You can also check reference books or online. 
  • Seed starting dates are usually listed as the number of weeks before the last frost. If you don't know the last frost in your area, you can google that too ("Wisconsin last frost date").
 

PHOTO INSPIRATION

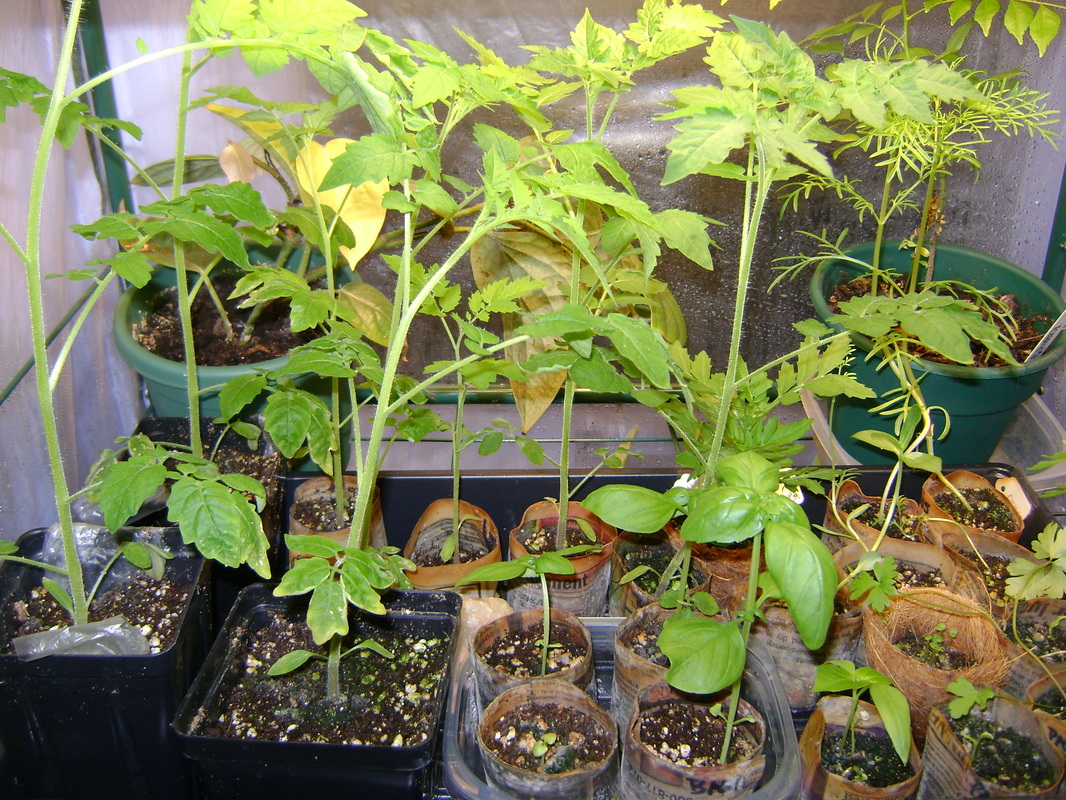
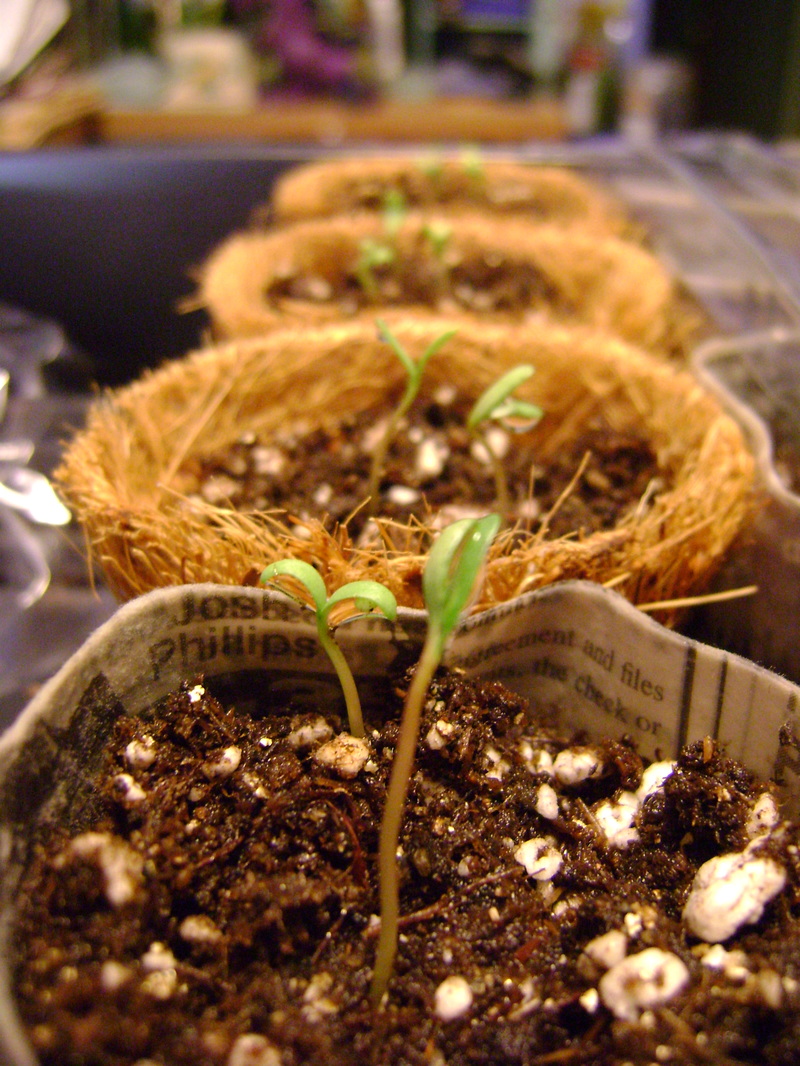
If you give seeds the right conditions, they will grow!
Picture
Picture
Picture
Picture

Happy Planting!

Home    Inside   Outside   Shelf Chefing   Cooking   Pantry   Celebrate   Our Books   Blog   About   Resources   Contact
Be the change you wish to see in the world.  ~Gandhi
Want to know when we add new content to our website?  Subscribe to our Blog.

These pages may contain affiliate links that allow us to share products we authentically recommend.
Clicking the links results in no extra cost to you, but we may receive a small commission that may someday help fund this work.

Copyright 2020 by Theresa & Rob Berrie