BUYING &
|
|
TIPS ON BUYING WOOD:
|
Bear here... I never thought of myself as a perfectionist but I really like to stack the wood by myself so it is the way I want it and I can make sure the larger logs get split.
This book has a lot of detailed information about wood buying, as well as a lot of other useful information for new wood stove owners:
|
GATHERING KINDLING- Gifts from the Trees:
|
We get a lot of twigs just by racking the small part of our yard that is still lawn. Our trees don't need these twigs so it is our turn to use them for fire starting. We also gather pine cones from under our pine tree. 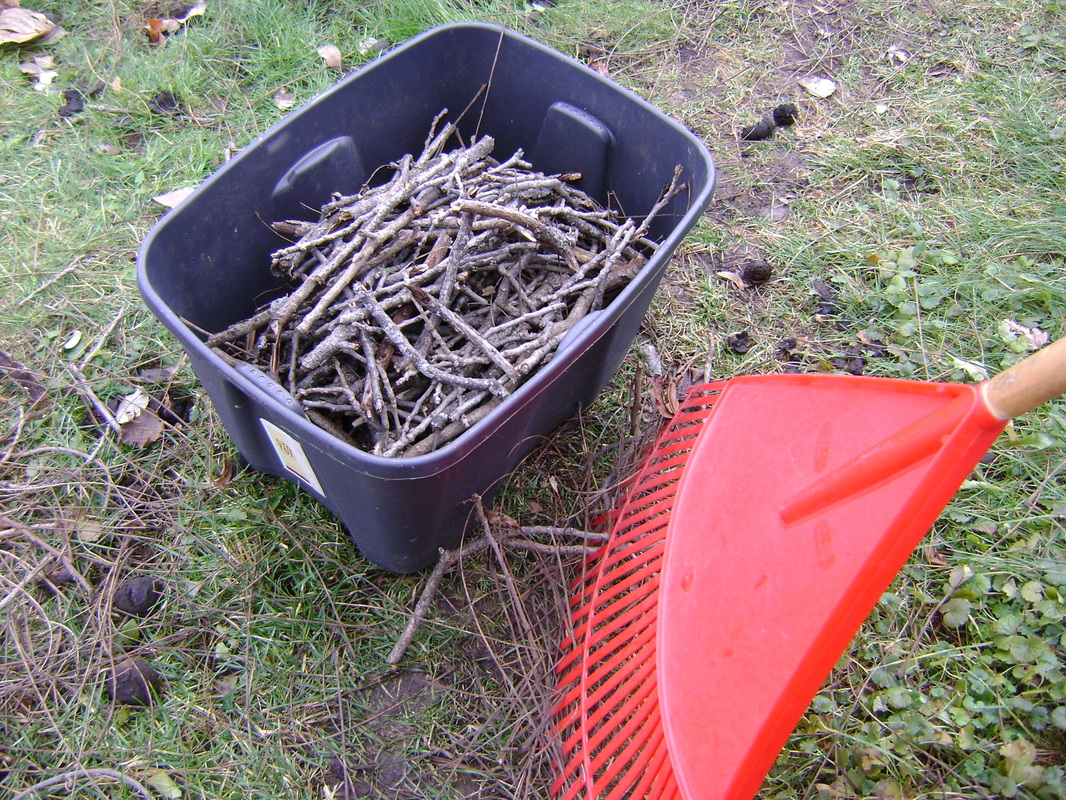
|
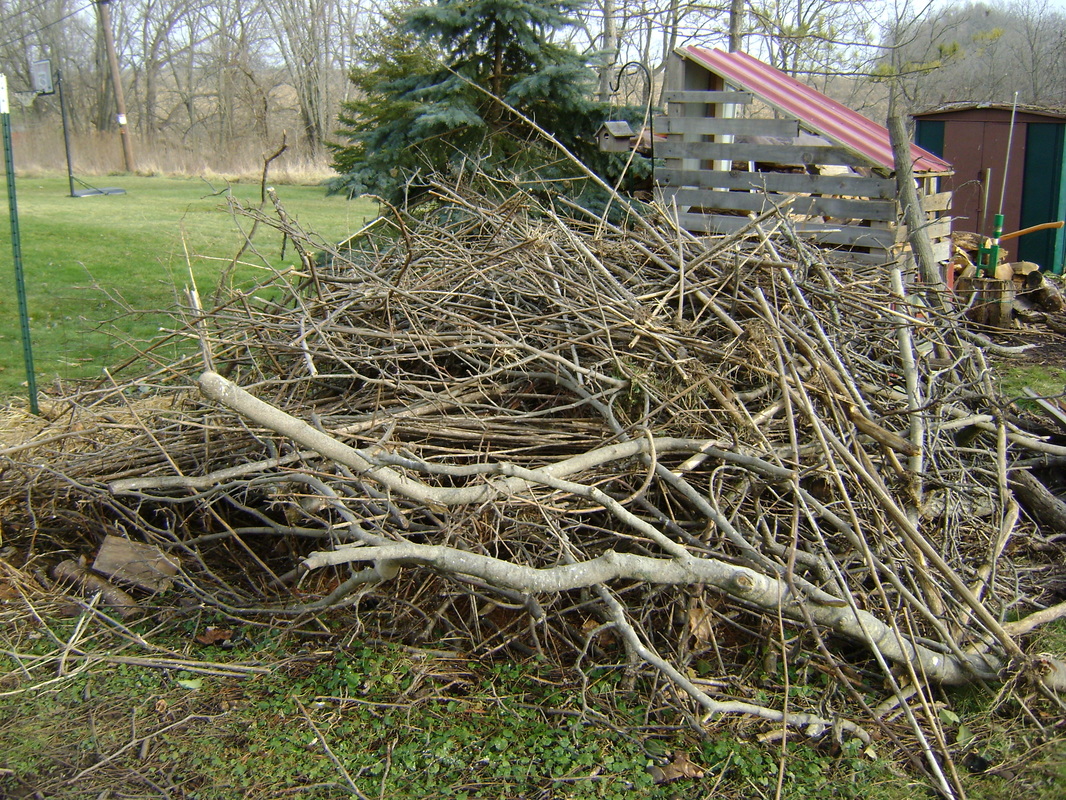
One year we trimmed some of our trees and made this pile of branches so they could dry for a season and become kindling... but instead it turned into a wildlife and bird condo (see our Gardening for Wildlife page). You also might be able to get tree trimmings from your neighbors- they're usually glad to have someone haul them away.
|
CUTTING KINDLING- BEAR'S OLD WAY
|
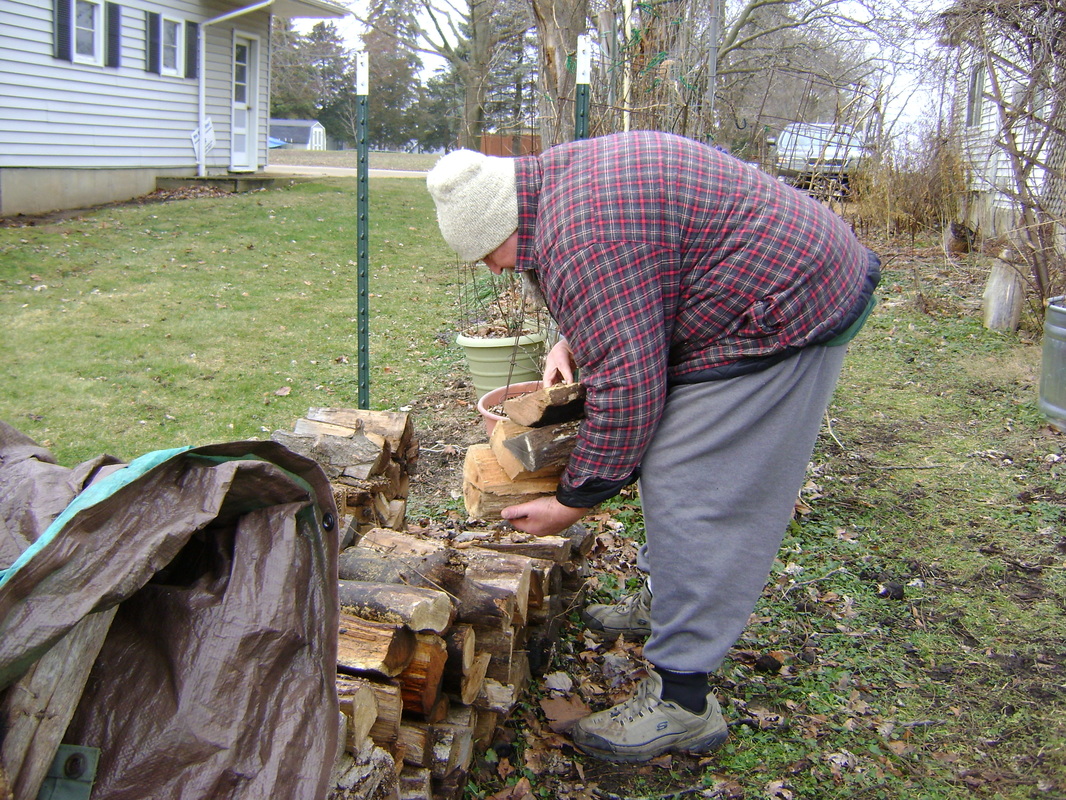
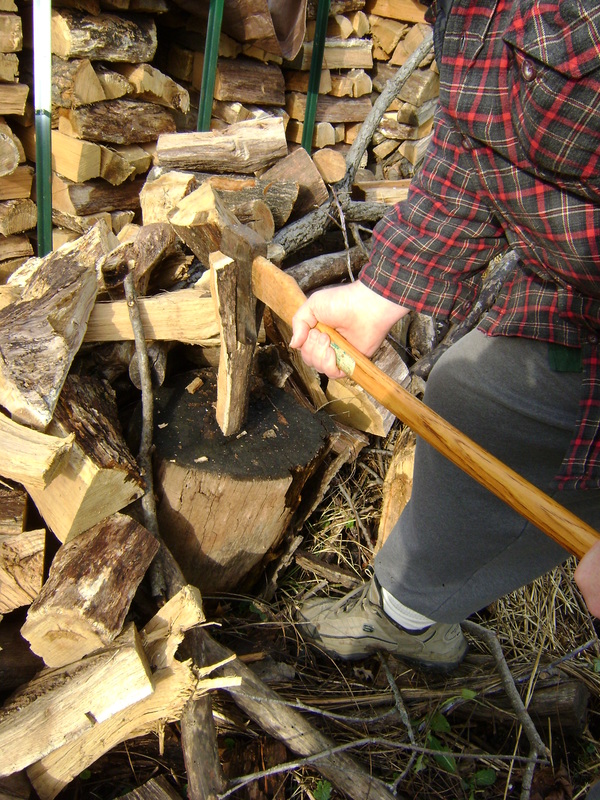
The old school way of cutting kindling is with an ax or a maul, which has its safety issues. If you cut wood this way, be sure to wear glasses to protect your eyes, because wood chips will fly (Bear's not wearing his in the photo below because he was just modeling. He doesn't split wood this way any more). The wood needs to be able to stand alone on your cutting stump while you take a swing at it with the ax. This only works with logs with flat bottoms. Some of my swings have missed and come close to taking my leg off, so BE CAREFUL!
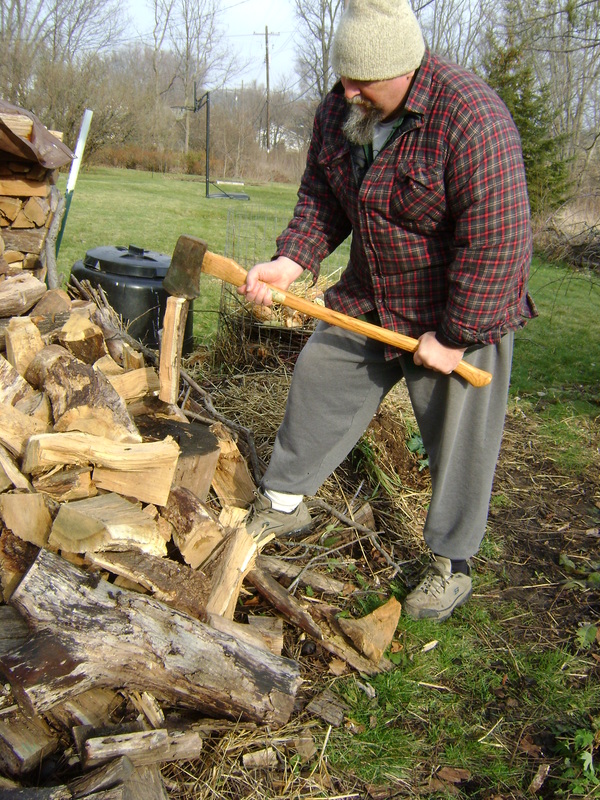
|
If the wood doesn't stand alone, you have to hold it and gently swing the ax to bite it into the wood. Then lift the whole thing and let the force of the swing and the sudden stop of the wood carry the ax through the log.
|
Bear's comments: If you have to do a lot of manual splitting do it over a few days. Go for an hour or two the first day and give your body a chance to get used to the work. Cutting kindling with an ax was cool and ego building the first day, but over the next couple days my legs, back, and arms told me I was stupid and showed me the pain to prove it.
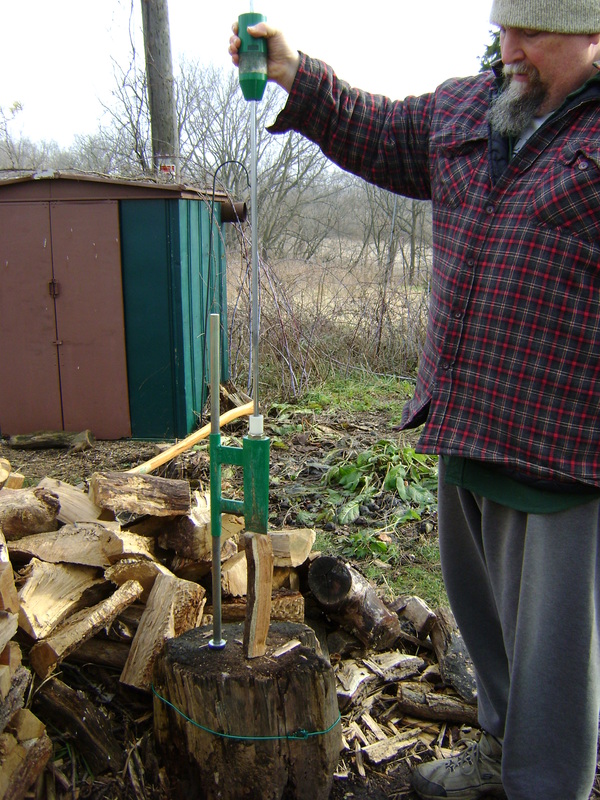
CUTTING KINDLING- BEAR'S NEW WAY
We saw this handy manual log splitter at the Wisconsin Mother Earth News Fair and decided to buy one right away. They were around $100. It is called the Smart-Splitter. It's made in Sweden by Agma. Bear is loving it and even Theresa likes using it. It's much safer than using an ax.
|
1. Here's what the Smart-Splitter looks like. You have to attach it to a stump.
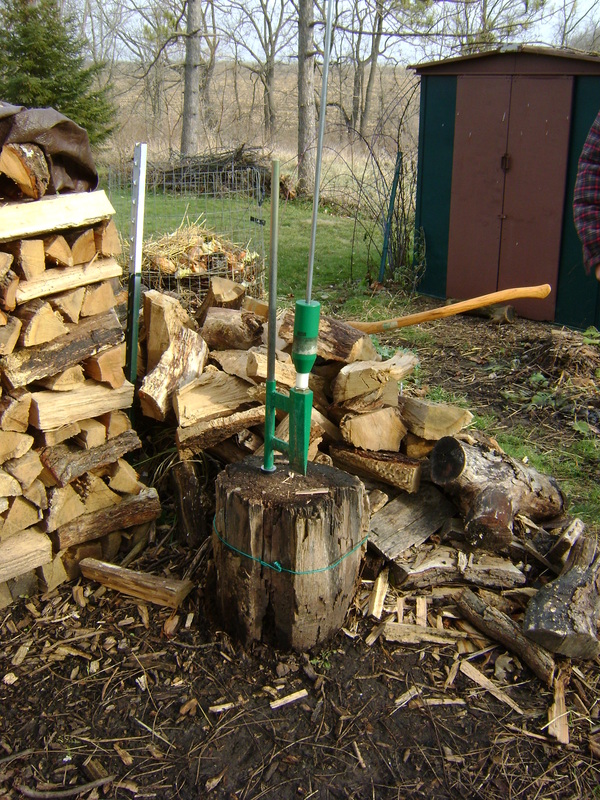
|
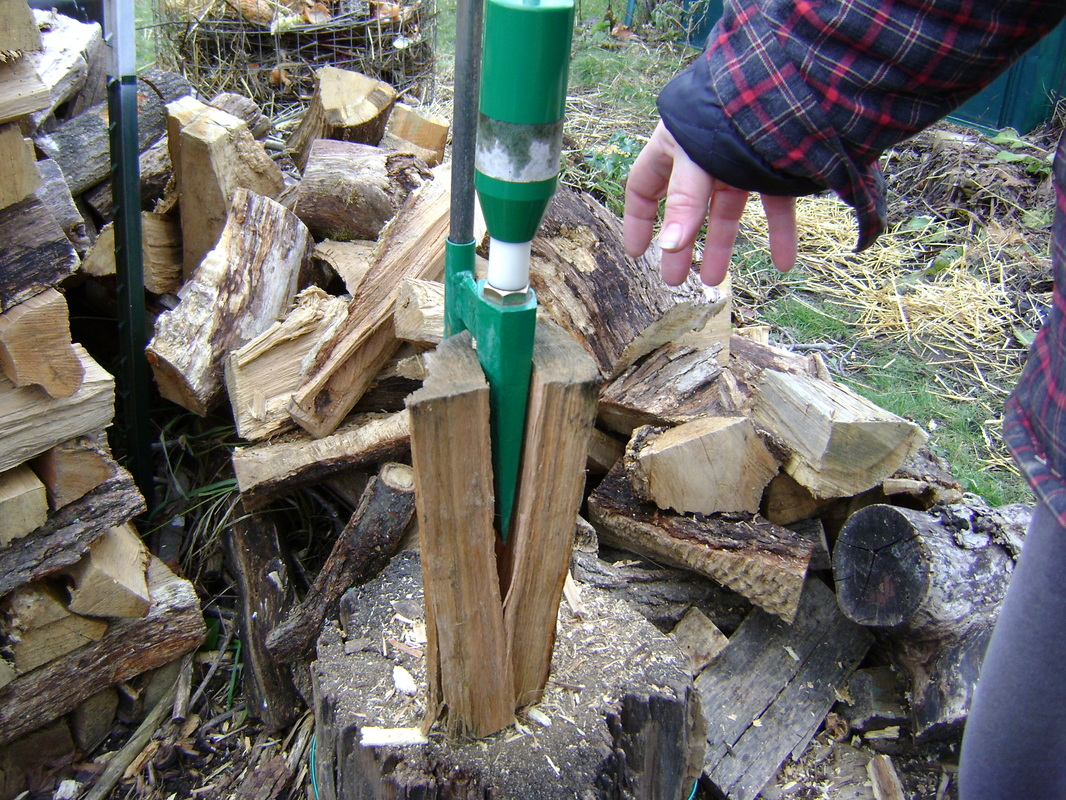
2. You put the log you want to split under the blade and the weight of the blade holds it in place.
|
|
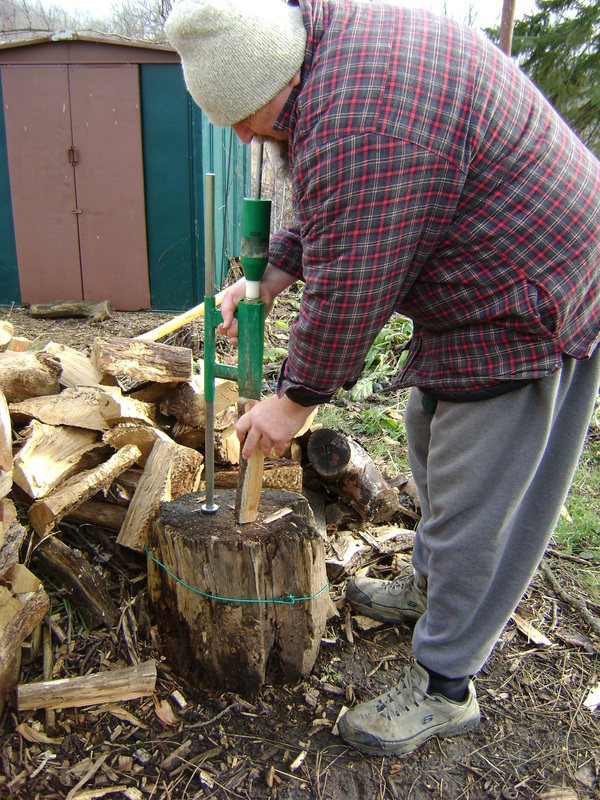
3. Then you lift the weight and slam it down on the blade. This is the one place you could hurt yourself- make sure your fingers don't get pinched. (The directions suggest using both hands at the same time to slam the weight down, but Bear's strong so he only uses one, and trades arms so neither gets tired.)
Bear's endorsement: This tool is the best kindling maker I have ever seen. It makes very thin pieces with little to no chance of missing and getting yourself hurt. |
4. The blade splits the wood. You know your wood is well seasoned if it takes only one drop to split it. Some pieces take five or six drops. If you drop it twice and the blade still hasn't cut into the wood, forget that piece and grab another.
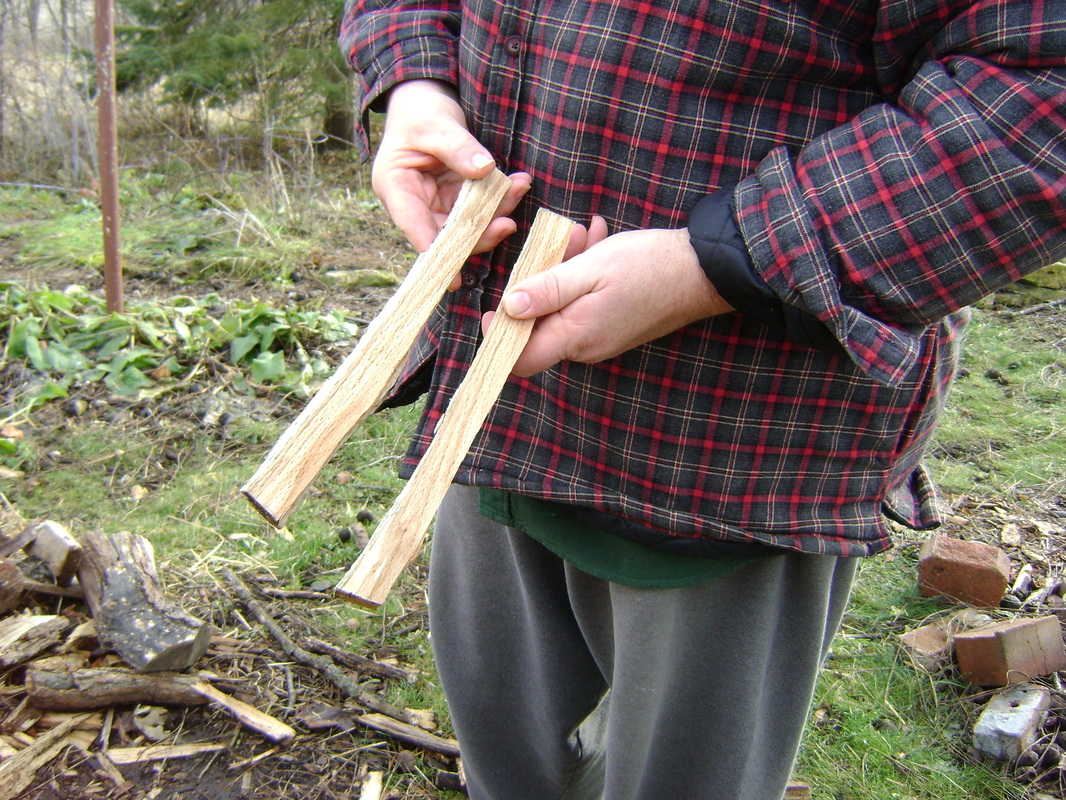
5. Repeat until you have small enough kindling.
|
|
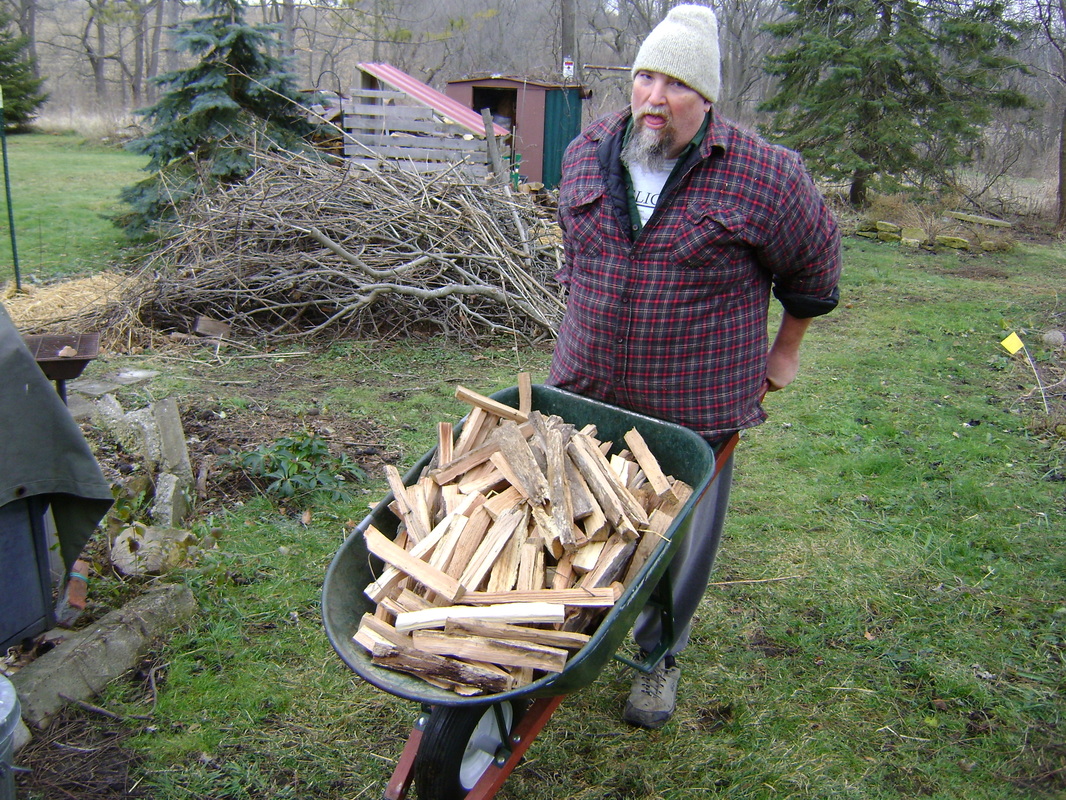
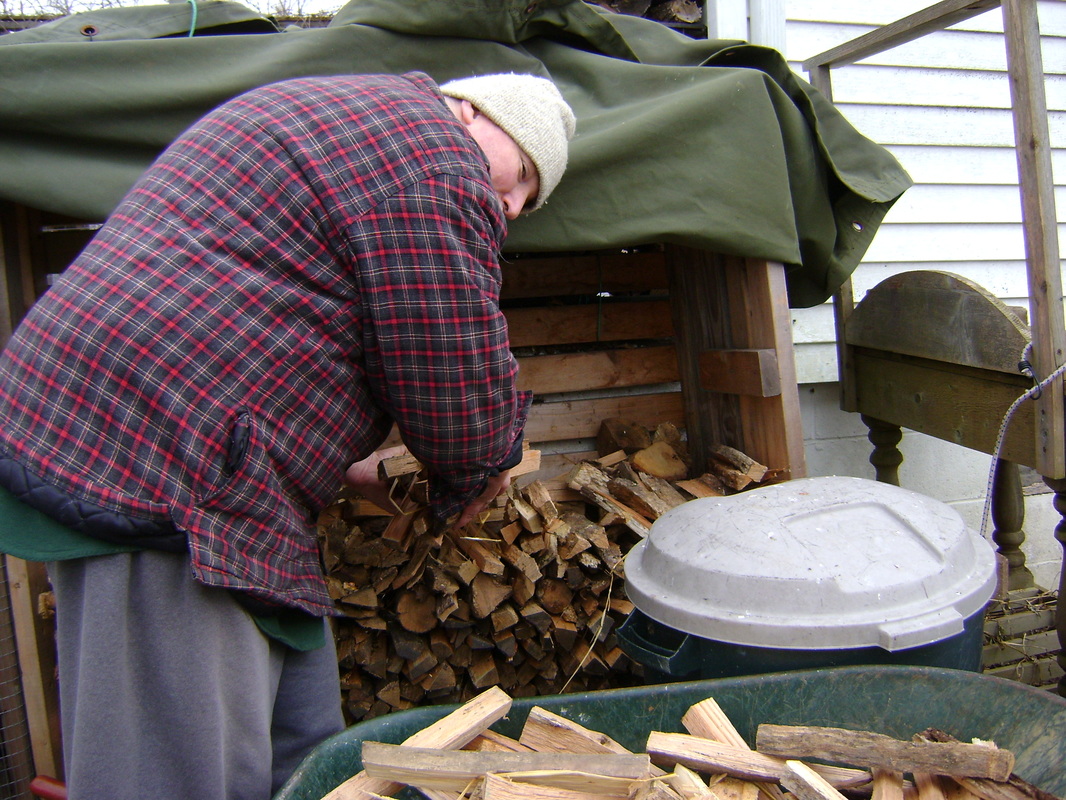
6. When you have a wheel barrow full, haul to your storage shed... (Why yes I am happy, on the inside. Why do you ask?)
|
7. ... and stack. Kindling is your friend, so make a lot of it. Good kindling makes fires easier to start and restart if you forget to add logs during the day.
|
STORING WOOD OUTSIDE
|
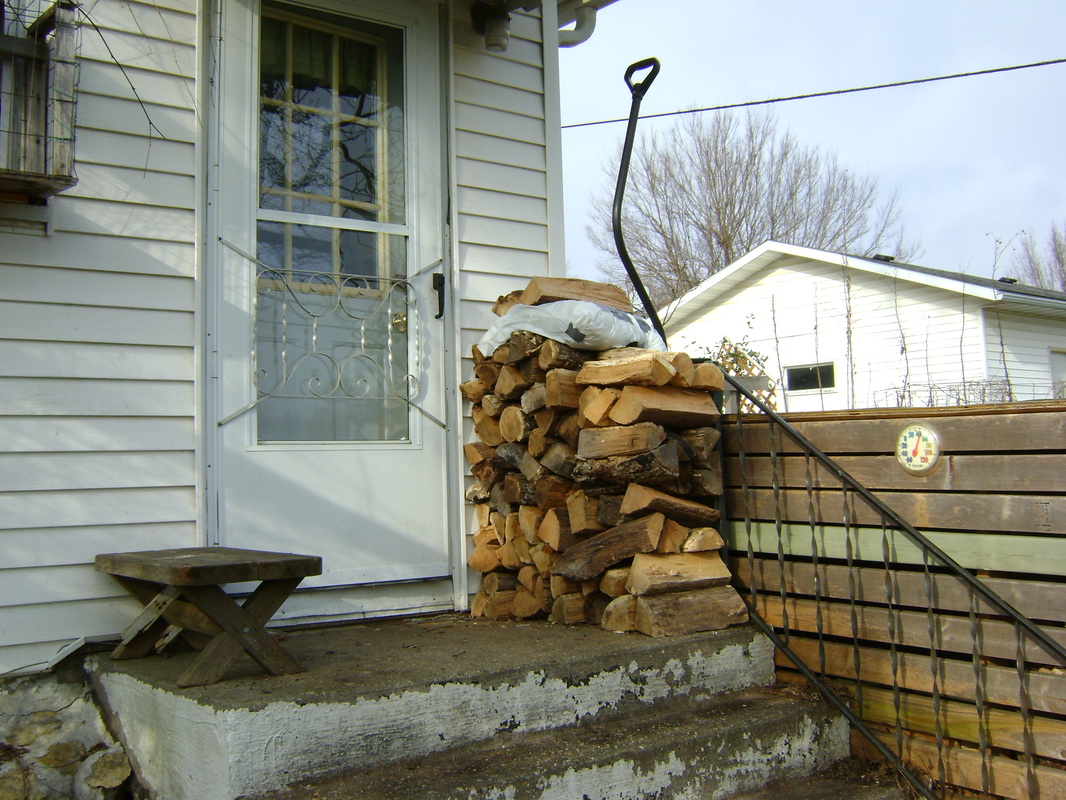
1. We stack some wood right outside the back door, so it's close by in case we need it during Winter storms. Bear tries to store enough wood and kindling by or inside our house for one week. The back door pile can fill the inside piles at least twice, so his largest hauling jobs are to fill the kindling bins and the back steps about once a week.
|
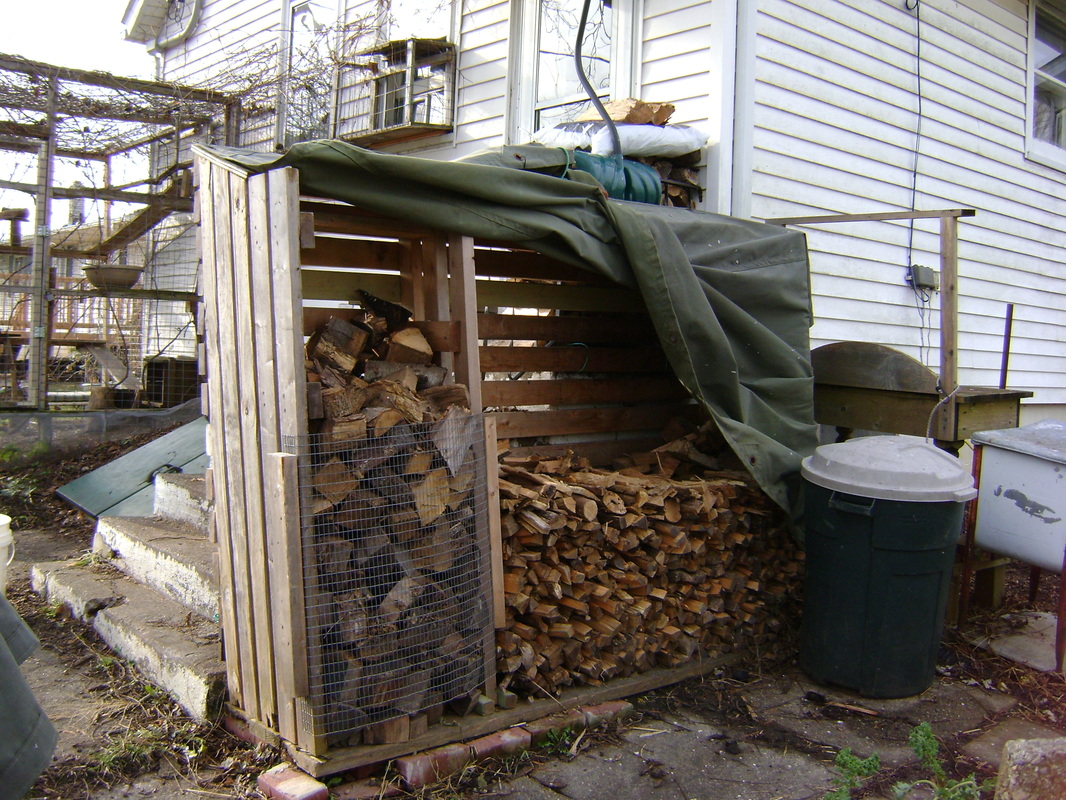
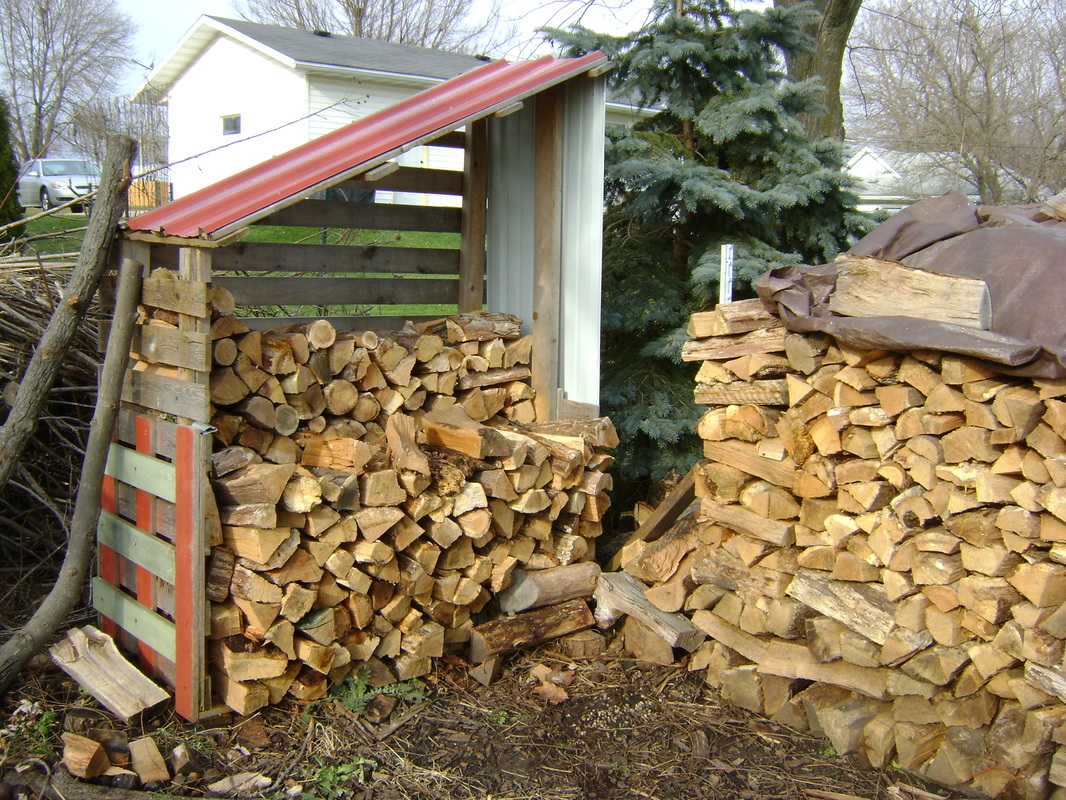
2. Next to the back steps we also build this shed to hold kindling and small wood chunks (left). We cover it with a cloth tarp, which is held in place by screws that go through the grommet holes. One Winter the whole thing fell over in a wind storm, so we have since wired it to the metal stair railing that is behind it.
|
|
3. One Summer we built another small wood shed. The bottom of it was a large box in which her mother's cedar chest was shipped to Theresa. We added more supports, made it taller, and put on a roof made of scrap metal.
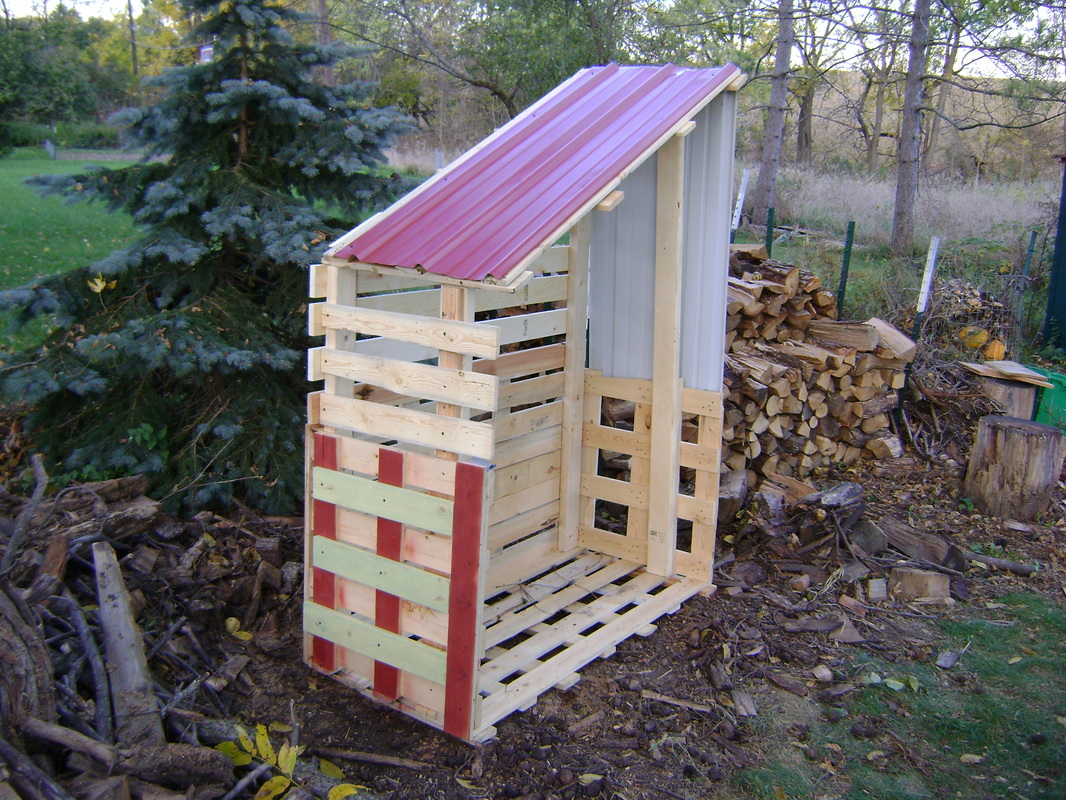
|
4. It helps keep our wood piles a little neater and slightly drier.
|
|
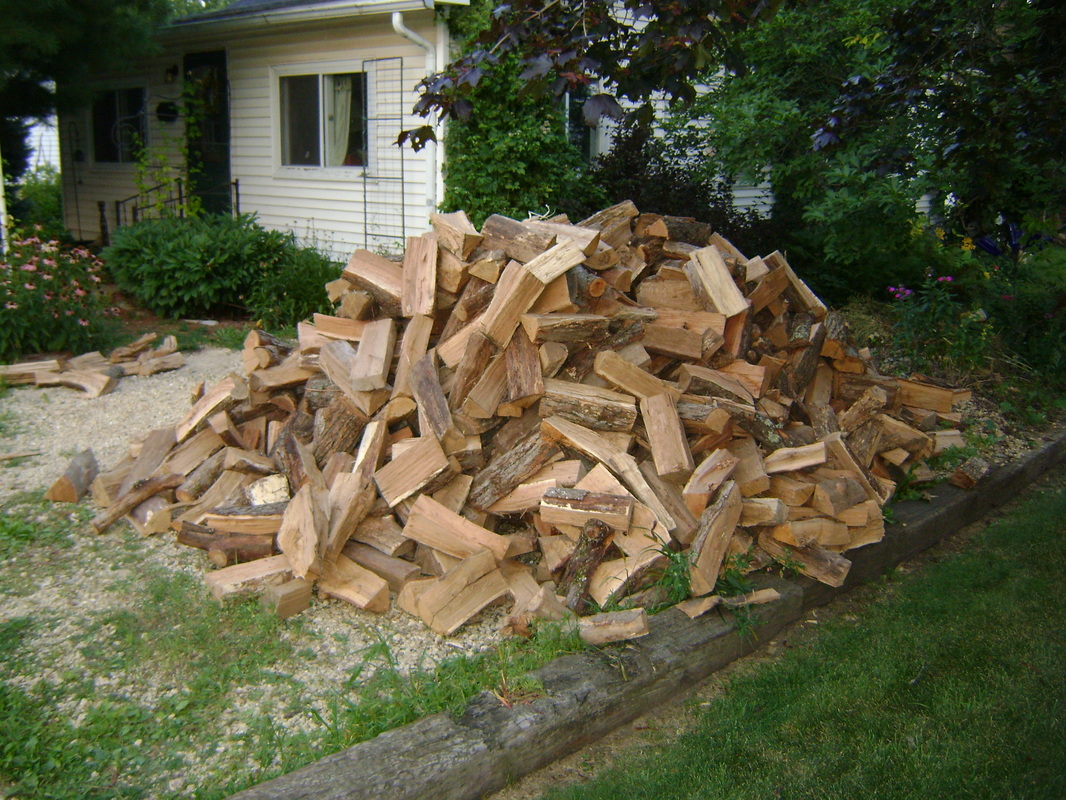
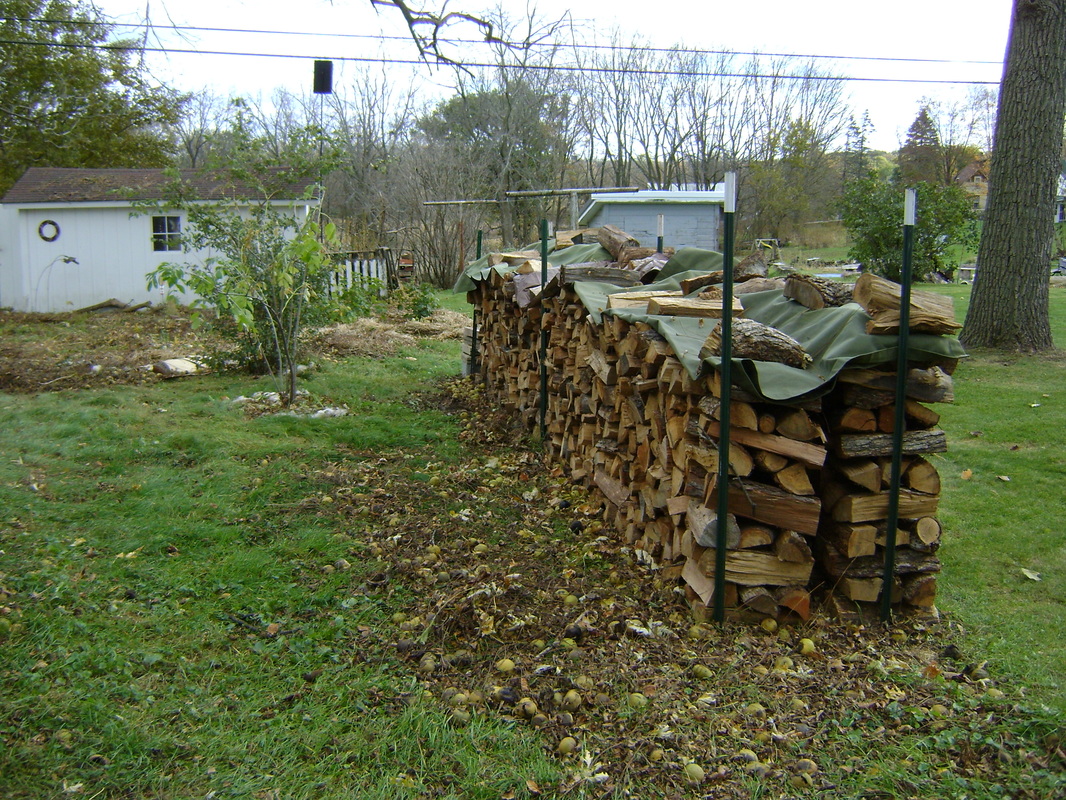
5. Our largest wood piles are made by driving green T-posts into the ground and stacking the wood between them. The bottom layer will likely freeze to the ground in the Winter, or you can raise it up by putting some flat and long lumber beneath it.
|
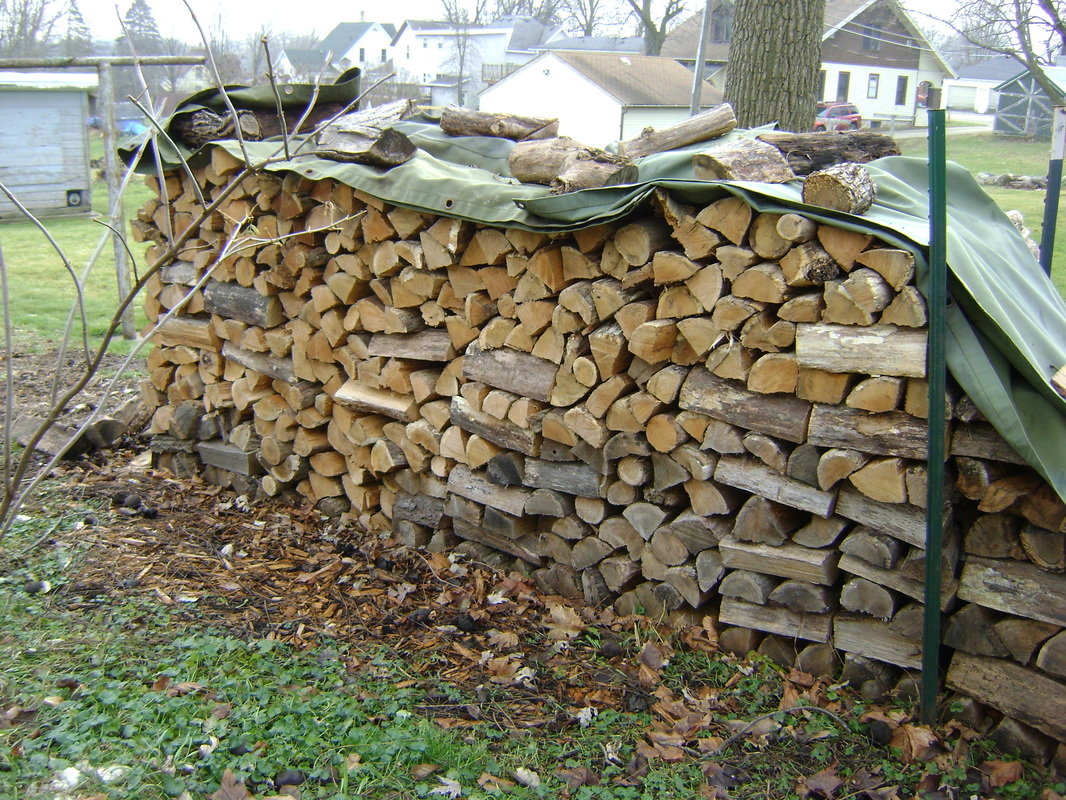
6. We cover just the top of our wood stacks with tarps to keep some of the rain and snow off. You don't want to cover the sides so you don't cut off the air circulation that lets the wood dry and age. In the photo below, you can see the older, aged wood on the bottom- it is grey. The new wood on the top is still light brown. Aged wood is the best to burn.
|
|
Ghost shot... What do you see?
|
7. We also use our smaller shed to store twigs, paper, and other kindling that we've gathered.

|
STORING WOOD INSIDE
|
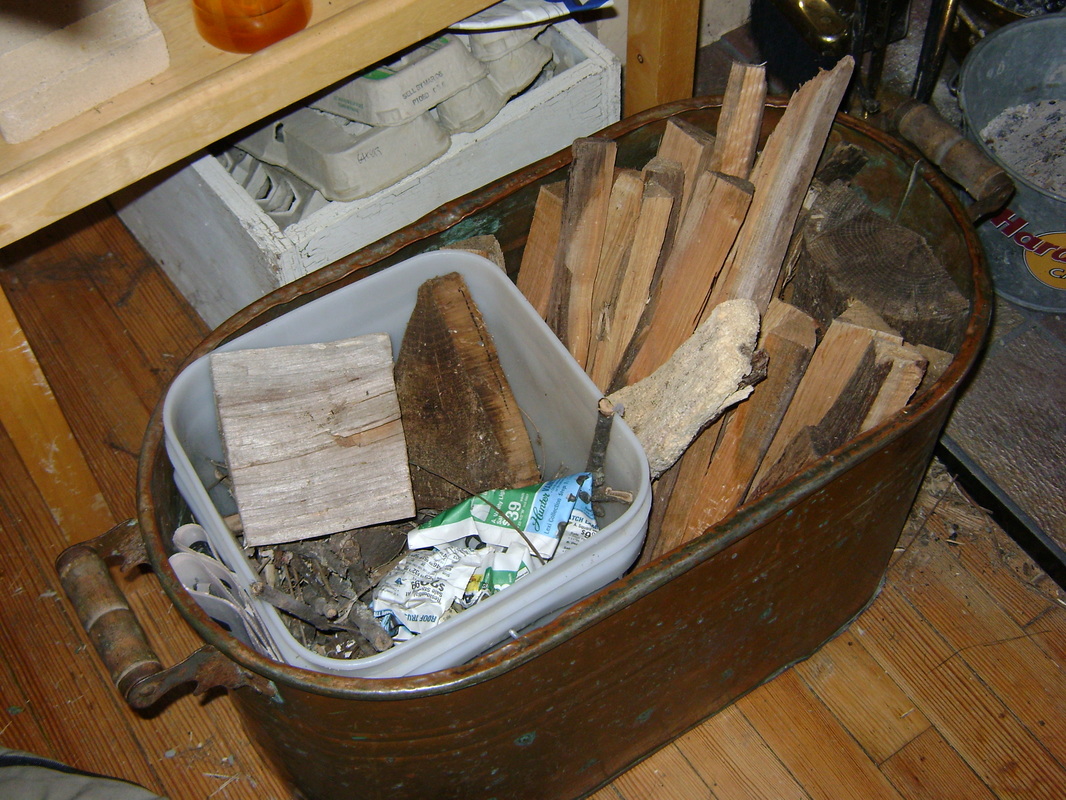
1. We keep this antique copper kettle next to our wood stove to store wood kindling. The white box behind it stores newspaper and egg cartons. We also have kindling in plastic buckets by the back door so we have fewer trips to the kindling pile.
|
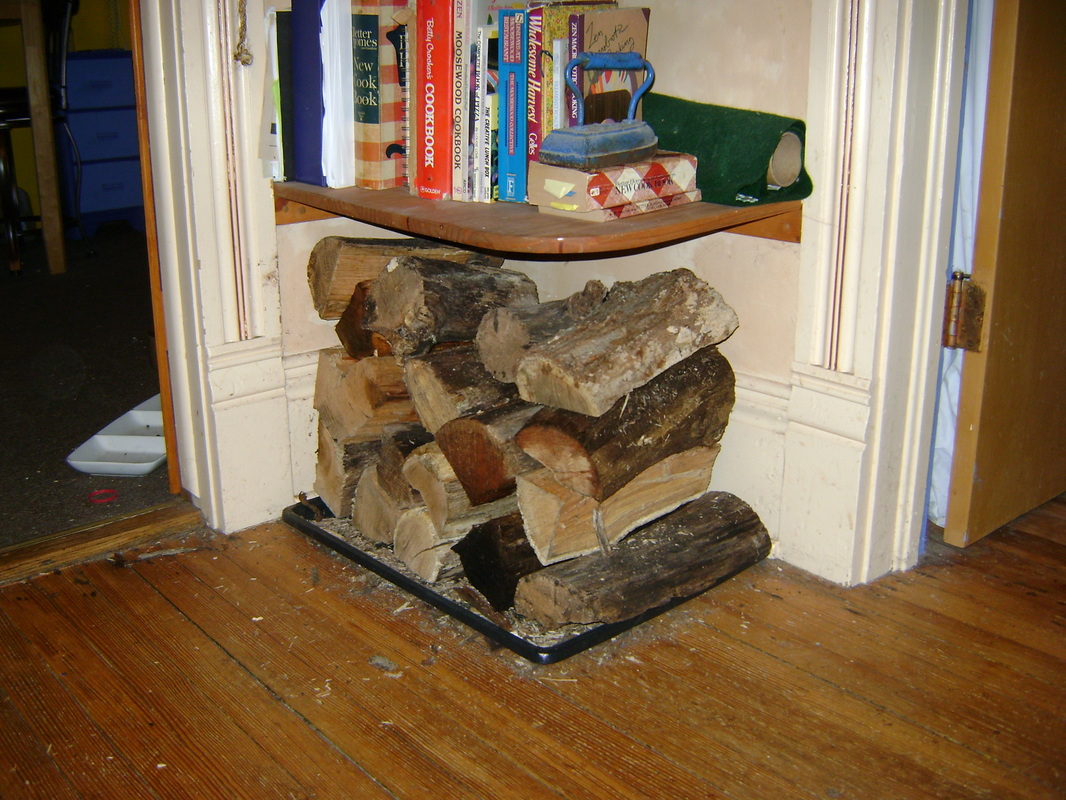
2. We keep a stack of logs in this corner area between two doors in same room in which we have the wood stove.
|
|
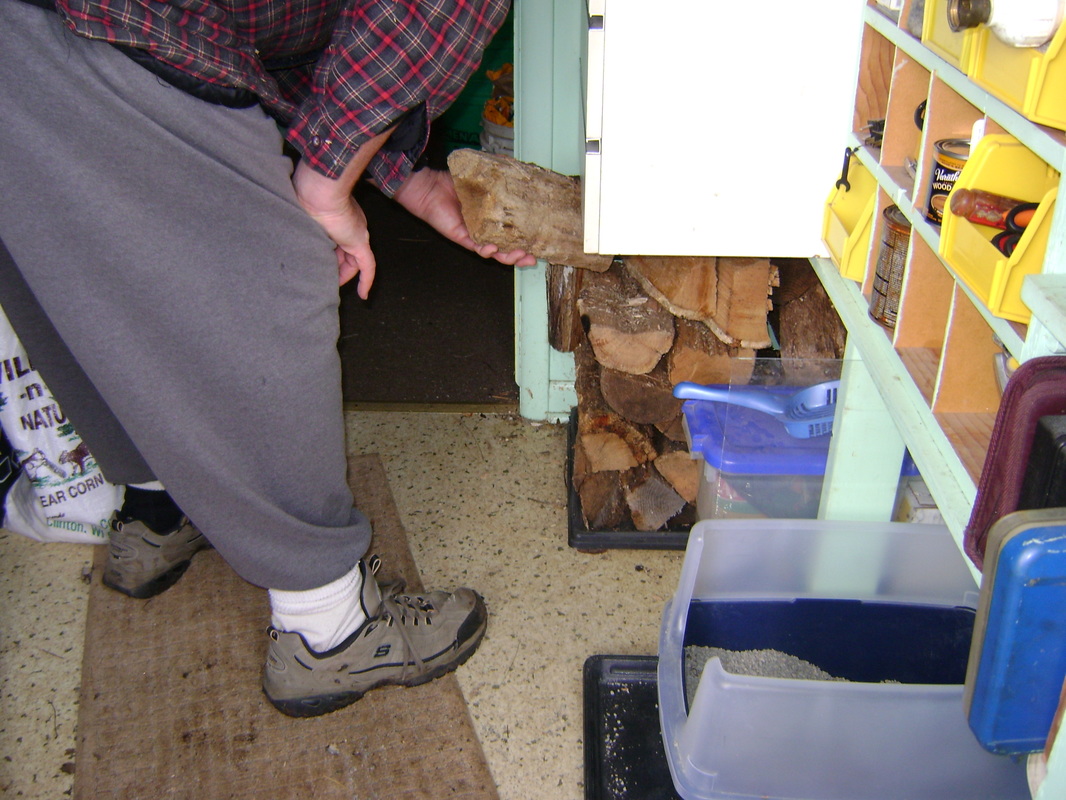
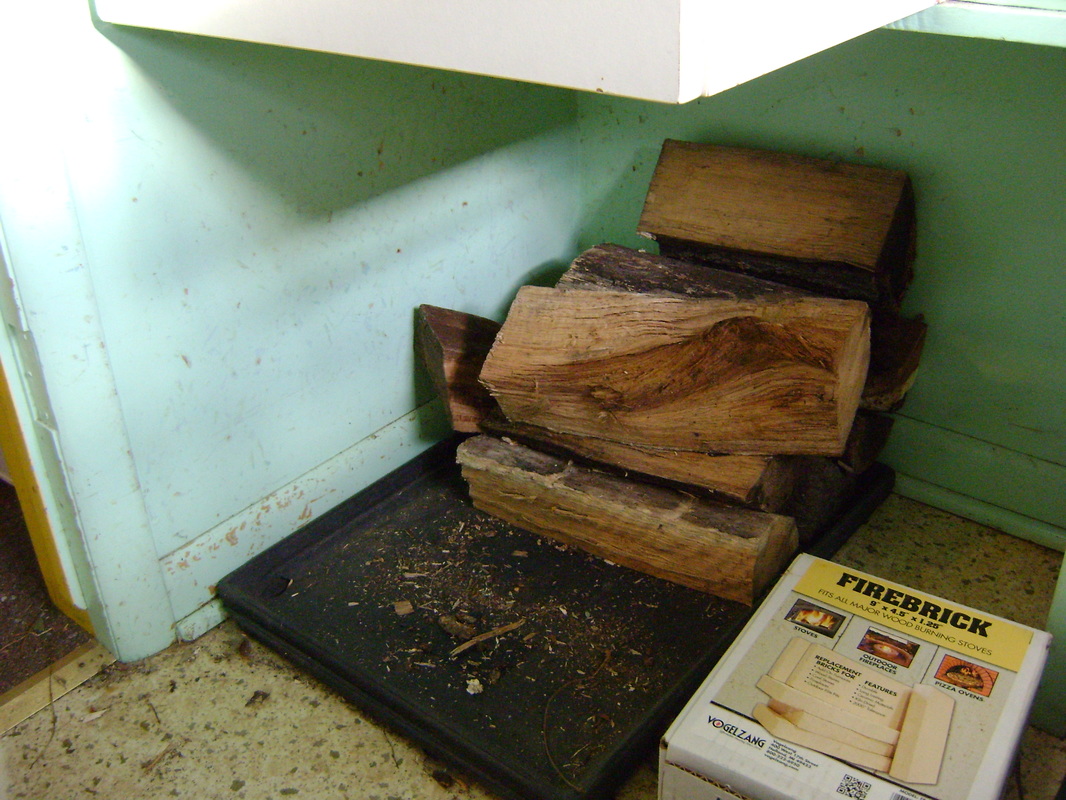
3. We have a second indoor storage area near the back door, in the utility room under another shelf. It's good to keep as much wood inside as you can, so that it drys off and warms up before you put it in the fire, and so you have it in case of emergencies.
|
4. The indoor piles can make quite a mess. We protect our floors a little by putting plastic trays under our log storage areas. We get these trays from Farm & Fleet in the pet department. They are sold as the bottoms for wire dog kennels.
|
RETURN TO THE MAIN WOOD STOVE PAGE