
Sunchokes have edible tubers.
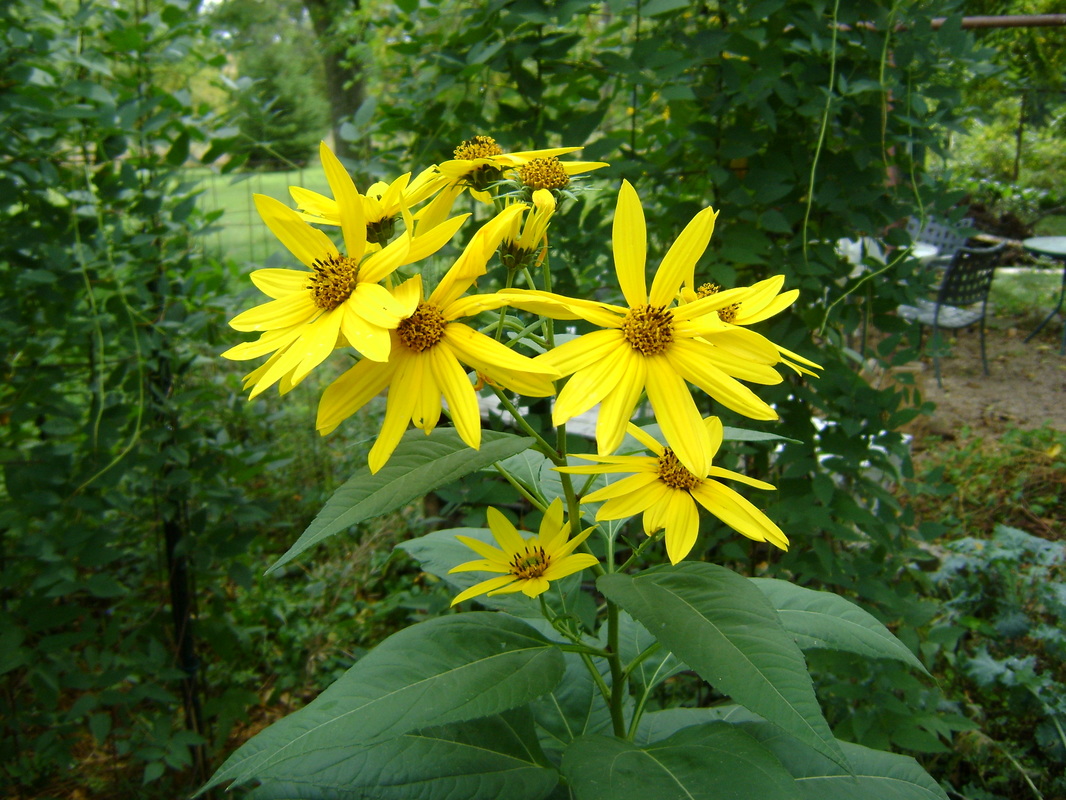
As members of the sunflower family, they have lovely late Fall blooms.
|
Perennial Vegetable:
|
They can grow prolifically in a small space.

There are many ways to eat them, including as a potato substitute.
|
GROWING SUNCHOKES
Summary from Theresa:
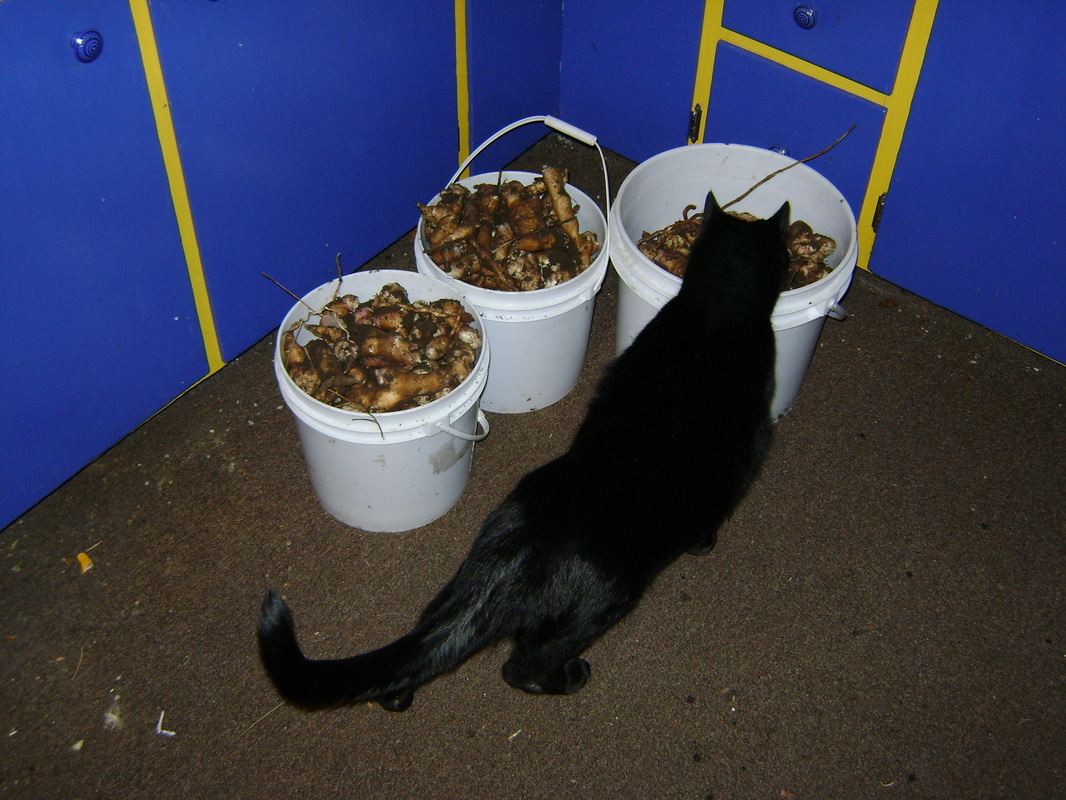
- Sunchokes are a wonderful perennial root vegetable to grow because they are incredibly prolific. This makes them great for growing in a tiny yard. They are our largest harvest- we can get around 50 pounds of edible tubers from our small patch, which is about 5 foot square.
- Sunchokes are native to North America and can grow throughout the United States and as far north as Zone 2. They were cultivated by Native Americans.
- Sunchokes prefer full sun, but we also have a patch growing in partial sun under our walnut trees. They prefer moist but well-drained soils.
- Be careful where you plant them. Any part of a tuber left in the ground will grow back, so they are hard to remove from an area once you've planted them there.
- Sunchokes can become invasive after a few years. We've had to surround our main patch with 12 inch metal flashing sunk into the ground. If you have more room, one farmer who was selling sunchokes at the farmer's market in Spring told me she kept their patch in control by mowing around it.
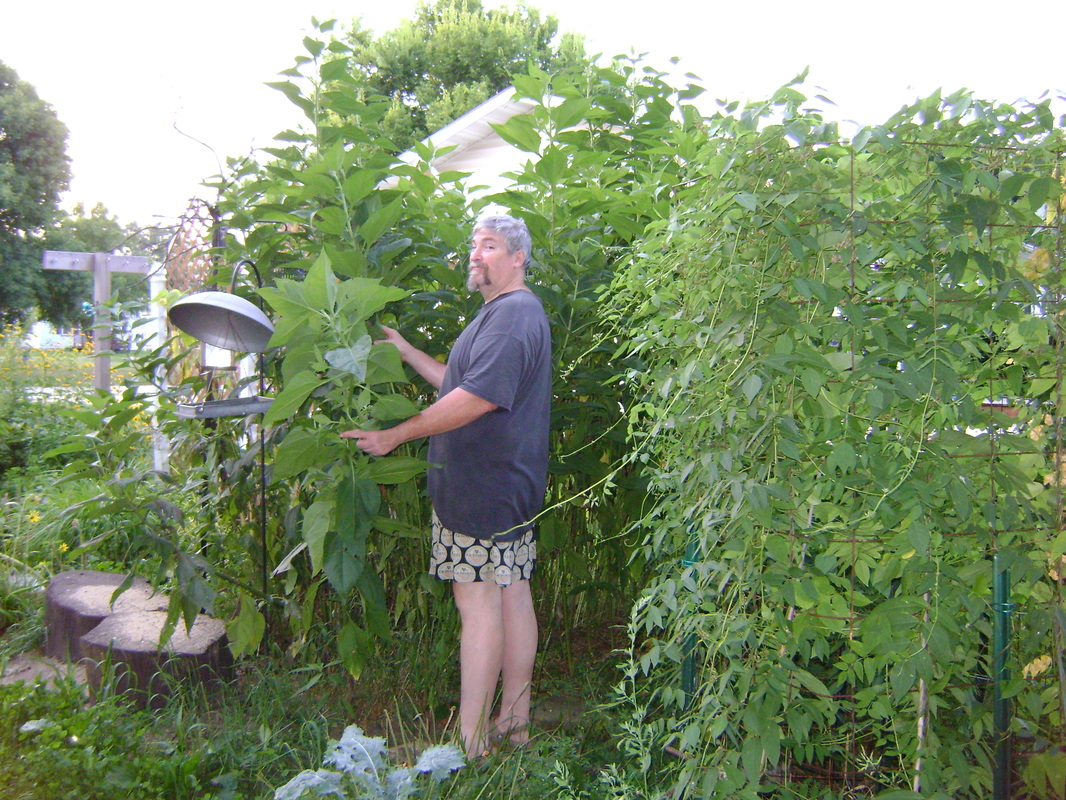
- Sunchokes die back to the ground in Winter, but we leave some of the dead stems in our patch behind the bird feeder in the Winter because they are good bird perches. They can grow to as much as 10-12 feet tall in one Summer. This makes them a good screen or wind break. Ours fall over in heavy winds, though, so we erected a fence behind them to keep them out of the neighbor's yard. I've also read that you can pinch back the growing tops when the plants get 2-3 feet tall, so that they become bushier instead of taller.
- Sunchokes contain inulin, a type of starch that stores energy in the roots. It can cause gas, since it is difficult to digest by humans, although we haven't found this to be much of a problem. If you eat them often enough, they are easier to digest. They are also easier to digest when cooked than when eaten raw. Inulin doesn't raise blood sugar levels, so can be part of a diabetic diet. Apparently, research has also shown that inulin helps you absorb calcium and increases beneficial microbes in the digestive tract. The inulin level decreases over the Winter, turning to fructose, which makes the Spring harvested tubers so sweet.
- Sunchokes are a member of the sunflower family, and produce small, yellow sunflowers. They bloom in very late Fall, when everything the other flowers in our yard have died, and are a welcome addition. I've read that the seeds are edible like other sunflowers, but so small they are not worth trying to dehull. (Bear's cook of anarchy is wondering what would happen if you ground the seeds without dehulling them... more fiber?)
- There are many different varieties of sunchokes available. I recommend planting a kind that is not knobby, otherwise they become difficult to clean. I bought ours from Fedco Seeds, the Clearwater variety. I have also seen chokes offered through the Seed Saver's Exchange annual membership catalog. Both send tubers for planting.
- This book has a description of some of the different varieties:
How to Grow Perennial Vegetables: Low-maintenance, Low-impact Vegetable Gardening by Martin Crawford. ISBN: 978-1-900322-84-3.
|
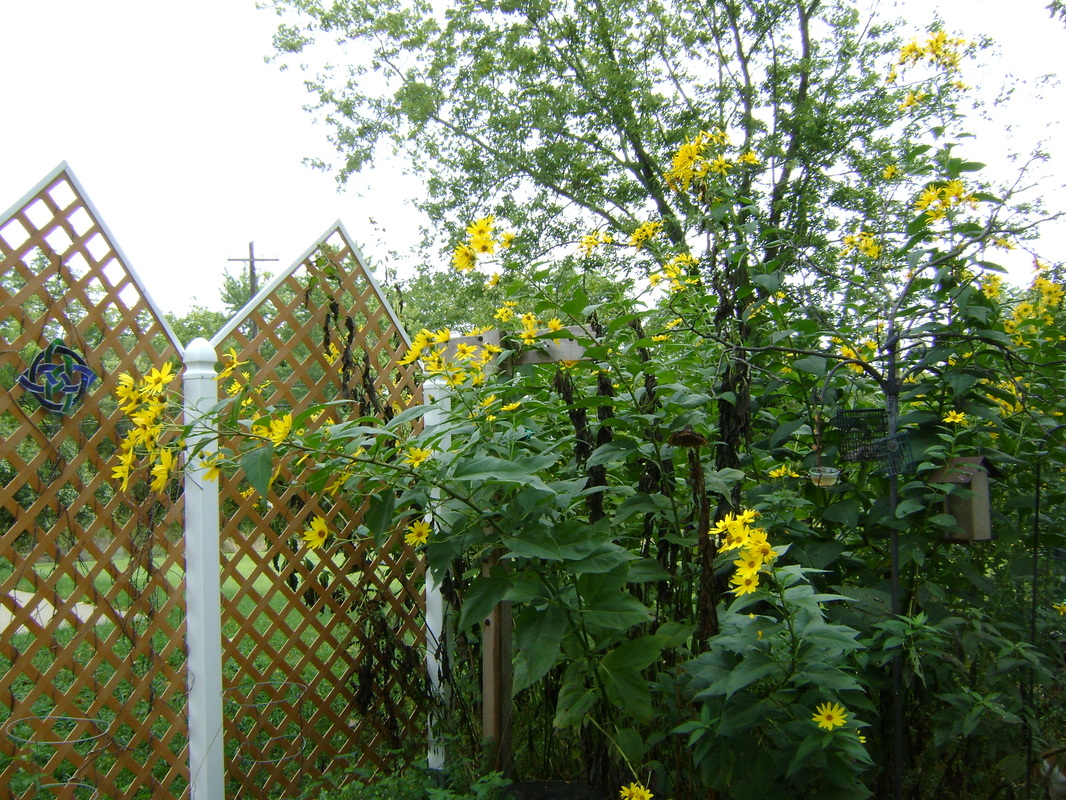
1. This is our main sunchoke patch- in the area behind our bird feeders. It is roughly five feet square...
|
2. ... and we can get around 50 lbs of tubers from it.
|
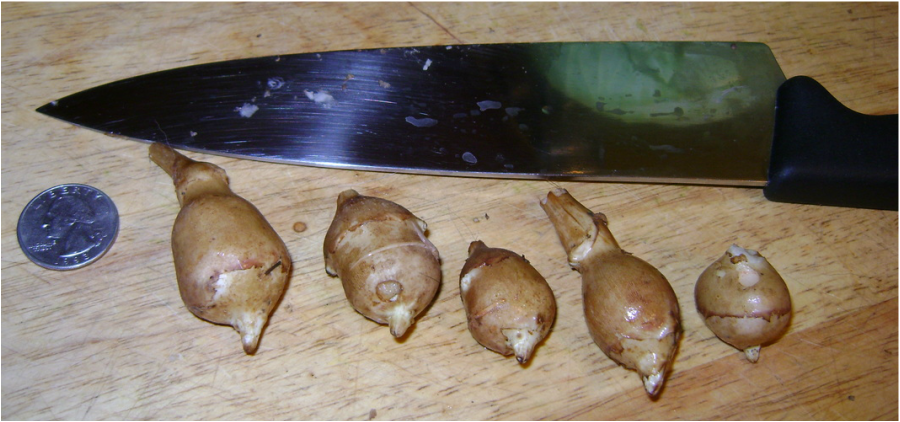
3. Here are what some of the smallest tubers look like. If you're planting them the first year, put the eye/growing tip up (the eyes are all pointed away from the knife in the photo below). If you have larger tubers, you can cut them up, leaving one eye per piece, and plant those, like you can do with potatoes. Plant them 1 to 2 feet apart, about 6 inches deep.
|
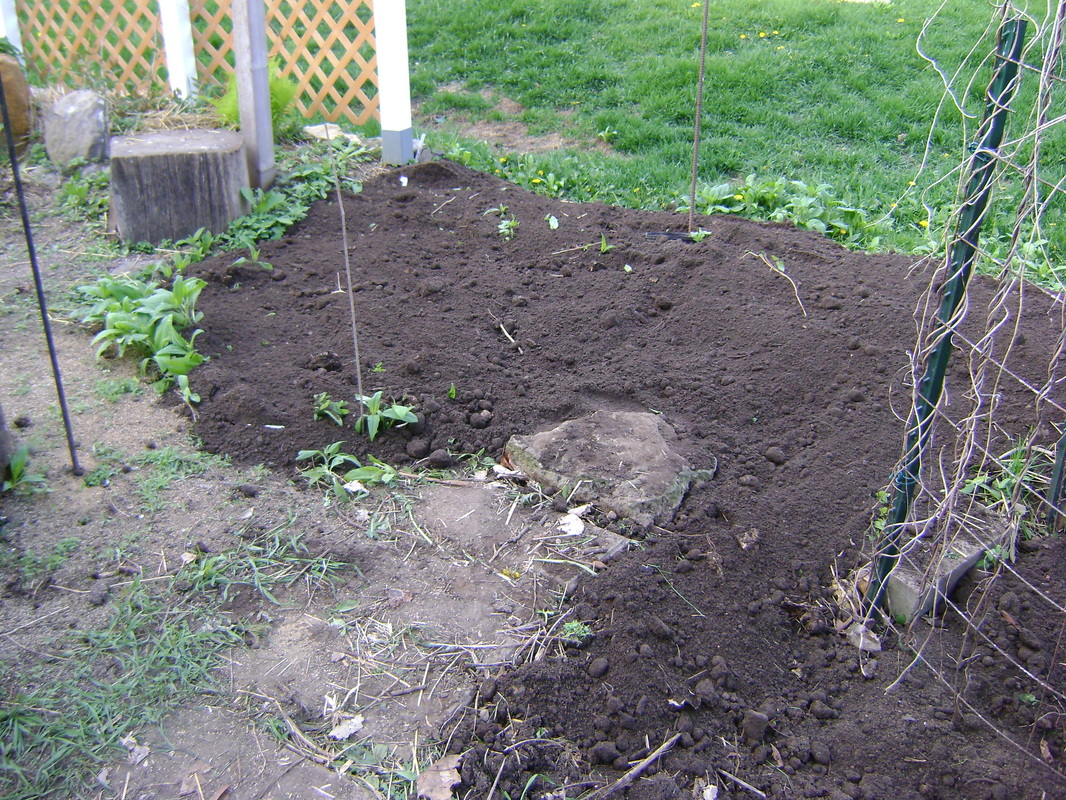
4. We seem to get a bigger harvest if we add a layer of compost to the area in the Spring. In our area, we also usually need to water them in the mid-Summer heat if it hasn't rained for a while.
|
5. After a few years, our patch started to grow beyond it's boundaries, so we surrounded it with 12 inch metal flashing sunk into the ground to keep the plants where we had room for them.
|
Sunchokes Through the Seasons:
|
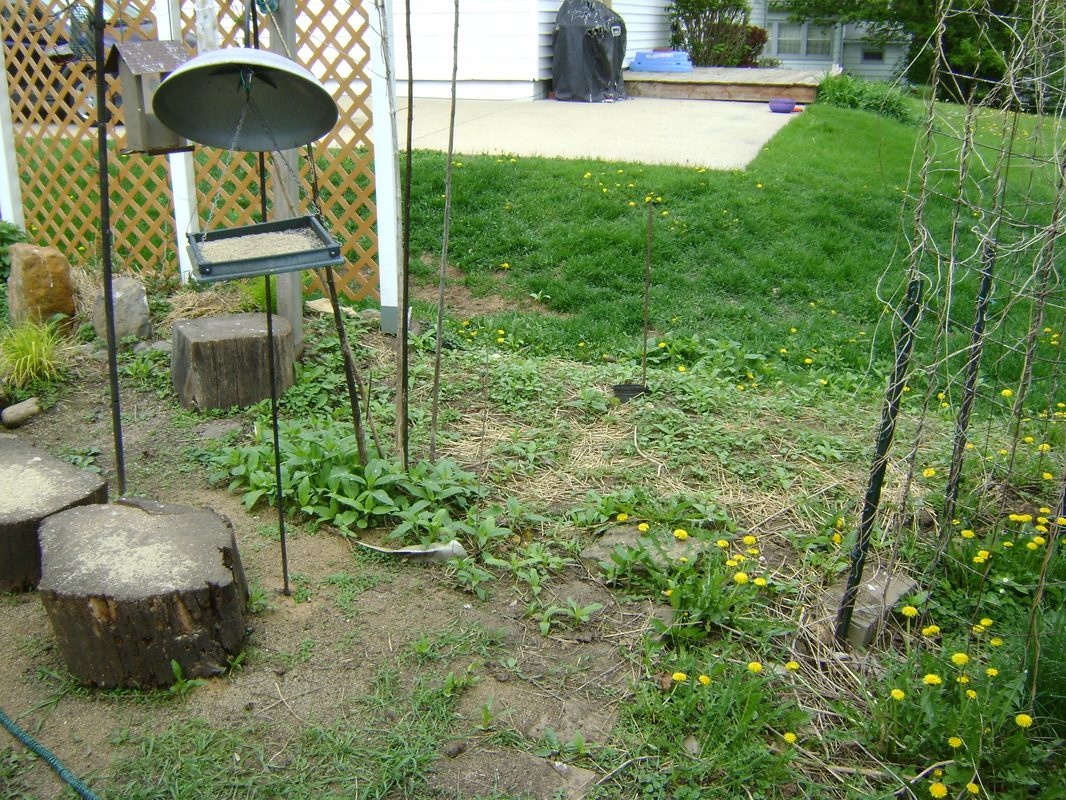
1. Here's our sunchoke patch in early Spring , as the plants are just emerging from the ground.
|
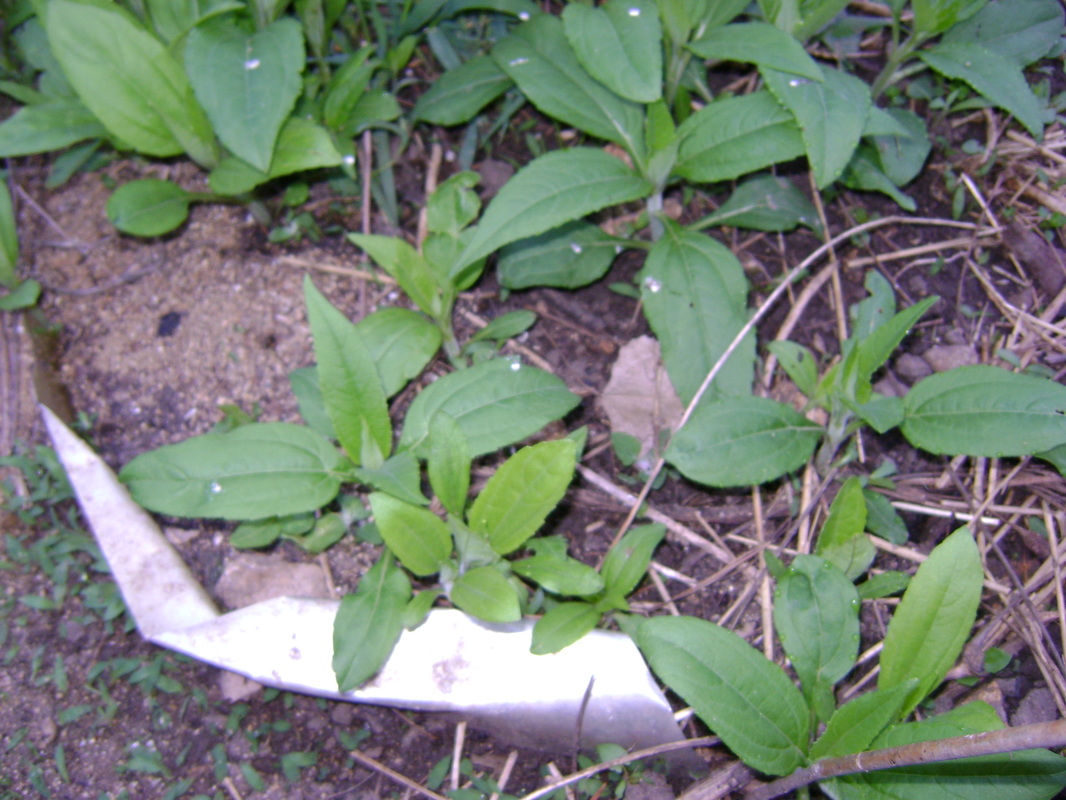
2. Here's a close up of the short Spring plants in early May:
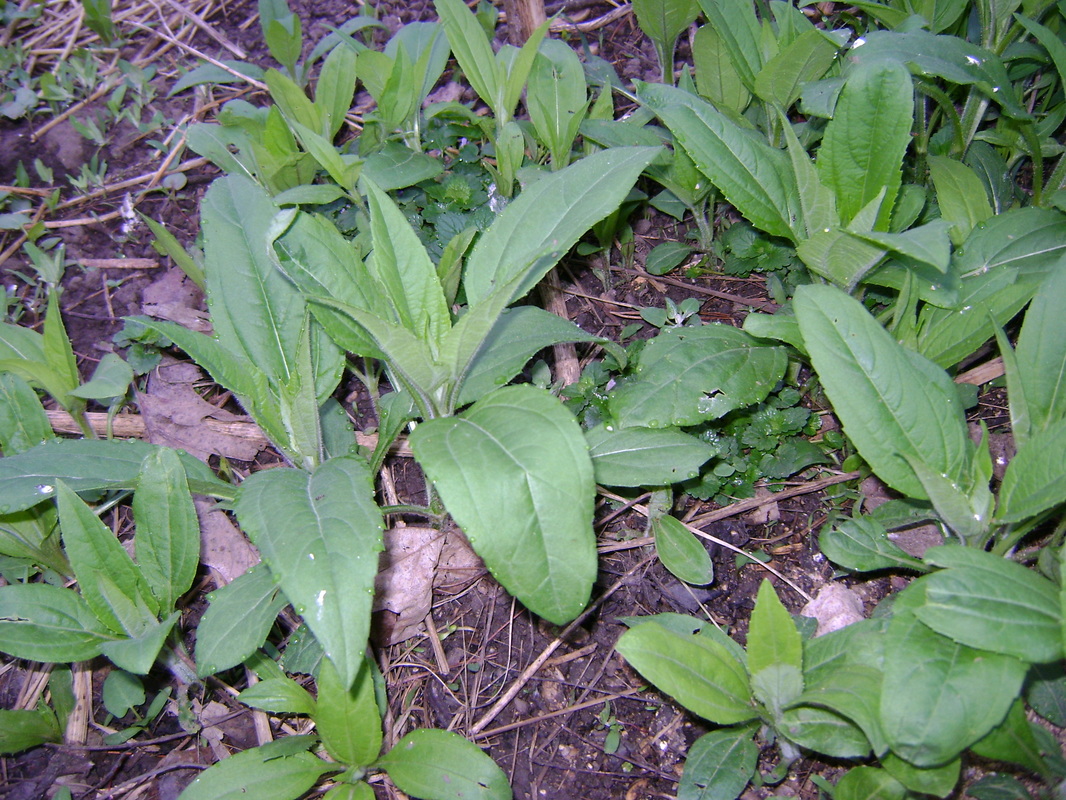
|
|
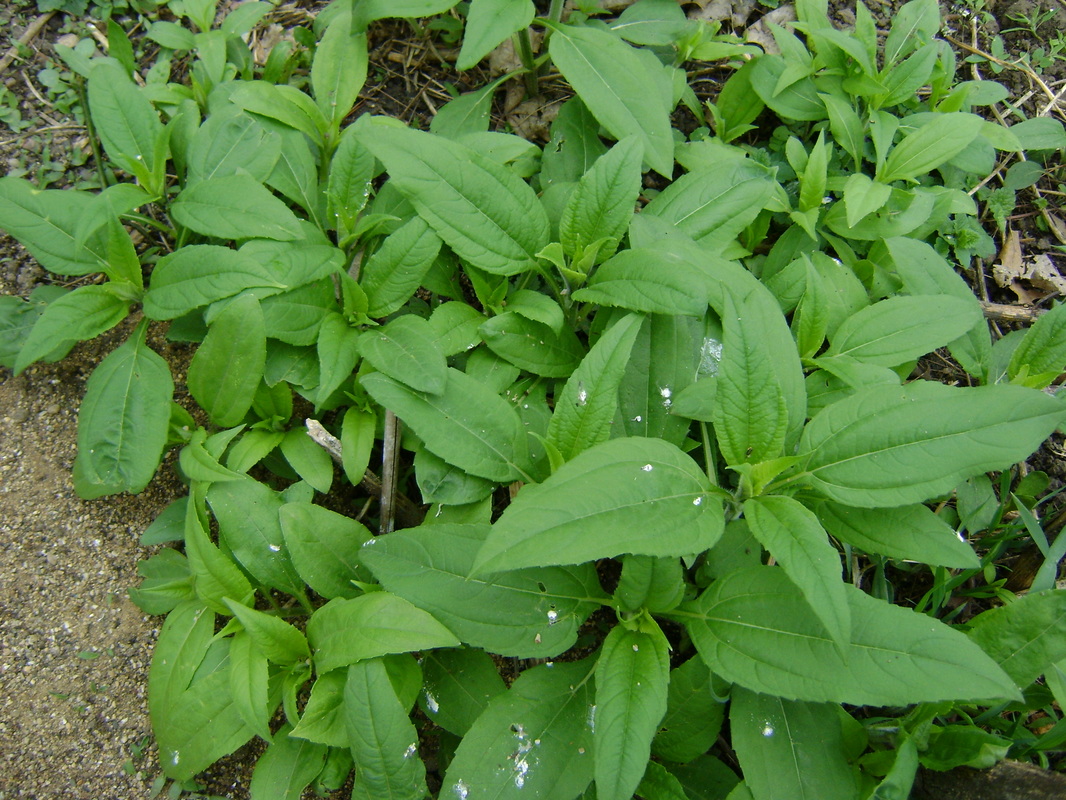
3. Here's another shot of the Spring plants, but in an area where we didn't harvest the Fall before. You can see the plants are growing too close together. Sunchokes patches actually benefit from harvesting, so they don't get too crowded.
|
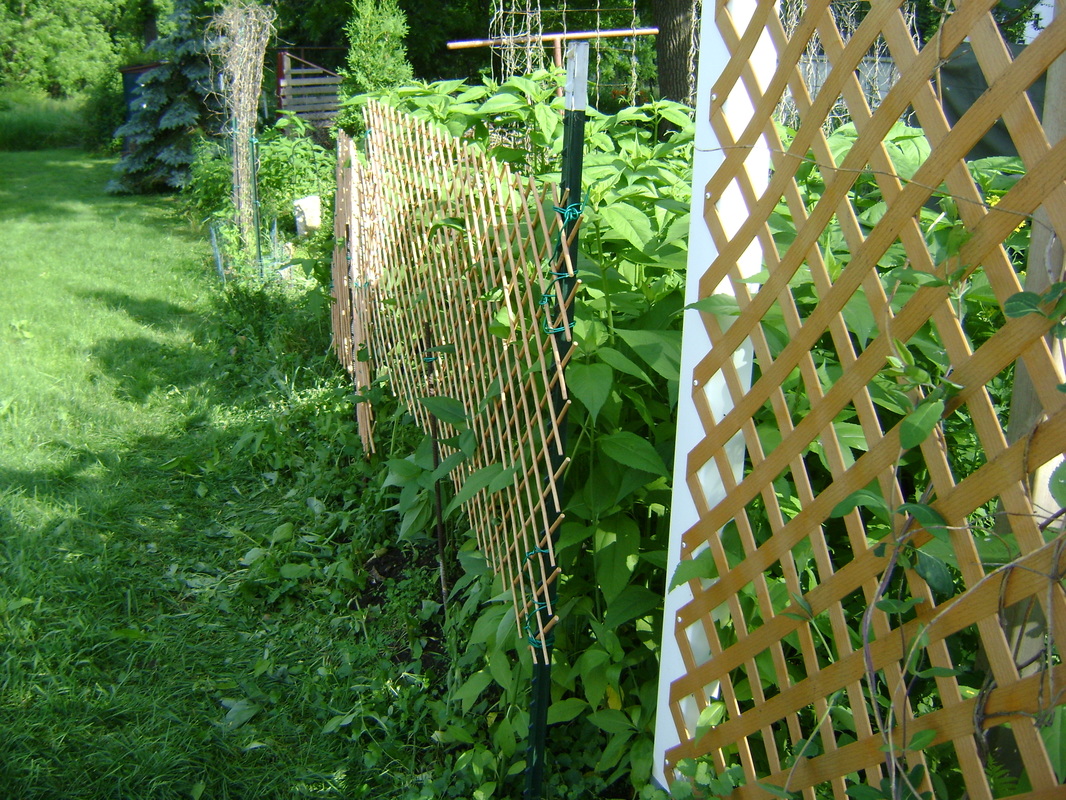
4. Here are the sunchokes in mid-June, when they're several feet tall, behind the crisscrossed bamboo fencing, which we installed to keep the taller plants from falling into the neighbor's yard.
|
|
|
|
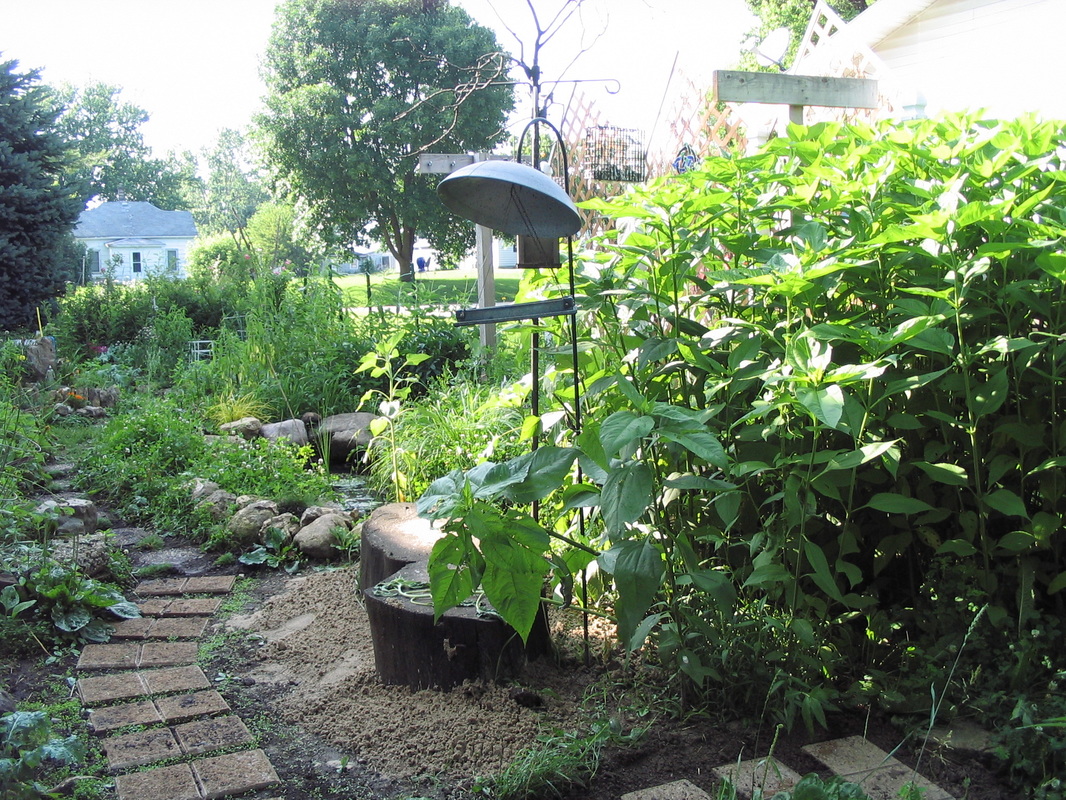
5. Here are the sunchokes in early July (on the right). Now they're as tall as the bird feeders. They become a nice little forest for the birds, although the neighborhood cats like to hang out there too.
|
6. Eventually, they will be the tallest plant in our yard (except the trees of course). Bear is 6'4" and standing in front of the chokes.

|
|
7. In late September/early October they will get beautiful blooms when most of the other flowers have died.

|
8. Eventually, our sunchokes grow beyond our 8 foot trellis (on the left). Some of them will likely fall over, so grow them where that won't bother you if you can.
|
9. They are so tall that they are quite striking in the Fall garden.
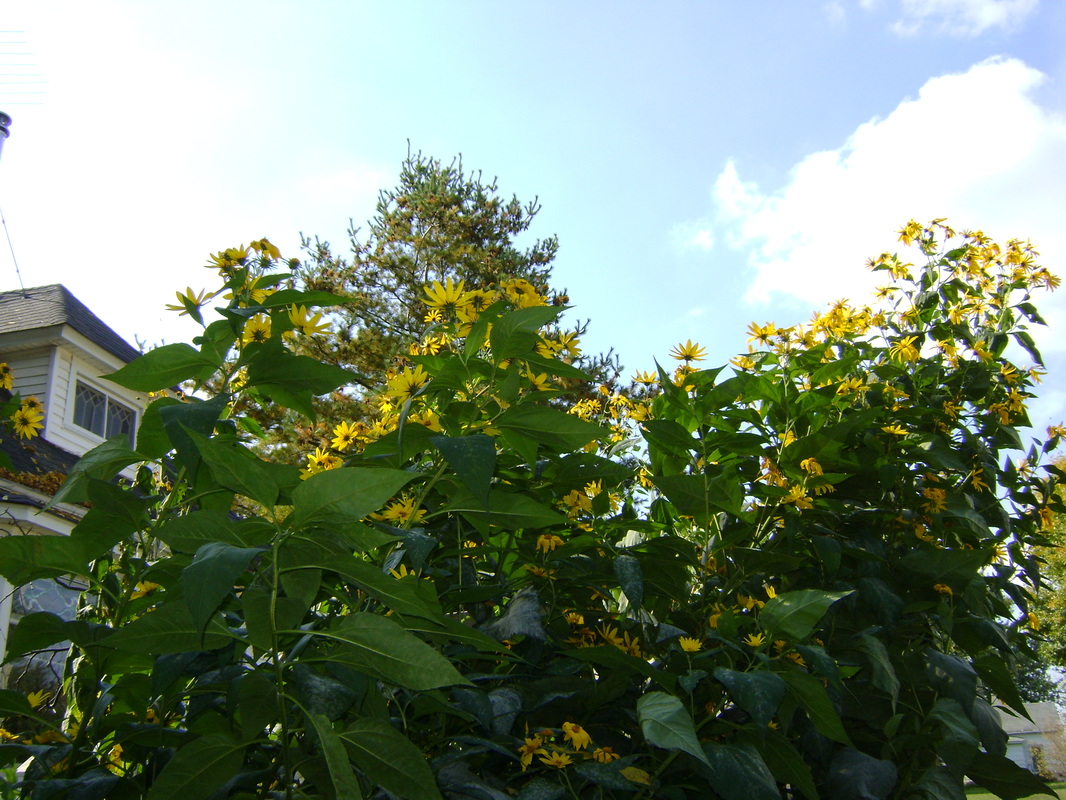
Bear is singing: It's gonna be a bright, briiiight ... sunchoke day...
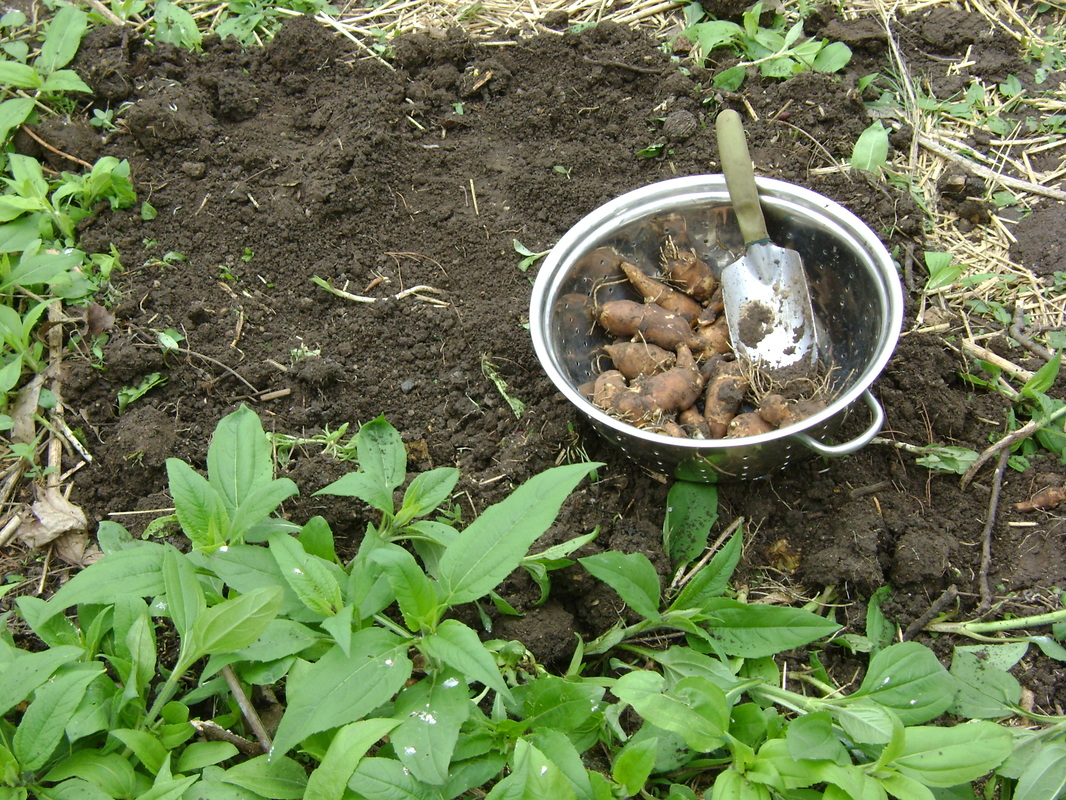
HARVESTING SUNCHOKES- in the Fall
|
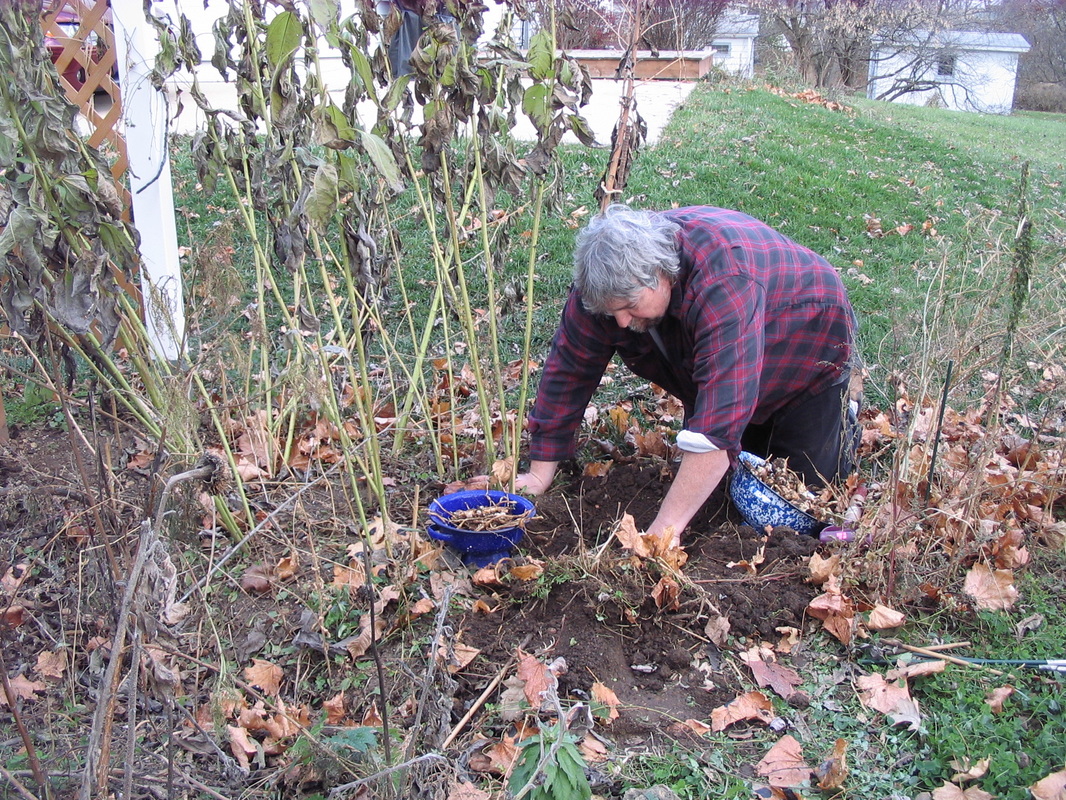
1. Dig up sunchokes in the Fall, after the plants have died back. If you can, wait until after a few frosts, which will make the chokes sweeter and remove some of the inulin that can cause gas in some people. We usually harvest in early November, waiting as long as we can to dig them up right before the ground freezes.
|
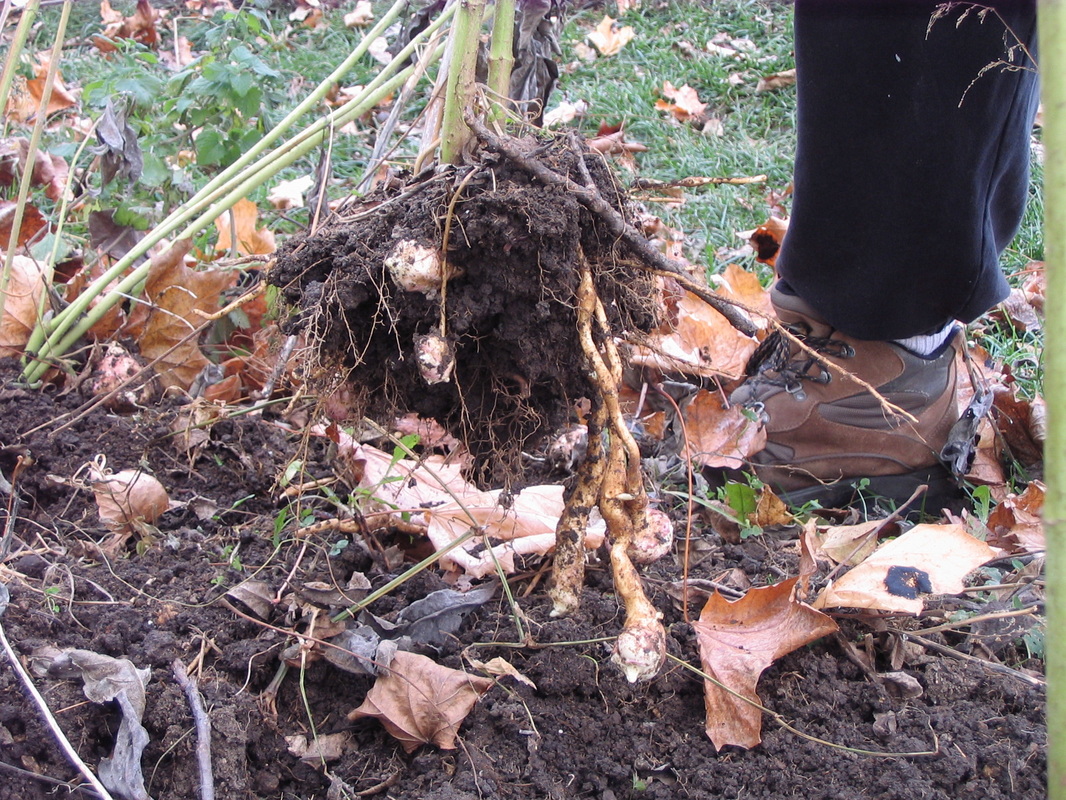
2. Cut down the sunchoke stems and add them to your compost pile, your wildlife brush pile, or use them as kindling. Sometimes you can pull up the plant and they'll be a clump of sunchokes dangling from the bottom.
|
|
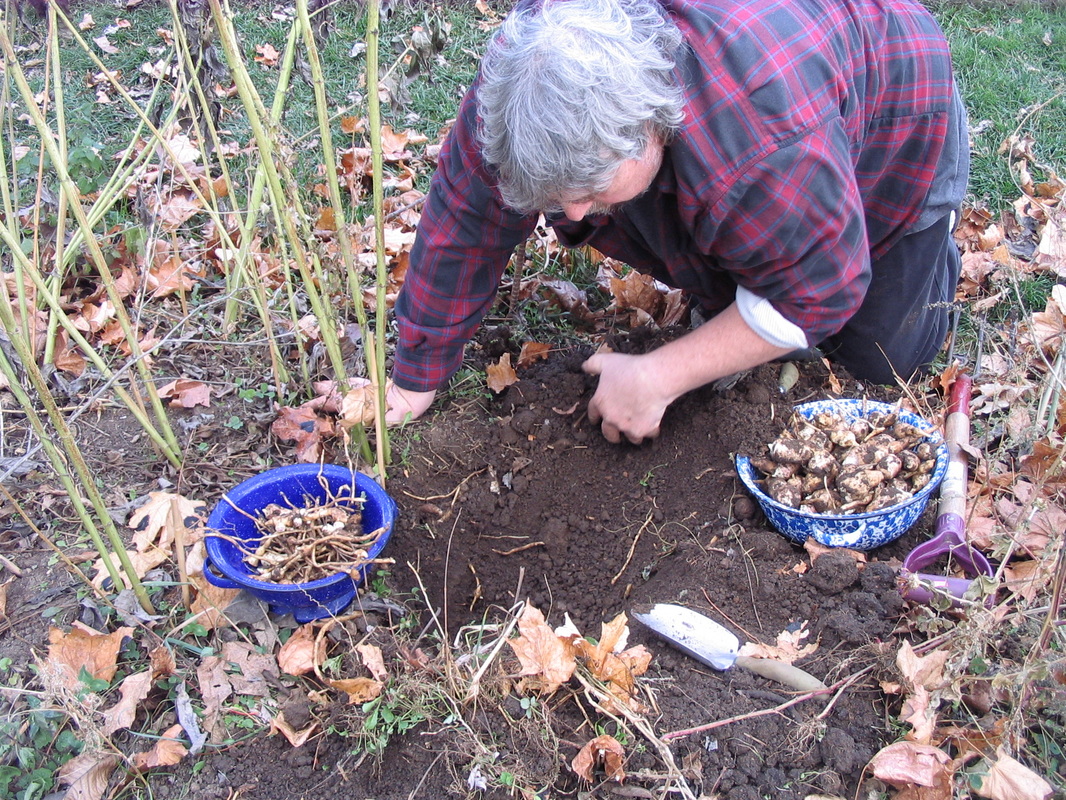
3. Use small hand tools (a spade or trowel) to carefully dig up the chokes... along with your hands. Bear usually does this job, and treats it like a treasure hunt.
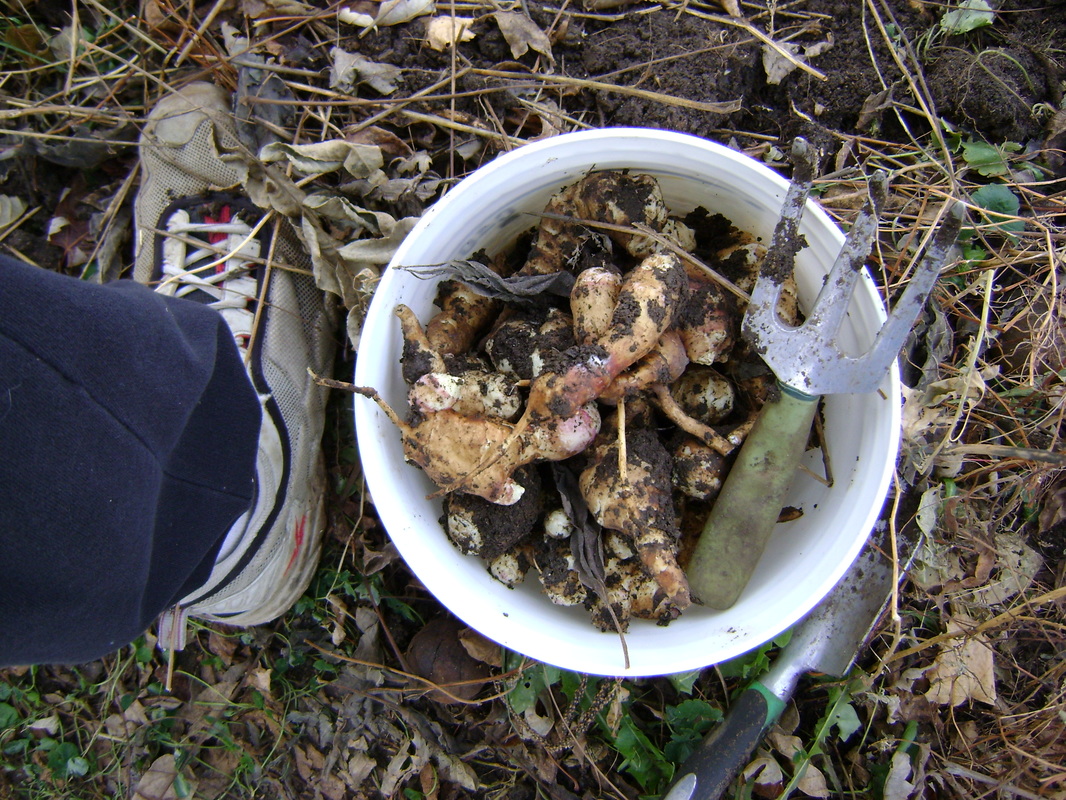
|
4. He says you should dig a trench about a foot down, then use the spade to dig under the adjacent area, popping up the dirt and hopefully the sunchokes, so that you don't stick your tools through the sunchokes (which will happen sometimes anyway- just eat those first). Pile the dirt you dig up into the first trench you made. Repeat until you've covered the area.
|
|
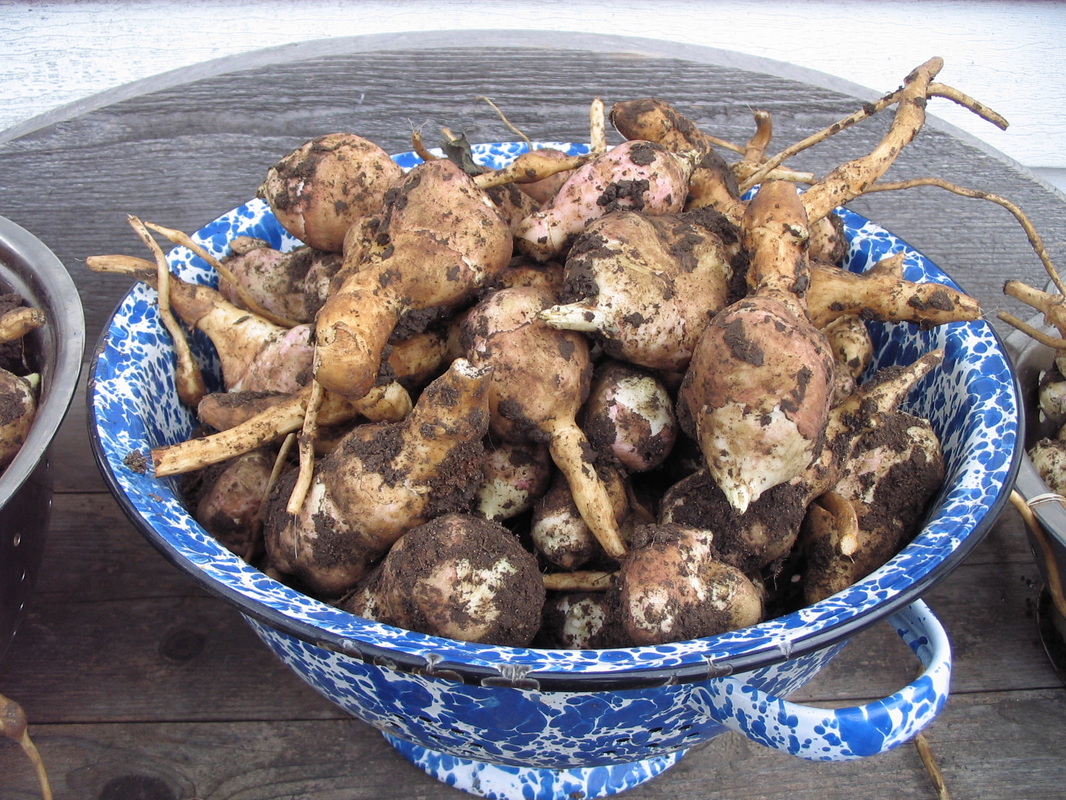
5. Keep the large sunchokes, and leave the smaller ones in the ground to grow next year.
|
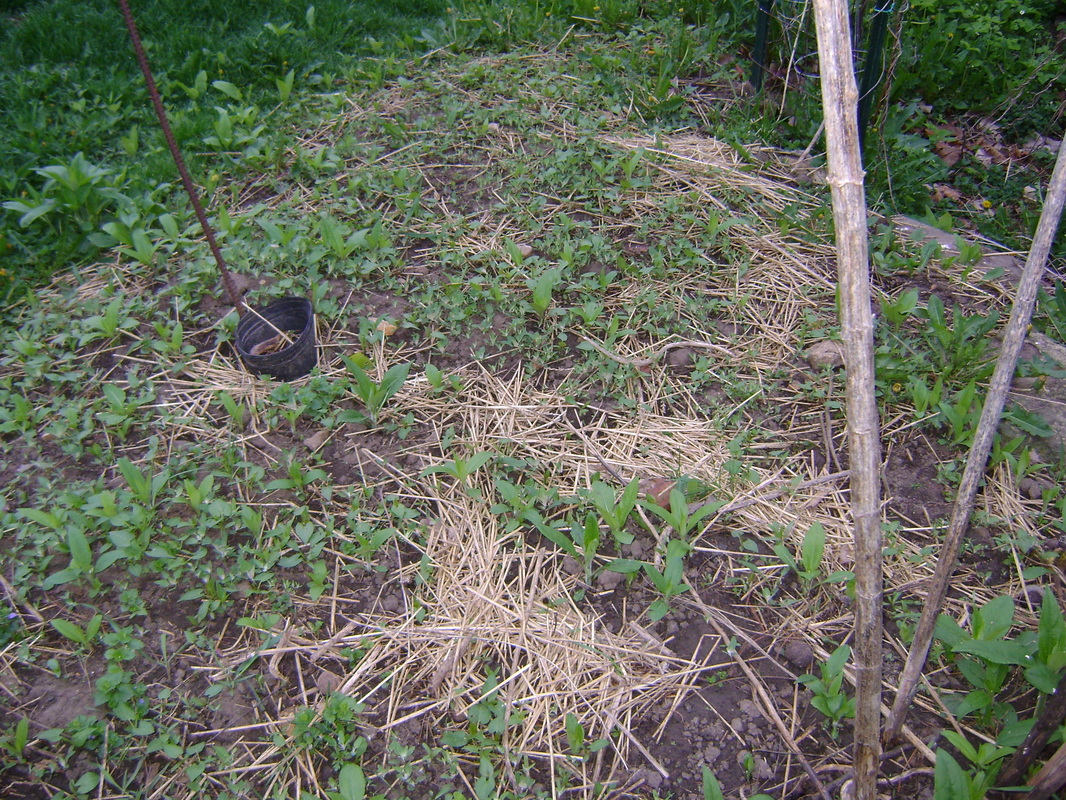
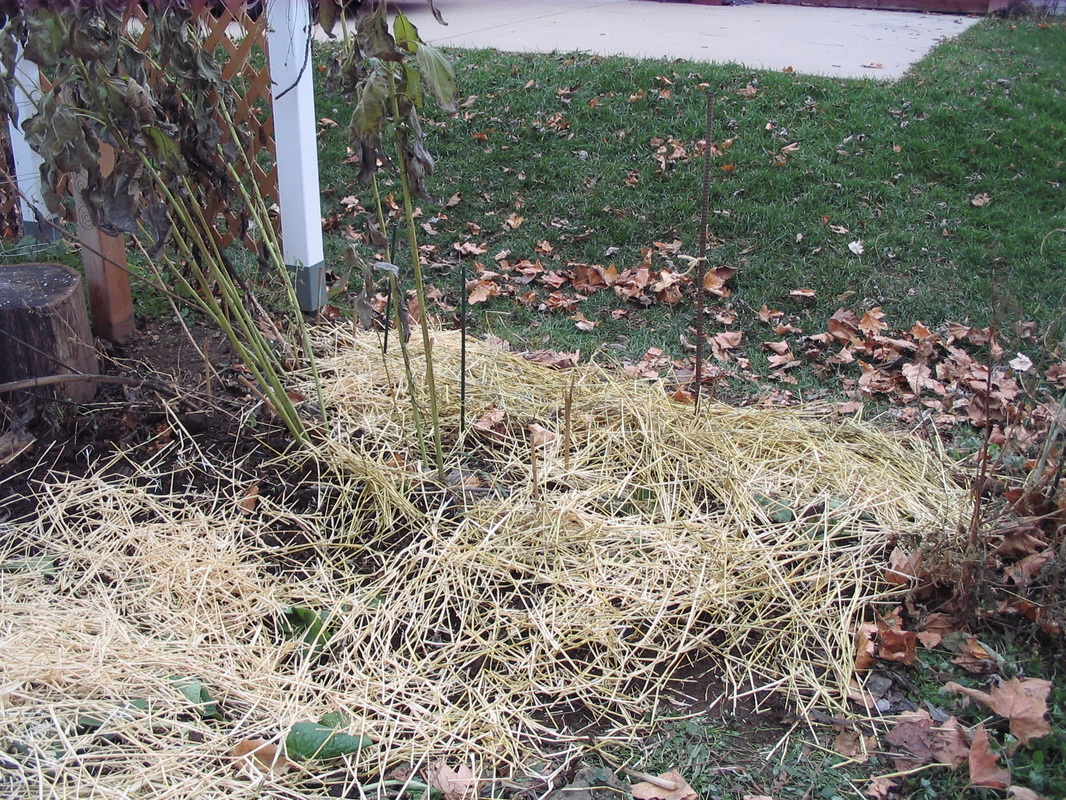
6. After the harvest, remember to protect the rich topsoil that you've disturbed so it doesn't disappear over Winter. We spread a layer of straw on our patch. Note we've left some sunchokes plants undisturbed- you can see their stems on the left. These will be for harvesting in the Spring and they are good bird perches in the Winter.
|
HARVESTING SUNCHOKES-
|
Early Spring harvest of sunchokes.
|
CLEANING SUNCHOKES
|
1. Cleaning the soil off of all the sunchokes you've been lucky enough to harvest can be time consuming, so Bear recommends cranking up the tunes, grabbing a drink, and pulling a seat up to the sink.

|
2. We like to fill a tub with water and soak the sunchokes to remove some of the dirt.

|
|
3. Then we scrub each choke by hand with a vegetable scrubber.

|
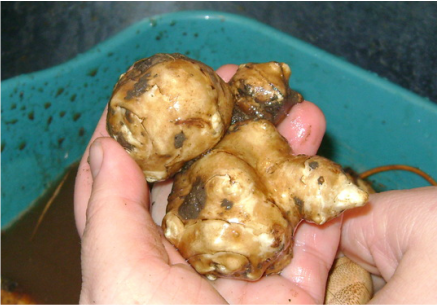
4. This is why it's good to plant a variety that isn't generally knobby. Otherwise they look like the choke below. It's hard to get the soil out from the nooks and crannies. A nail brush or a toothbrush are helpful for removing dirt from the hard to reach areas. (Don't know why this is so much knobbier than all the others?)
|
|
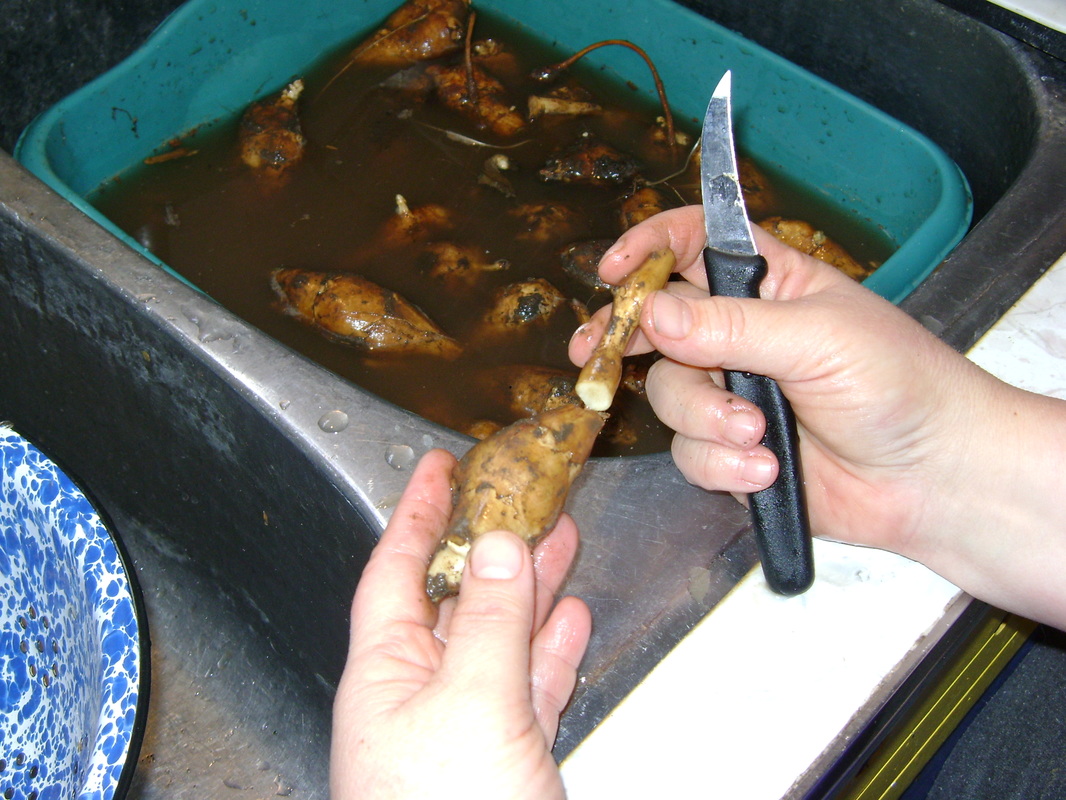
5. You should cut or snap off any of the skinnier roots that grow between the tubers.
|
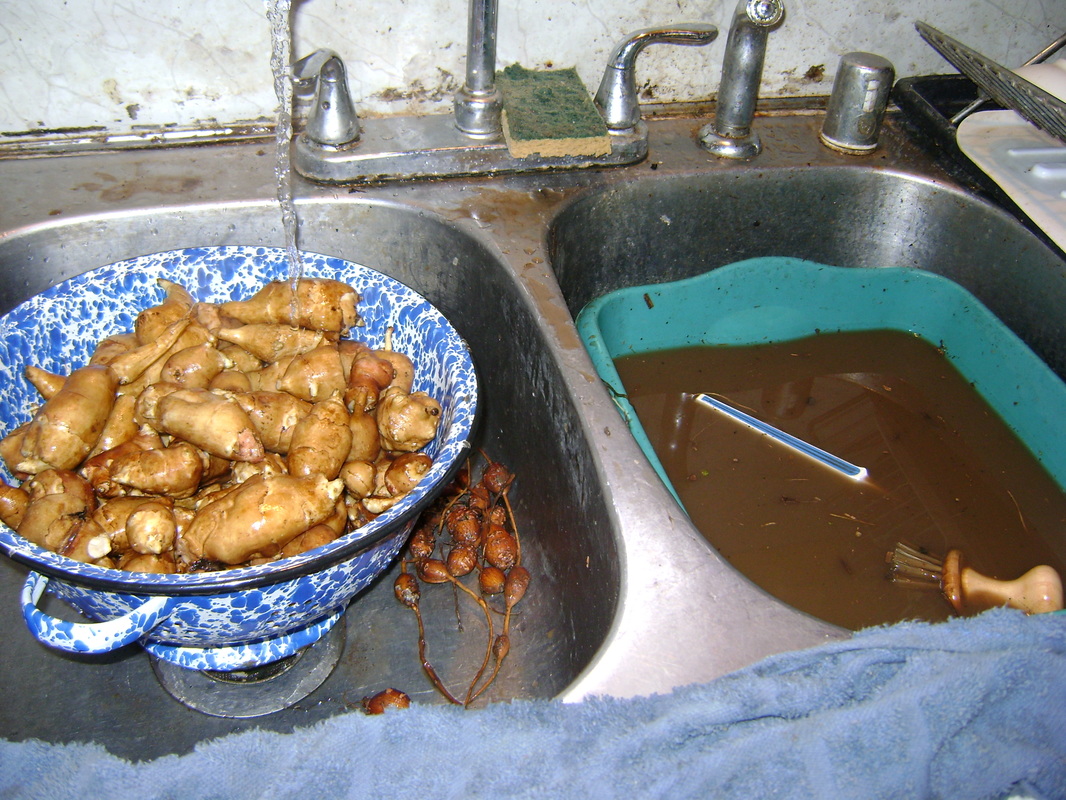
6. We put the hand washed tubers into a colander and give them one more rinse.
|
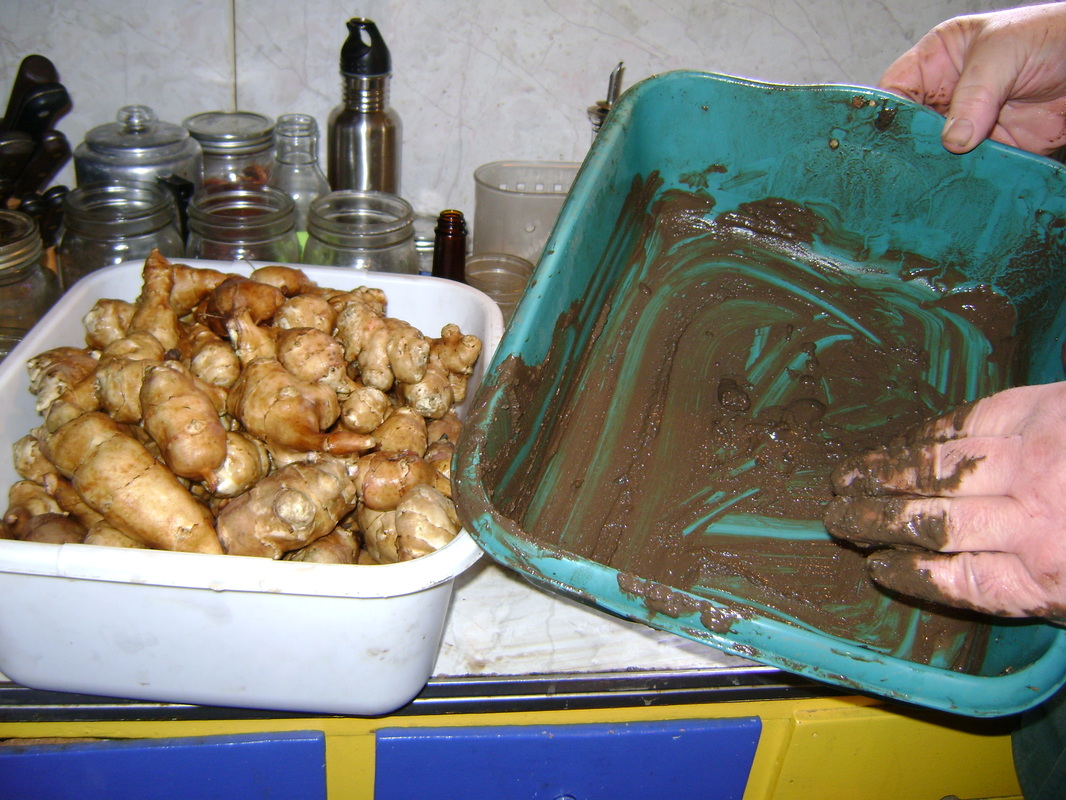
|
7. We end up with a tub of beautiful tubers and a tub of mud. Don't wash the mud down your sink or it will likely clogg it.
|
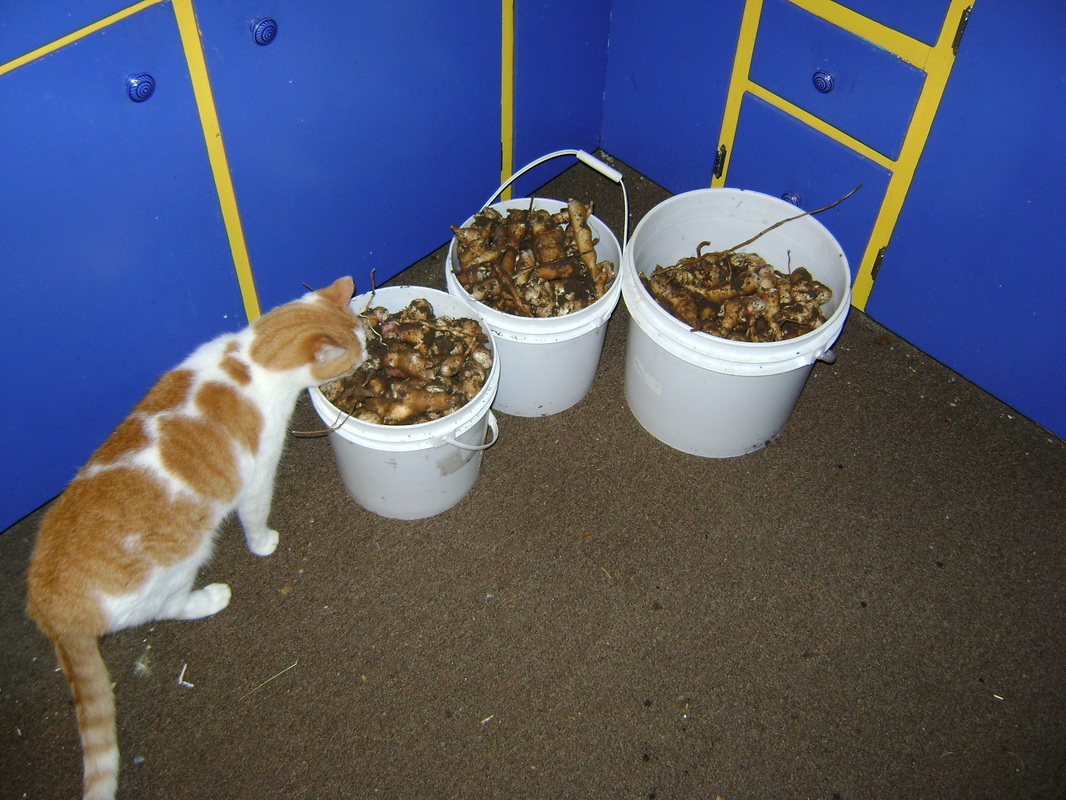
8. We get quite a lot of sunchokes from our tiny patch, so it takes a while to clean them all. You could probably put them in the root cellar (see below) with the dirt on them, but then you'd have to clean them every time you eat them. We prefer to do it all at once.
|
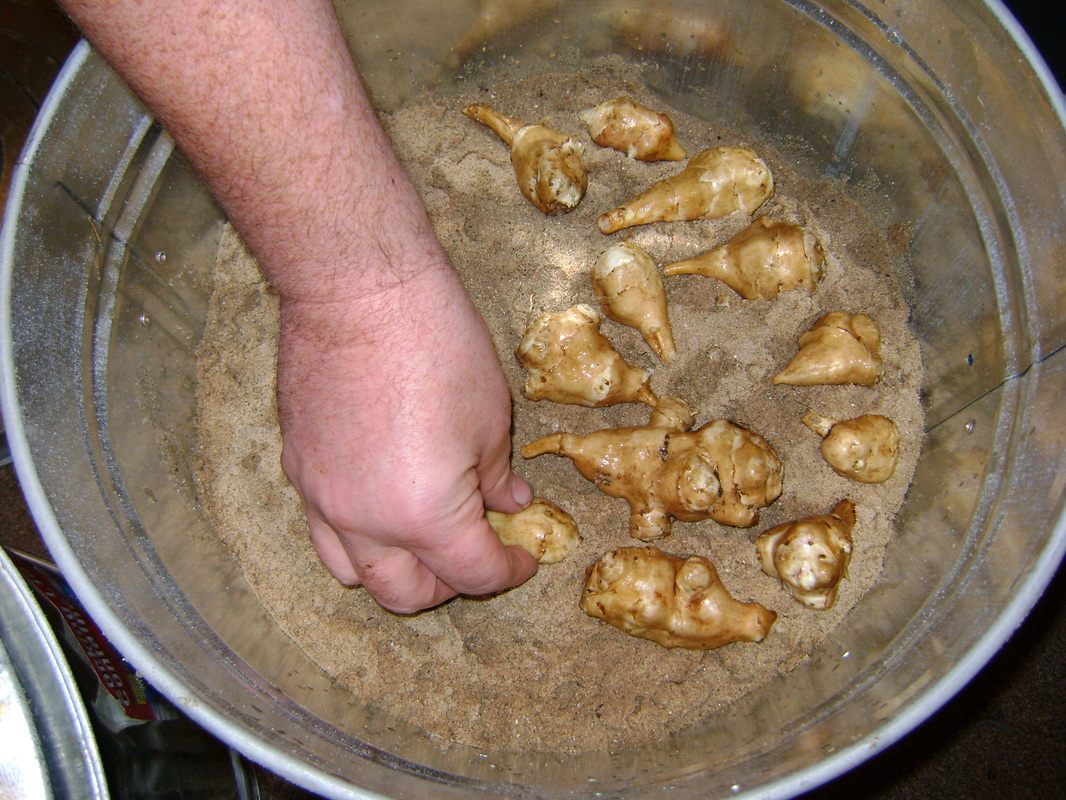
STORING SUNCHOKES- Keep them Cool & Moist
|
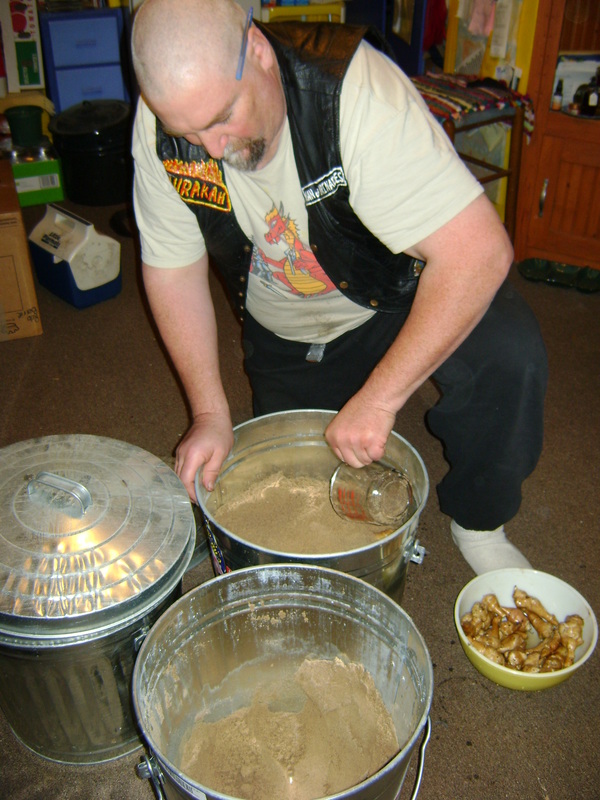
Bear burying sunchokes in wet sand to store them in our root cellar.
|
EATING SUNCHOKES
We treat cooked sunchokes largely like potatoes, and have substituted them successfully in many potato recipes. Note, though, that they cook much faster than potatoes and don't hold their shape as well. If you fry them, they get much mushy instead of crispy. Some recipes will call for peeling the chokes, which we have never done. It would take more patience than we have. However, we also never peel our potatoes.
Sunchokes can also be eaten raw. They have a texture somewhat like water chestnuts, and are good in salads. Spring harvested sunchokes are really good raw because they are so sweet.
Sunchokes can also be eaten raw. They have a texture somewhat like water chestnuts, and are good in salads. Spring harvested sunchokes are really good raw because they are so sweet.
Garlic Mashed Sunchokes:
This is an Alton Brown recipe for garlic mashed potatoes that adapts well to sunchokes. It's a faster recipe than many of the others we use.

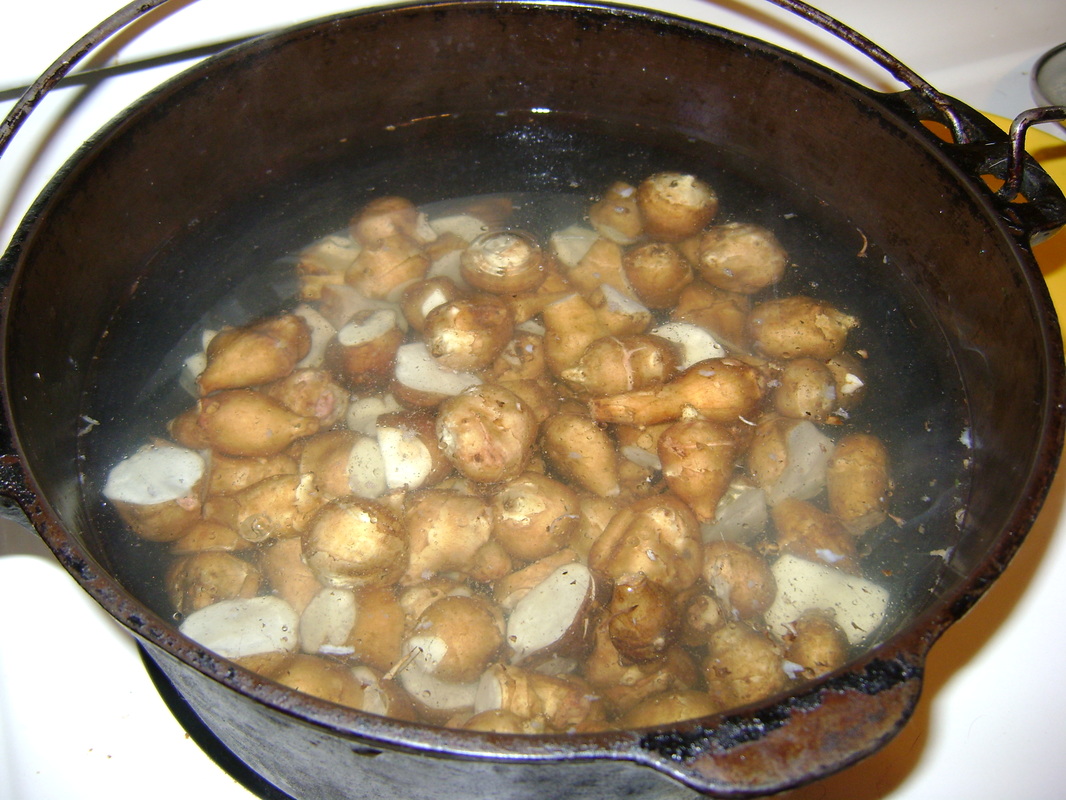
1. Boil chopped, unpeeled sunchokes until tender, about 10 minutes.
|
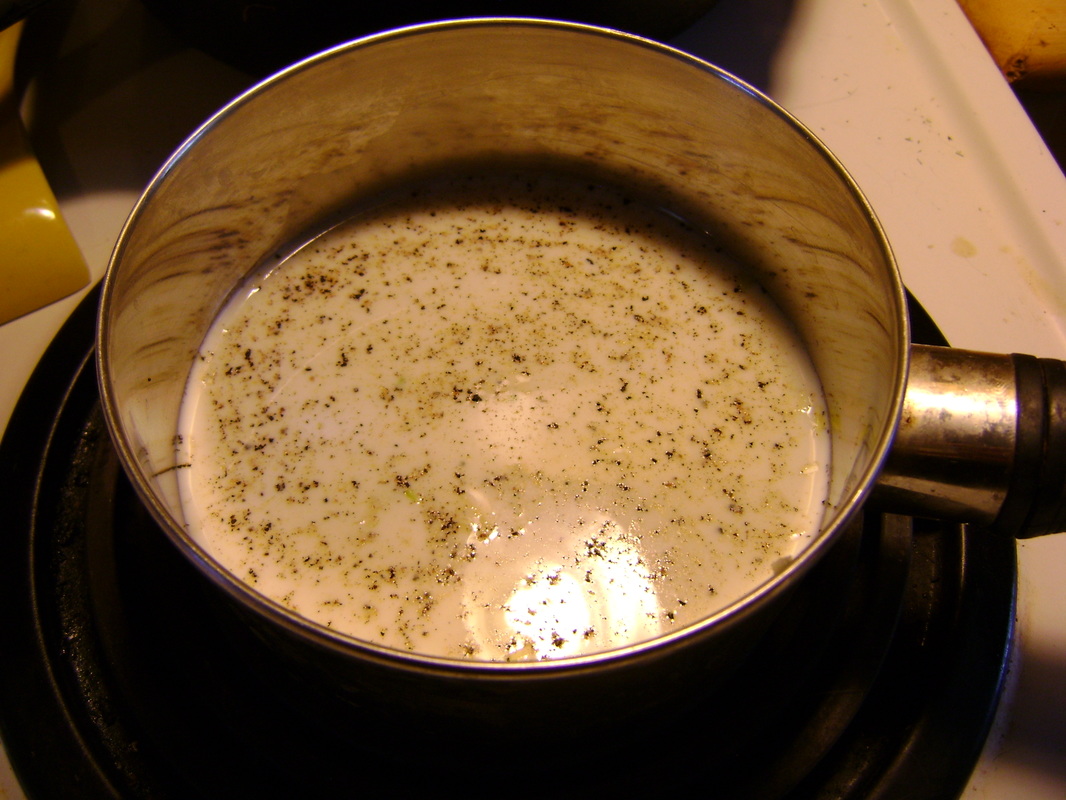
2. While the chokes are boiling, add milk, pepper, and several minced or crushed garlic cloves to a separate pot. Heat slowly. You don't want the milk to boil, but it will steam. Take a sip (don't burn your tongue). When you can taste the garlic in the milk, it's ready.
|
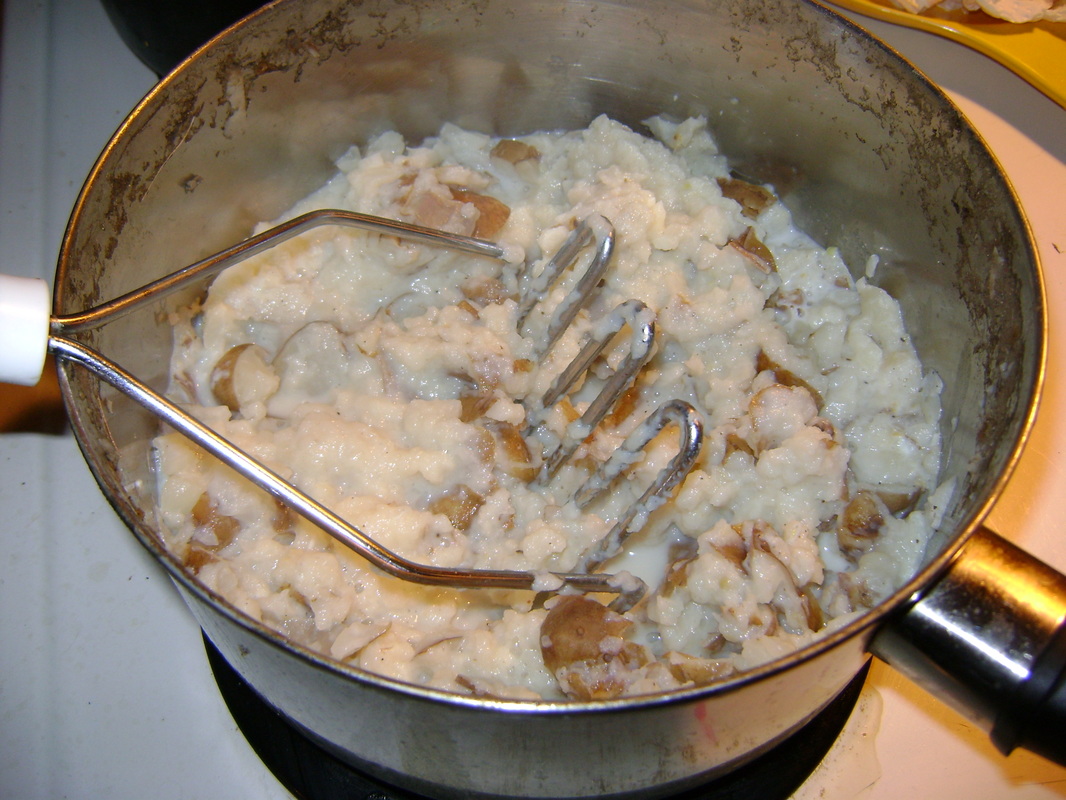
3. Combine the milk & garlic mixture with the boiled sunchokes, and mash. It goes well with anything that mashed potatoes taste good with.
Other herbs or flavor combinations in the milk should work well too. |
Sunchoke Rumbledeethumps:
Rumbledeethumps is a Scottish dish traditionally made with potatoes. It's a rich dish, since it has so much cheese in it, and it takes a while to cook since there are so many steps. However, the taste is totally worth it. We think of this dish as something to have for a Sunday brunch or a holiday meal, to accompany a large chunk of special meat that Bear cooks.
|
1. Boil chopped sunchokes in water until soft, about 10 minutes.
|
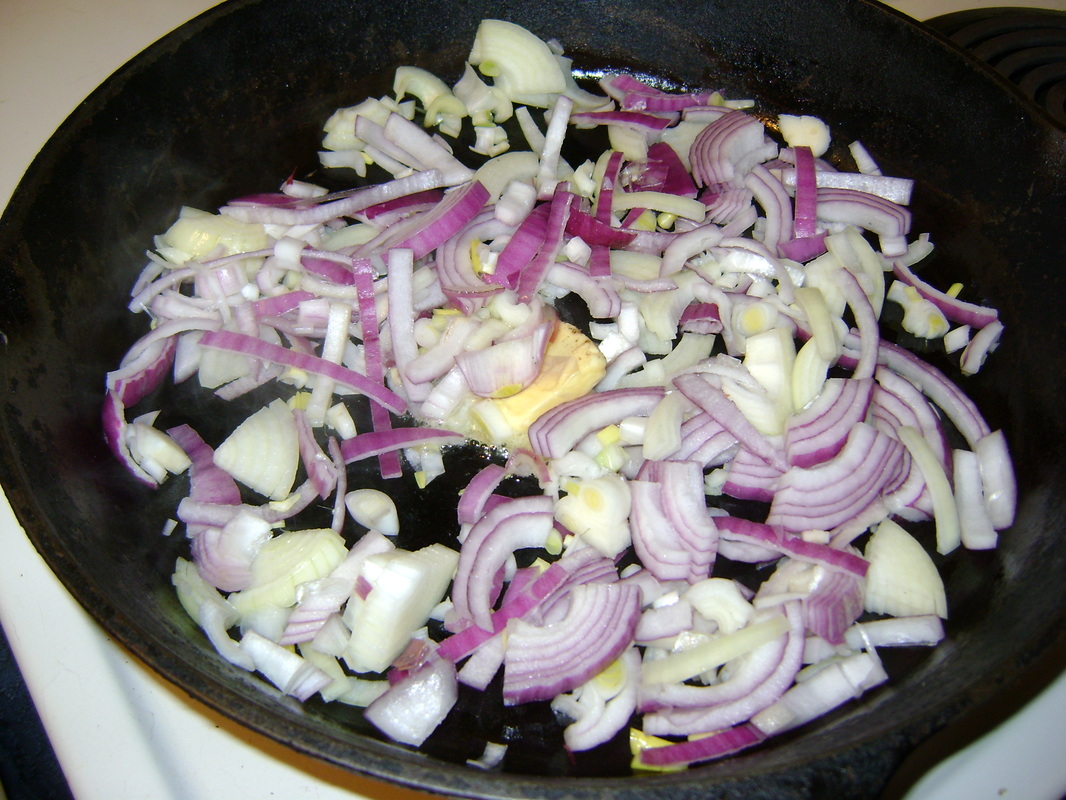
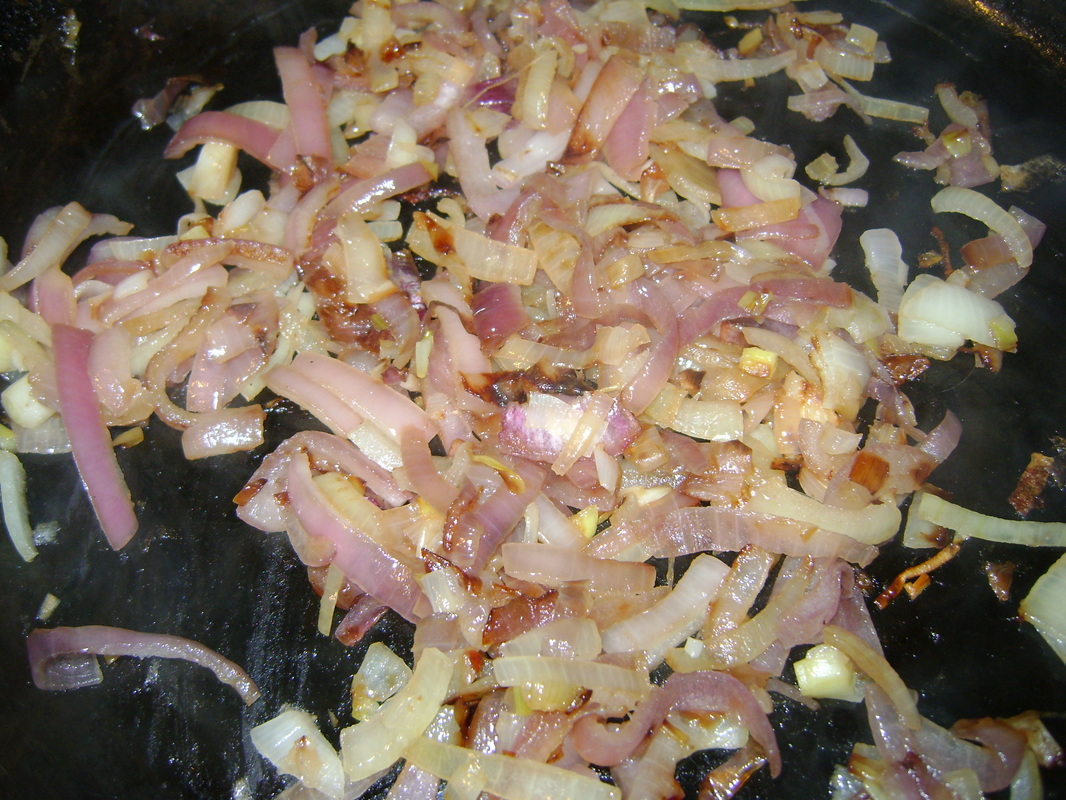
2. In a skillet, fry a sliced onion in butter.
|
|
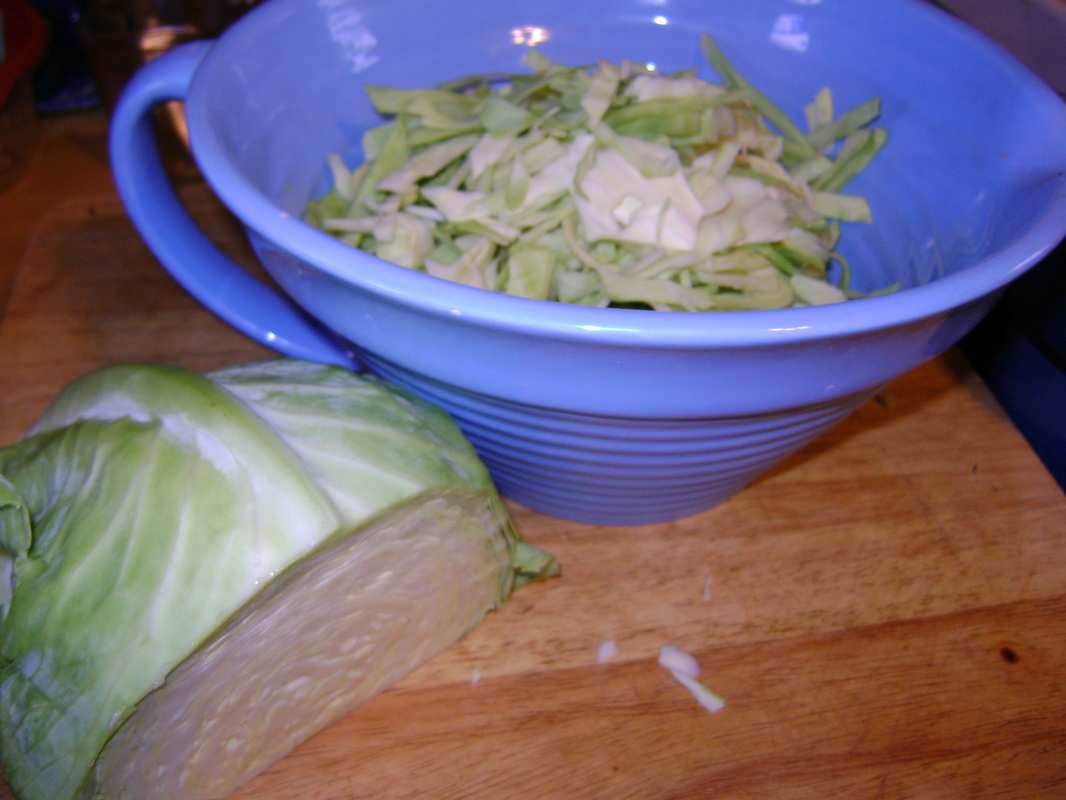
3. Thinly slice about half of a cabbage.
|
4. Continue frying onions until they have carmelized/browned.
|
|
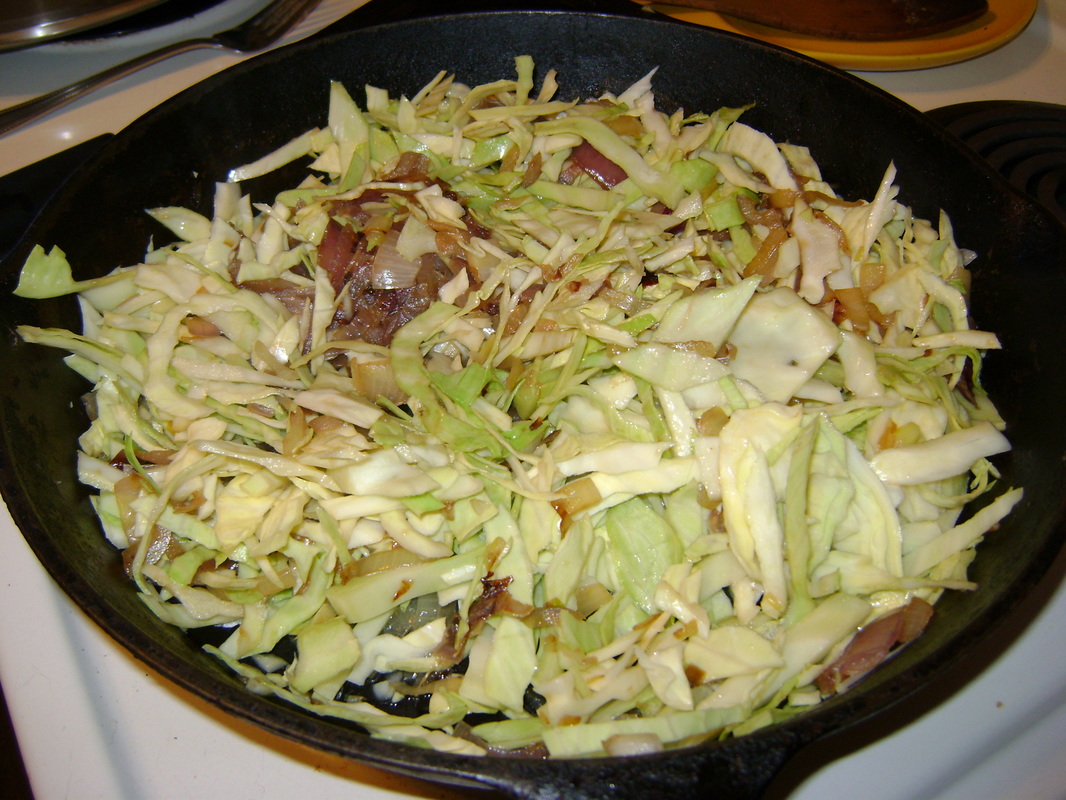
5. Add sliced cabbage to browned onions...
|
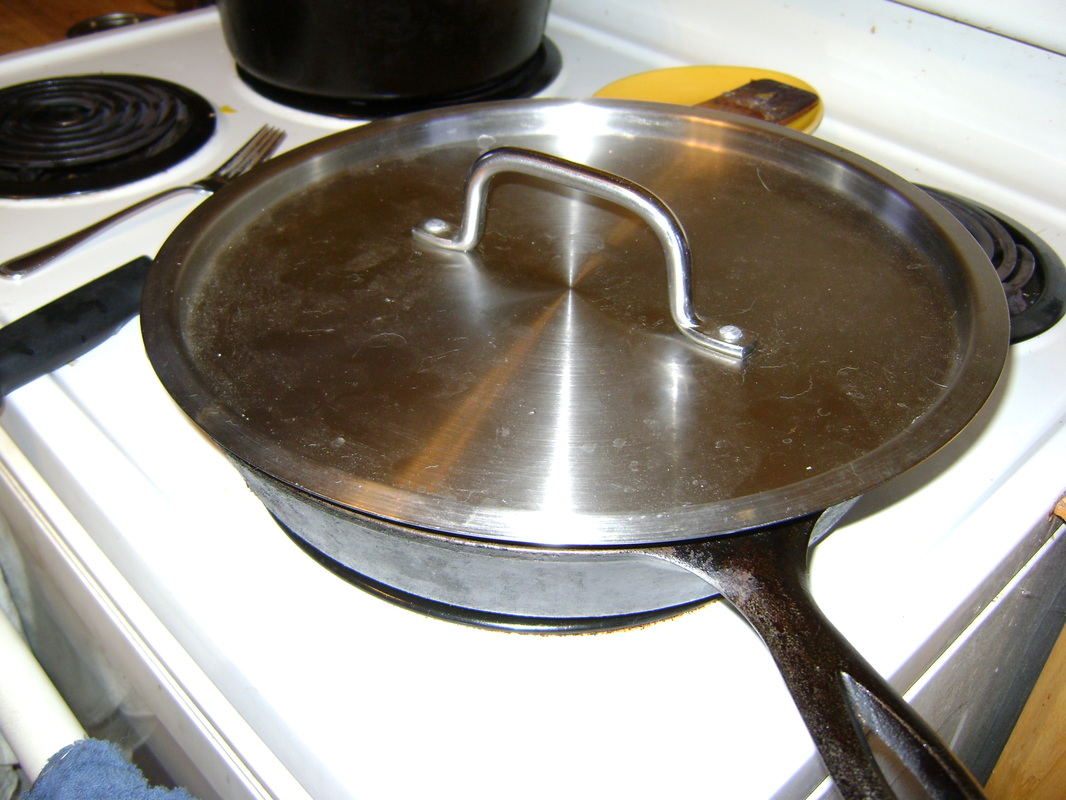
6. ... and cover with a lid, cooking until the cabbage is soft (you can add a bit of water if you're afraid things will start to stick to the pan).
|
|
7. When the suncokes are soft, drain and add butter...
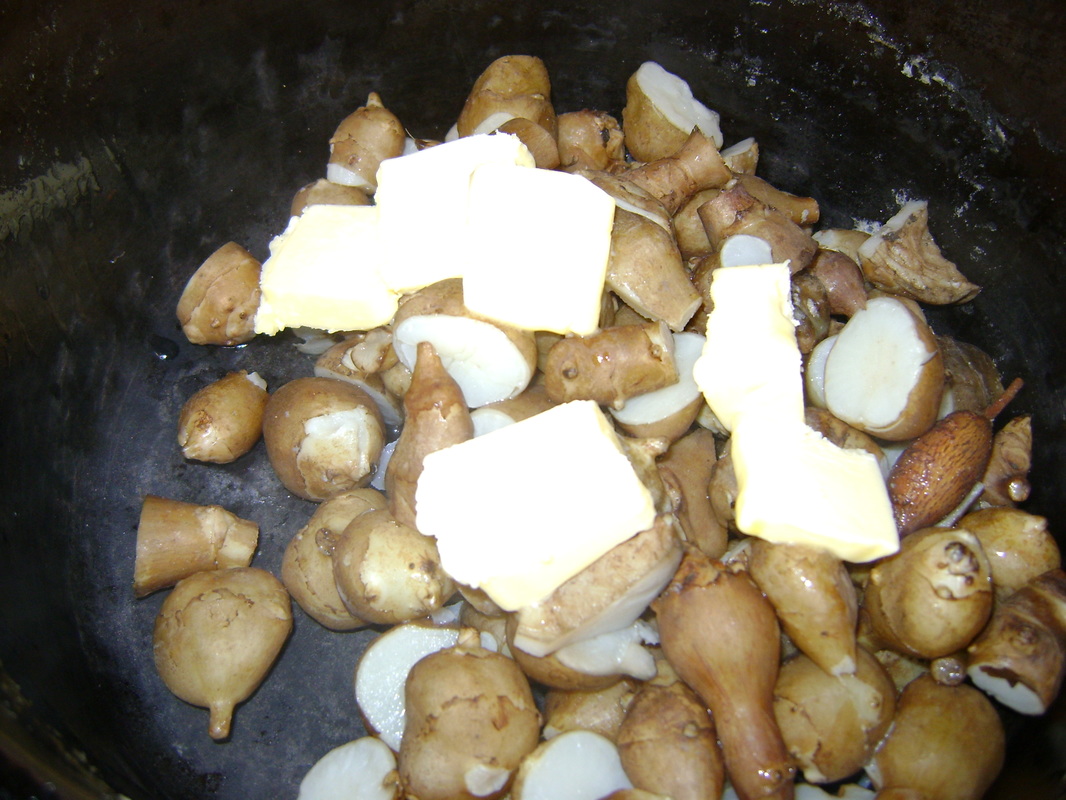
|
8. ... then mash.
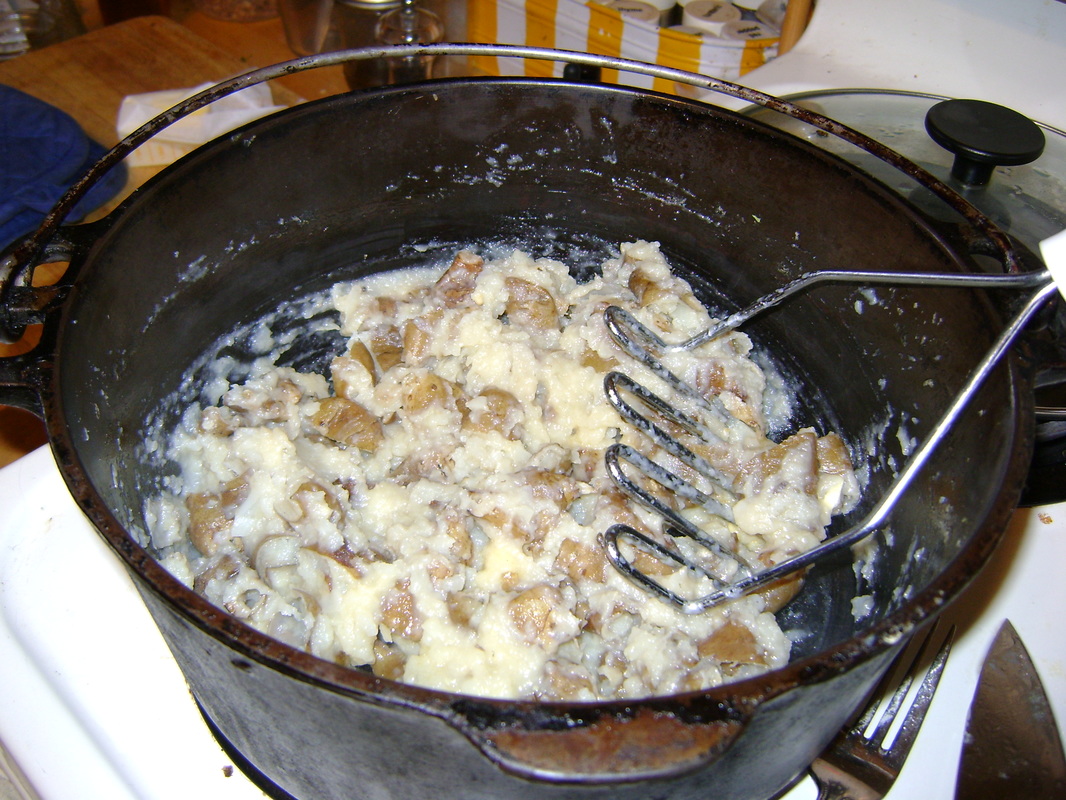
|
|
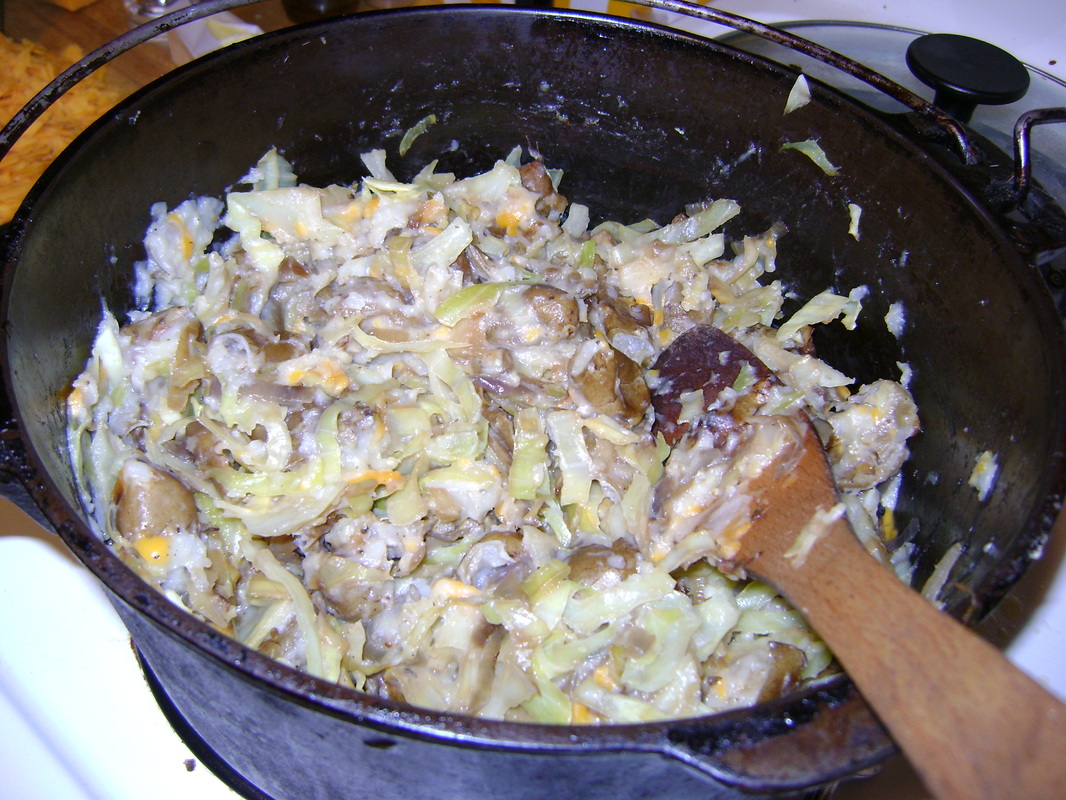
9. Add the cooked cabbage and onions to the mashed sunchokes. Also stir in a bit of shredded cheddar cheese (as much or little as you want).
|
10. Put the whole mixture into a baking dish.
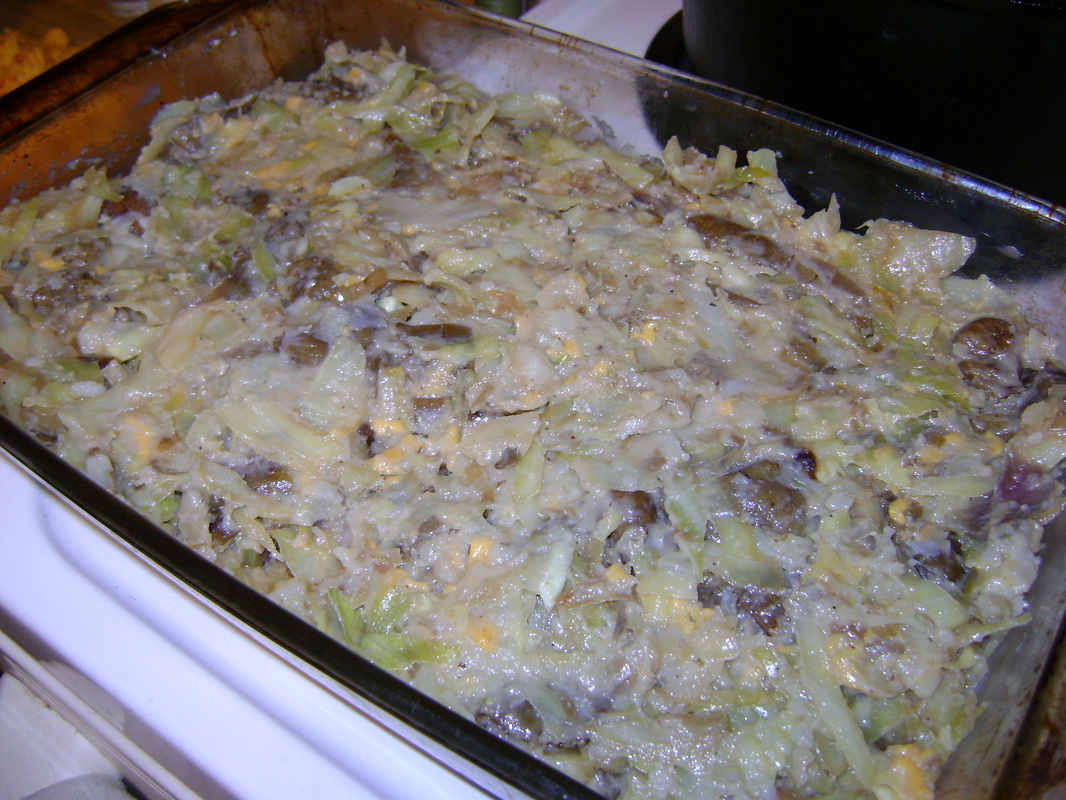
|
|
11. Cover with more shredded cheddar.
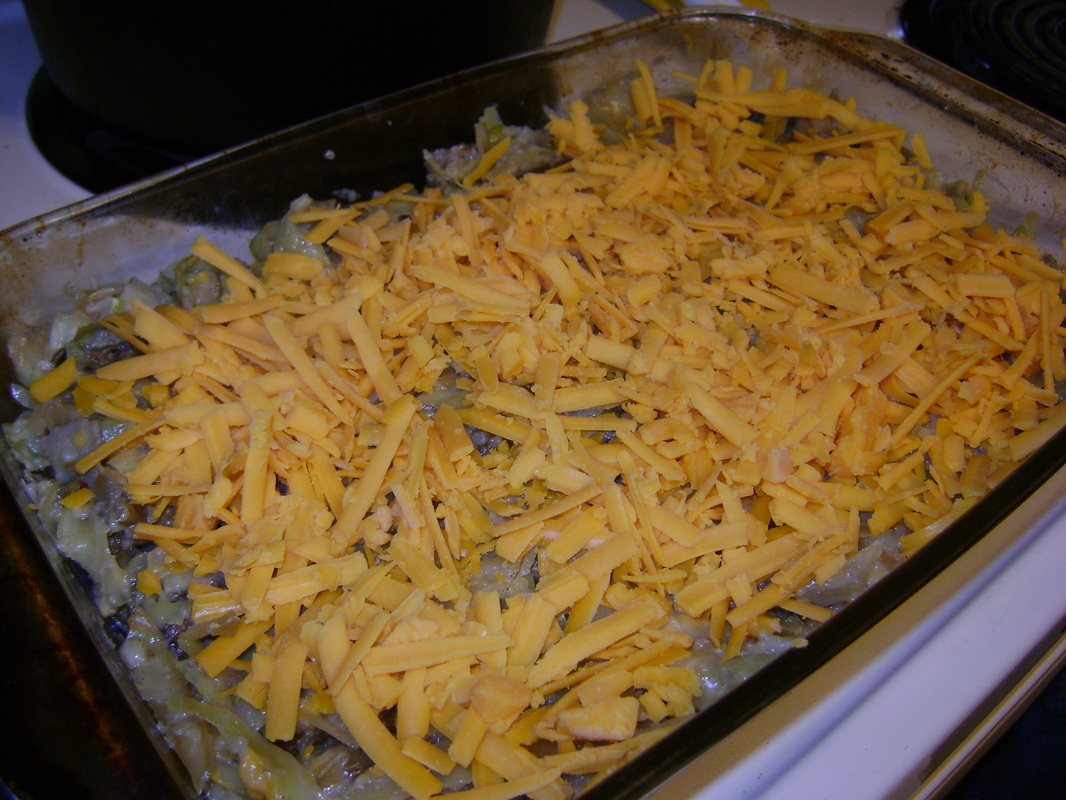
|
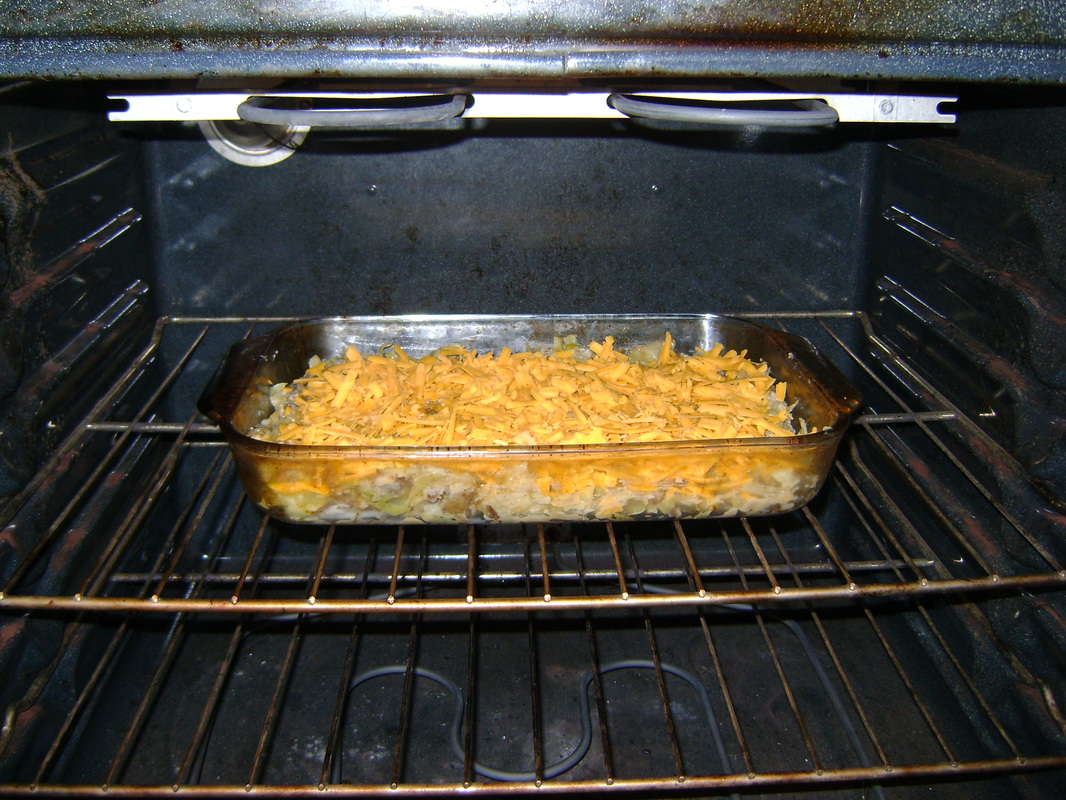
12. Bake at 350 degrees F. It's done when the cheddar has browned on top, maybe 20 minutes. Yummy.
|
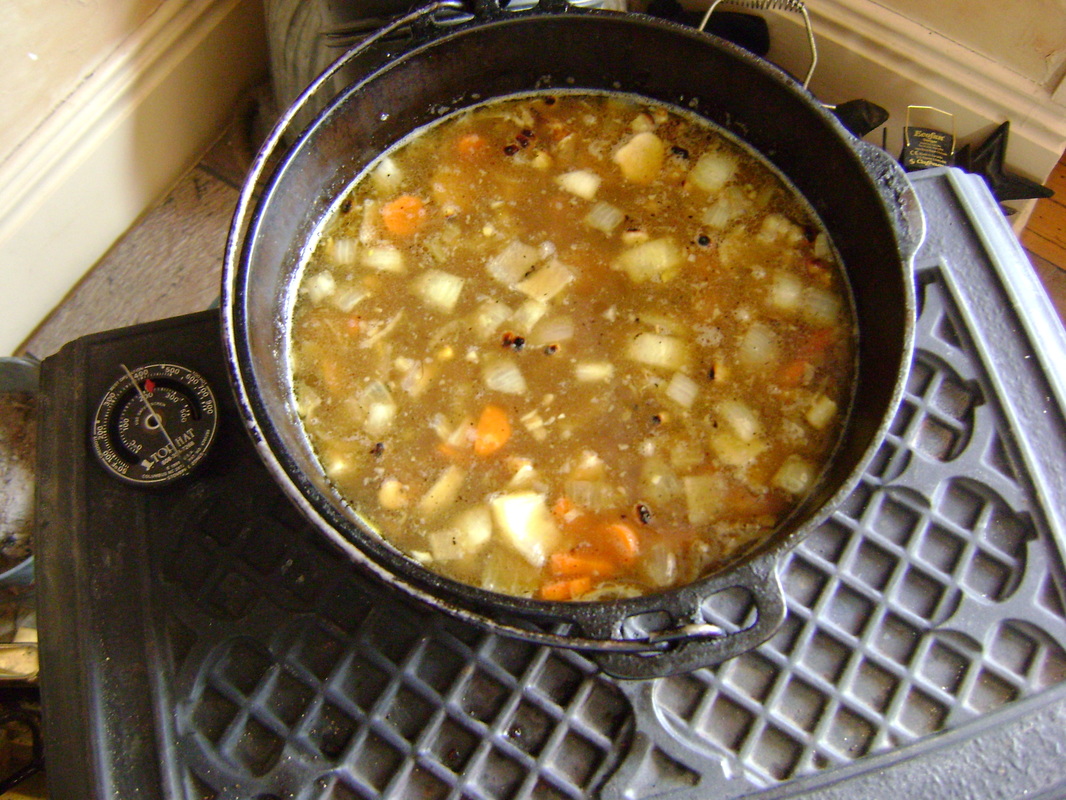
Sunchoke SoupClick to see Theresa's Sunchoke Soup recipe, cooked on a wood stove.
|
|
|
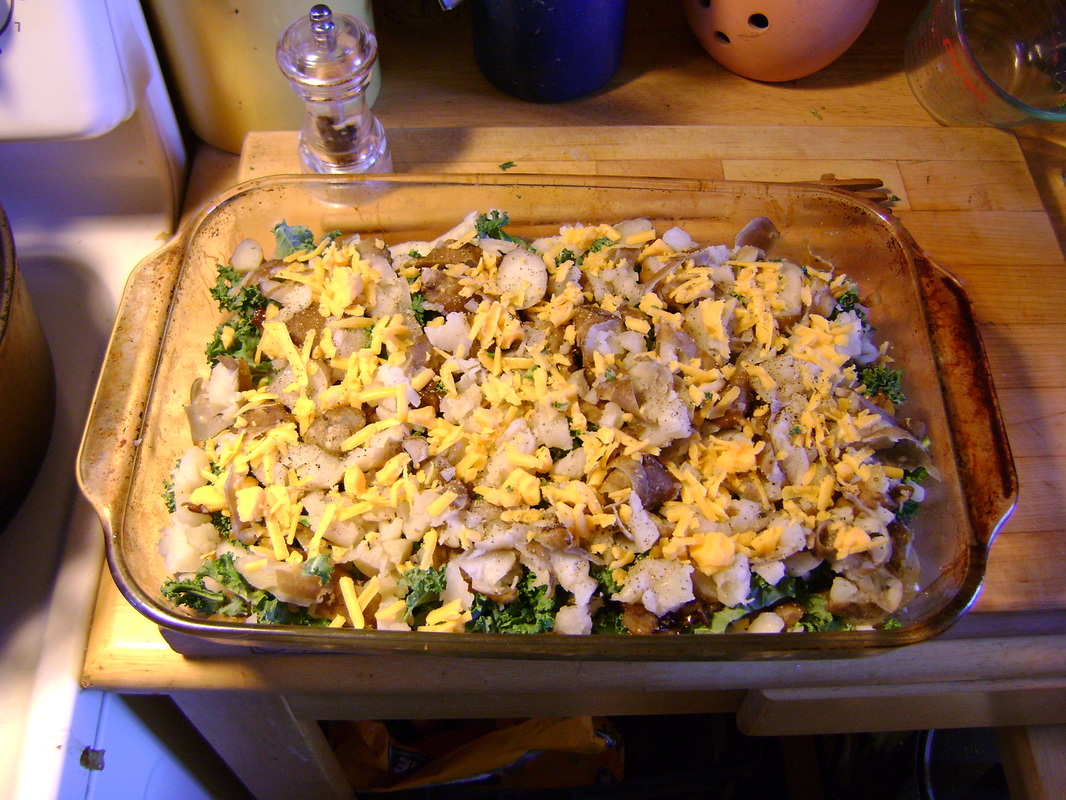
Sunchoke ColcannonClick to see Bear's Sunchoke Colcannon recipe, a mixture of chokes and kale (with cheese, of course).
|
RETURN to the PERENNIAL VEGETABLES page.