EAT YOUR YARD: WILD GRAPES
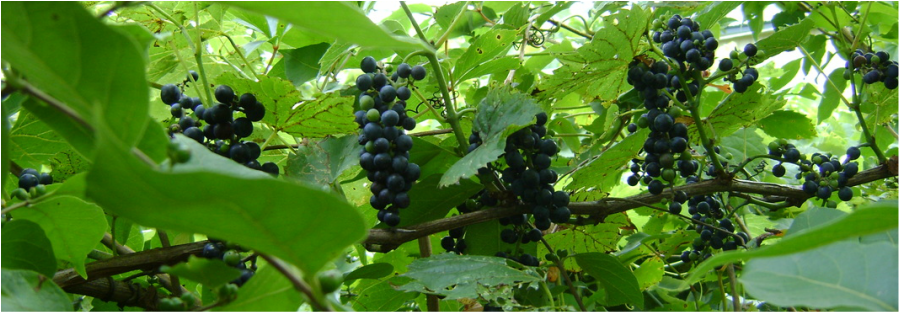
From Theresa: Wild grape vines invited themselves into our yard, and I have been happy to let them grow here. I have tried several times to get cultivated grapes to grow in the sunnier parts of the yard, but they have never survived. The wild grapes, though, grow well in the shade under and near our walnut trees. I have let them grow to cover our catio, and have erected trellises for them in other parts of the yard. Some years they produce grapes, and others they don't, but we also supplement by foraging for grapes on the nearby bike path.
Wild grapes are much smaller and tarter than their sweet and juicy cultivated cousins.
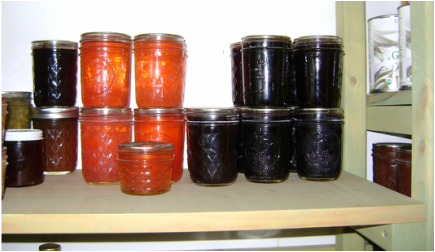
However, I think they make the best grape jelly, which is mostly how we eat them.
I use the jelly to sweeten plain yogurt and oatmeal.
Wild grapes can also be frozen whole, and I used to add them to very crunchy cereals (think Grape Nuts),
where they add a nice color and flavor, but you won't notice the crunch of their very large seeds.
Wild grapes are much smaller and tarter than their sweet and juicy cultivated cousins.
However, I think they make the best grape jelly, which is mostly how we eat them.
I use the jelly to sweeten plain yogurt and oatmeal.
Wild grapes can also be frozen whole, and I used to add them to very crunchy cereals (think Grape Nuts),
where they add a nice color and flavor, but you won't notice the crunch of their very large seeds.
Making Wild Grape Jelly
Harvesting:
|
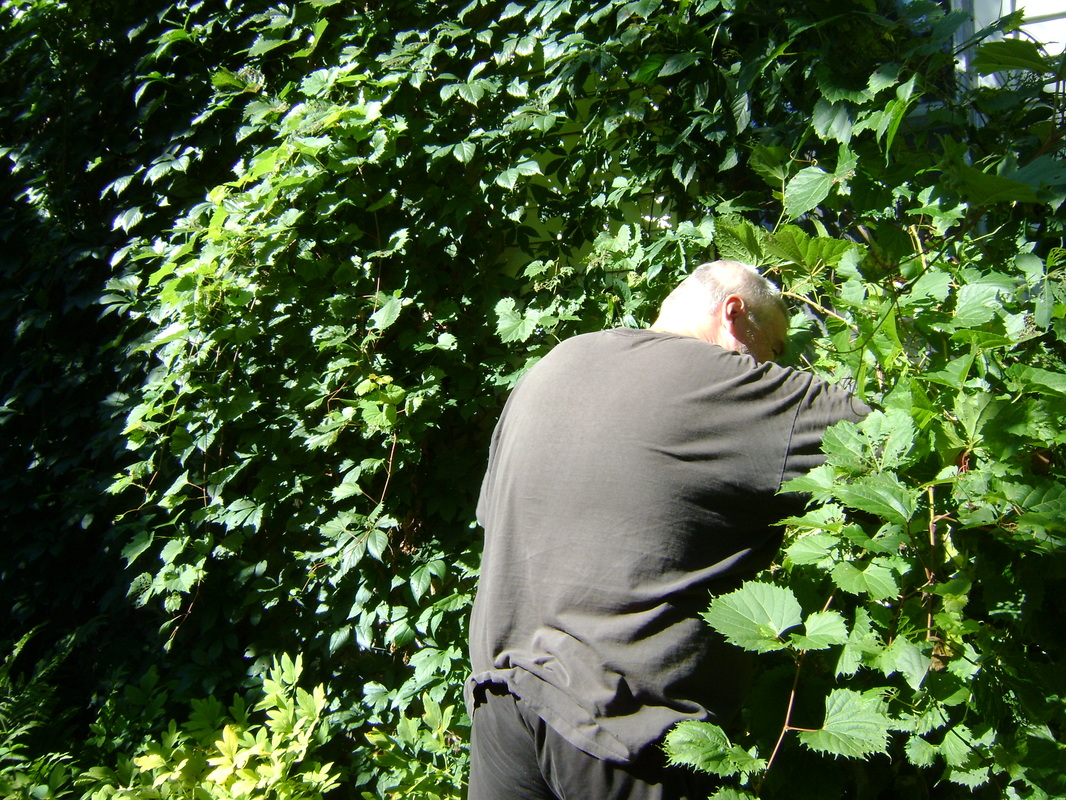
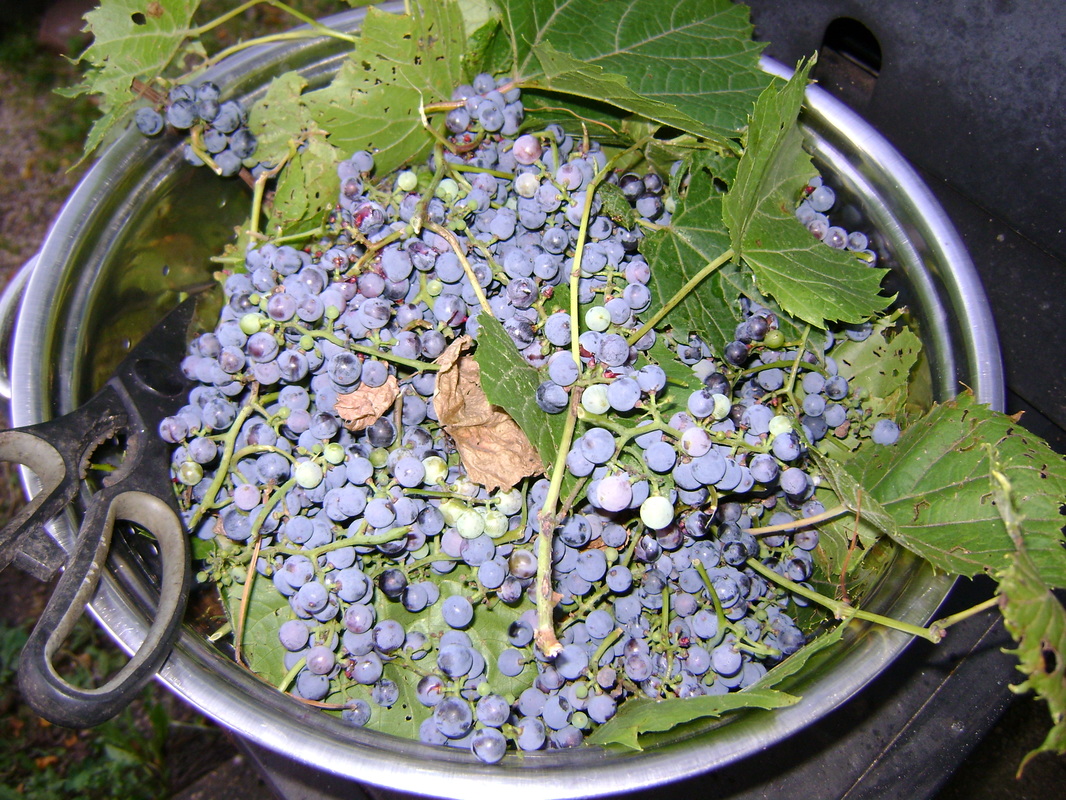
1. We harvest grapes in our area in mid to late August. I've read that you should wait until after a frost for the best flavor, but when we've tried waiting that long, there haven't been any grapes left except the dried up ones. We keep an eye on our vines and harvest when the bunches have a large number of plump, purple grapes- each bunch usually has grapes in different stages of development- from green, to ripe and juicy, and already dried up. We dig back into the vines, looking under the leaves, to find all the grapes we can.
|
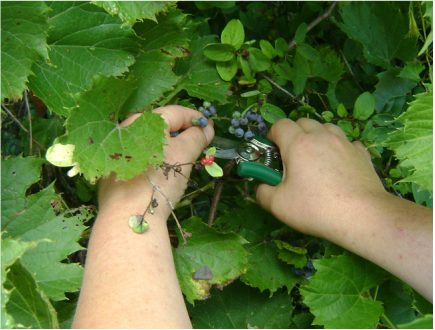
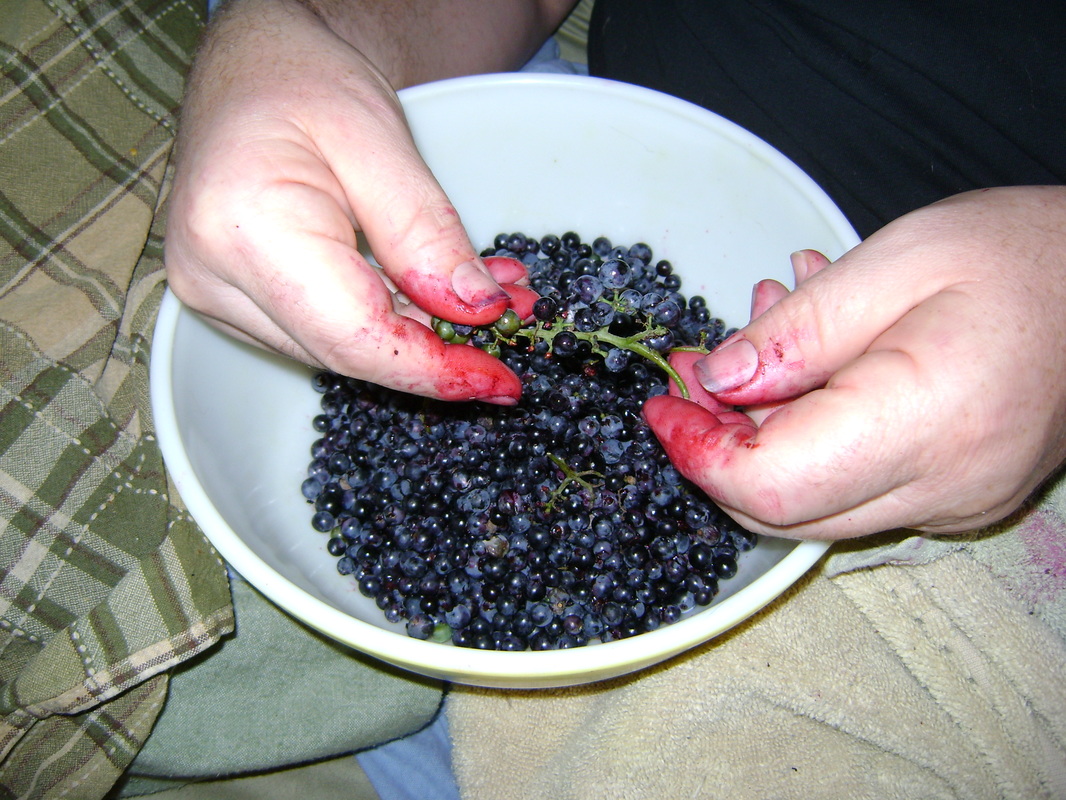
2. You'll need scissors or garden clippers to cut the grape bunches from the vines. As you can see, wild grapes are much smaller than cultivated grapes. They are only about a centimeter or less in diameter, and the interior is mostly seed. You should try one off the vine at least once to see how tart they are.
|
Preparing the Grapes:
|
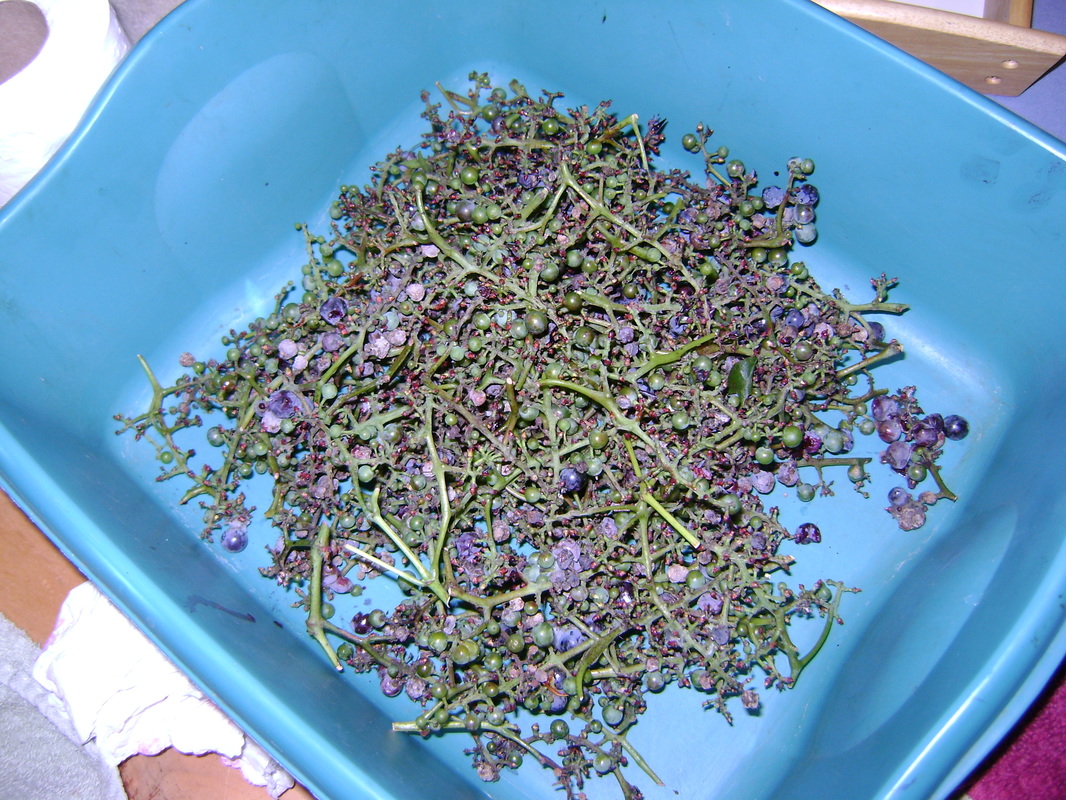
3. You'll end up with a pile of grapes still attached to the vine, which look like this...
|
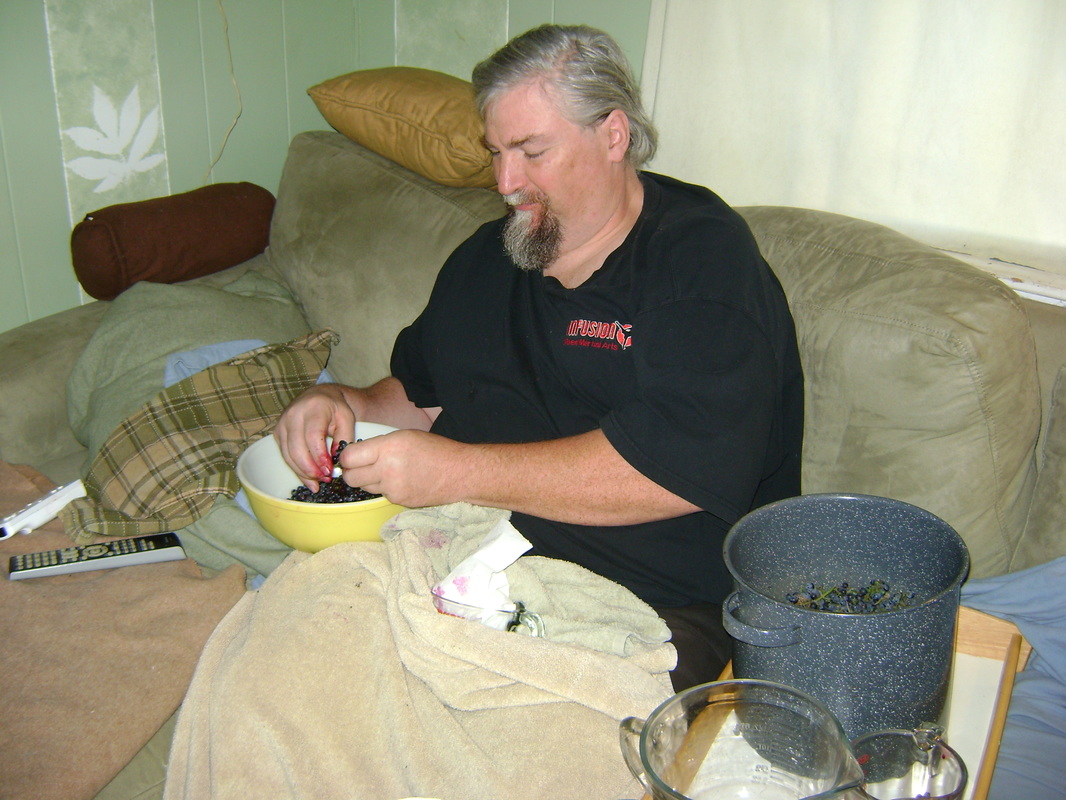
4. ... so you'll need to remove the grapes from the vines by hand. This can be done in front of your favorite TV show...
|
|
5. ... if you're careful to protect your couch from grape juice stains. Pick off the ripe grapes, while discarding the ones that are too young or to old.
|
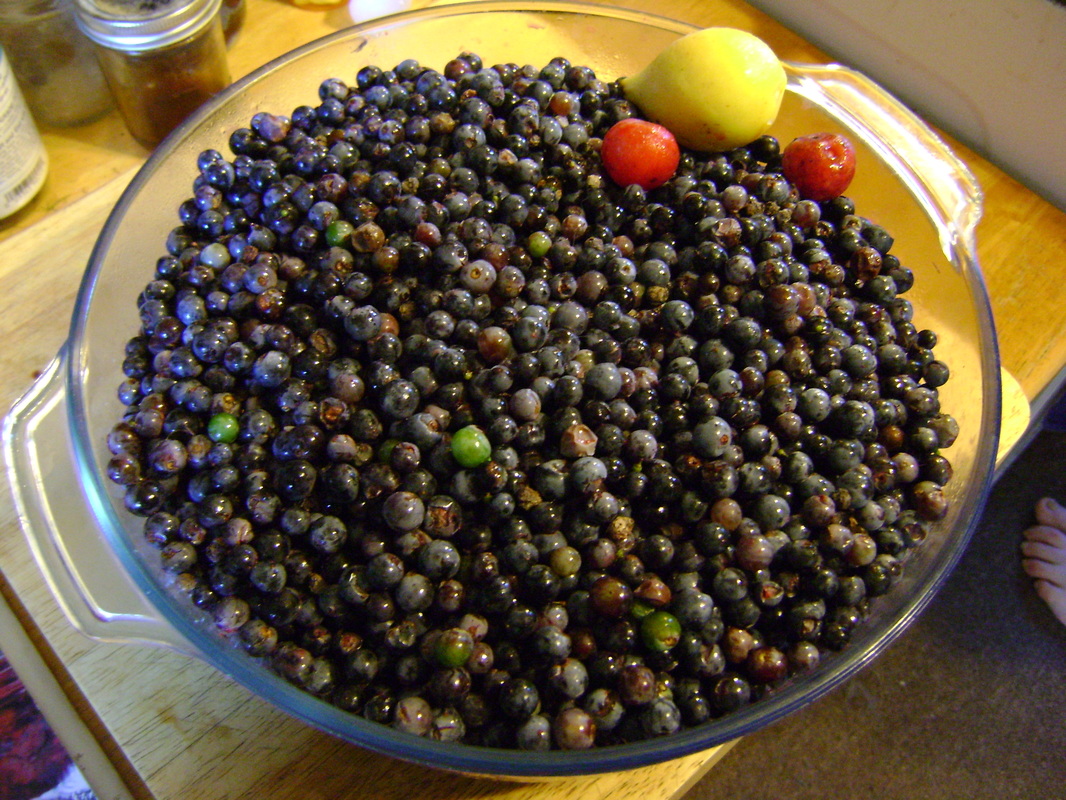
6. Here's what they look like after you've removed them from the vine. One recipe I found said it's traditional to include some green grapes in your mix, so we do that. Next you'll want to measure how many cups of grapes you have.
|
Canning Day 1: Making Grape Juice
|
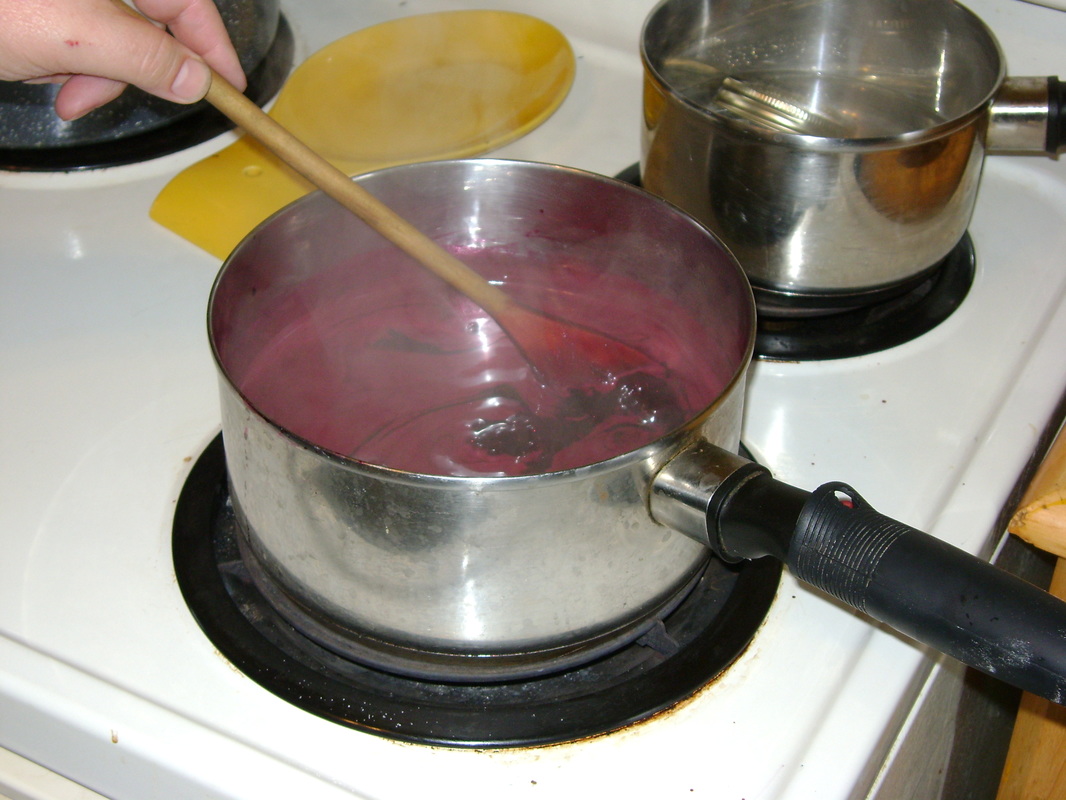
7. Put the grapes you've removed from the vine into a large pot on the stove, adding 1/4 cup of water for every quart of grapes (a quart is 4 cups, so that's 1/4 c water to every 4 cups of grapes).
|
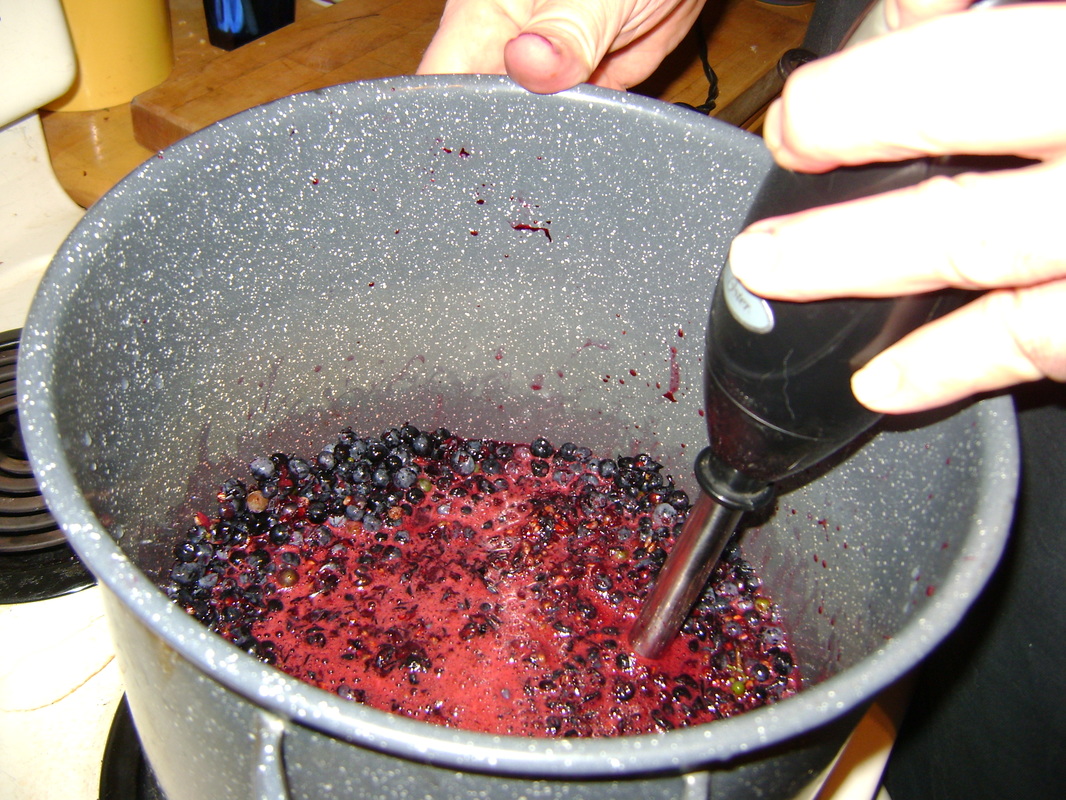
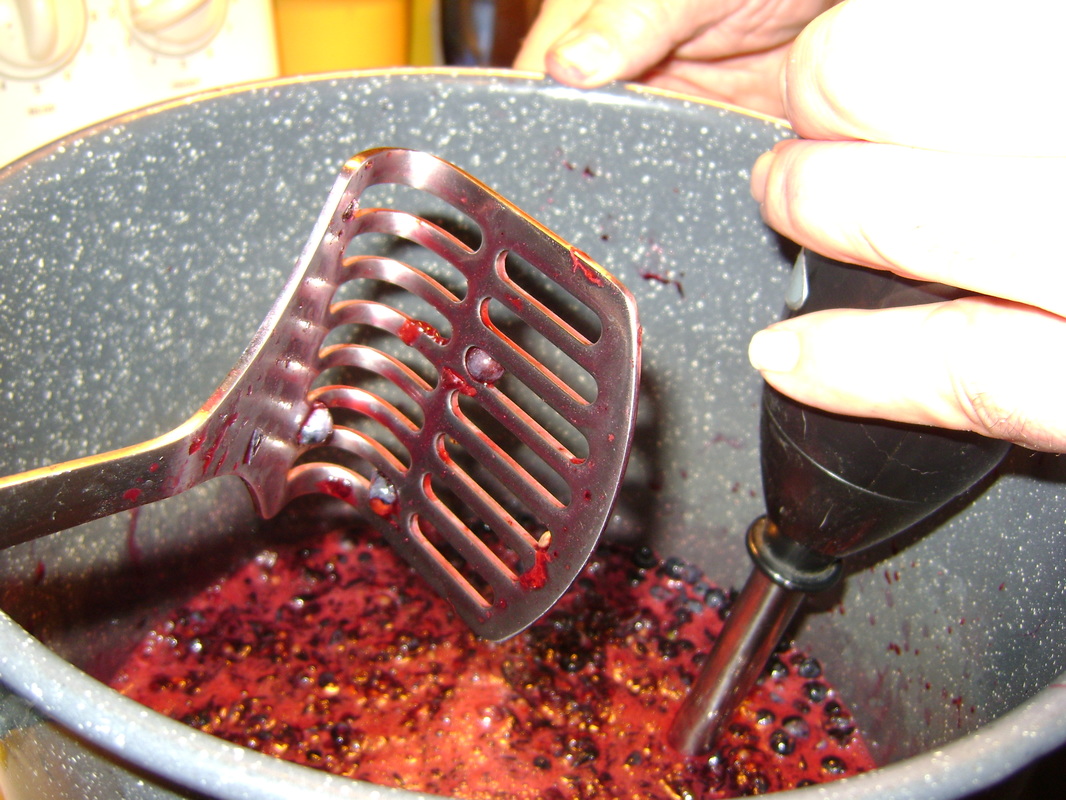
8. Crush the grapes by whatever means you have- we like to use our immersion blender (shown on the right). This flat spatula (on the left) is also useful. Smashing the grapes helps them release their juice.
|
|
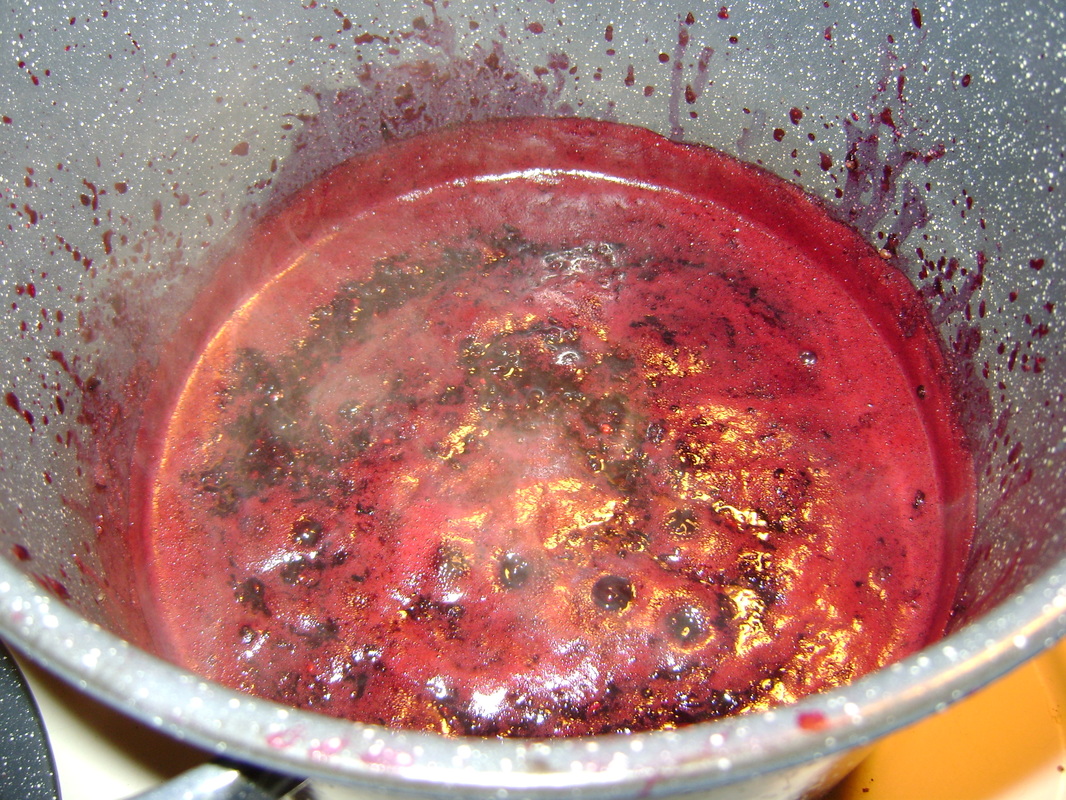
9. Bring the grapes to a boil, then simmer for 15 minutes...
|
10. ... stirring occasionally. This step releases more juice.
|
|
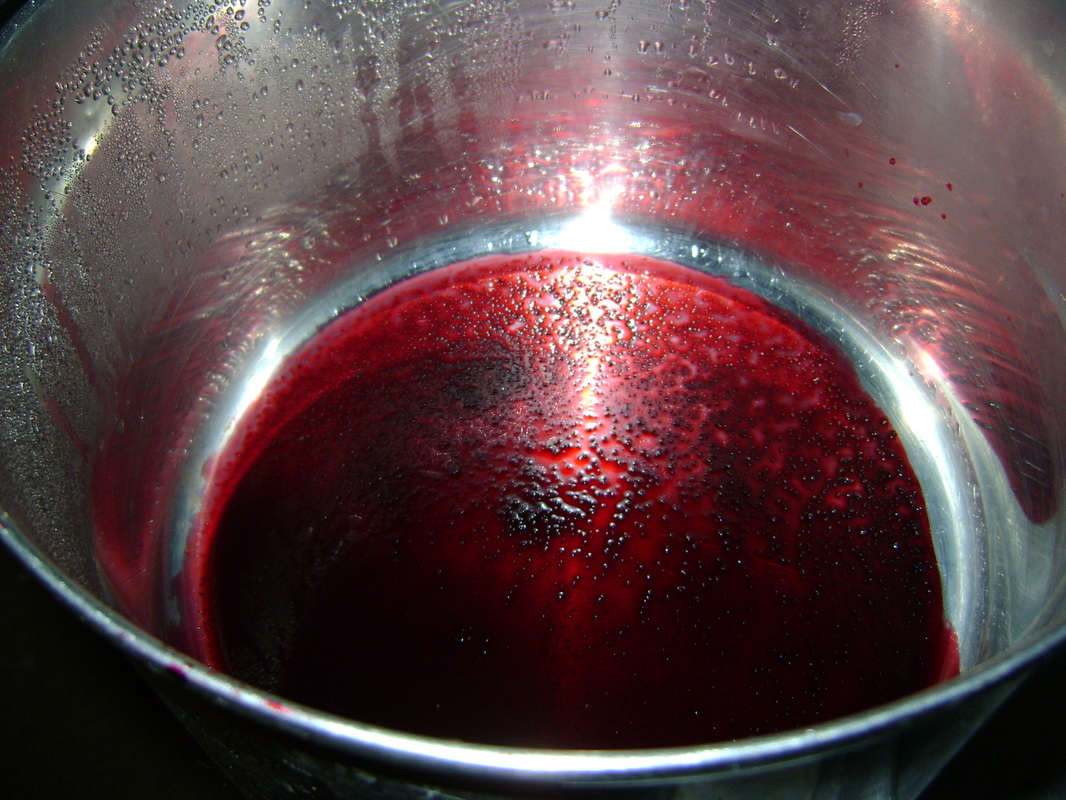
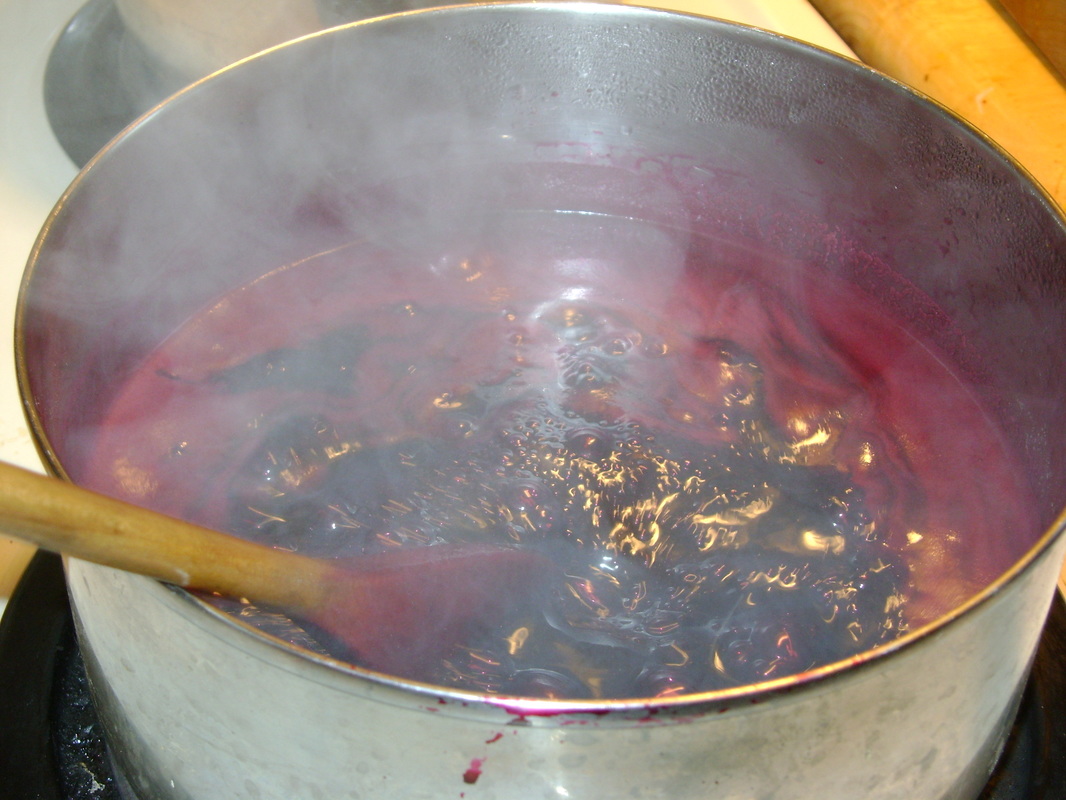
11. When the grapes are done simmering, drain out the juice. We use a mesh colander over a pan. Let the colander sit until you feel like most of the juice has dripped through. You can help this process along by stirring occasionally, but mostly it just takes patience, so go do something else for a little bit.

|
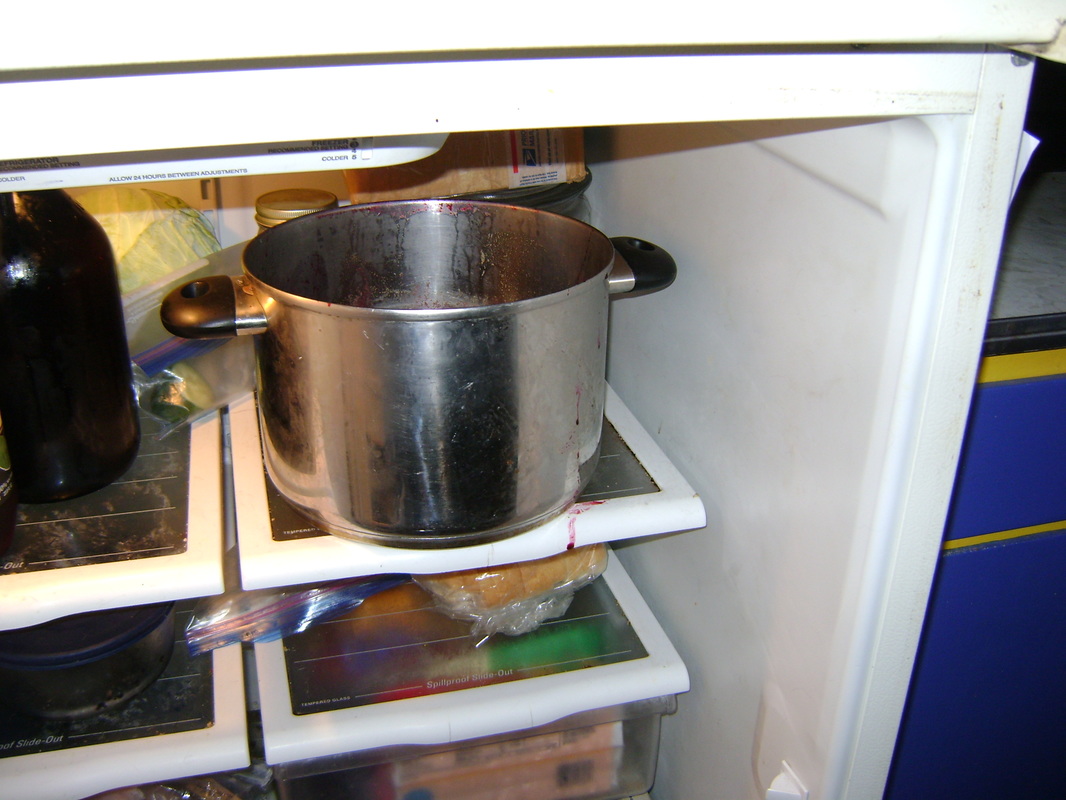
12. Remove the strainer and compost the grape skins. Let your pot of strained juice sit overnight in a cool place, such as the refrigerator. (One year it was late and time to go to bed, and the pot was too hot to refrigerate, so we left it out on the counter, because it was getting down to 50 degrees (F) that night.)
|
Canning Day 2: Making Grape Jelly
|
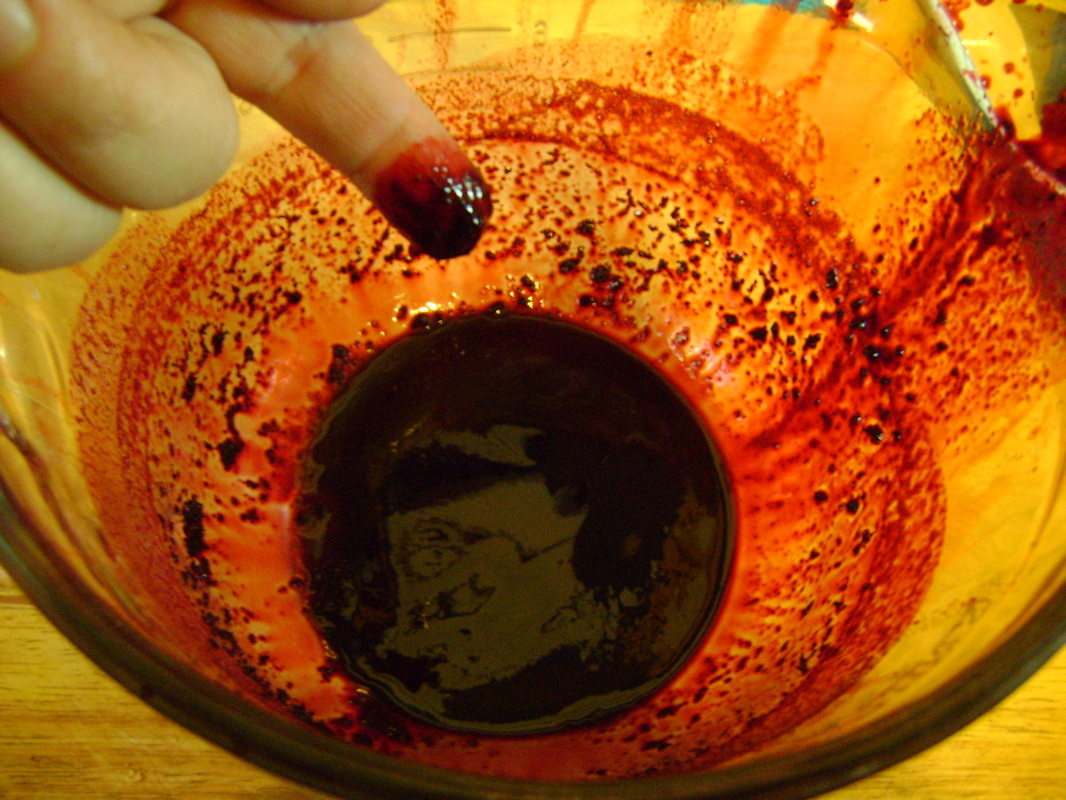
13. The next day, we poured the juice from the pot into a large measuring cup. See the small clumps of crystals left at the bottom of the pot? Those would make your jelly gritty and unpleasant. This is why you let the juice sit overnight- so these crystals settle to the bottom, and you can pour off the juice and leave them behind.
|
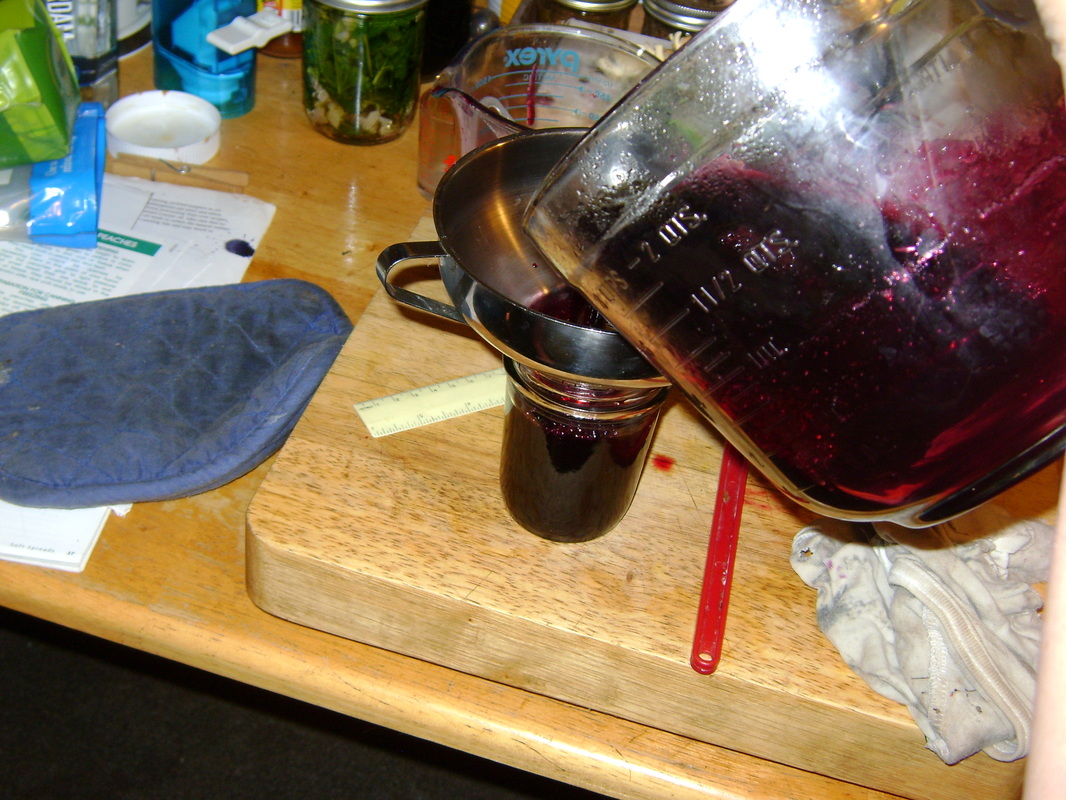
14. Next, pour the juice from the measuring cup into a clean pot on your stove. It's not a bad idea to pour it through a strainer one more time...
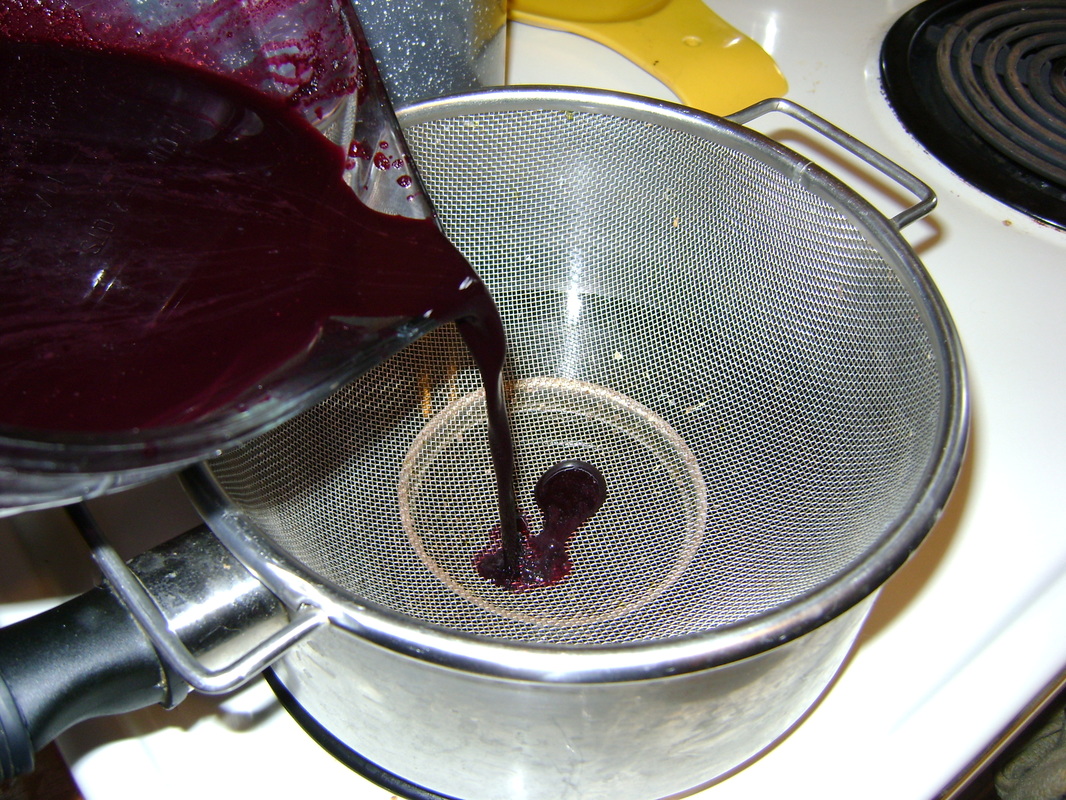
|
|
15. ... When you're almost done pouring, there will likely still be sediment at the bottom of the measuring cup, as you can see below. Don't pour it into the pot.
|
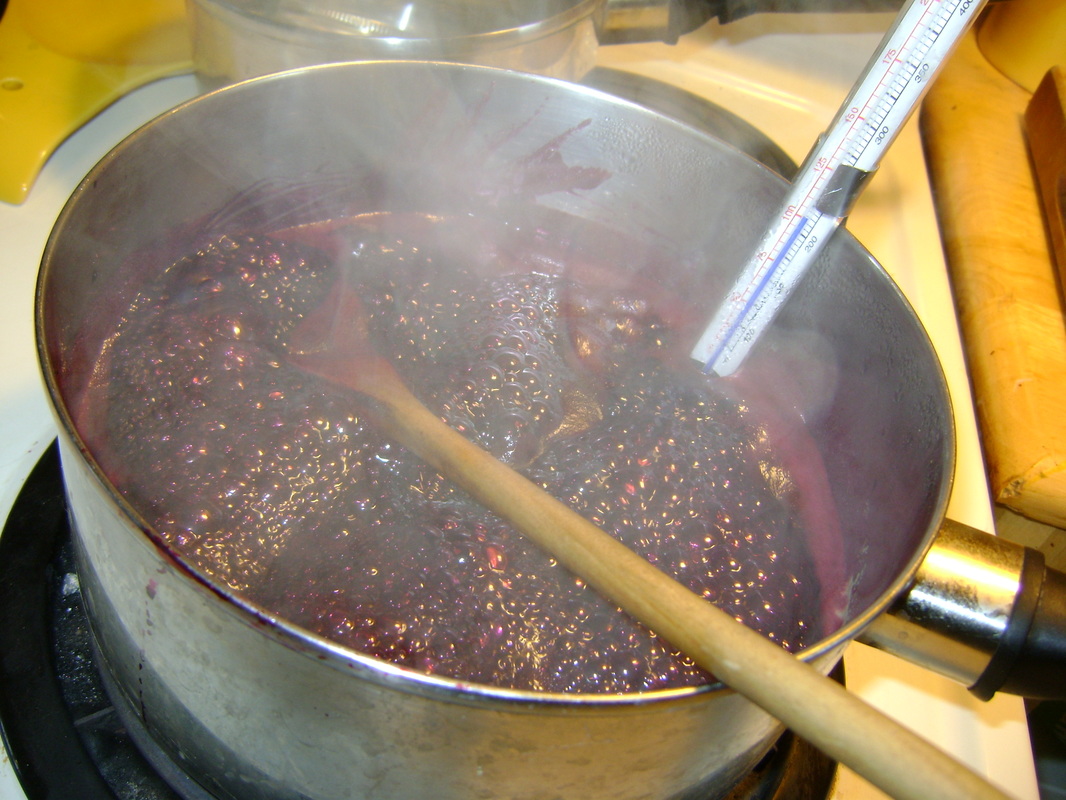
16. Next, add sugar, at the rate of 3 cups sugar to 4 cups of juice, or to taste. Wild grapes are very tart, so unfortunately, we cannot skip this step.
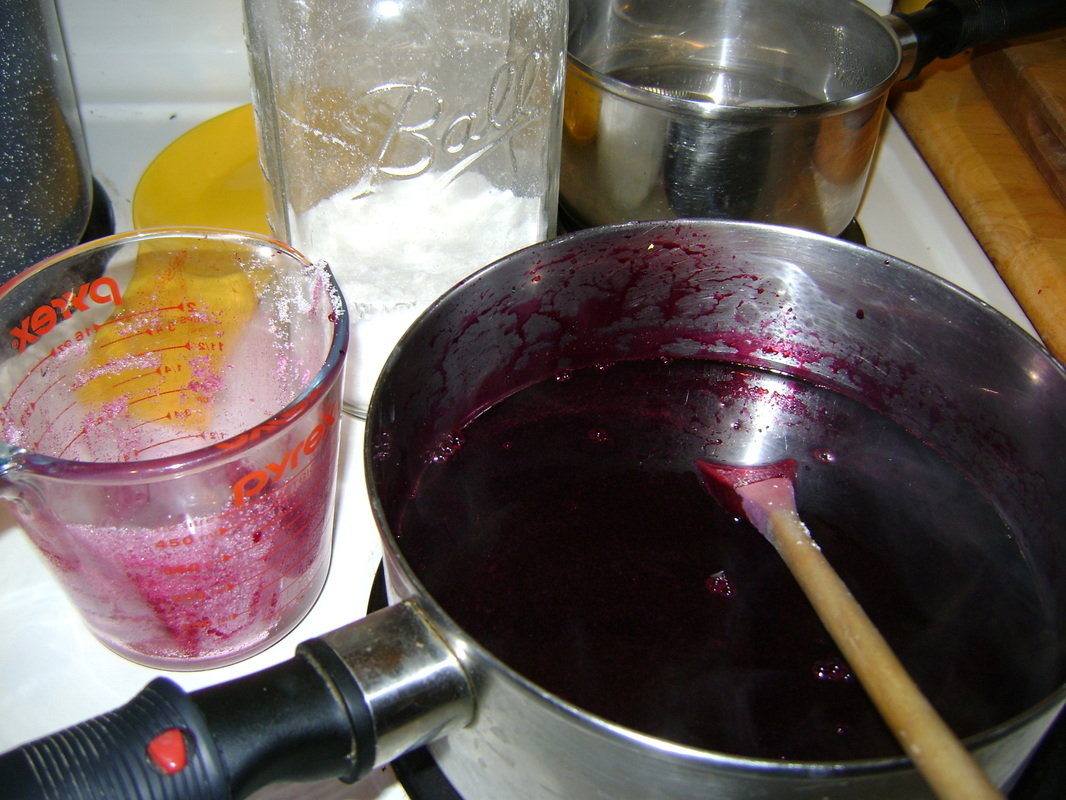
|
|
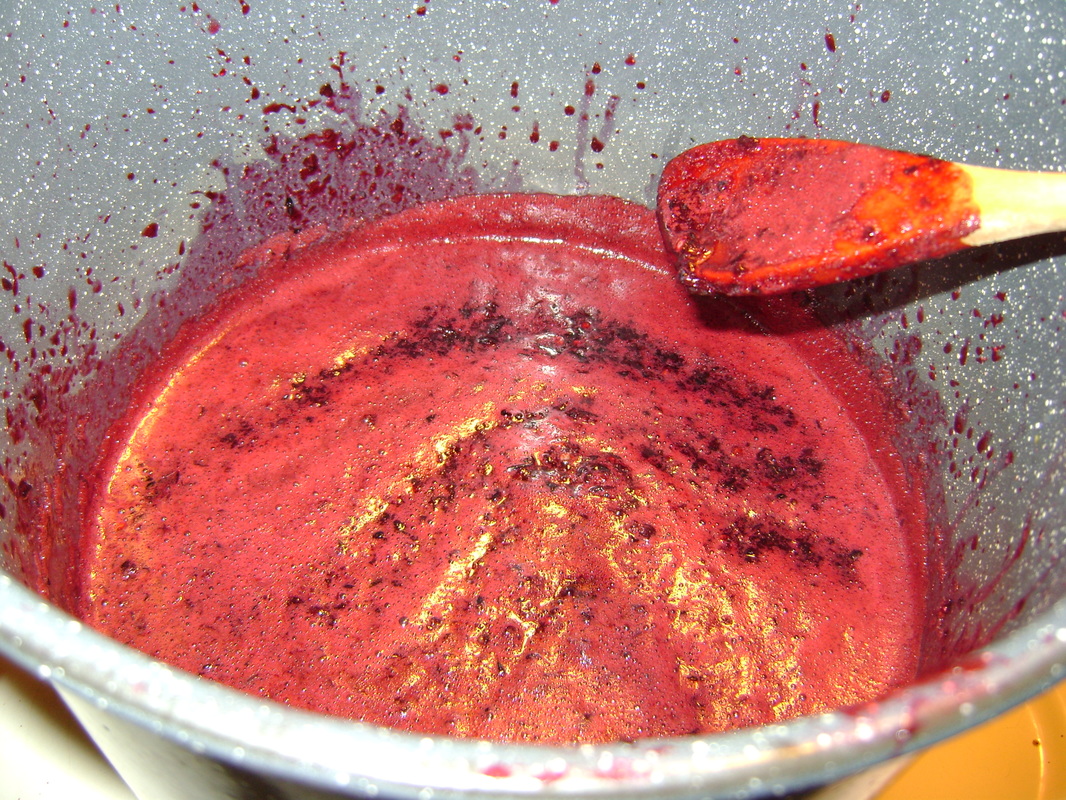
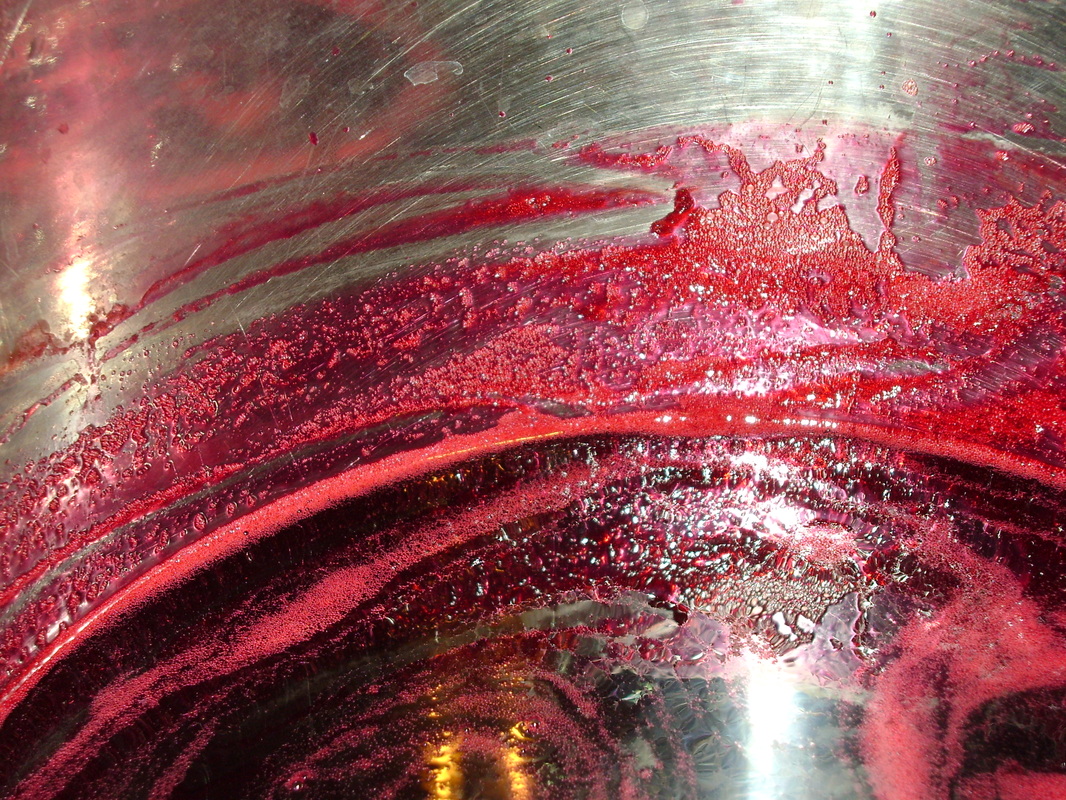
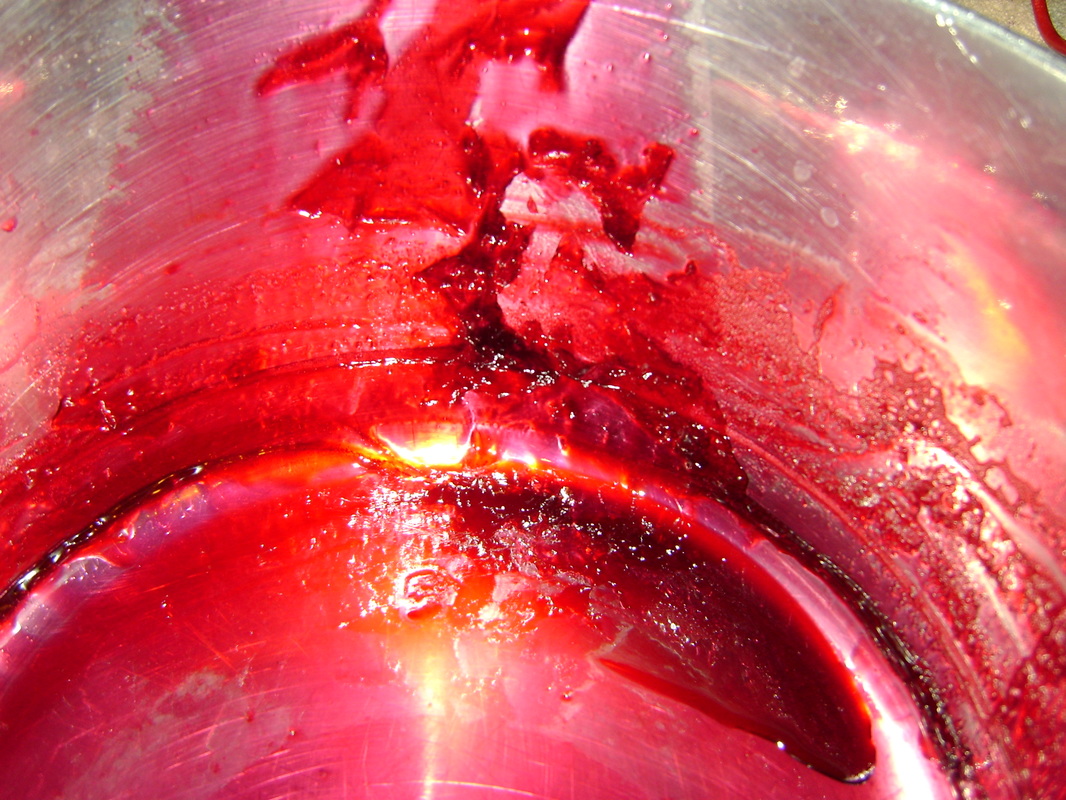
17. Bring the juice to a boil, stirring constantly.
|
18. Continue boiling and stirring, on high heat, until it's reached the gelling point (about 15 -20 minutes), then can the jelly.
|
How to Tell if Your Jelly has Reached the Gelling Point:
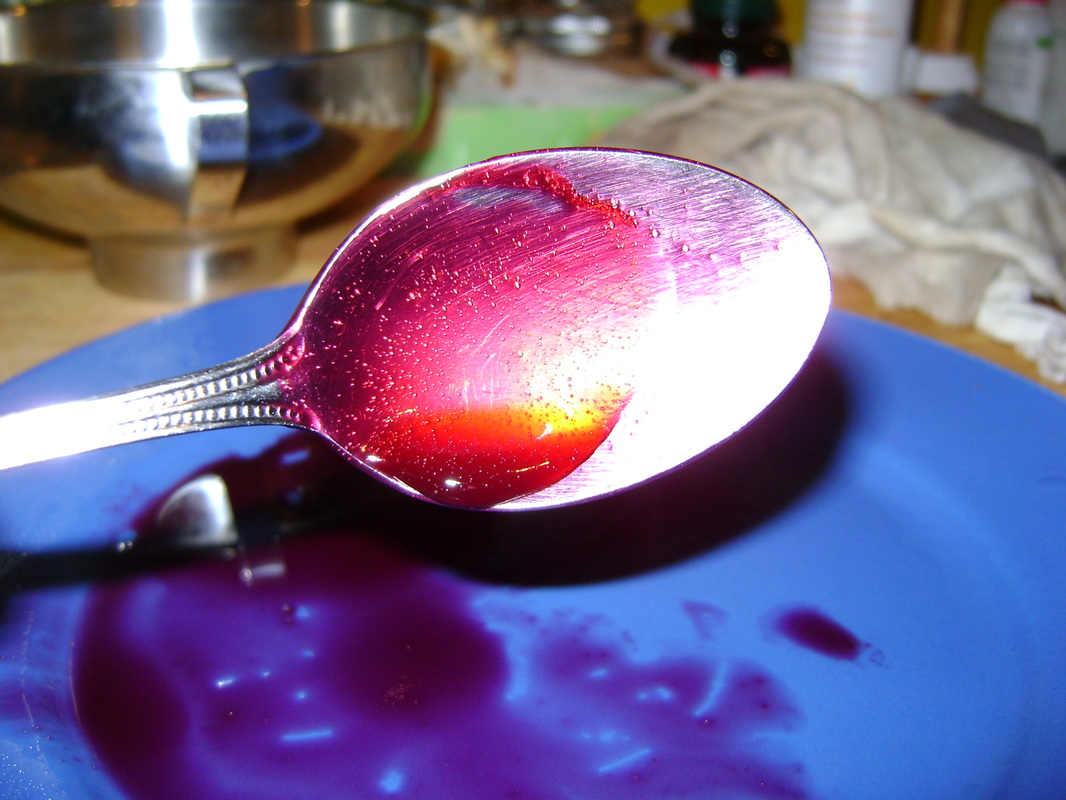
I love making wild grape jelly because if I do it right, it turns into jelly without needing to add any pectin, and to me, this is magical. The transformation from liquid to solid happens miraculously, just by adding heat.
When juice that has reached the gelling point cools off, it will solidify into the jelly texture we're all familiar with. There are different ways to tell if your jelly has reach the gelling point, and I am still trying to master them. Below is what I've learned so far. One year it didn't work correctly for me, so instead of jelly I had grape syrup, but it was still very yummy, so I couldn't really complain.
When juice that has reached the gelling point cools off, it will solidify into the jelly texture we're all familiar with. There are different ways to tell if your jelly has reach the gelling point, and I am still trying to master them. Below is what I've learned so far. One year it didn't work correctly for me, so instead of jelly I had grape syrup, but it was still very yummy, so I couldn't really complain.
|
Method 1: the "Temperature Test"
|
|
Method 2: the "Sheeting Test"
|
|
Method 3: the "Plate Test"
|
|
|
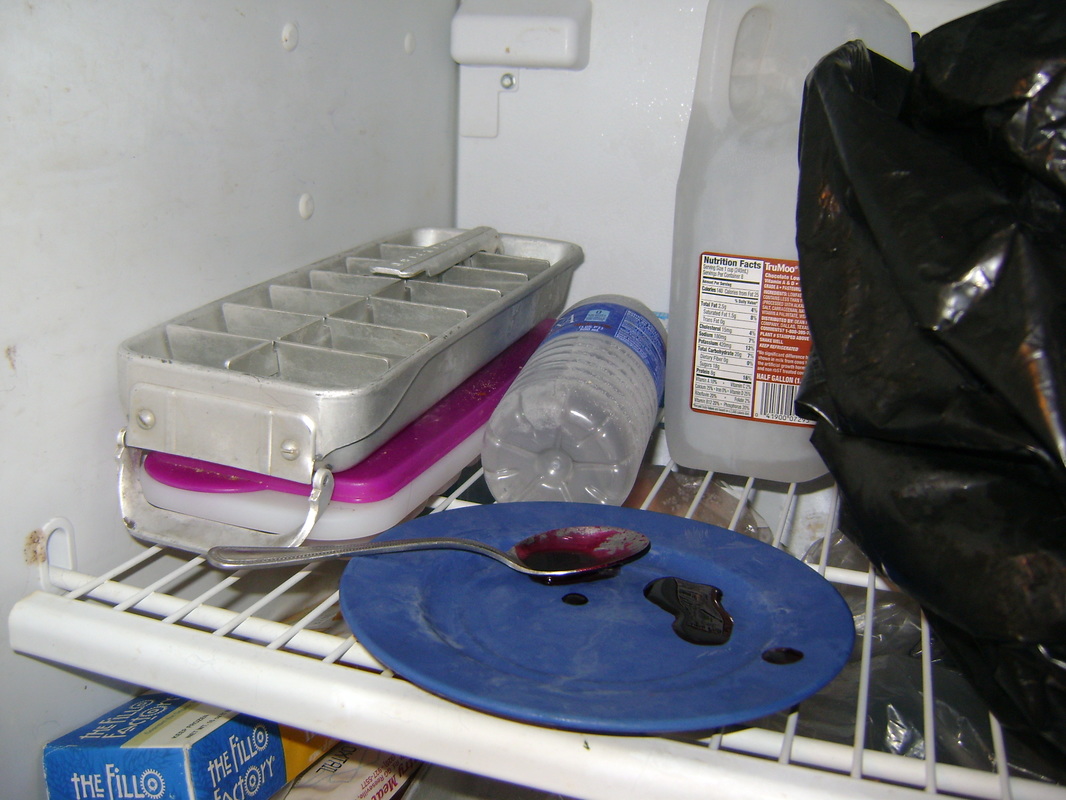
Method 4: The "Side of the Pot" Test
|
|
A Final Test After the Fact
|
|
Canning:
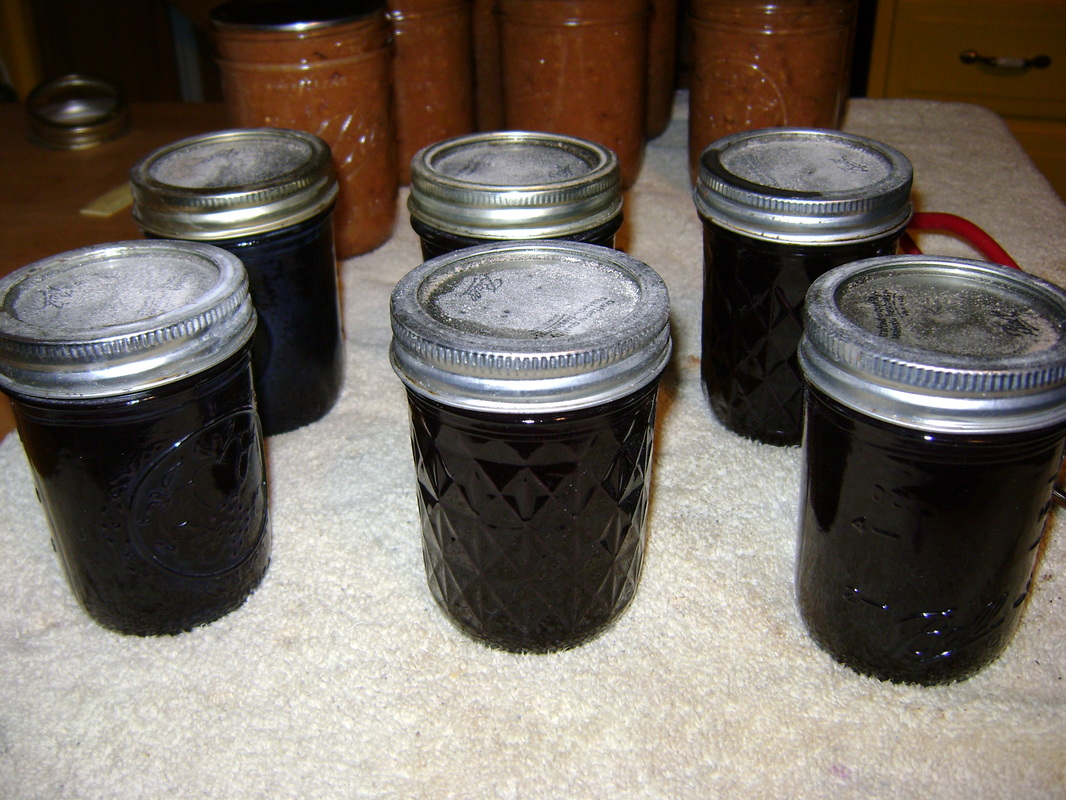
After you've decided that your juice has reached the gelling point, can it in a water bath canner, in 1/2 pint (8 oz.) jars, with 1/4" of headspace, for 10 minutes.
|
|
The next day, you'll have jelly, and you can start eating it!
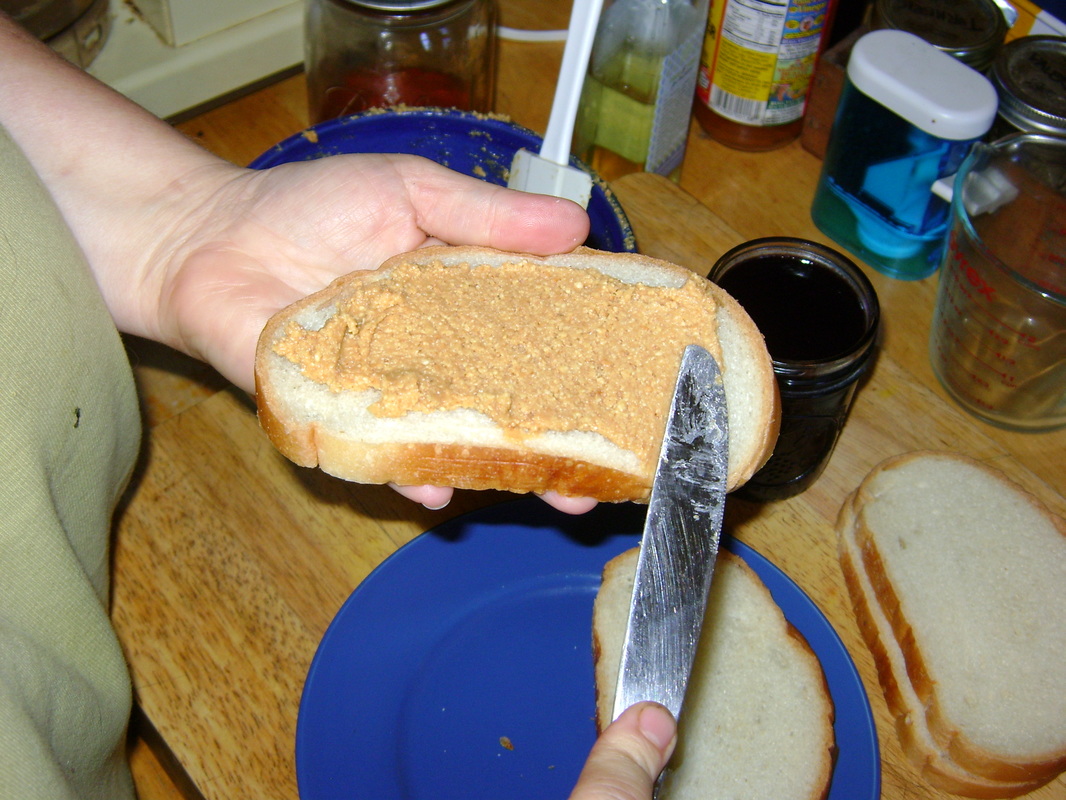
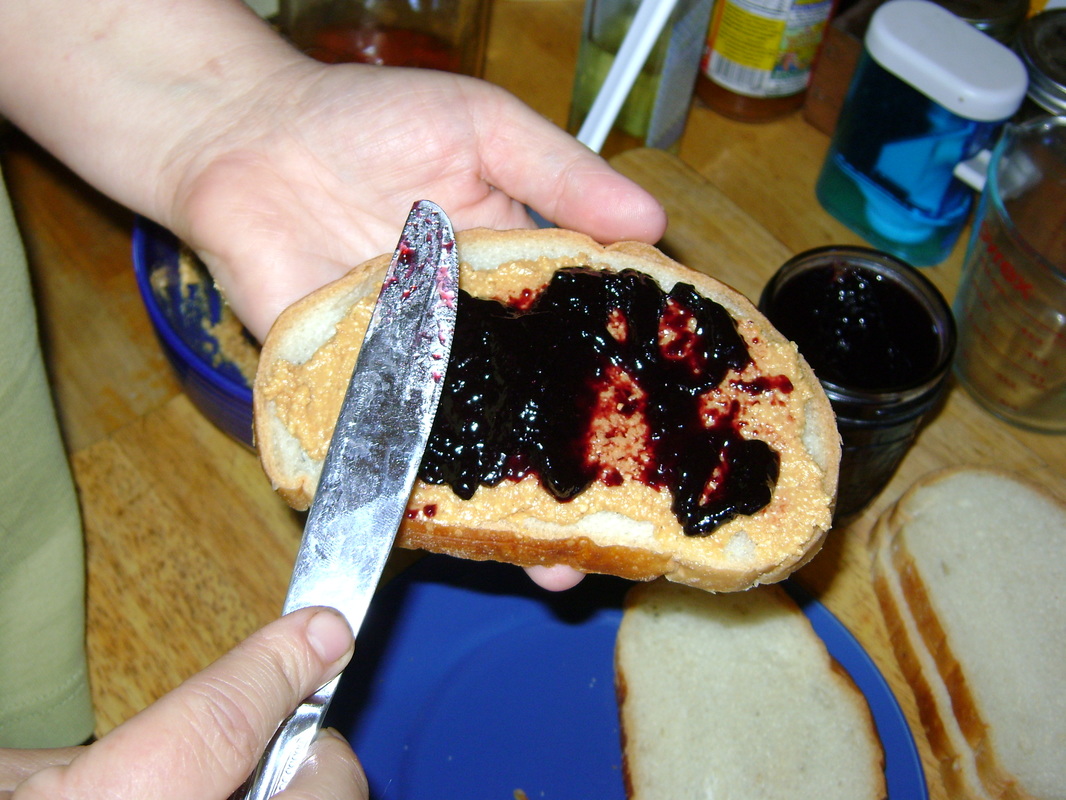
A Classic Peanut Butter & Jelly Sandwich,
made with our wild grape jelly and homemade peanut butter:

|


|
Yummy!
Storing: |
Use as a Sweetener: |
|
Canned jelly is shelf stable, so stores for a long time in your cupboard, although it's best to eat it within a year.
|
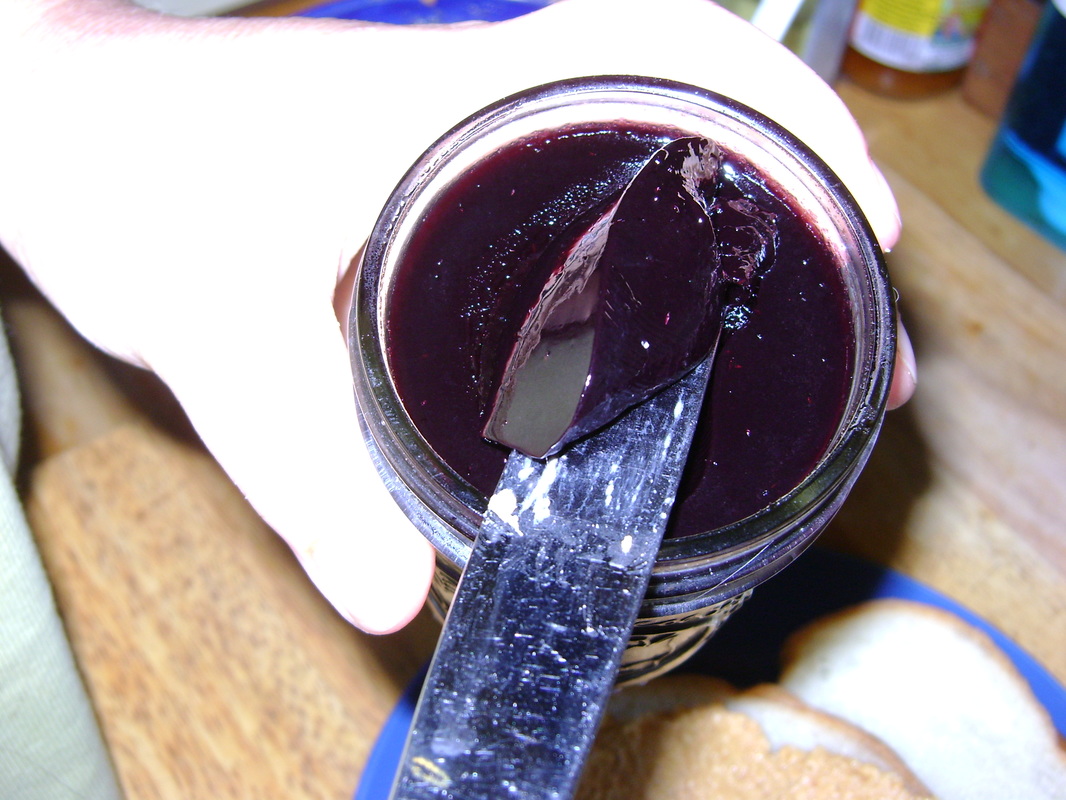
We end up with more jelly than we could eat on toast,
so I also think of it as a sweetener, and use it in place of honey or syrup or sugar:
|
Harvest Records:
|
|