Our Tiny Homestead
  • Home
  • Inside
    • Buy Nothing Challenge >
      • 2014
      • 2015
      • 2018
      • 2019 & Debt-Free
    • Our Wood Stove
    • Laundry
    • Prepare for a Power Outage
    • Renovations
  • Outside
    • Theresa's Gardening Goals
    • Permaculture 101
    • Perennial Vegetables
    • Eat Your Wild Yard
    • Seed Starting
    • Walnut Syrup
    • Gardening for Wildlife
    • Wildlife Pond
    • Save Our Bees
    • Our Gardens >
      • Celtic Cross Garden
      • Catio Construction
  • Shelf Chefing
    • Bear's Shelf Chefing
    • In Shape Shelfchefing
    • Wild Raspberries
    • Grilled pizza
    • Celebrate Seasonal Eatin >
      • Samhain - Late Fall
    • Cook of Anarchy grilled cheese
  • Cooking
    • Wood Stove Cooking
    • Haybox Cooking
    • Heat wave solar cooking
    • Division of Labor
    • Recipes
  • Pantry
    • Pantry Intro
    • Pantry Cooking
    • Yearly Harvest List
    • Preserving
    • Making Staples
    • Growing Sprouts
    • Building Our Pantry
  • Celebrate
    • After the Pandemic
    • Winter Solstice
    • Mid-Winter & Imbolc
    • Spring Equinox
    • Late Spring & Beltane
    • Summer Solstice
    • Fall Equinox
    • Late Fall & Samhain
  • Our Books
  • Blog
  • About
  • Contact
  • Resources

PERMACULTURE DESIGN PRINCIPLES

1.  Planting Zones
2. Keyhole Beds
3. Herb Spirals

Now that you're getting rid of your lawn and are dividing your yard into garden rooms, here are some permaculture principles you can use to help you determine how to furnish each room with different types of garden:
 

1.  Plant in Zones

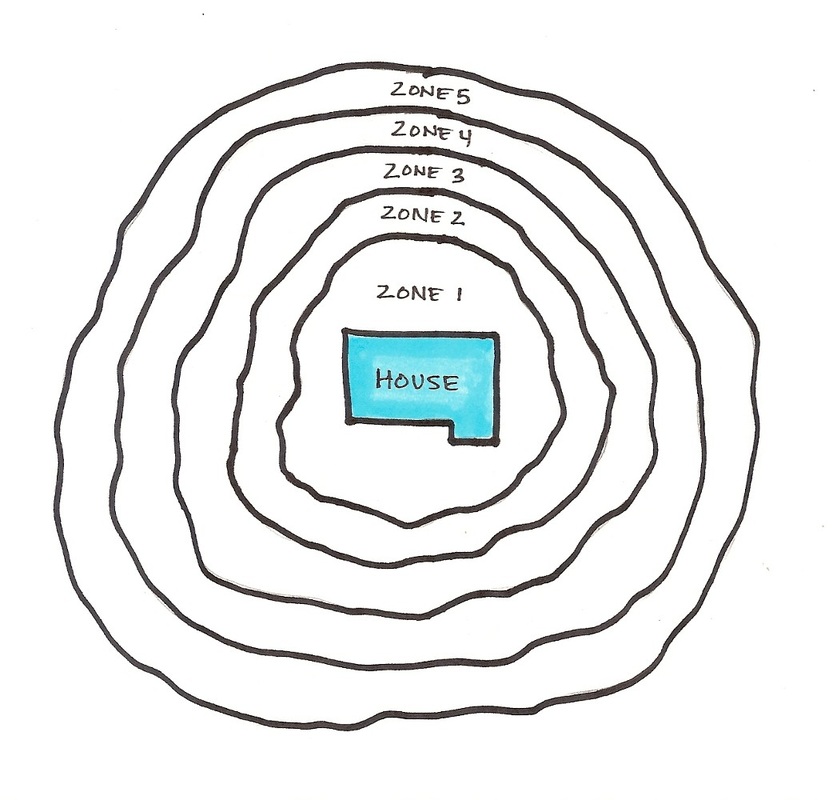
Permaculture zones are a way of thinking about where to put what on a large property. The basic premise is that whatever involves more daily work on your part should be closer to the house:
  • Zone 1:  This is the closest to the house. It is visited most often, and is most intensively managed. It includes plants that are for daily food use, such as a kitchen garden.

  • Zone 2:  Is semi-intensely managed, including staple crops that are harvested once a season, barns, and small animals (such as poultry and rabbits).

  • Zone 3:  This is the farm zone, with cash crops, large fruit & nut trees, and large animals (like cows and pigs).

  • Zone 4:  This area needs minimal care, such as wood lots for timber, animal pastures, areas for native plants.

  • Zone 5:  This zone is left wild & unmanaged. It's farthest from the house and is used for inspiration (observing how Nature works so you can recreate it in the other zones).
Picture
Applying Permaculture Zones to a smaller property:

  • Follow the basic principle of the above zones:  the plants you use the most or that require the most care should be closest to the house.
  • Many people put their vegetable gardens as far from the house as possible, but at the end of the day you’ll be tired and won’t want to walk that far, even if it’s only 50 feet away. You especially won’t want to carry water or haul the hose out there.  
  • If the fresh herbs are right outside your kitchen door, you’re much more likely to go get a few while you’re cooking dinner. 
  • Vegetable and herb gardens don’t need to be relegated to the back 40 because they’re “ugly.”  They can be planted so that they are beautiful enough to deserve a prime location near your house, such as our vegetable garden to the right.
  • Don’t forget your front yard if that’s your sunniest location- many people are starting to put edible gardens in front of the house.
  • Keep a small corner of your yard wild, so you can observe how Nature does Her gardening.
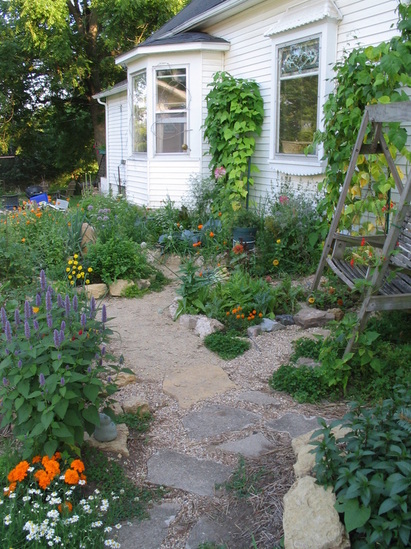
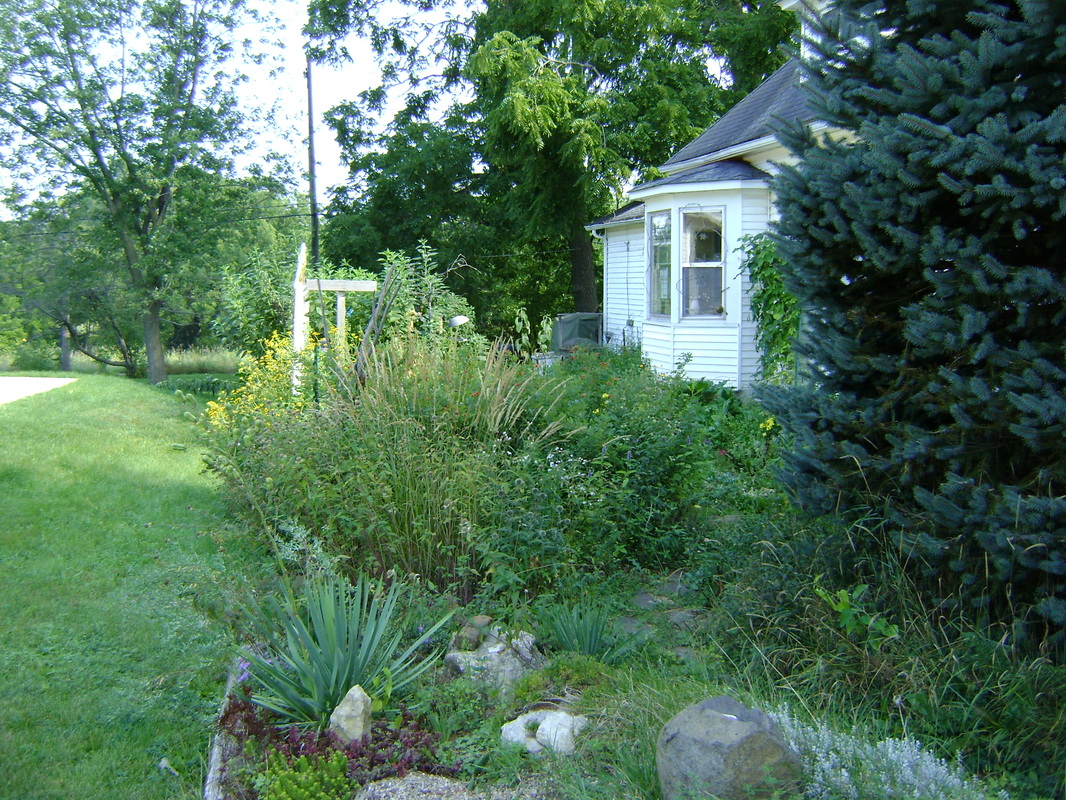
The garden along the side of our house (below left), is close to the hose and easily accessible out our kitchen door. Even though we have a tiny yard, I find it easier to get myself to go to this side garden for a few herbs to add to a meal than going to the garden at the back of our property behind our shed (below right), which we can't even see from the back door. The hose doesn't reach that far, so it was very hard to water this garden before we installed a rain barrel to collect rain water from the shed's roof.
Picture
Picture
Our side yard.
Picture
Garden behind our white shed.
 

2. Keyhole Beds

In Nature there are very few straight lines. Try to imitate this in your garden. Avoid straight paths and straight borders. Keyhole beds mimic Nature’s curves and save space.

Keyhole beds:
  • are horse shoe shaped, about 8’-10’ across.
  • A path runs down the middle, shaped like a keyhole. It's about 1' wide, but gets wider at the end so there’s room to turn around.
  • Keyhole beds create more space for planting by reducing the size of paths.  Here are some numbers from the book Gaia's Garden:  for 50 feet of planting, traditional rows of vegetables require 40 sq. ft. of path, raised beds require 10 sq. ft. of path, keyhole beds require 6 sq. ft. of path.
  • You can reach everything in the bed from the path, so you don’t have to walk on the soil and compact it (which would require you to till it later).

Plant the keyhole bed using the Zone system:
  • The most frequently picked plants go closest to the center:  e.g. daily salad greens should be next to the path.
  • Behind these, place plants that are picked less frequently, but regularly: tomatoes, peppers, beans.  
  • At the back of the bed where it’s harder to reach, install long-term crops that only get harvested once: potatoes, carrots, cabbage
  • Fill in the edges around or between keyhole beds with perennial plants that attract beneficial bugs or provide other benefits to plants.
  • You can install a trellis around the back of the bed for vining plants.
Picture
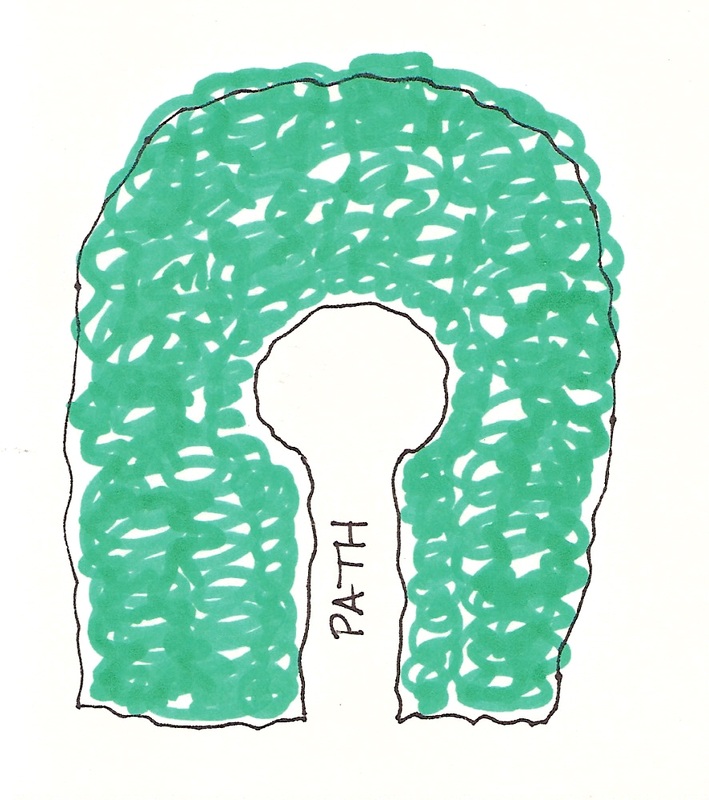
Diagram of a keyhole bed.
Picture
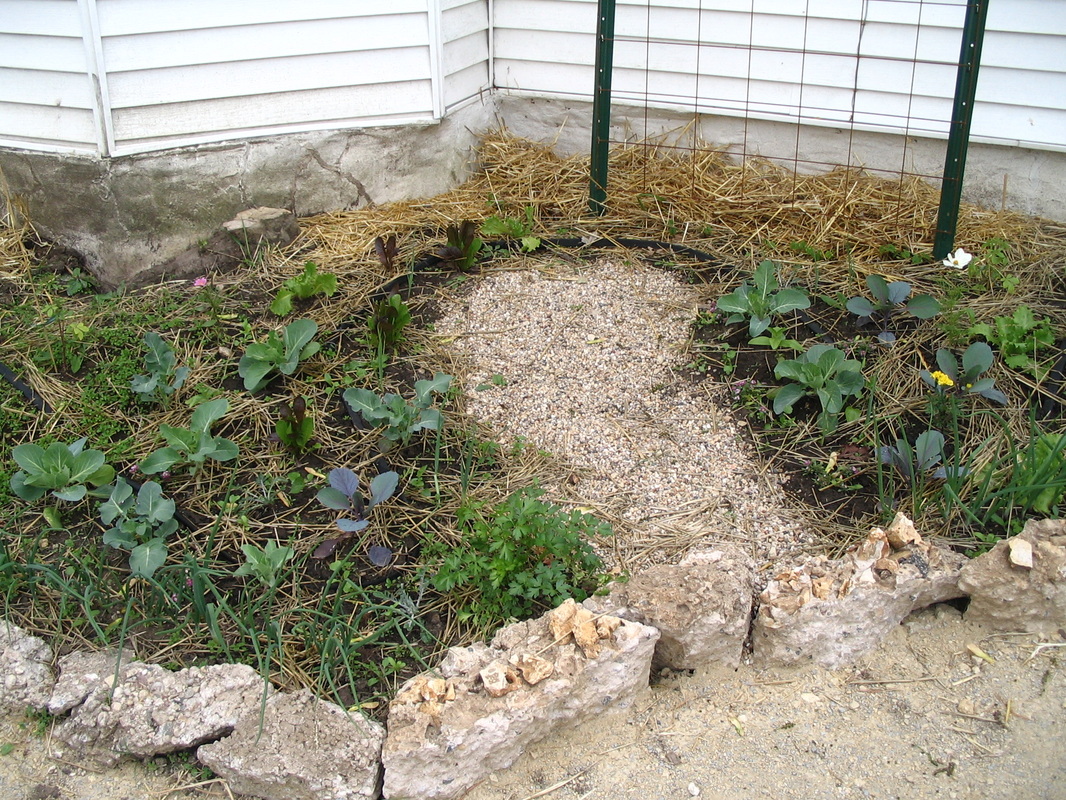
Keyhole bed when first planted.
Picture
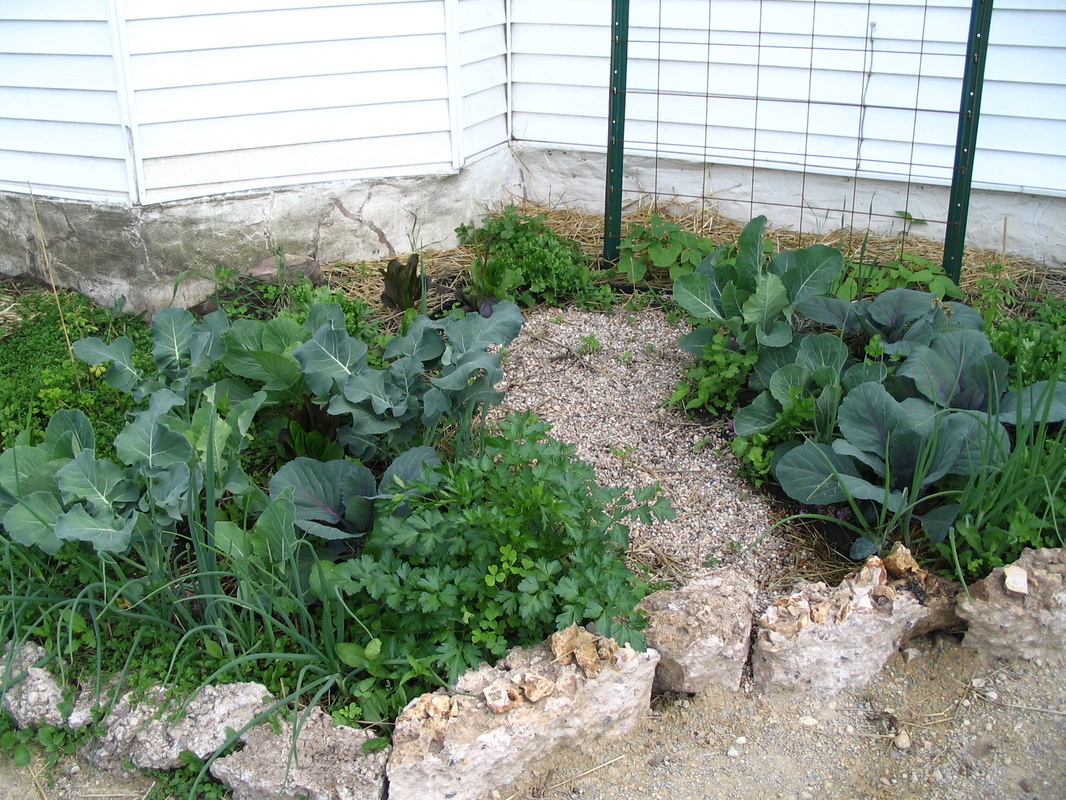
Keyhole bed later in the season.

You can design larger areas with multiple keyhole beds to save space:

The design below is known as a Mandala Garden. 
It's made of multiple keyhole beds.
Picture
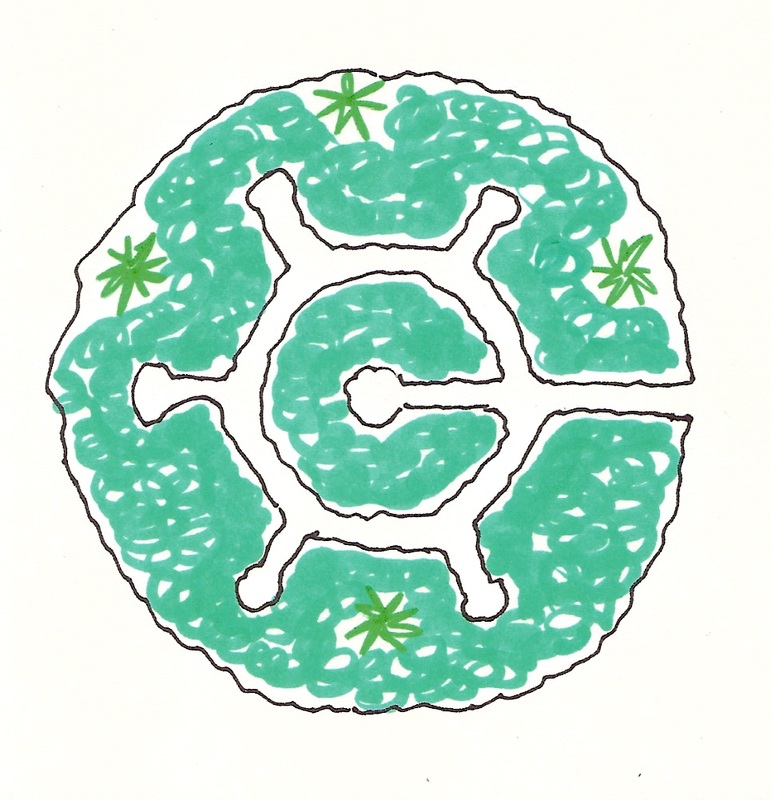
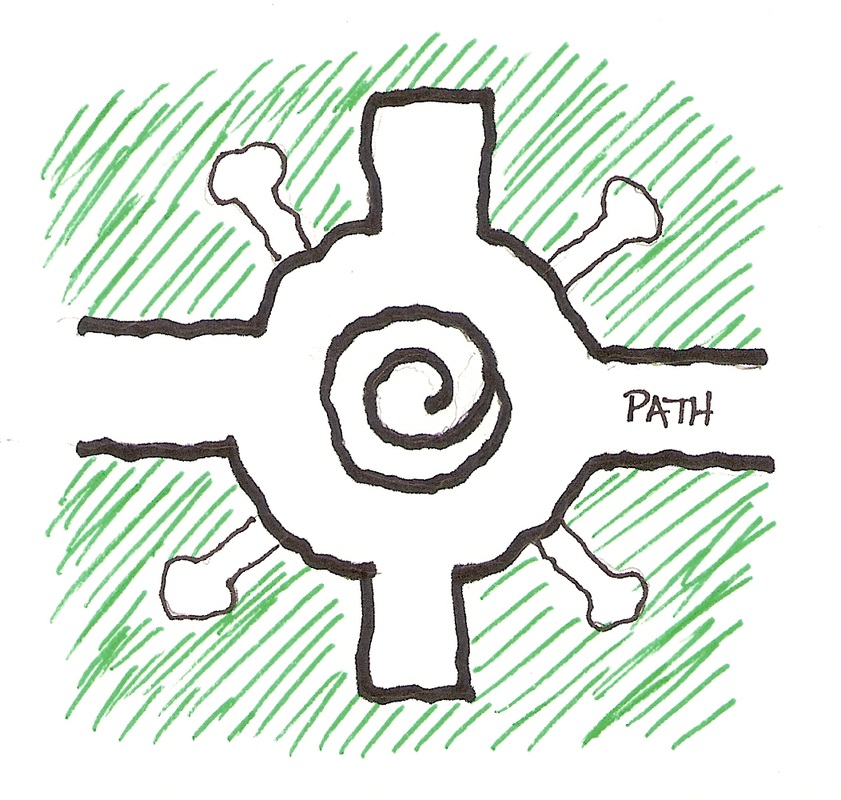
 The Mandala design inspired me to create something similar (below) in our Celtic Cross Garden.
Picture
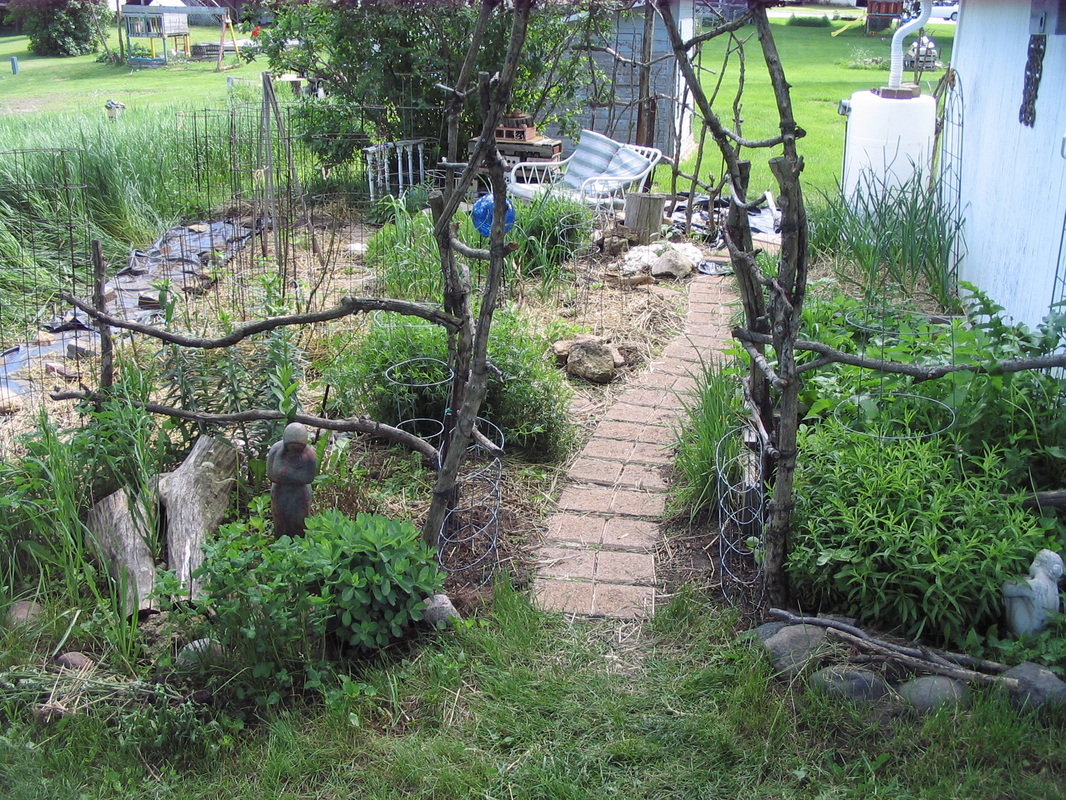
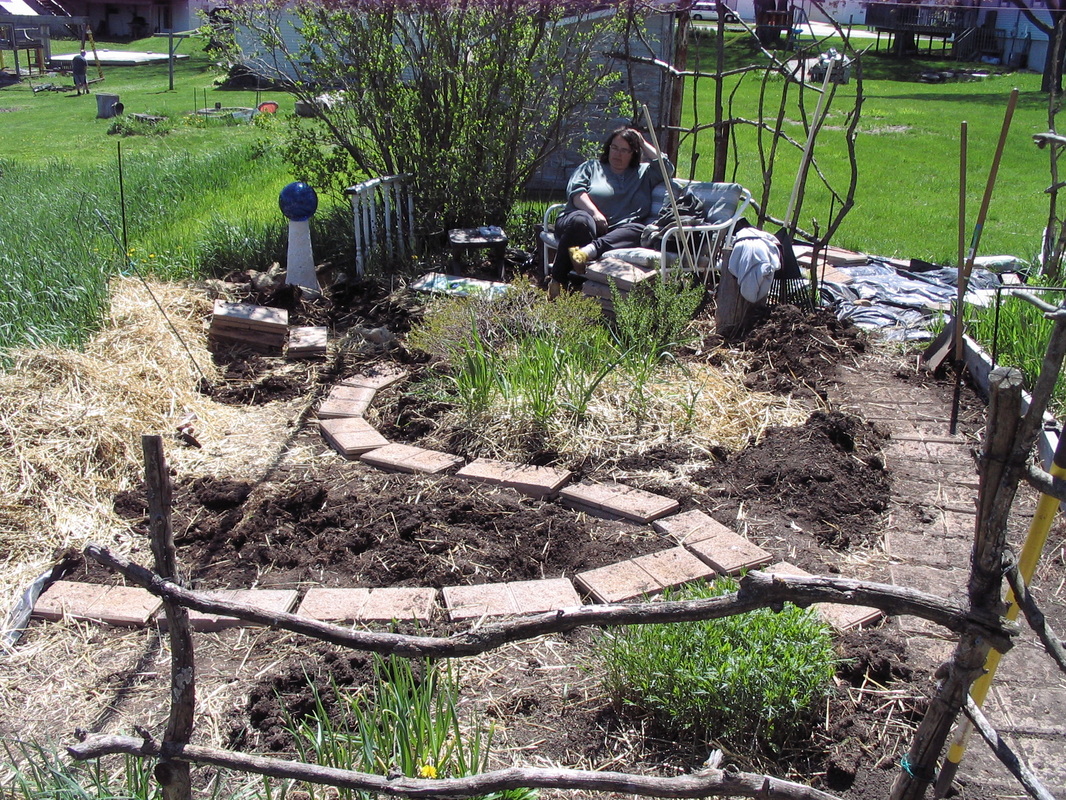
Below is another example. I couldn't put keyhole beds in this area because I already had some perennials plants in place that I didn't want to uproot. But I remembered the principles behind keyhole beds while I was deciding where to put paths in the garden behind our shed. These paths have natural curves and are placed so that all areas of the garden can be reached for harvesting without stepping onto the garden soil.
Picture
 

3. Herb Spiral

Herb spirals also mimic patterns found in Nature.
  • They save space by curving 20-30’ of plants into a circular space about 5’ across and 3’ high.
  • Place large rocks in a spiral pattern (shown in the diagram to the right). Go up a level higher for the rocks on the inner spiral. Fill in between with good soil.

This design creates different niches so you can install plants that have different needs:
  • The top will be drier and sunnier (good for oregano and thyme)
  • The bottom will be wetter because the rain will run down the sides
  • The north facing side will be shadier (good for parsley and chives, that like moist, partial shade)
  • If your spiral is tall enough, it's easier to reach the herbs at the top without bending all the way over.
  • Herb spirals are great right outside the kitchen door, so you can easily access herbs while you’re cooking. We had to put ours in the side yard (below) because the area right outside our door is too shady.
Picture
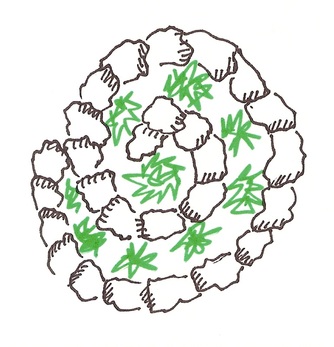
Diagram of a herb spiral seen from above.
Picture
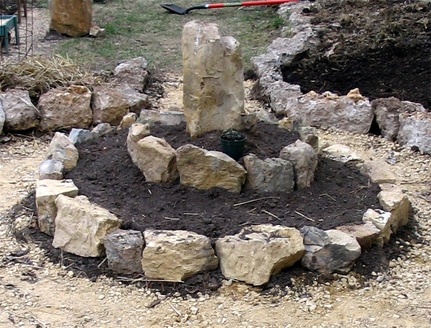
Unplanted herb spiral in the middle of our Celtic Cross Garden.
Picture
Planted herb spiral later that Summer.

For more ideas about designing permaculture gardens, continue to:
What & How To Plant

Home    Inside   Outside   Shelf Chefing   Cooking   Pantry   Celebrate   Our Books   Blog   About   Resources   Contact
Be the change you wish to see in the world.  ~Gandhi
Want to know when we add new content to our website?  Subscribe to our Blog.

These pages may contain affiliate links that allow us to share products we authentically recommend.
Clicking the links results in no extra cost to you, but we may receive a small commission that may someday help fund this work.

Copyright 2020 by Theresa & Rob Berrie