Freezing as Part of
|
PRESERVING FOOD
|
1. How To Freeze Foods- Example: Sweet Peppers
Peppers (both sweet and hot) are one of the vegetables that don't need to be blanched before freezing, so they are an easy project to start with. We buy sweet peppers of various colors from the farmer's market during peak season (usually in August) when they are cheaper. Here's how to freeze them:
|
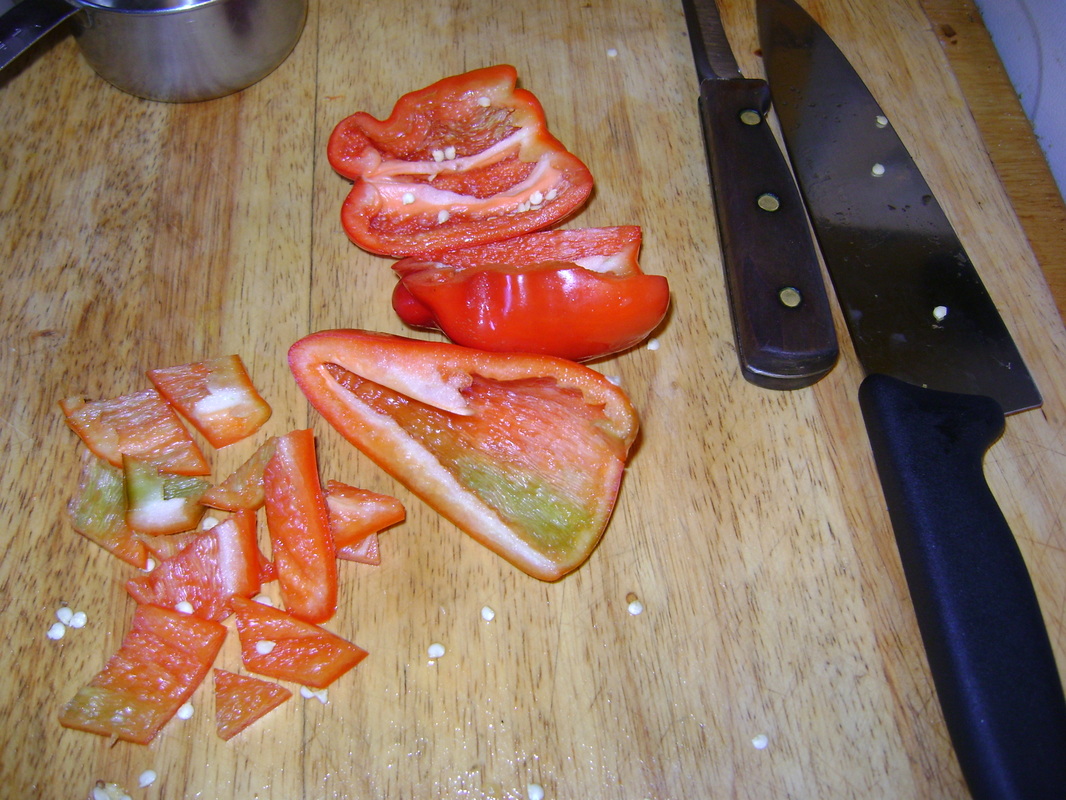
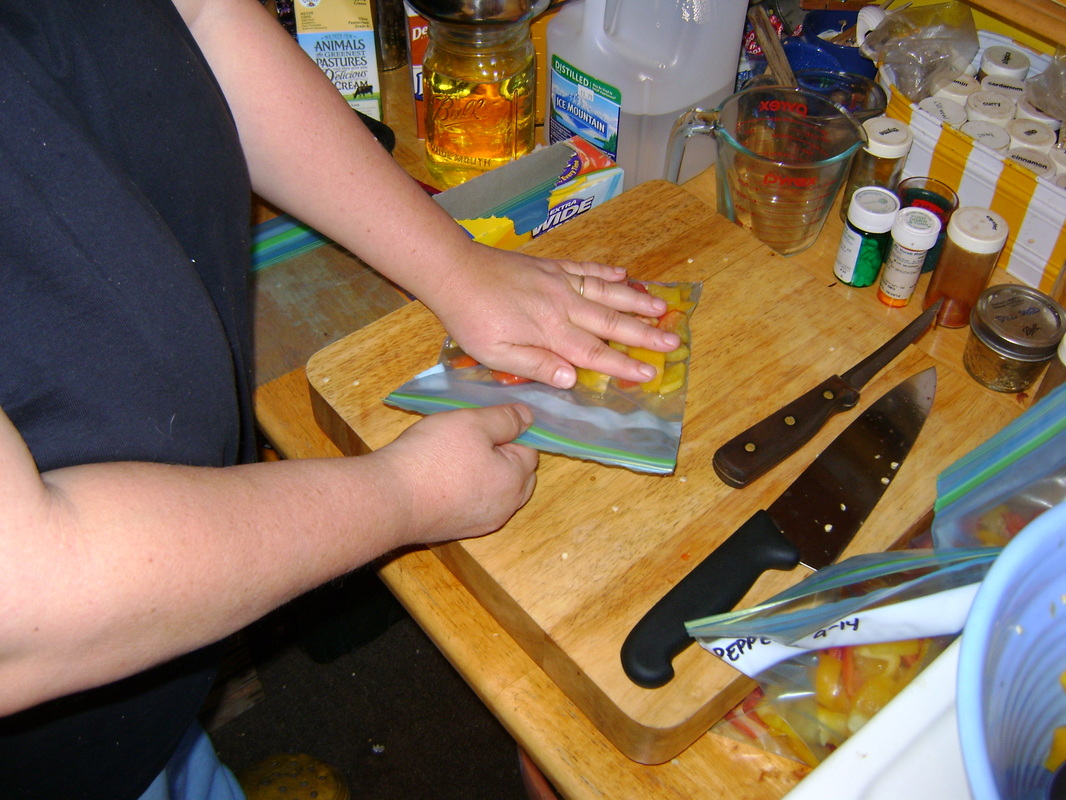
1. Cut open the peppers, pull out the seeds and discard, then rough chop them. Bigger pieces tend to preserve better in the freezer. Note: make sure your knife is sharp, or this won't be any fun. Also, I've found that peppers cut easier if you slice them with the inside up (like in the photo).
|
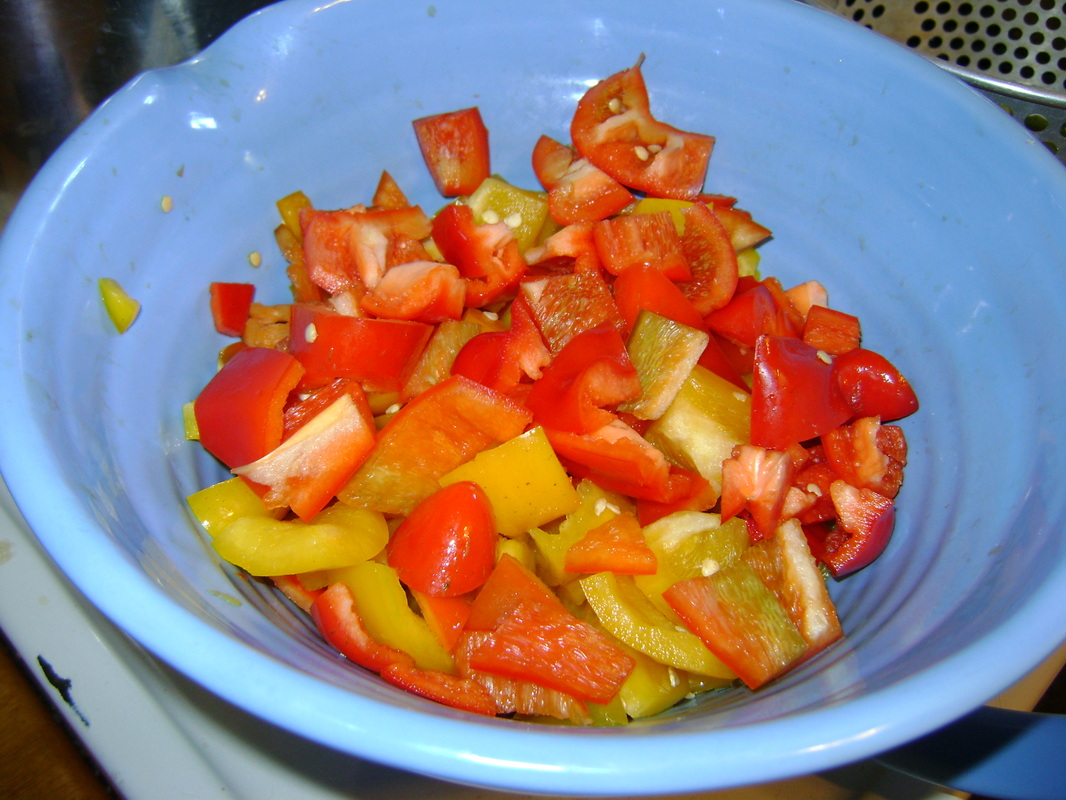
2. We like to mix peppers of different colors, although this time we didn't have any green peppers.
|
|
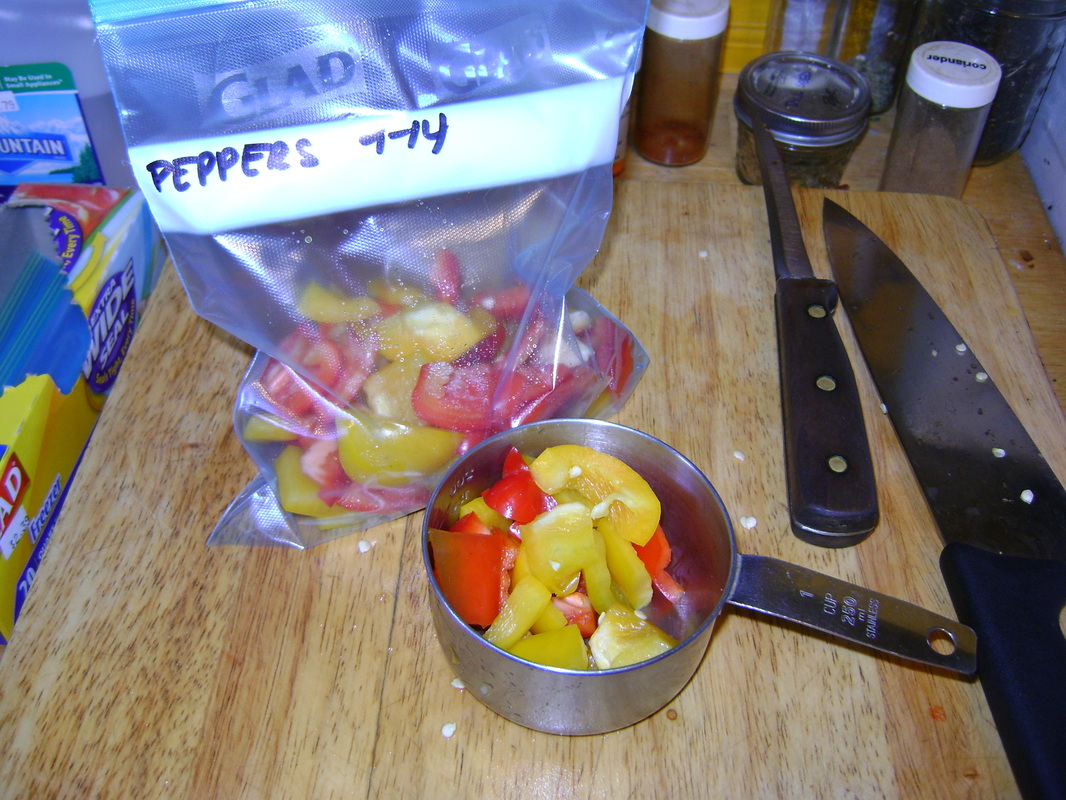
3. Put the peppers into heavy freezer bags. Don't put in more than you expect to use at one meal. You can use a measuring cup if you want to be consistent with how much you put in each bag.
|
4. You want to get as much air out of the freezer bag as possible, so there's less room for freezer burn to occur. Here's how I do it: Shake the food to the bottom of the bag, lay the bag flat on the cutting board, and press on it to squeeze out the air. Start pressing at the bottom of the bag and press toward the opening, moving around the food so you can push out as much air as possible.
|
|
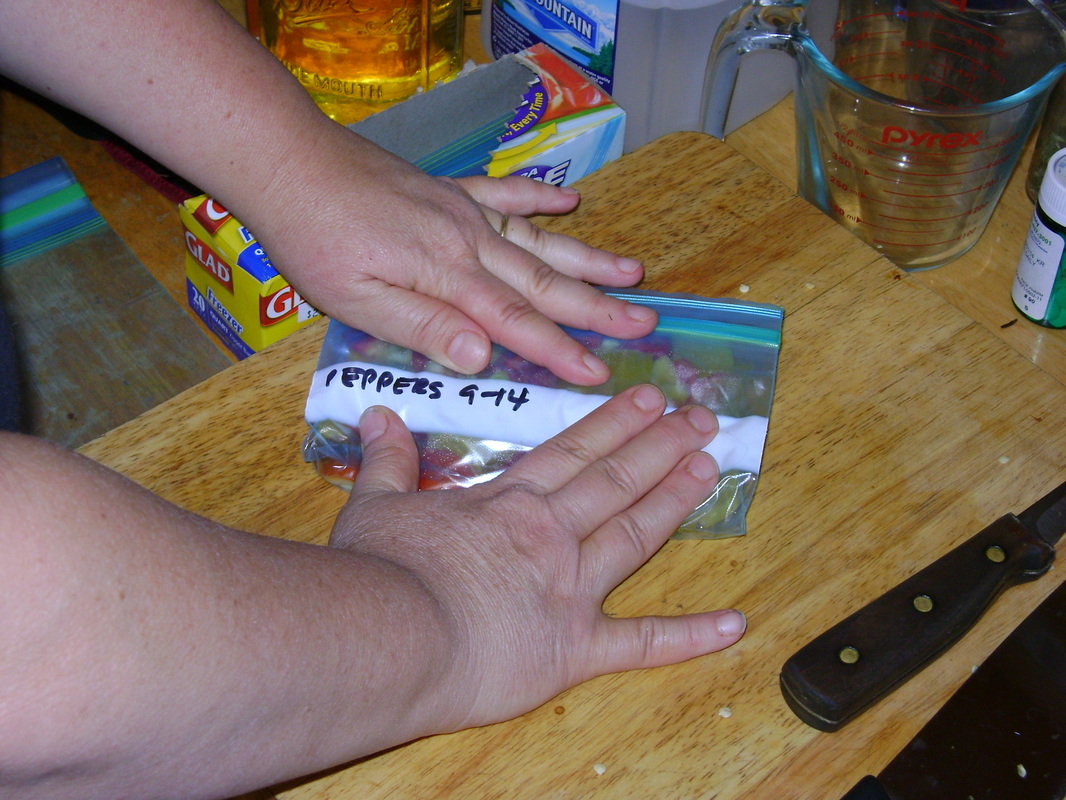
5. Fold the empty top part of the bag up over the full, bottom part of the bag, and squeeze out the air again, still pressing toward the opening.
|
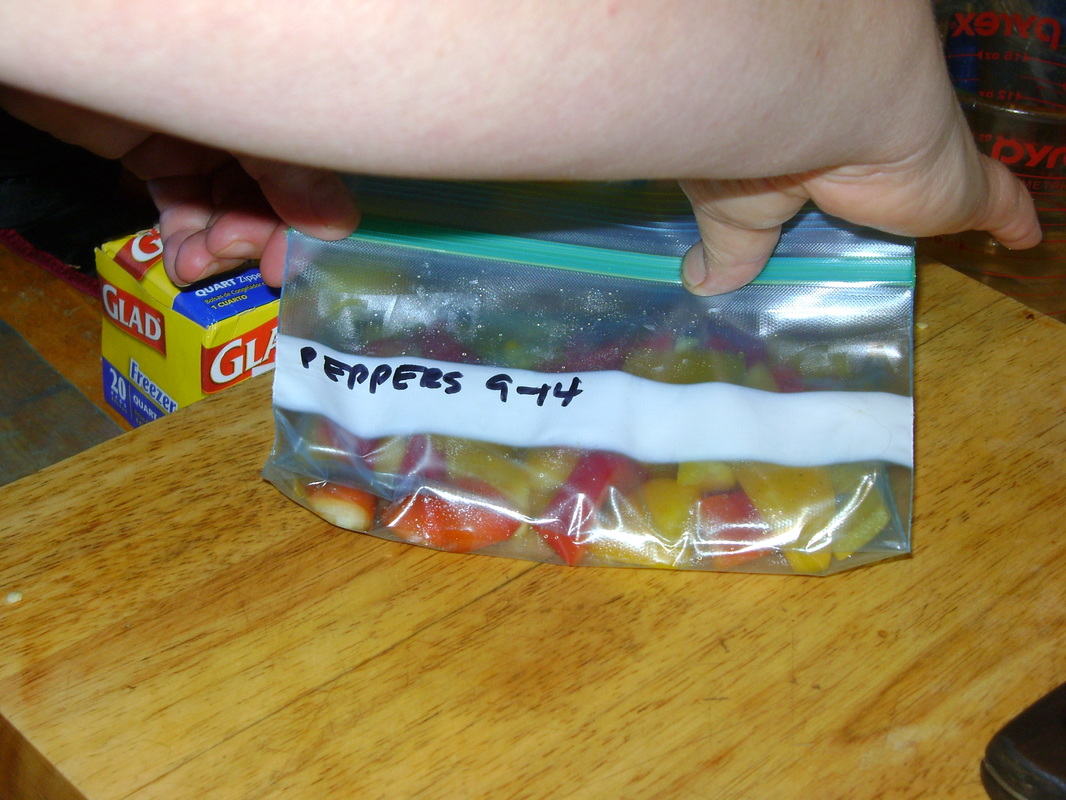
6. Start sealing the bag until only a little bit is still open on one side. Press as much of the remaining air as you can out of the little opening and seal.
|
Using Frozen Peppers:
- I find these peppers very easy to use. I can take them directly from the bag and cook them in a skillet, usually with onions, no thawing needed.
- They work great in a lot of the dishes I create (see Theresa's 5 Steps for Cooking from the Pantry) as Step 4: add vegetables of at least two different colors.
- We also freeze smaller serrano peppers whole, which are a hot pepper, and I use them to add heat to my refried Mexican beans (just one whole pepper per crock pot is enough for us).
2. Blanching to Preserve Frozen Foods- Example: Green Beans
Most vegetables are supposed to be blanched before you freeze them. Blanching consists of briefly boiling vegetables to remove enzymes on the surface that could promote spoilage. I admit that I am skeptical about whether doing this is necessary, and can attest that I have frozen beans without blanching and noticed no problems. Most of the time, though, we do include this step, and it certainly seems reasonable that vegetables will last longer in storage if you blanch them first. The Ball Blue Book of Preserving (often available where canning supplies are sold), which we usually think of in connection to canning, also includes a fairly comprehensive section on freezing foods. It lists specifics instructions for each vegetable (as well as fruits, meats, etc.), including blanching times.
General Blanching Instructions:
Our Preservation Dance: These blanching instructions may sound complicated, but Bear and I have learned to do it together in a kind of dance, with me standing at the stove and him standing at the sink. I fill my colander and plunge the beans into the boiling water, setting the timer for 3 minutes. At two minutes I give Bear a warning, and he empties the colander that has been holding the beans that were cooling in the ice bath. I lift the colander out of the boiling water and dump the beans into the empty colander in the ice bath. Then I quickly put another handful of beans into my colander and plunge it back into the boiling water. I set the timer and we do it all over again, so that we always have a batch of beans boiling and cooling at the same time. Here are some pictures:
General Blanching Instructions:
- Blanching needs to be done quickly, following the times as precisely as possible so that you inactivate the spoilage enzymes, but don't overcook the food and lose nutritional value and taste.
- Blanching consists of boiling the food for the specified time (usually a few minutes), then plunging it into an ice bath to stop the boiling.
- To make the ice bath, we fill a large bowl or pot with cold water and ice, and leave it in our sink. We rest a colander in it to hold the food and make it easy to remove.
- Bring a pot of water to a rolling boil before you plunge the vegetables into it, and make sure your pot is big enough so that the vegetables are completely submerged.
- Even though you may want to get done faster, it's best to blanch in small batches so that everything goes under the water and so that the water keeps boiling after you put the vegetables in.
- Begin timing the moment you plunge the vegetables into the water.
- When the blanching time is up, immediately plunge the food into the ice water bath to stop it cooking. Keep the vegetables in the ice bath for the same amount of time that you boiled them.
- You can blot the produce with a towel to dry it a bit before freezing (but we usually skip this step).
- Put in freezer bags as shown above in Step 1 and freeze while still cold.
- We only freeze two vegetables this way. Here are their blanching times:
Green or yellow wax beans: blanch 2-3 minutes
Corn: blanch 4 minutes if cut off the cob
Our Preservation Dance: These blanching instructions may sound complicated, but Bear and I have learned to do it together in a kind of dance, with me standing at the stove and him standing at the sink. I fill my colander and plunge the beans into the boiling water, setting the timer for 3 minutes. At two minutes I give Bear a warning, and he empties the colander that has been holding the beans that were cooling in the ice bath. I lift the colander out of the boiling water and dump the beans into the empty colander in the ice bath. Then I quickly put another handful of beans into my colander and plunge it back into the boiling water. I set the timer and we do it all over again, so that we always have a batch of beans boiling and cooling at the same time. Here are some pictures:
|
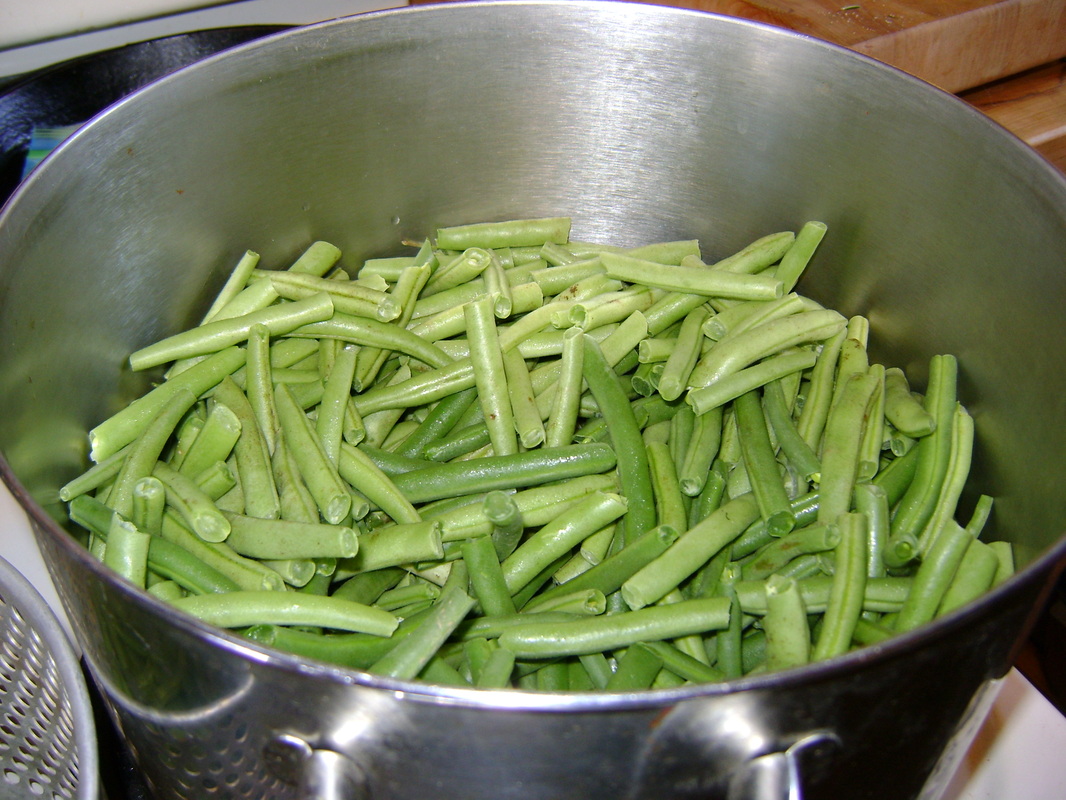
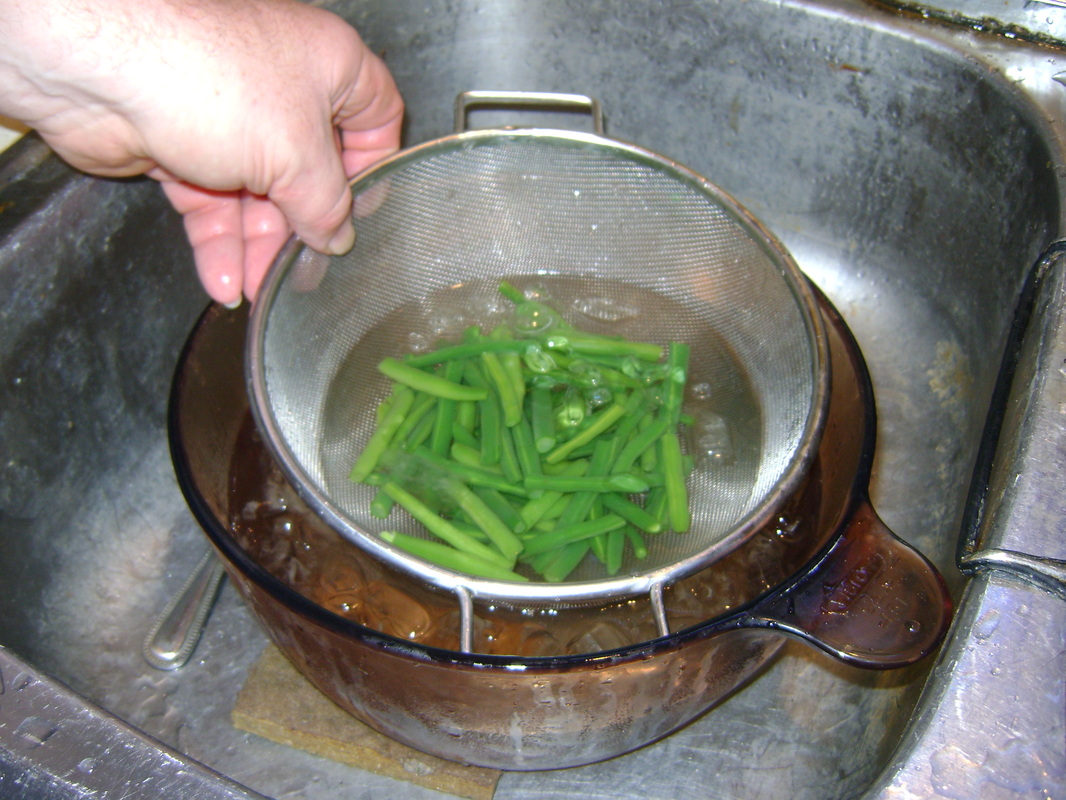
1. Begin by cleaning your beans if needed in cold water, then snap off the end of each bean, and snap each bean into 2 or 3 pieces, depending on your size preference. This may sound like a chore, but I actually love it, and fondly remember doing it as a child sitting on our back porch. I like to try to stay in rhythm- with each snap coming at regular intervals. If you manage this, you can go into a kind of peaceful trance.
|
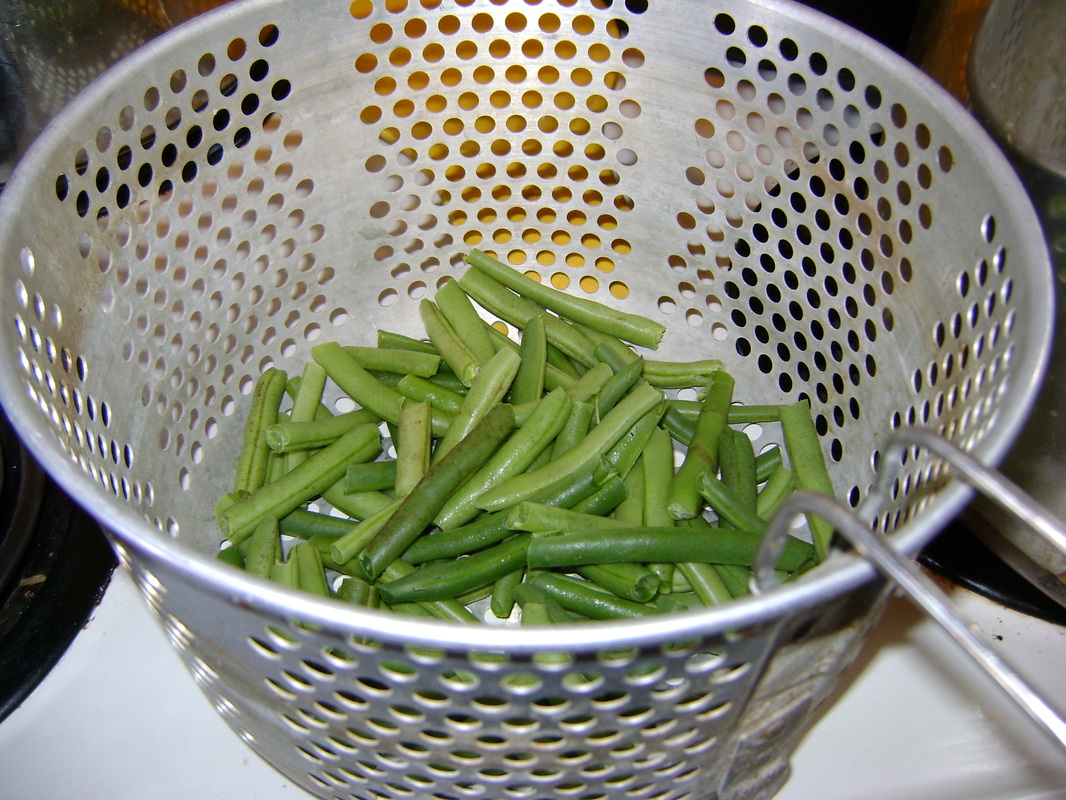
2. This is the colander we use to plunge the beans into the boiling water. We got it at a garage sale. I think it comes from a deep dryer. The handle is detachable for easy storage. It works really well, because it hangs farther down into the water than other colanders. Note that I only have a small amount of beans in the bottom.
|
|
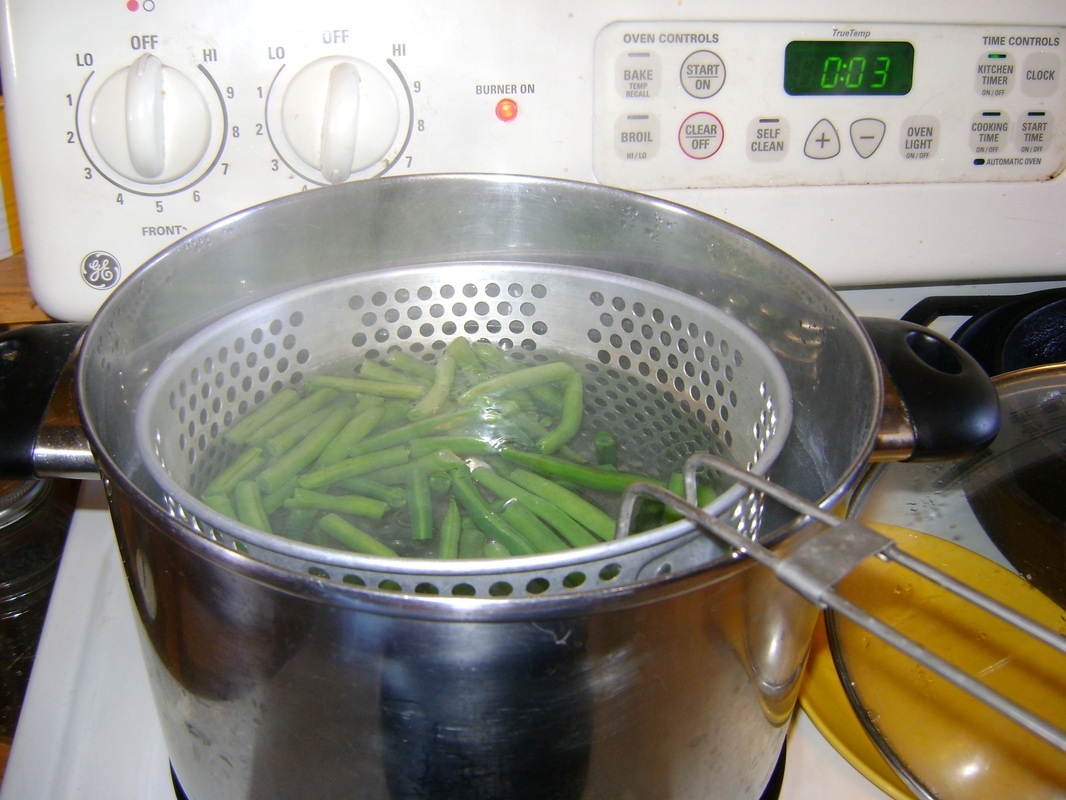
3. Plunge the beans into the boiling water and set the timer for 3 minutes. The rolling boil will likely stop, but it will start again soon.
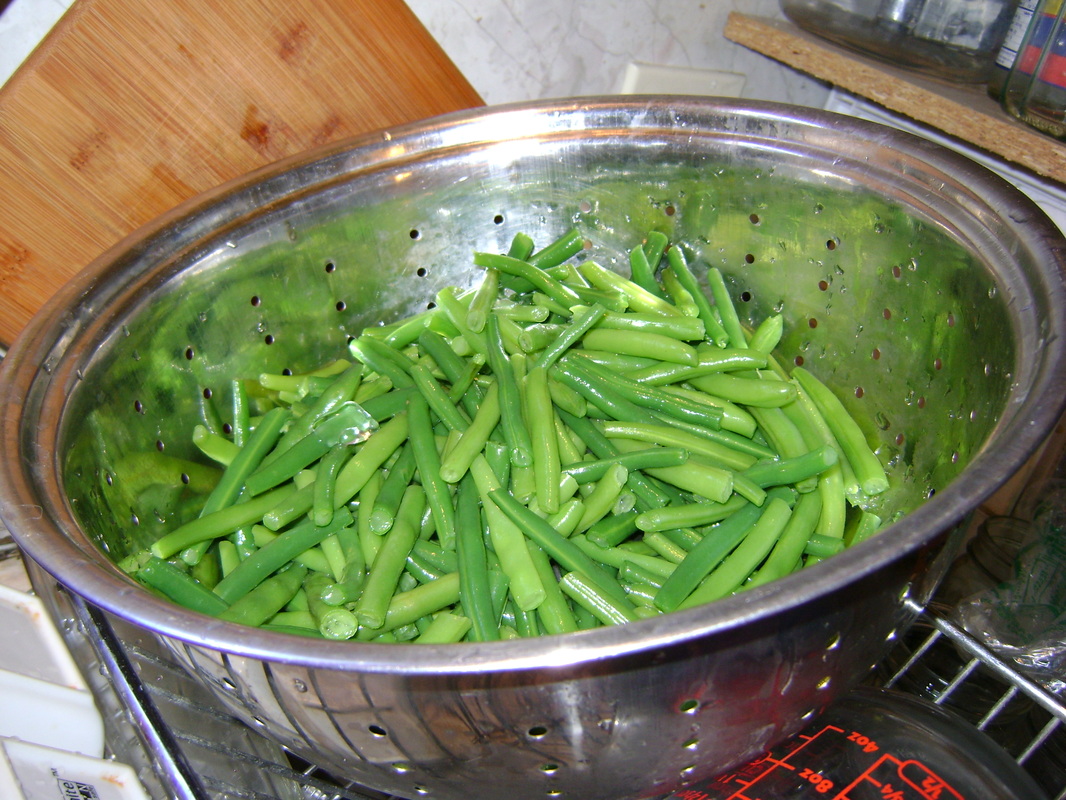
5. We have a big colander sitting on our drain board next to the sink to dump the beans into after Bear removes them from the ice water. Note that the blanched beans are still bright green, meaning they haven't been overcooked and have retained their nutritional value.
|
4. At two minutes, remove any beans that are in the colander in the ice bath, then dump the boiling beans into the ice water.
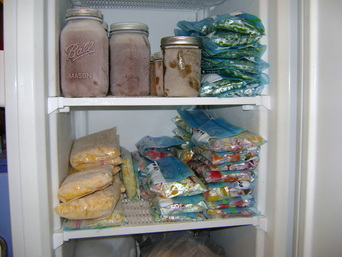
6. Repeat the boiling and icing in small batches until all your green beans are blanched, then put in freezer bags as outlined above. Below they are stacked in the freezer on the right of the top shelf.
|
3. More Freezing Tips:
- Use the more expensive freezer bags. This is not the time to save money- the cheap freezer bags don't protect your food nearly as well.
- Only freeze foods that are in good shape to start with, and cut out any small blemishes. No method of preservation improves the quality of the food, so use the best produce you have for freezing.
- Don't forget to label the food! It looks different after if freezes, so you may not be able to tell what it is later.
- If you're freezing more than one batch over the Summer, date the food you freeze, so you can use up the oldest food first.
- I try to use up food within a year of freezing it, after which it may start to lose nutritional value and taste, but you can probably still eat it.
- If you're freezing something you use regularly in a recipe, freeze it in the quantities you need and include the amount on the label. We store summer squash and pumpkin this way. We grate raw summer squash (a good way to use up zucchini!) and cook pumpkin, then freeze them in 1 and 2 cup bags, to use for making muffins during the Winter.
- Many soups also freeze well in freezer bags, which can be left flat and stacked in the freezer so they don't take up too much space.
- We make our own soup stock and freeze it in canning jars, making sure we leave an inch or two of air space at the top of the jar, because liquids expand when they freeze.
- See instructions elsewhere for how to freeze wild raspberries (scroll down to the "Other Experiments to Try" section).
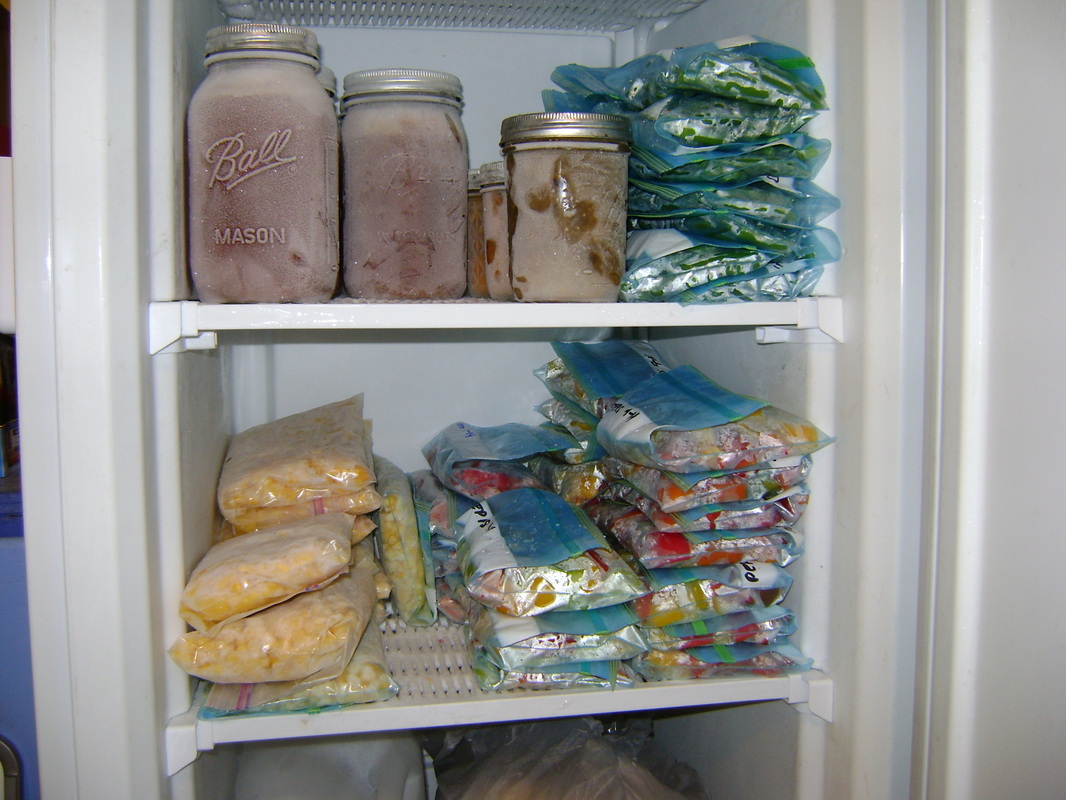
4. Our Upright Freezer:Our first freezer was this small upright one. Upright freezers are more expensive and use more electricity than chest freezers (because they lose more cold air when the door is open), but we bought this one for several reasons:
We use it to store:
(from top to bottom and left to right in the photo to the right)
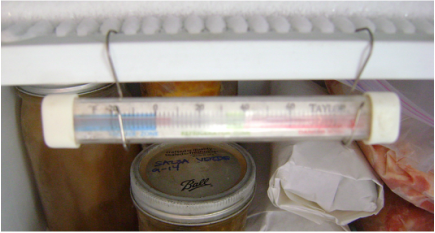
Temperature: We hung this freezer thermometer from the top shelf, to monitor the temperature, which is ideally at zero or below. It should be kept this low so that when the temperature rises after you open the door, or after you put in lots of unfrozen food at once, it will stay cold enough so that it doesn't get above freezing. In this photo the temperature is almost to 10 degrees, after having the door open for a only couple minutes to take photos:
|
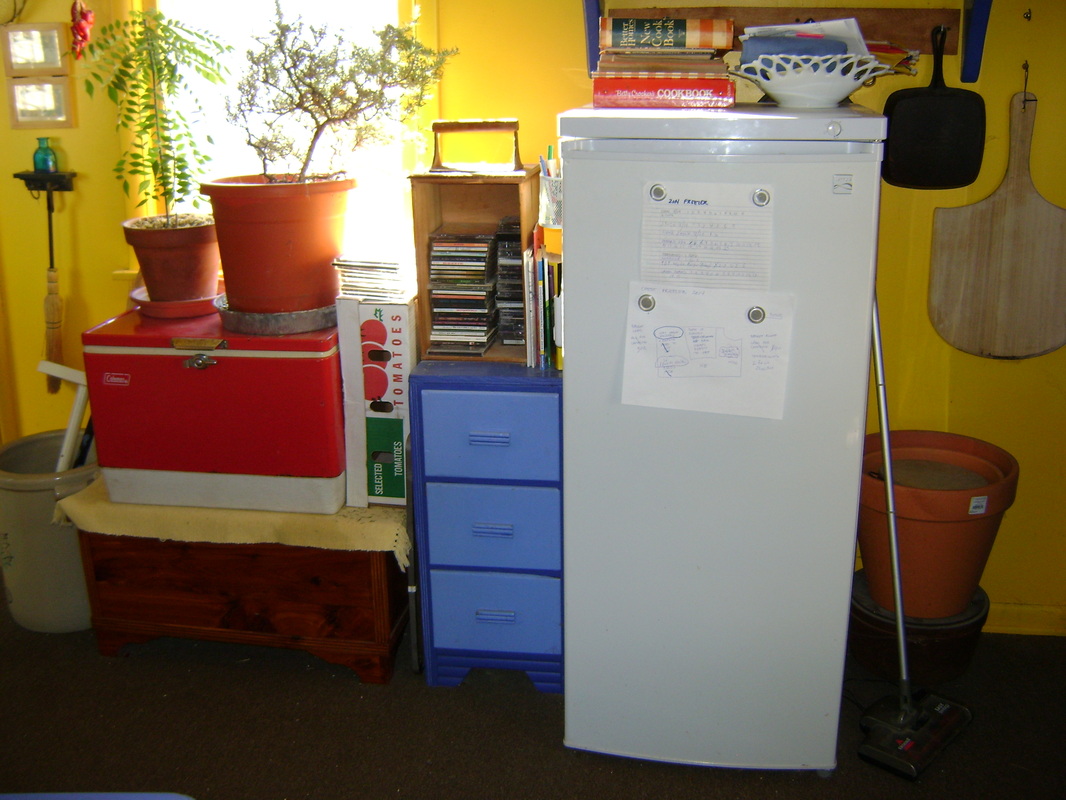
Upright Freezer (white above)
Cost: $270 (in 2010) Capacity: 5.1 cubic feet Defrost: have to do it manually 
|
|
Unplugging for the Summer: This freezer has worked great for us. We usually use up most of its contents by early Summer and can turn it off and defrost it. Whatever food is left can go into the freezer that is part of our refrigerator, and we save resources by leaving the upright freezer unplugged until we fill it again in the Fall.
|
Defrosting: I defrost this freezer by putting a plastic, square dish pan on the lowest shelf, which props the door open. I put thick, bathroom size towels under the bucket and on the floor in front of the freezer to catch the dripping water that missed the pan. Then I unplug it and let the ice melt and the freezer dry, for a couple days. Make sure the inside is completely dry before you close it for the Summer or it could start growing mold and you'll have a mess to clean up in the Fall.
|
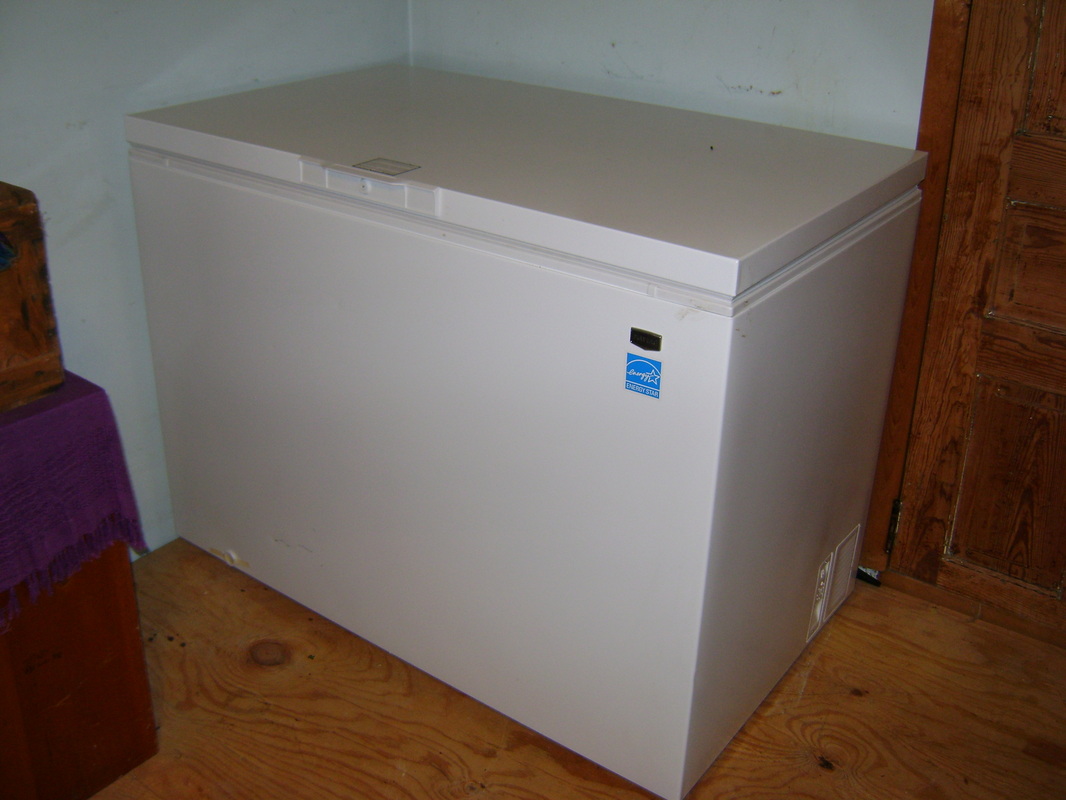
5. Our Chest Freezer- for Bulk Meat Storage:
|
Chest freezers may be harder to organize, but they are more energy efficient. When you open the door of an upright freezer, all the cold air falls right out and the motor usually kicks in right away to replace the lost air. In a chest freezer, the lid is on top, so most of the cold air stays right where it is when you open the lid (since cold air drops and hot air rises).
We bought our chest freezer a few years after we got our upright freezer. This time we got a larger chest freezer because we had a bit more money and wanted to store large pieces of venison that were waiting to be cut down into more edible sizes. These large pieces would not stack well on the shelves of an upright freezer. We had to rent a truck to bring the chest freezer home, because the box store wouldn't even deliver to our house, and we had to enlist the help of a couple friends to carry it inside because it was so heavy. There's no room for this bigger freezer in our kitchen, or anywhere on the first floor of our house, so we were reluctantly going to put it in our basement even though it would be hard to access. Bear was really against this idea, though, because he really doesn't like going to the basement (it's full of spiders). So I thought about this for a while and suggested we try putting the freezer in the one finished room in our attic. It was very hard to carry upstairs, so I suspect it will stay there no matter what, but the attic gets so hot in the Summer that we will need to remove all the food in it by then, or waste a silly amount of resources keeping the food cold. Chest freezers can be hard to organize. Ours came with two useful blue baskets that slide along the top, but the chest below is one big, empty space. I looked online to buy the freezer dividers that I'd seen came with some freezers, and found out they were really expensive. So I searched a bit more and found lots of suggestions for how other people organize their chest freezers more cheaply. Many people seem to have made good use of plastic milk crates, which is what we plan to use if we need them. They can be stacked along the bottom of the freezer, so that the crate on top can be easily lifted out to get to the food underneath. If Your Freezer Isn't Full: You can fill the empty space with bags of ice or milk jugs filled with water, which you can see inside ours in the photos to the right. A full freezer stays colder longer so uses less electricity. |
Chest Freezer:
Cost: $400 on sale, regularly $500 (in 2014) Capacity: 14.8 cubic feet Defrost: have to do it manually, but it has a drain (some don't) 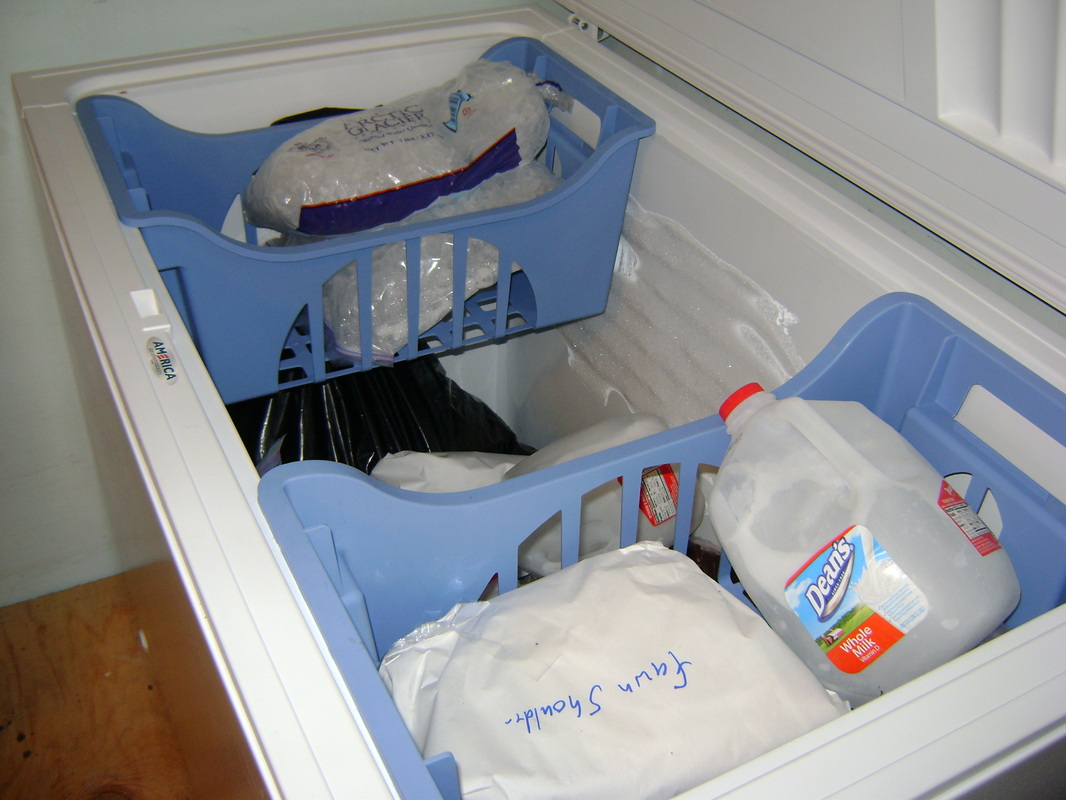
Our freezer came with two sliding blue baskets to help organize the space.
|
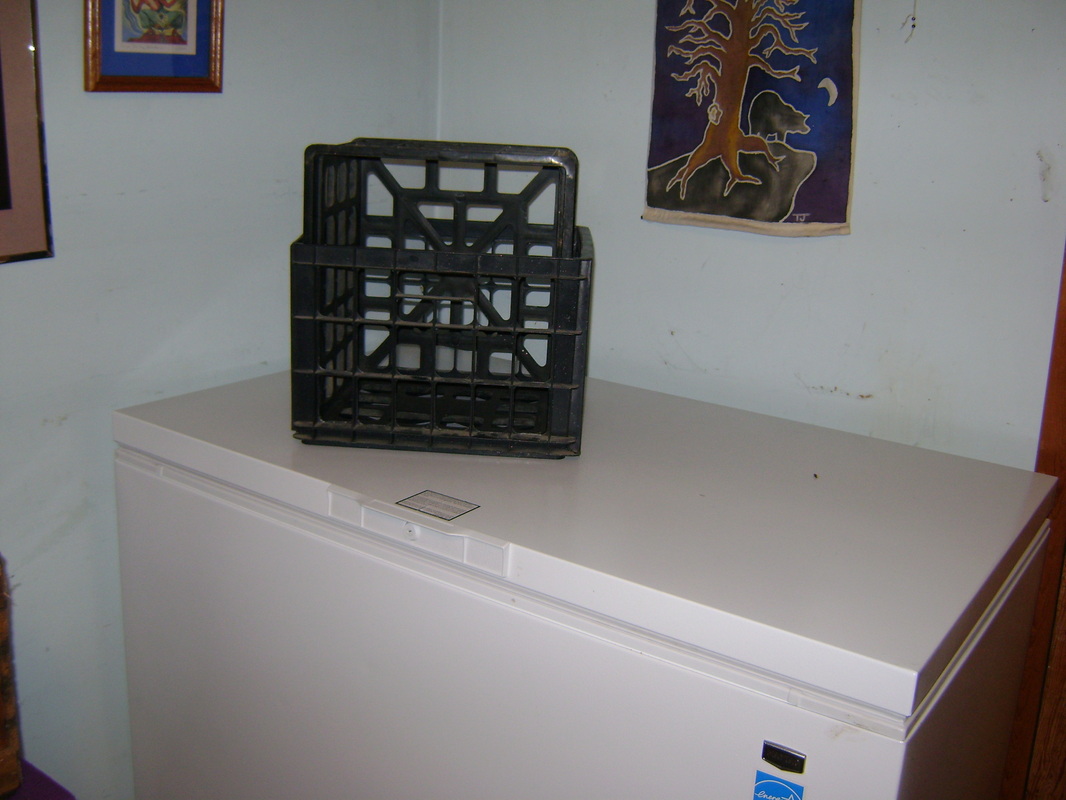
We'll use these black plastic milk crates if needed to organize the meat after it's been processed into smaller pieces.
|
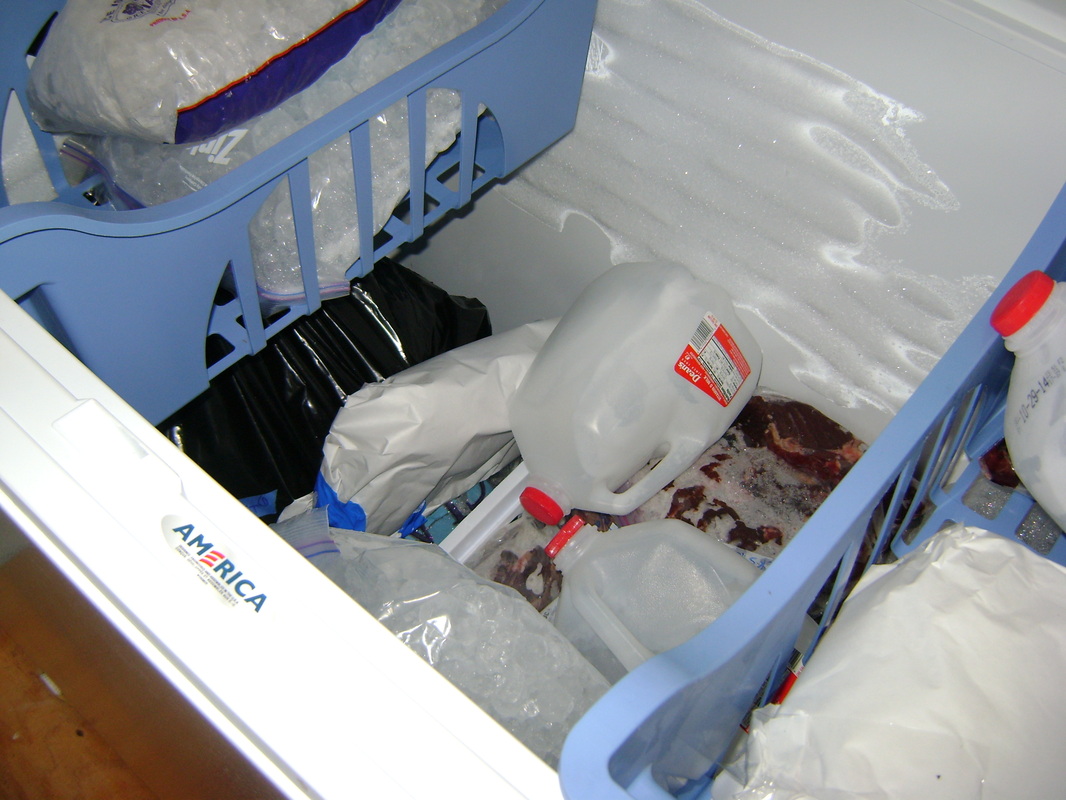
Under the baskets there is just empty space, which can be organized with plastic crates.
|
6. Keeping Track of What You've Frozen
How do you keep track of what's in your freezer so that you remember to use it all up? Here's how we do it:
|
Records for our Upright Freezer:
|
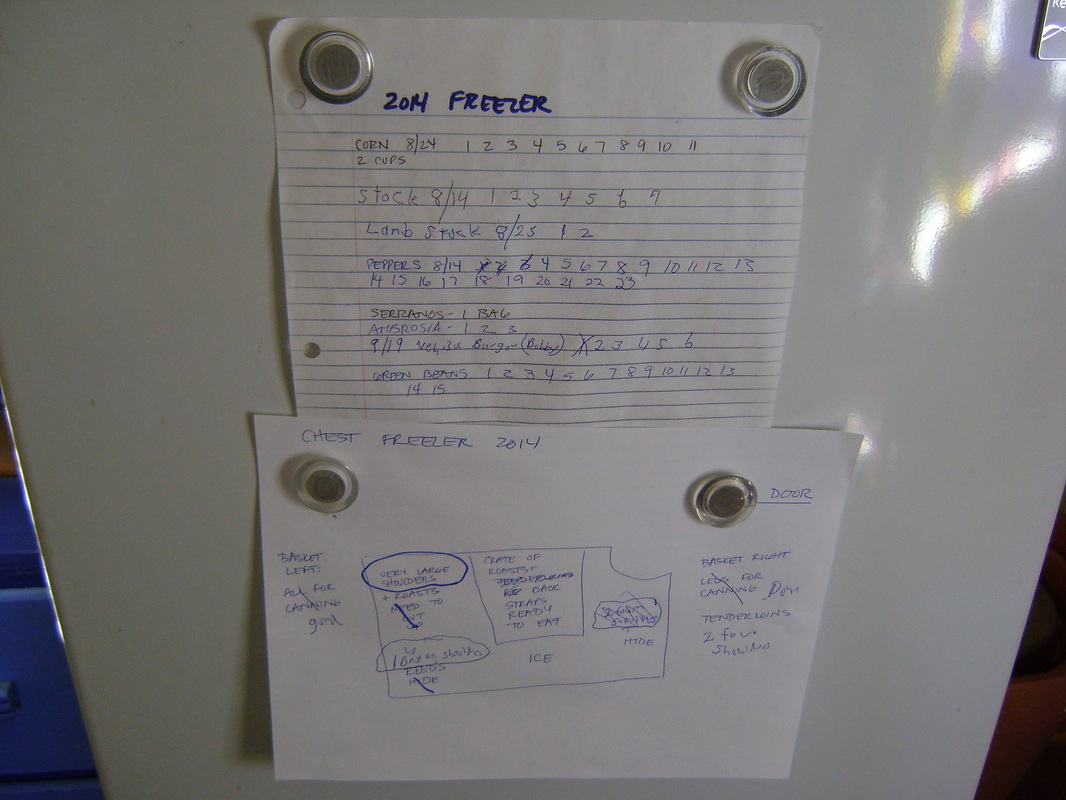
Records for our Chest Freezer:
|
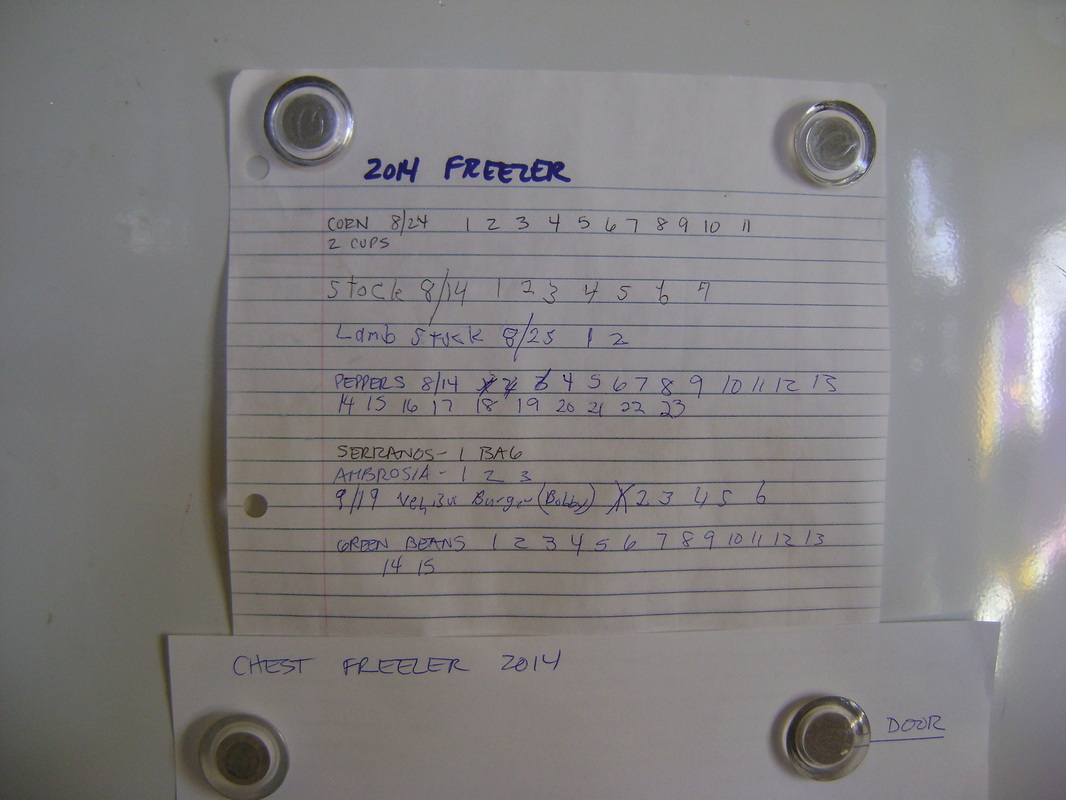
Close up of upright freezer record for 2014:
Close up of chest freezer record for 2014:
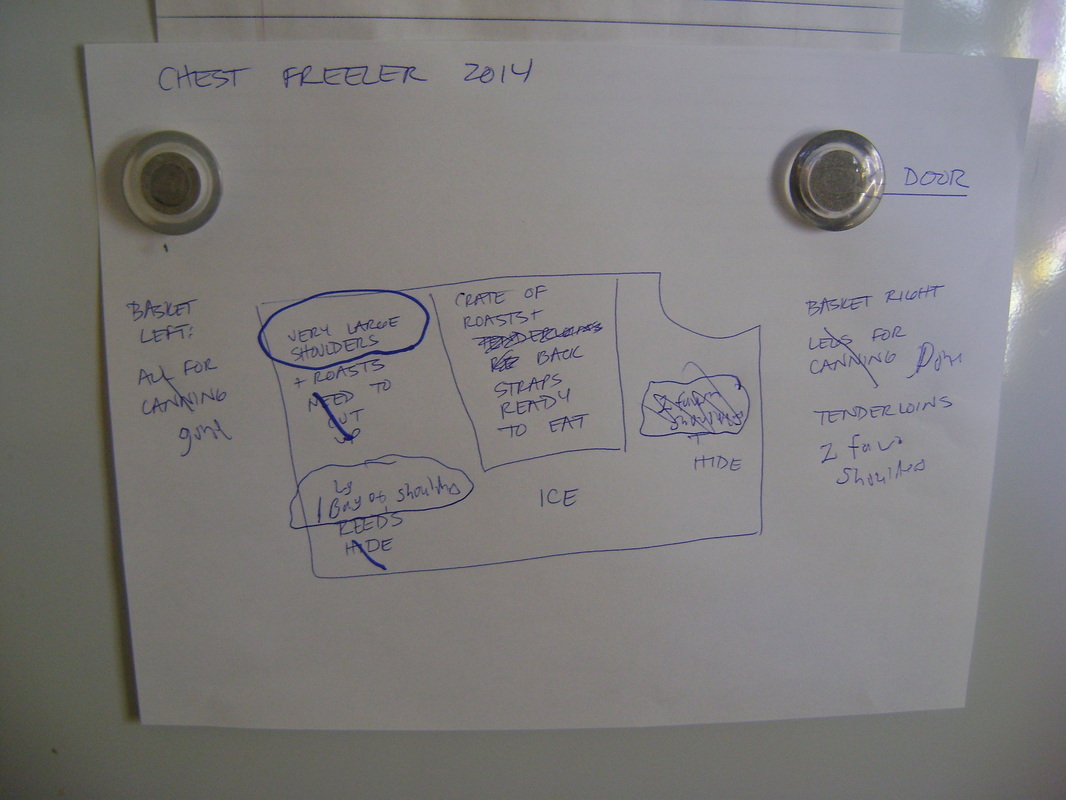
Our records aren't very pretty, but they work well!
7. What About Power Outages?
The draw back of using freezers is of course that they don't work during a power outage. We may think outages won't happen to us, but I hear about them in the news more and more often, and want to be prepared. Here are some options during a power outage:
- If you know a bad storm is headed your way, make sure the freezer is as full as possible, so that it will stay frozen longer if the power fails. Fill any empty spaces with bags of ice or plastic bottles (such as milk jugs) full of water (leave a couple inches empty at the top because it will expand when it freezes). If you don't have these on hand, you can also fill gallon freezer bags with water and stuff them in the empty spaces. However, be careful that they don't get frozen in a position such that you won't be able to pull them back out once they're solid (ask me how I know this).
- Once the power has gone out, don't let anyone open the refrigerator or freezer, so the cold air inside will last as long as possible. You may need a sign on the door, or you may want to tape it shut.
- FoodSafety.gov says: "Thawed or partially thawed food in the freezer may be safely refrozen if it still contains ice crystals or is at 40° F or below. Partial thawing and refreezing may affect the quality of some food, but the food will be safe to eat. If you keep an appliance thermometer in your freezer, it’s easy to tell whether food is safe. When the power comes back on, check the thermometer. If it reads 40° F or below, the food is safe and can be refrozen." See their Frozen Food and Power Outages for more details, and print out a copy so you'll have it for reference in an emergency.
- We are most likely to have power outages in the Winter, when we could move our food outside to keep it frozen if we needed to. We have a couple coolers we could use to do this, or we could use any type of boxes and put it in our catio, an outdoor screened porch for out cats. The problem with this is deciding when we need to move the food. Without prior experience, I'm not sure how long it will take a whole freezer to unthaw, and I don't want to keep opening it to find out. It will of course depend on how full the freezer is and how hot it is outside. Bear reminds me that it takes three days to unthaw a turkey in the refrigerator.
- If you think your food is going to unthaw and spoil, you can start canning it, if you have the necessary supplies on hand.
- The emergency preparedness books always say to go buy dry ice to keep your food frozen during a power outage. I have yet to read one that explains where one can buy dry ice and how you could buy it during a power outage, when all the stores will likely be closed, so I don't plan to rely on this.