|

Groundnuts have edible round tubers that grow on "strings."
|
GROWING GROUNDNUTS:
|
From Theresa:
|
|
Creating a Rain Garden for Growing Groundnuts:
Since groundnuts like to grow near river banks in moist soils, we created a rain garden to try and duplicate this habitat in our tiny yard. However, for the first two years our gutters were in need of repair and didn't drain into the rain garden, and the plants still grew well, so you may not need to do this in order to grow groundnuts. But if you can create a rain garden for them, in can't do anything but encourage them to produce more.
|
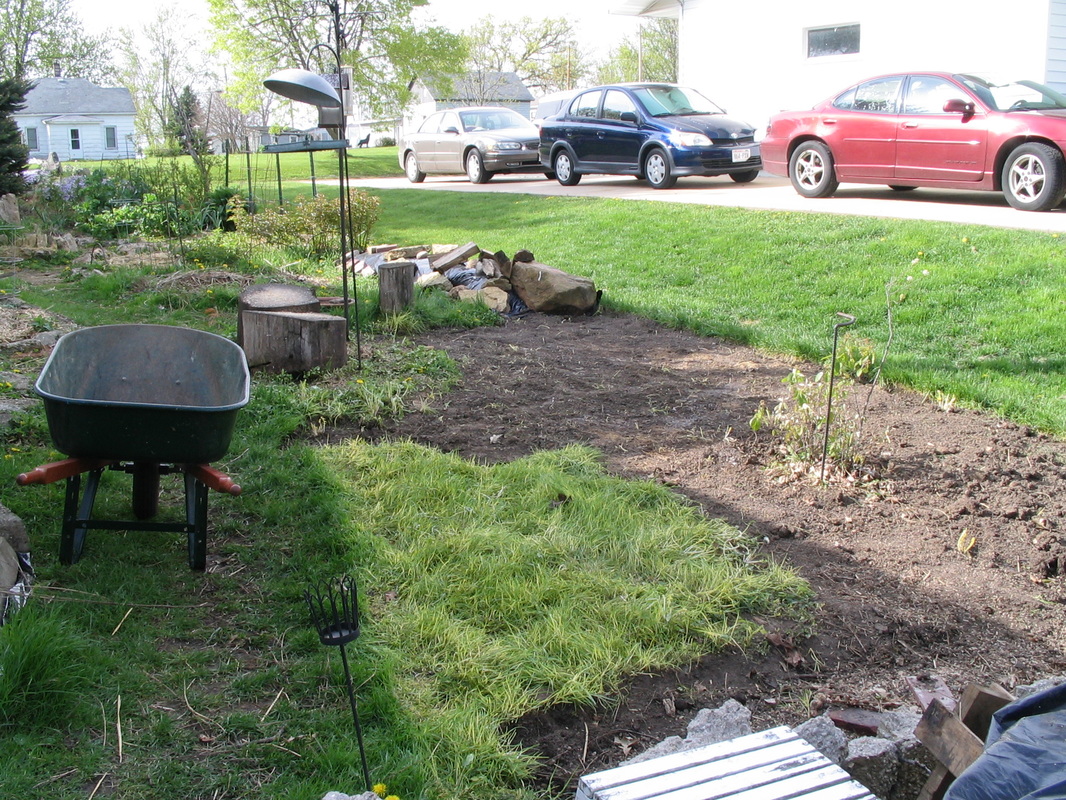
1. Here's a before shot where we're in the middle of digging up the lawn in our side yard. The exposed soil behind the bird feeders/tree stumps will become the sunchoke patch. The bare area in the foreground (as well as the patch of lawn next to the wheelbarrow) will become the rain garden for the groundnuts.
|
2. Rain gardens are flat depressions, dug about a foot into the ground, that are connected to a downspout from your roof, so that they fill with water after every rain. They don't create standing water- the water just drains more slowly into the ground so that it benefits the downhill plants, instead of washing away into a storm drain.
|
|
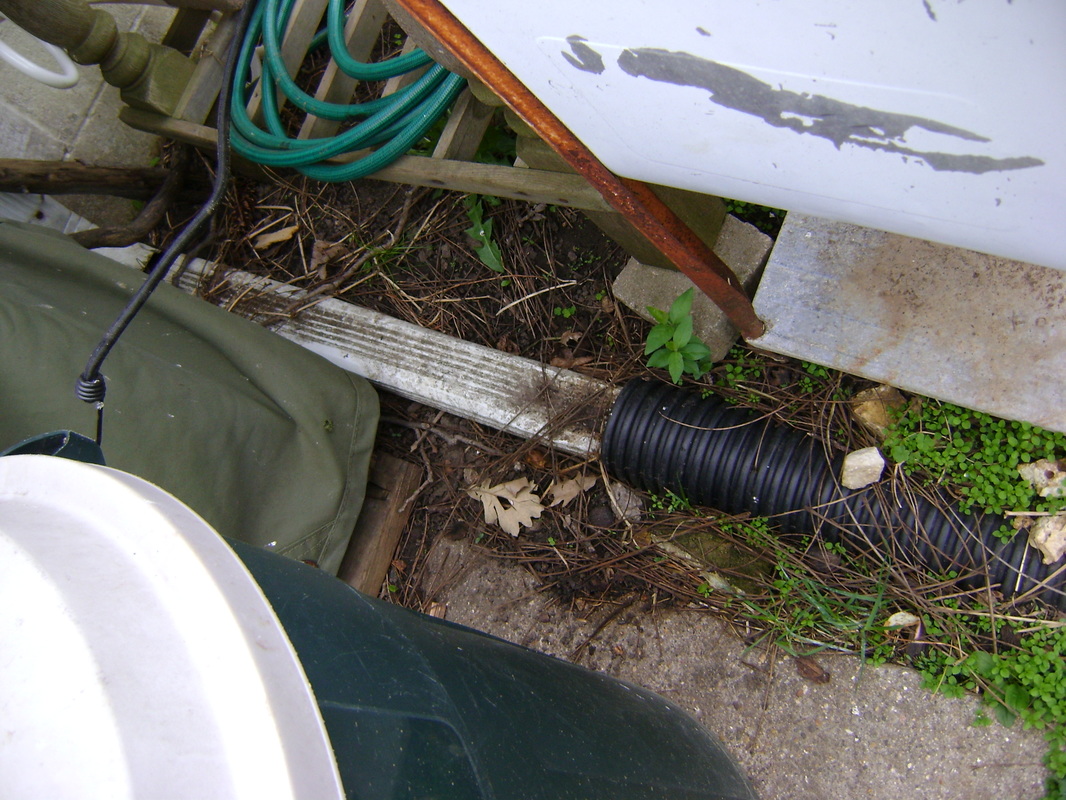
3. Here's the white downspout that connects to the gutters on our roof. We added the black drainage tubing, sinking it into the ground...
|
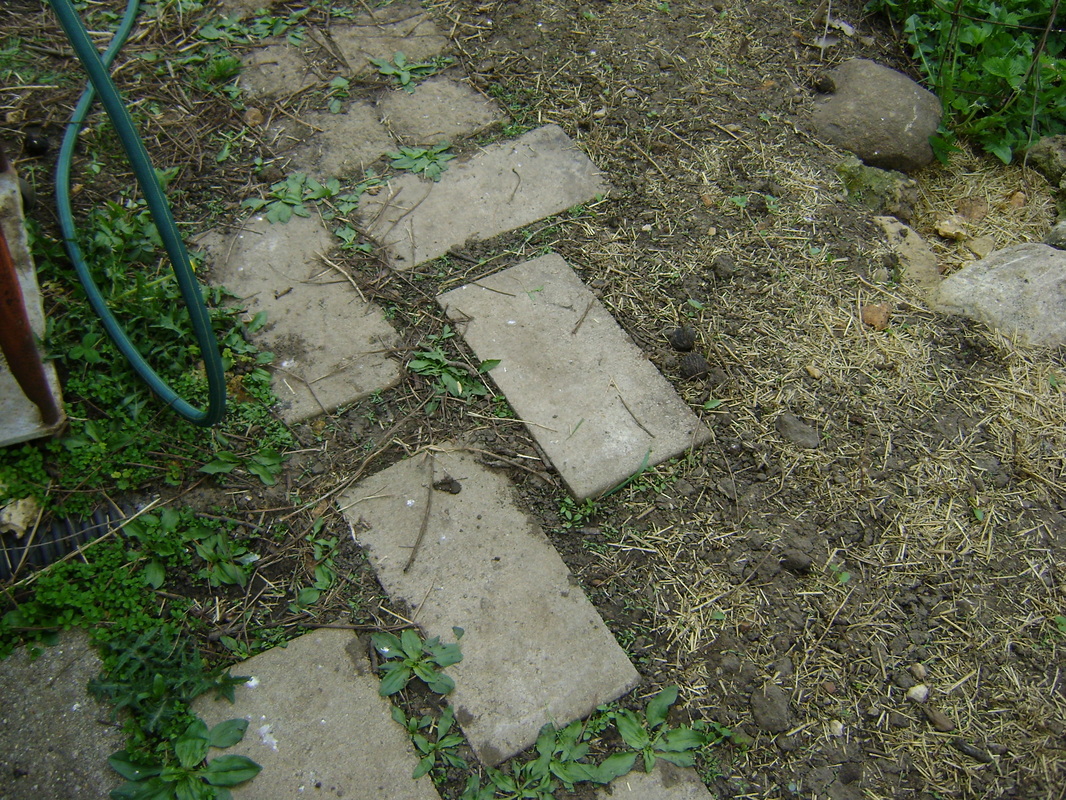
4. ... so we could run it under the main path through our side yard. You can see a bit of the black tubing on the middle left, where it goes under the stepping stones, then drains into the rain garden between the medium sized stones on the top right.
|
|
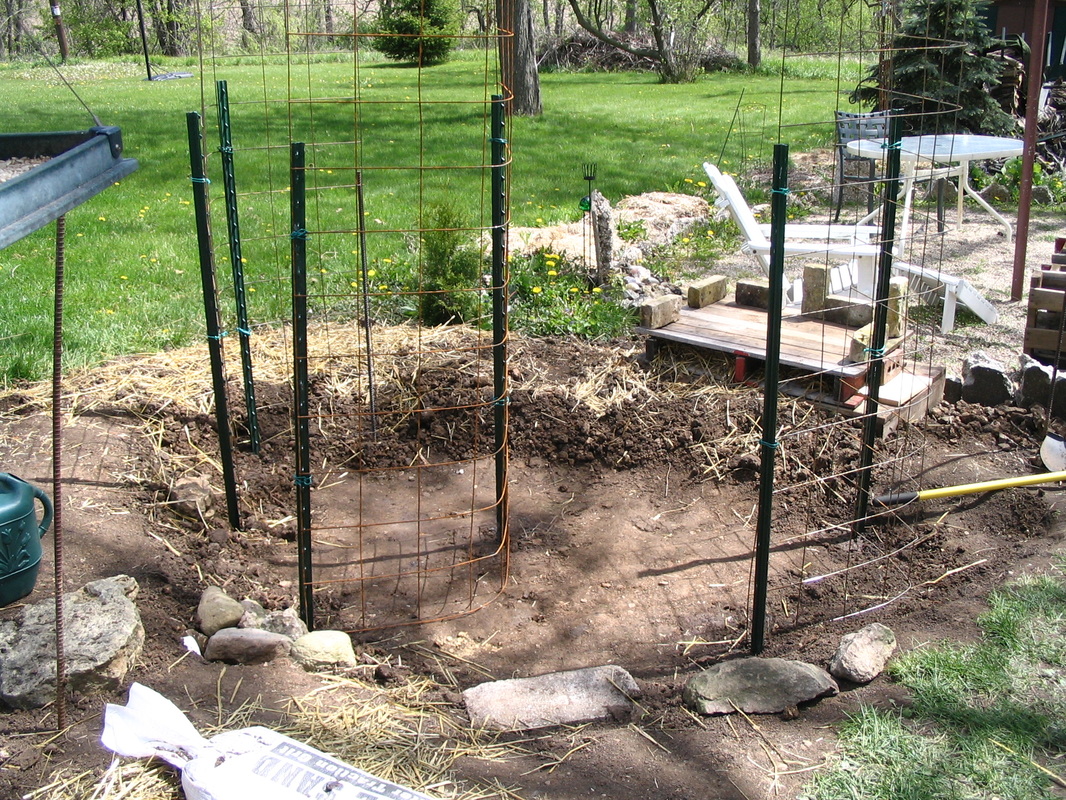
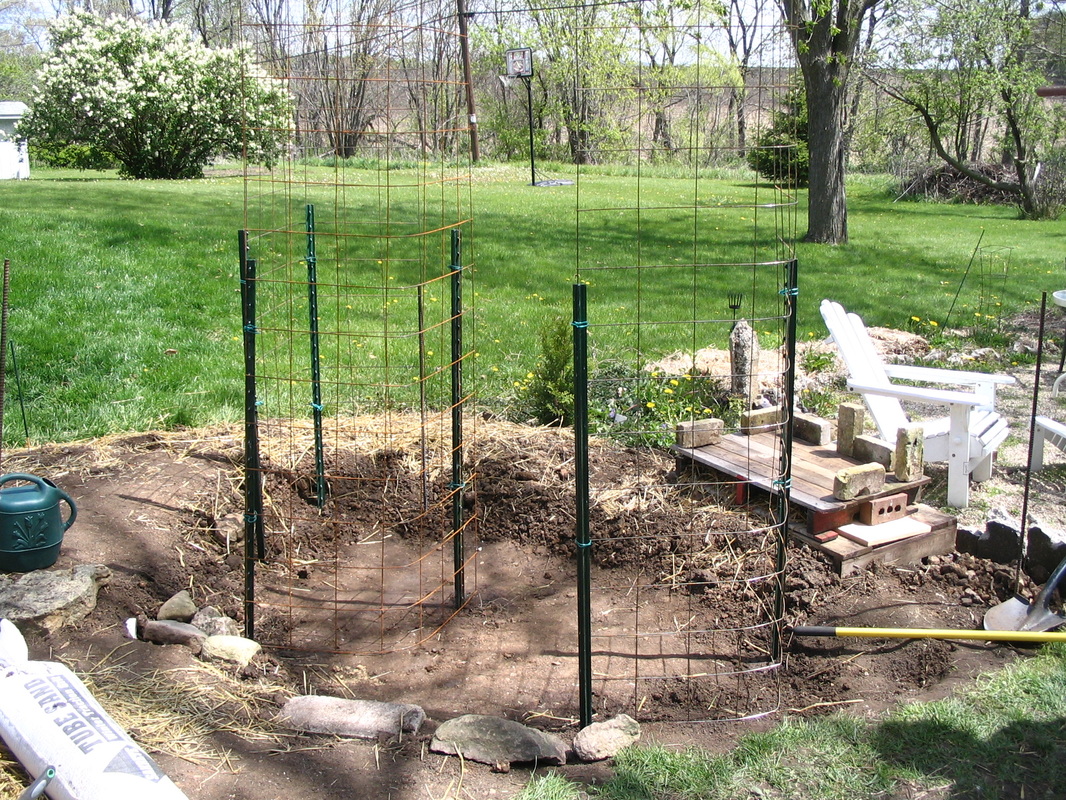
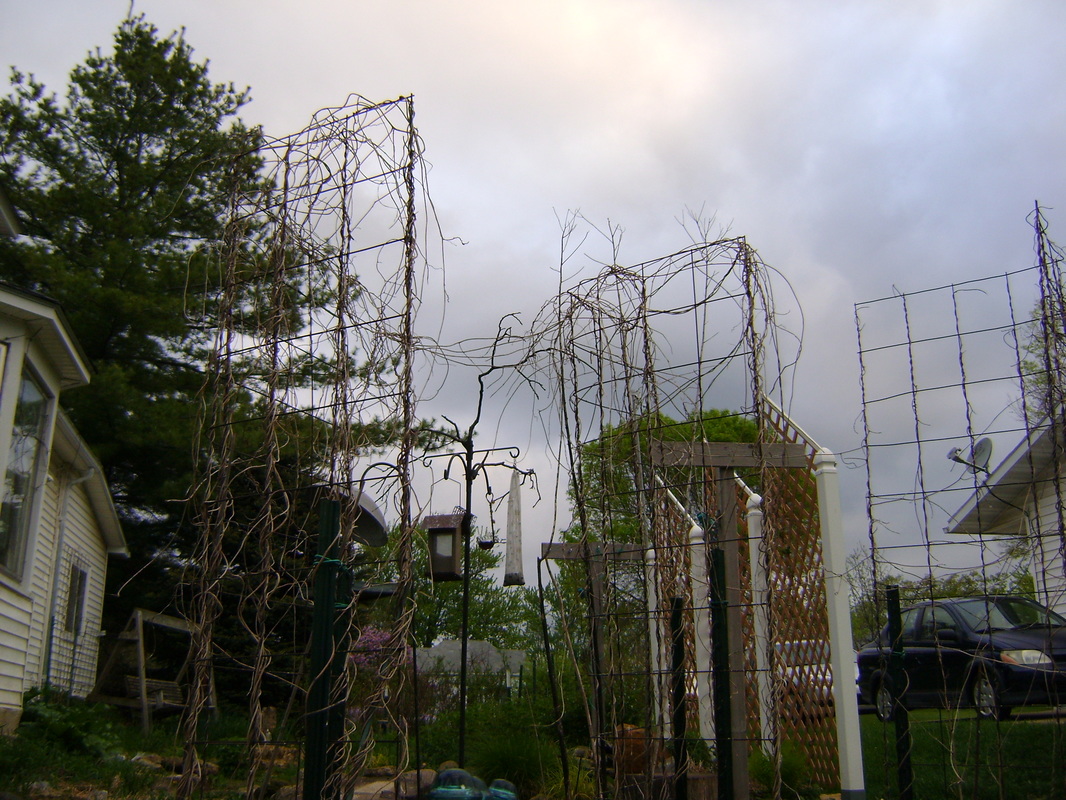
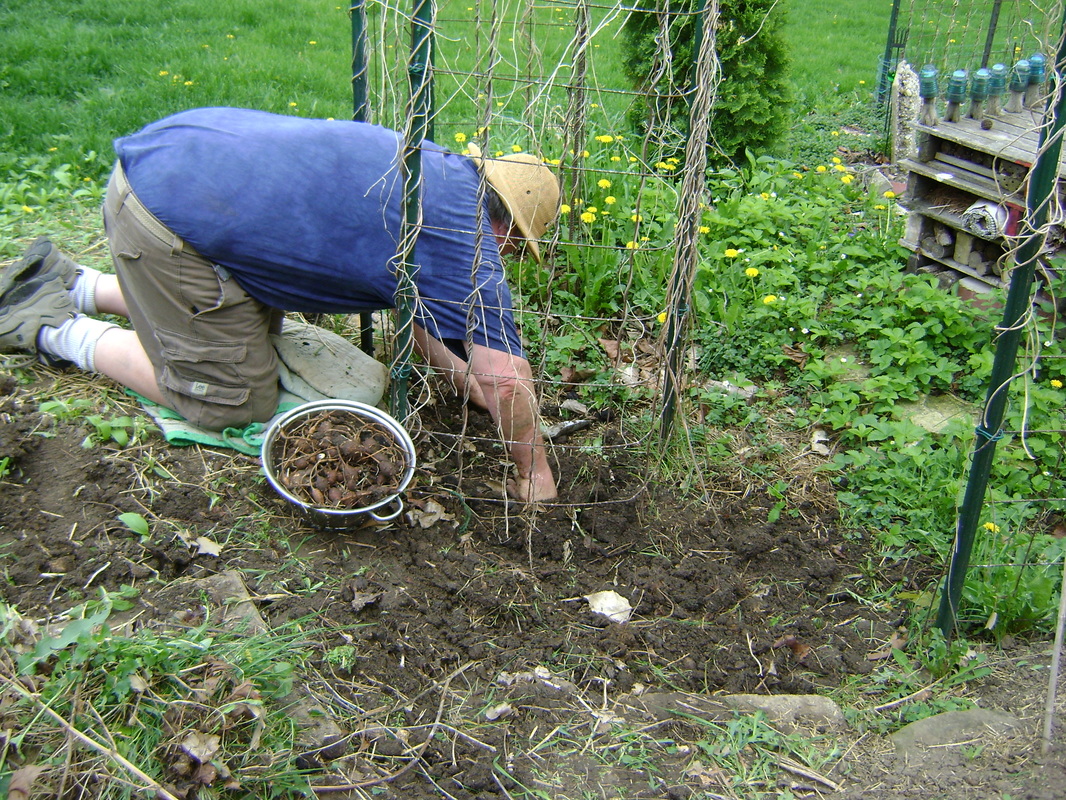
5. We erected trellises in the rain garden by attaching wire mesh to t-posts that Bear hammered into the ground. We use clothesline wire to attach the mesh to the posts, because it is covered with a green plastic coating that will help keep it from rusting.
|
6. Here's a Fall shot that shows the trellises a little better with the dead vines on them:
|
|
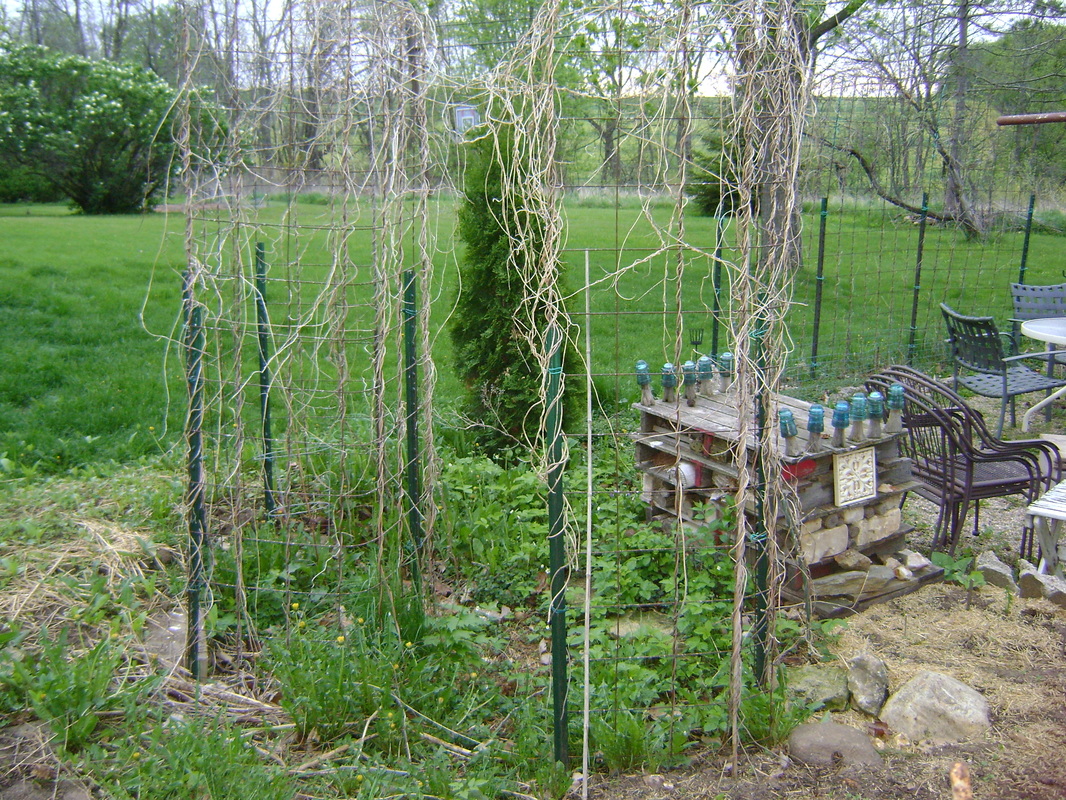
7. And another shot looking up at the trellises that shows their layout a bit better:
|
8. The wire mesh is from Home Depot, where they are sold as "Remesh Sheets" and are apparently used to reinforce concrete. They only cost $7. The mesh is 42" by 84", which makes them too big to get into our car and take home. So we ended up folding these in half, which is why I used them as "V" shaped trellises (when seen from above). However, it seemed like the V shapes allowed me to get more in the space, which is important in a tiny yard.
|
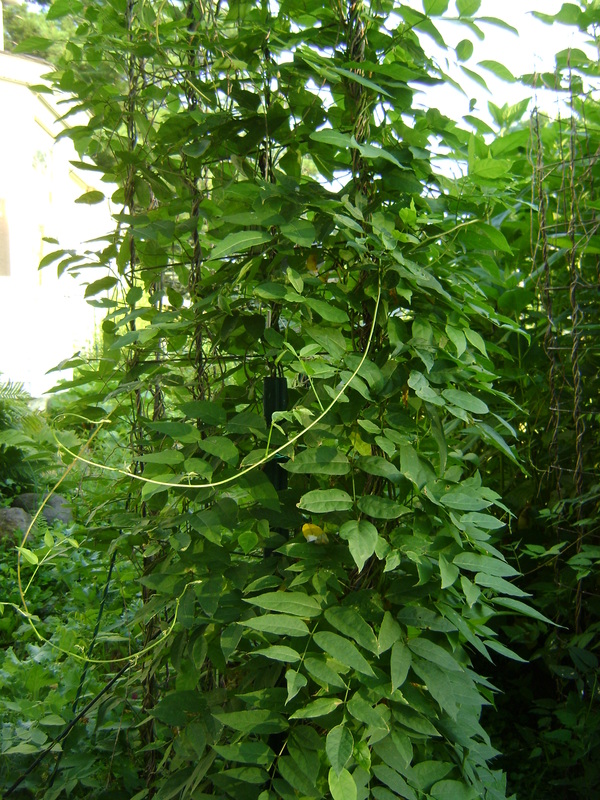
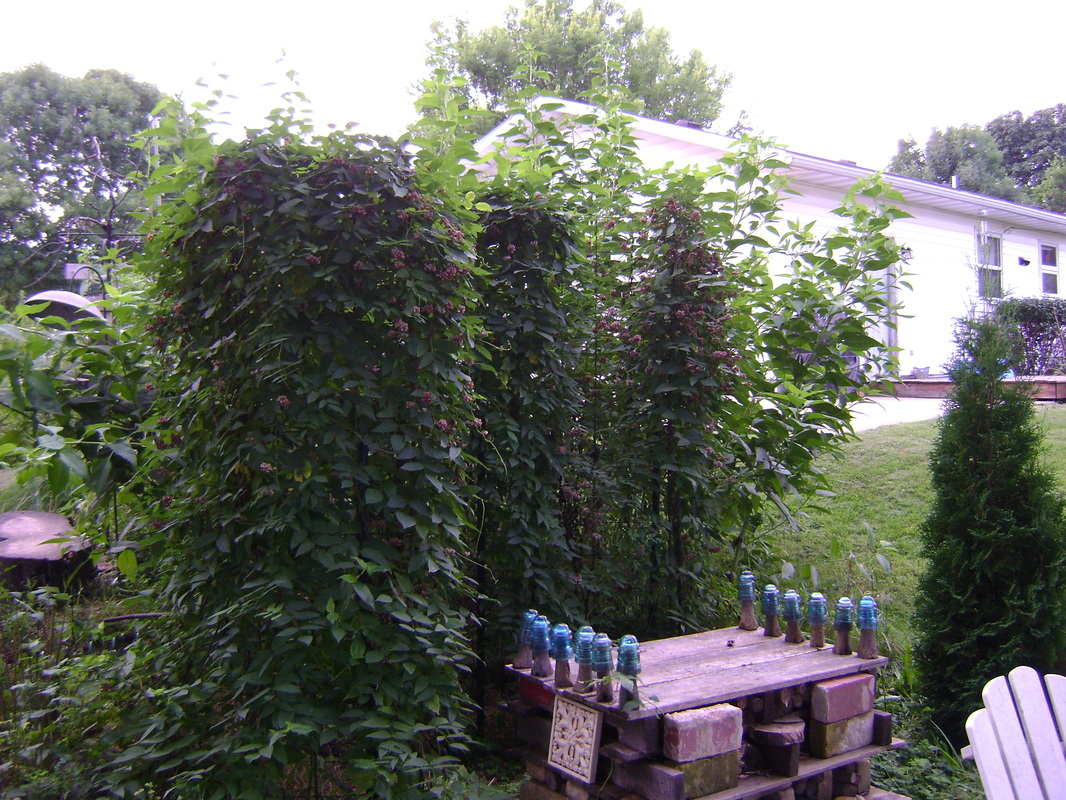
9. When the trellises are bare, they seem kind of like some medieval torture device, but when they are covered with vines they are quite lovely, especially when they are in bloom, like in the photo below:
Groundnut Plants:
|
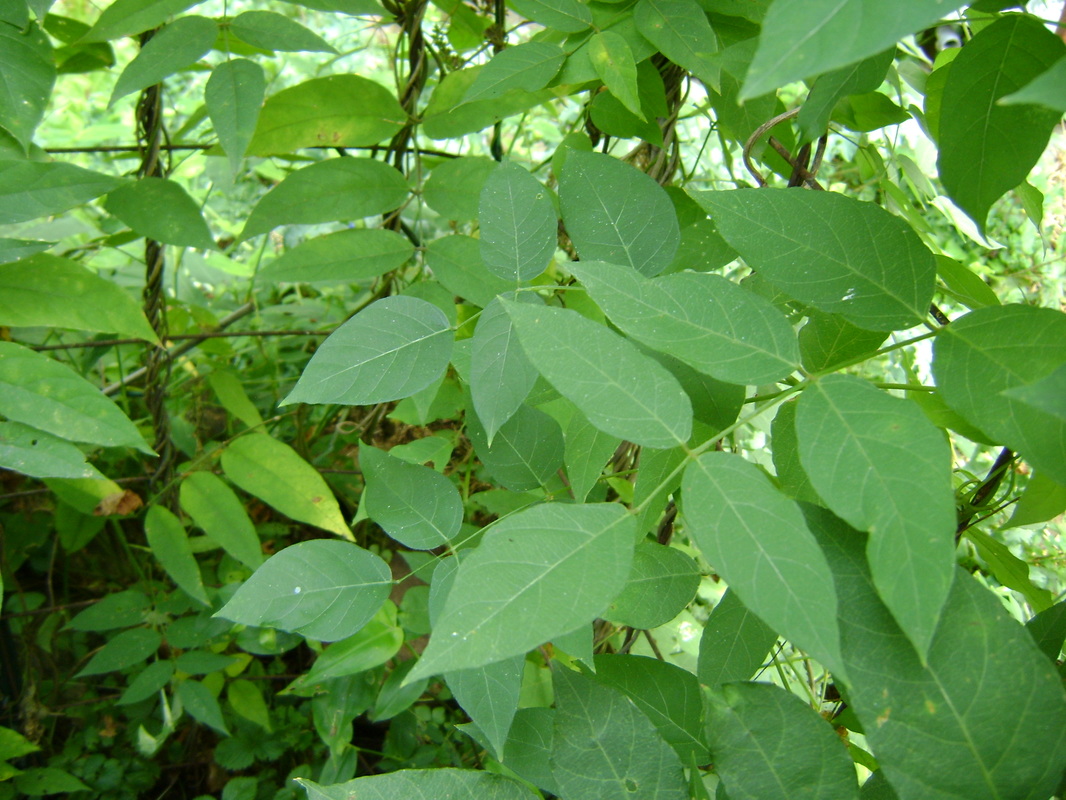
1. Here is a close up of the groundnut leaves:
|
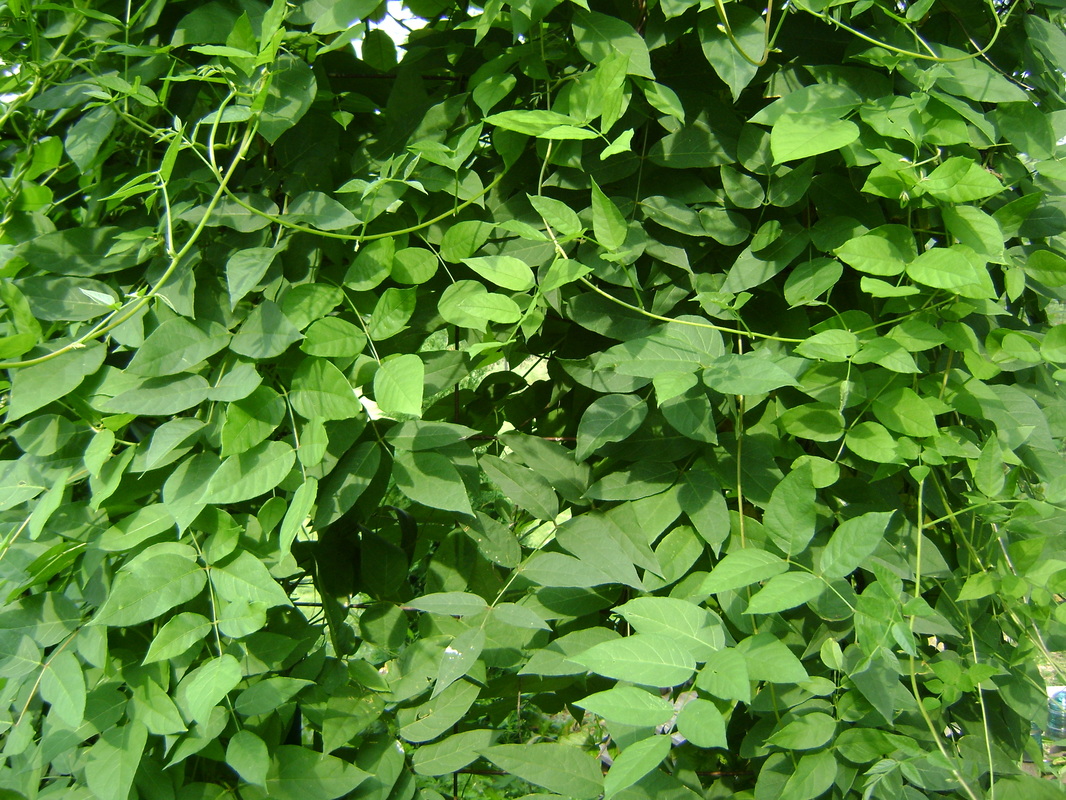
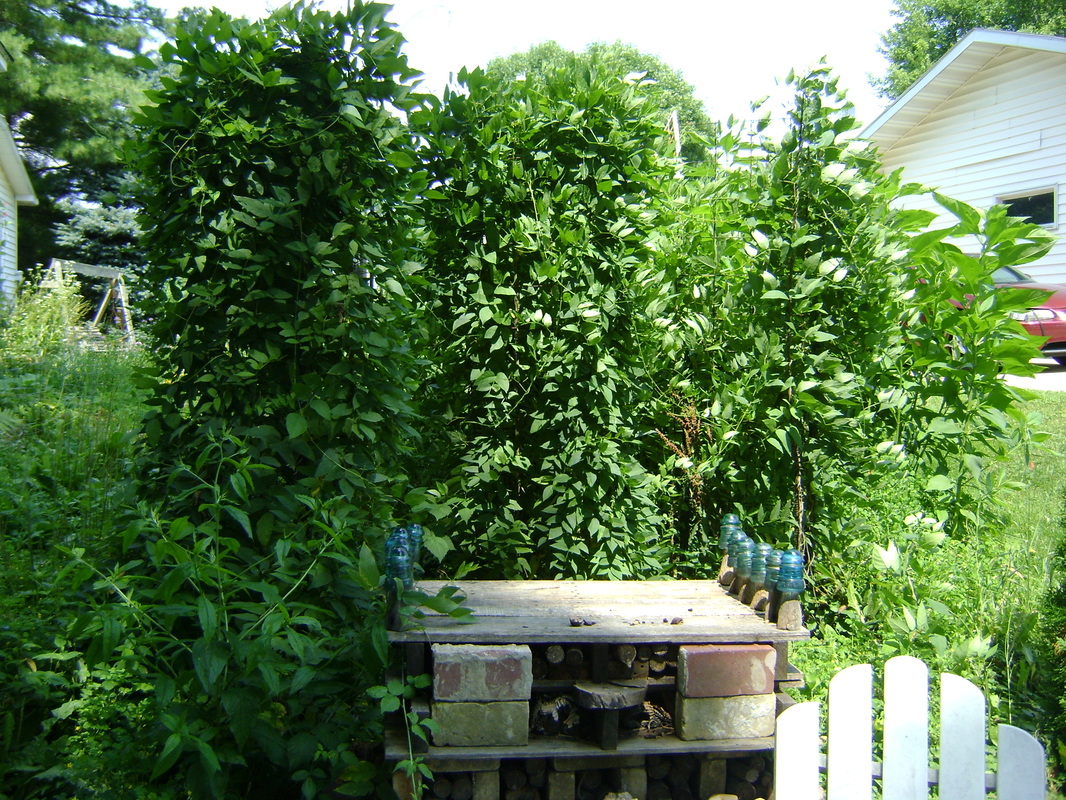
2. Groundnuts emerge later in the Spring than other plants, but they quickly do a great job of covering their trellises, and can make a great garden wall:
|
|
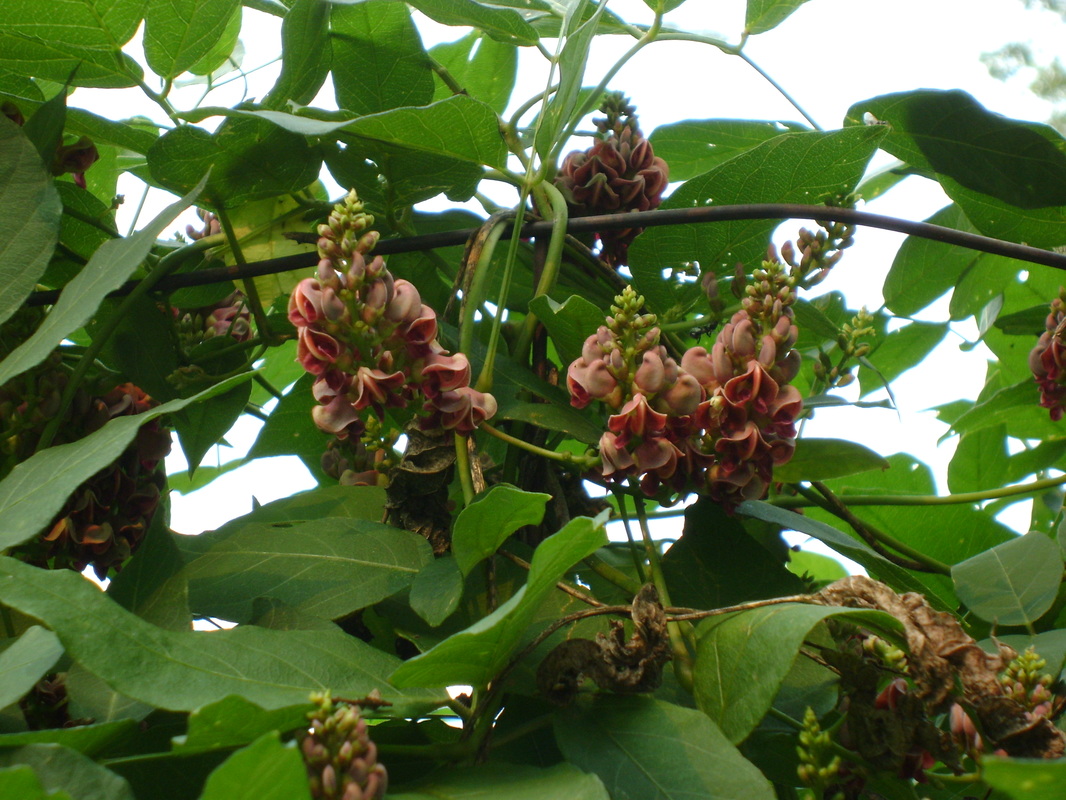
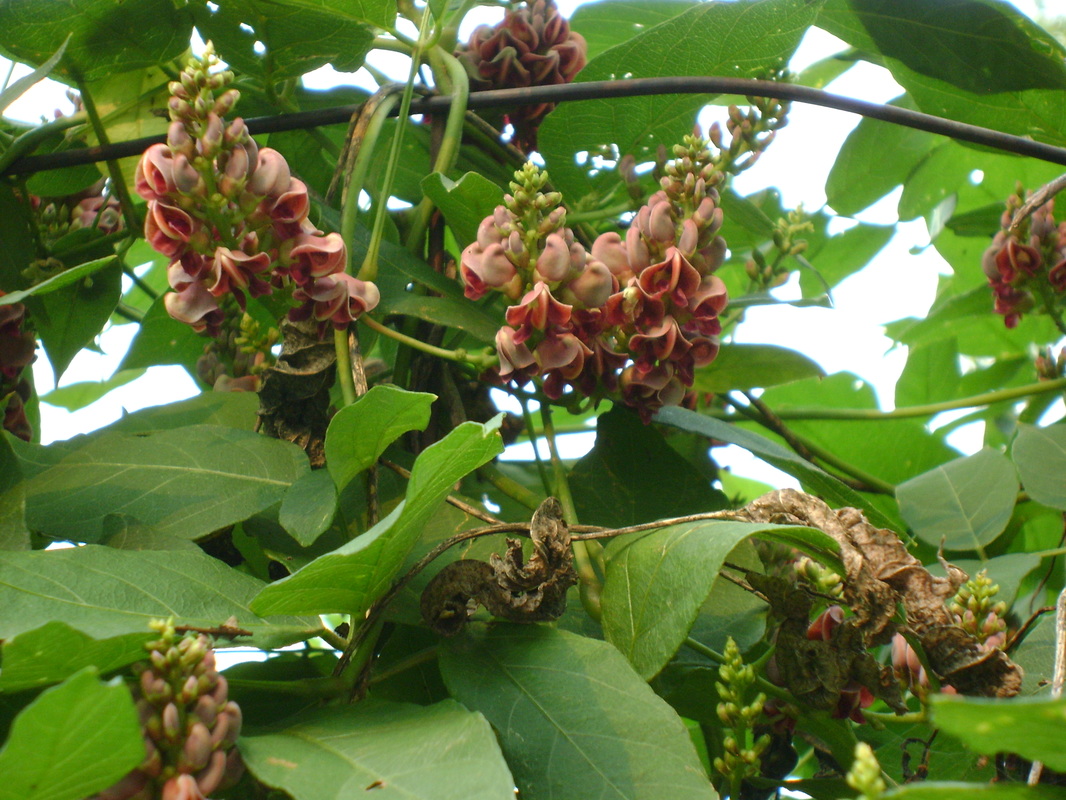
3. They have very unique flowers:
|
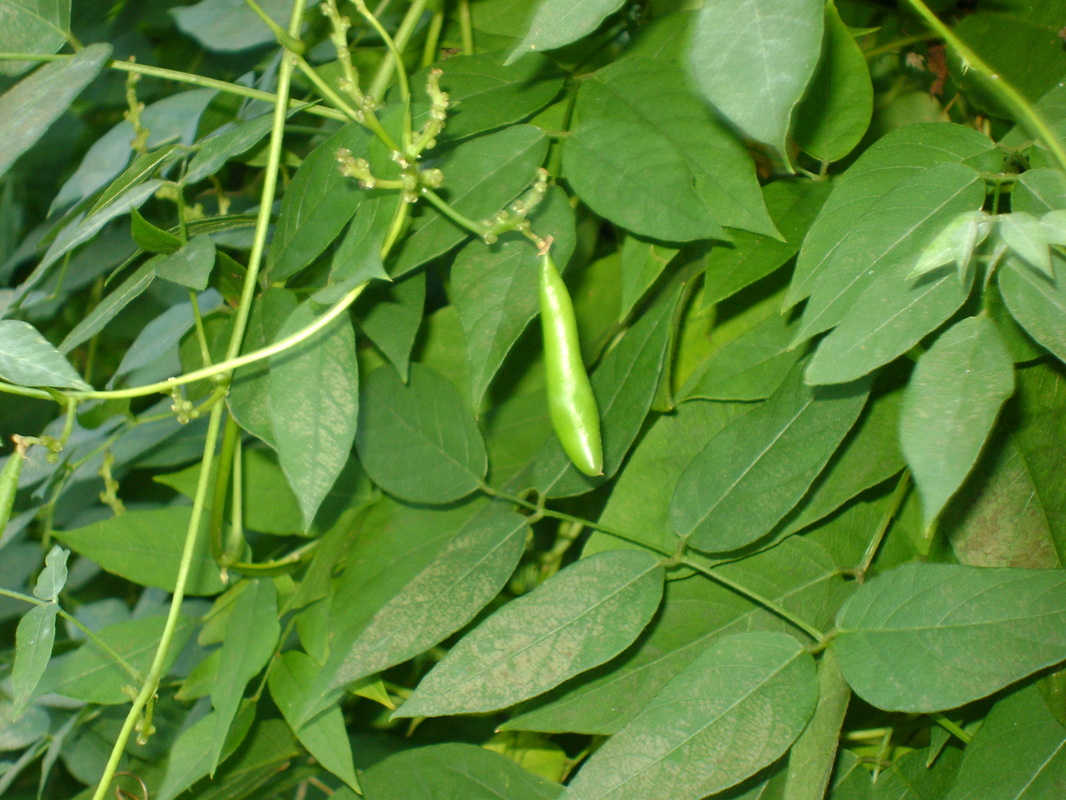
4. If you're lucky, they may also produce seeds in bean pods, which are also edible, although we're not clear on if you eat the whole pod, or remove the seeds and only eat them.
|
HARVESTING & CLEANING GROUNDNUTS:
|
1. Let your plants get established for 2 or 3 years before you harvest them for the first time, then you should be able to harvest yearly thereafter, making sure you leave some tubers in the ground to keep growing. We waited 3 years, then have just dug up part of the patch each following year.
|
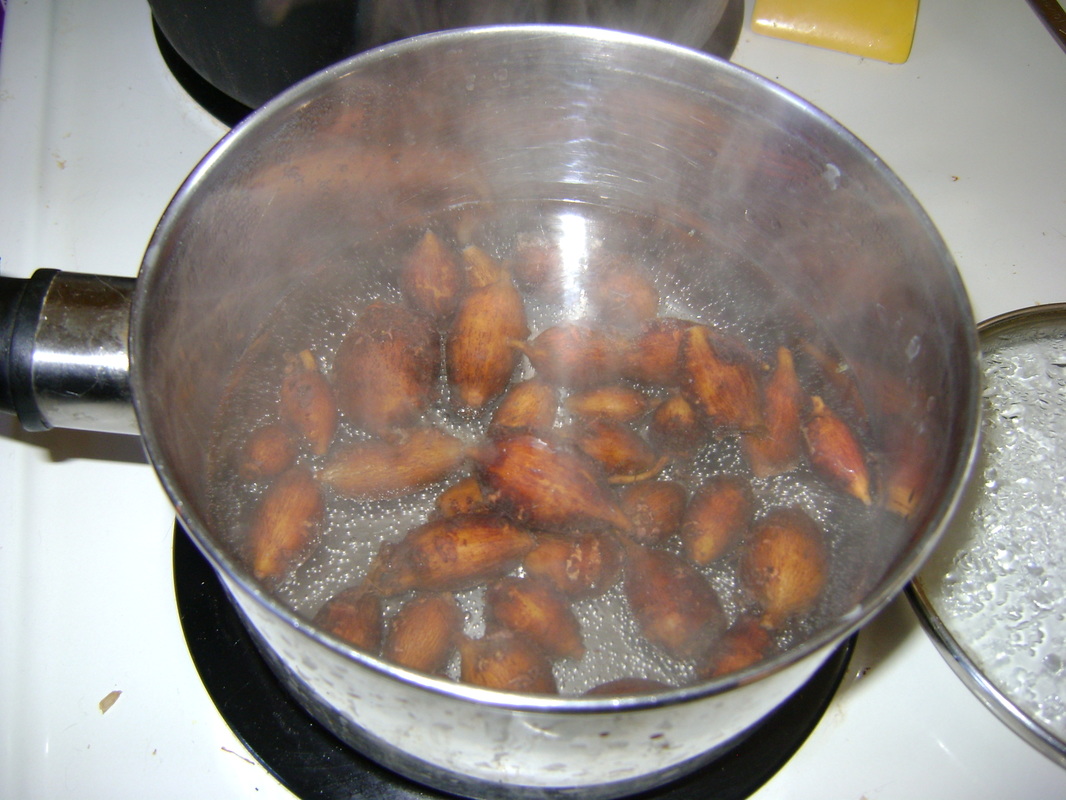
2. According to what we've read, groundnuts can be harvested at any time of the year. Tubers, though, are usually best harvested in the Fall, when the plant has stored all of it's energy under ground, so we try to harvest them after the vines have died back.
|
|
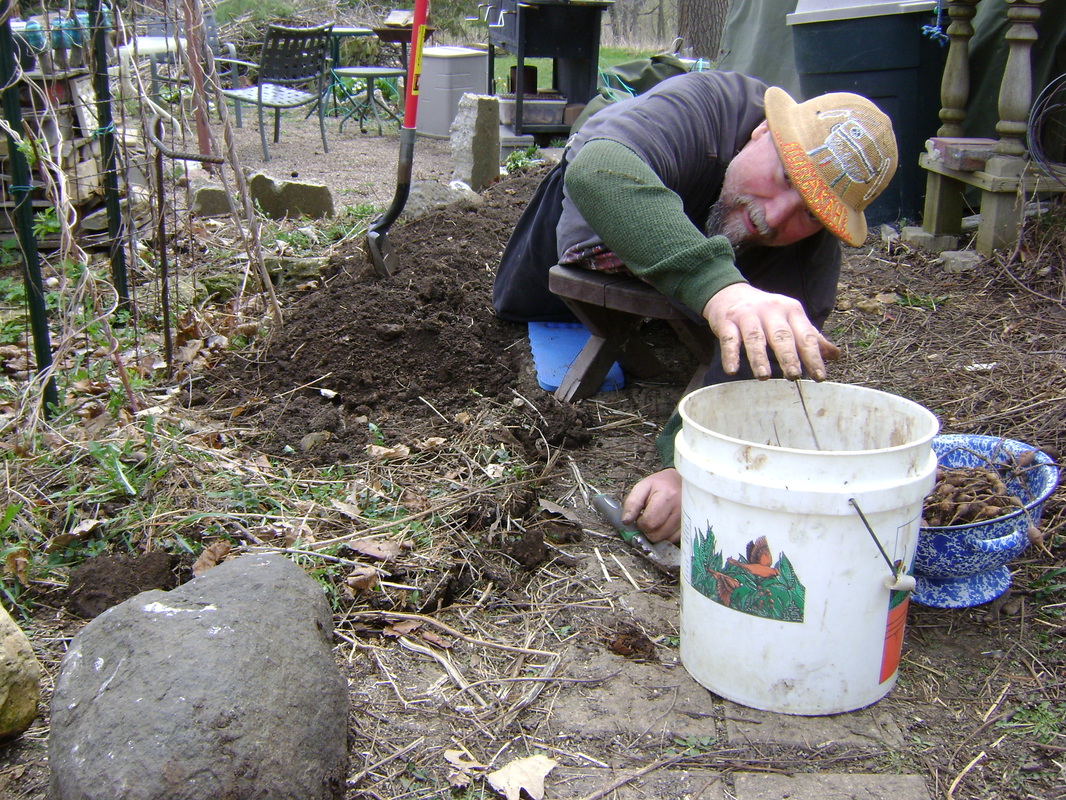
3. Bear is ready for his groundnut treasure hunt, with his pirate t-shirt...

|
4. ... fine safari hat, and garden yoga stretches.
|
|
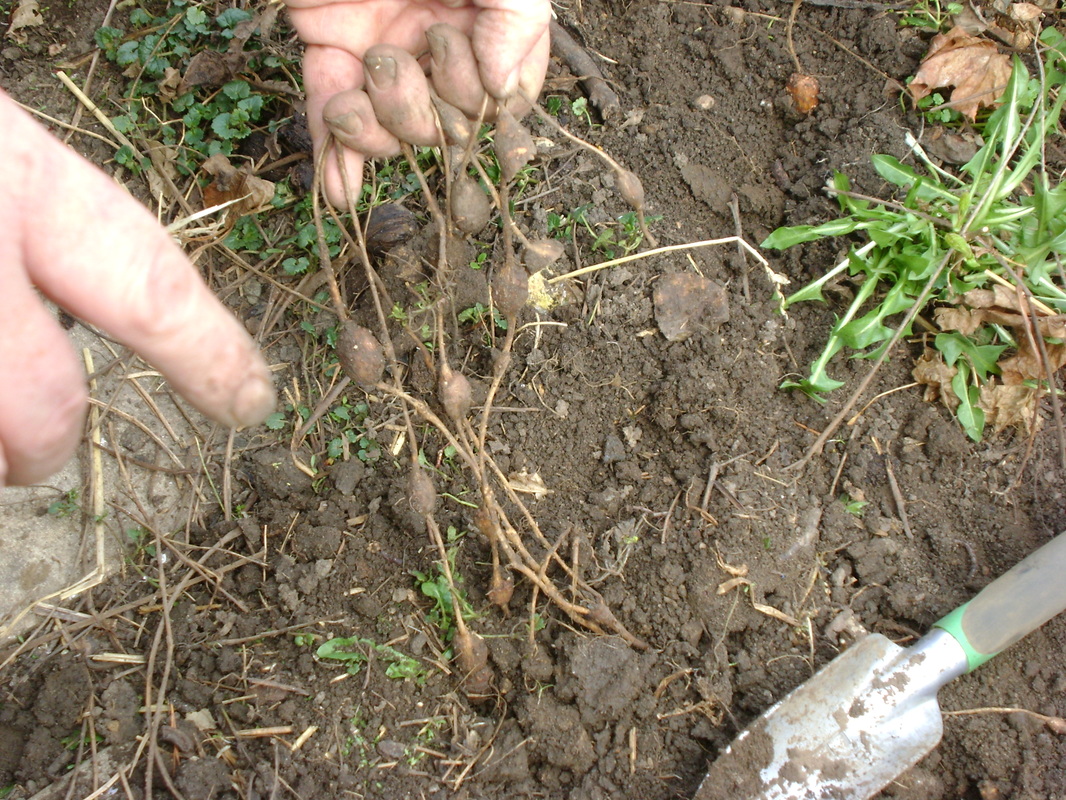
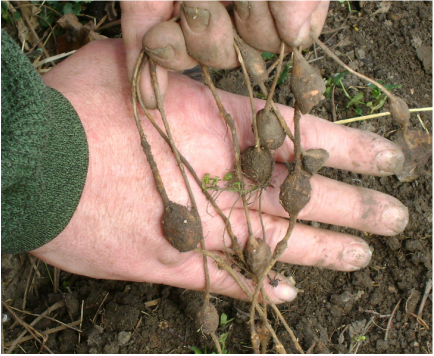
5. The tubers are small and round, and grow on strings. Dig around until you find one tuber, then if you're careful, you can follow the string to find the rest of them.
|
6. Here's a closer shot:
|
|
7. The tubers vary in size from tiny to a couple inches long. Bear says he always finds the biggest ones in the least convenient places, like under our paving stones.

|
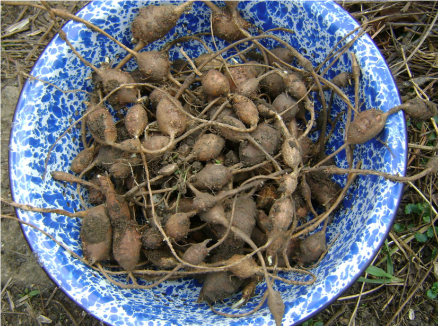
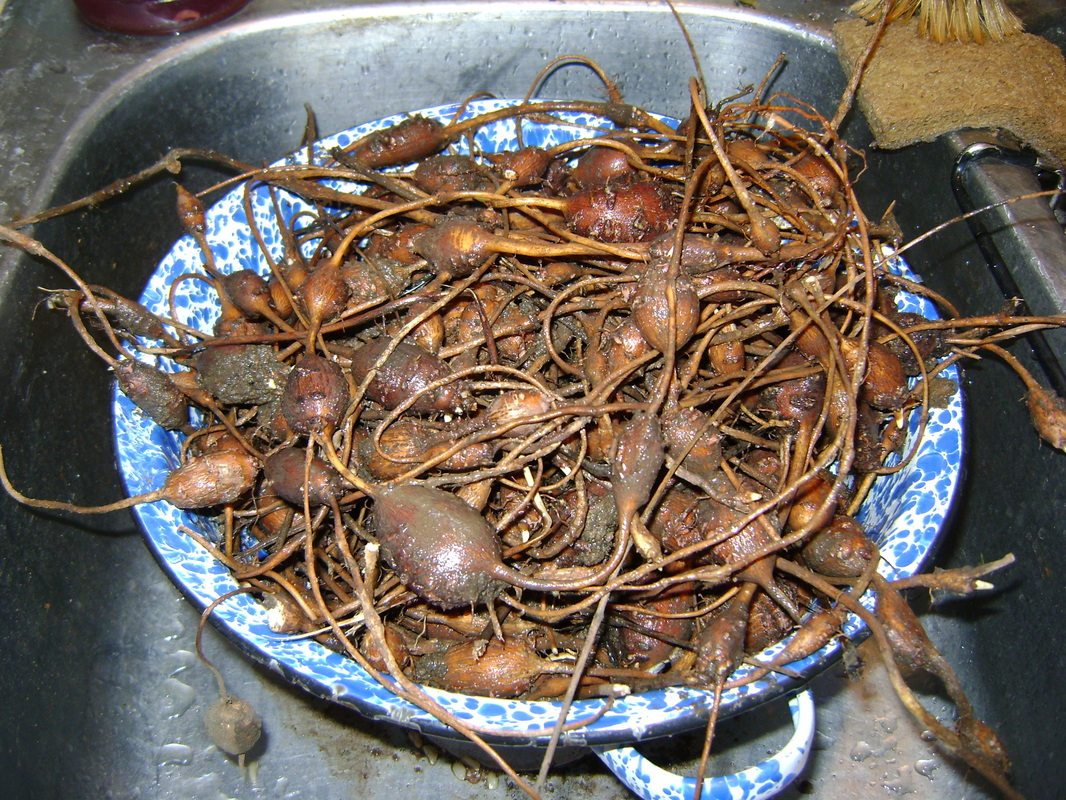
8. Here's a colander full of harvested groundnuts still on their strings and covered with soil:
|
|
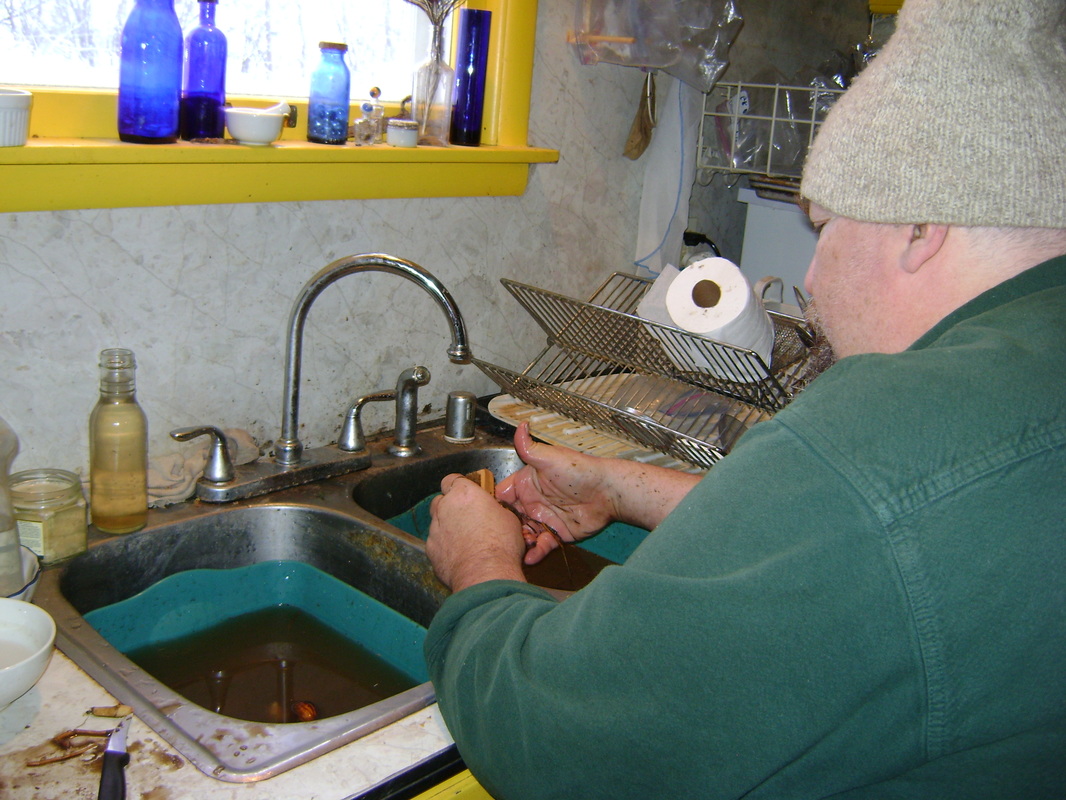
9. We found the booty, now we need to wash the booty...
|
10. ... oh, joy.
|
|
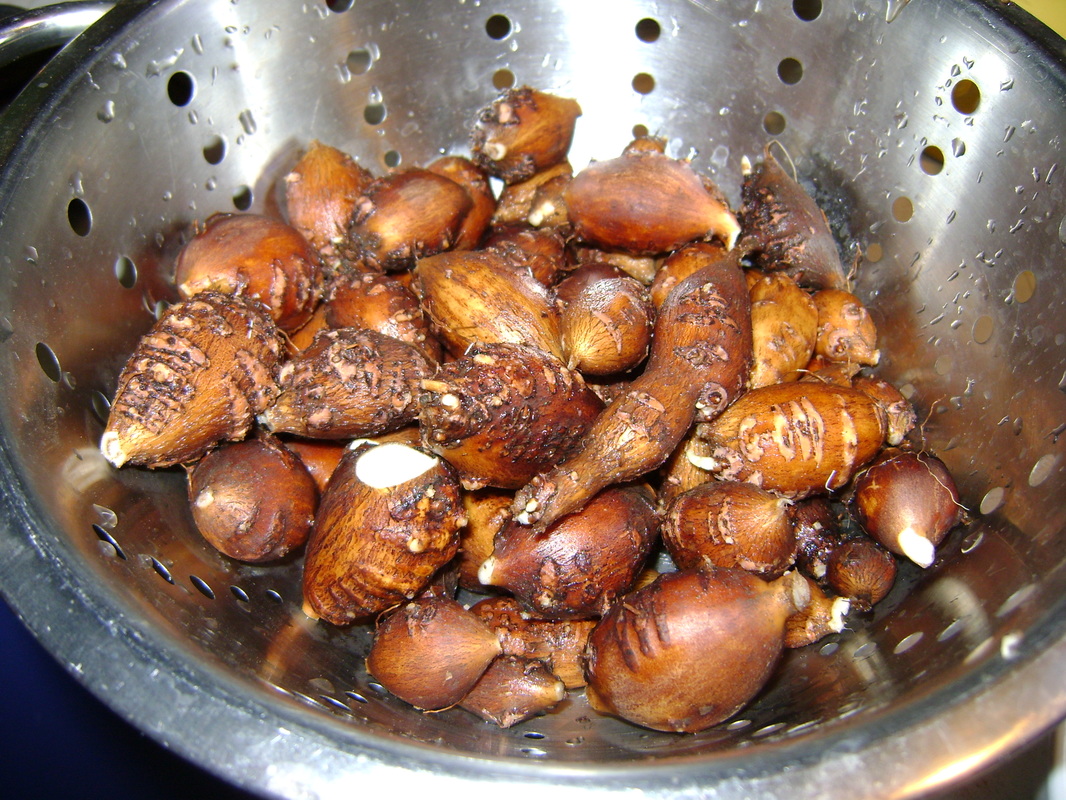
11. Each nut has grooves on a couple sides. These hold the soil very well, so we scrub them with a fingernail brush to get them clean.

|
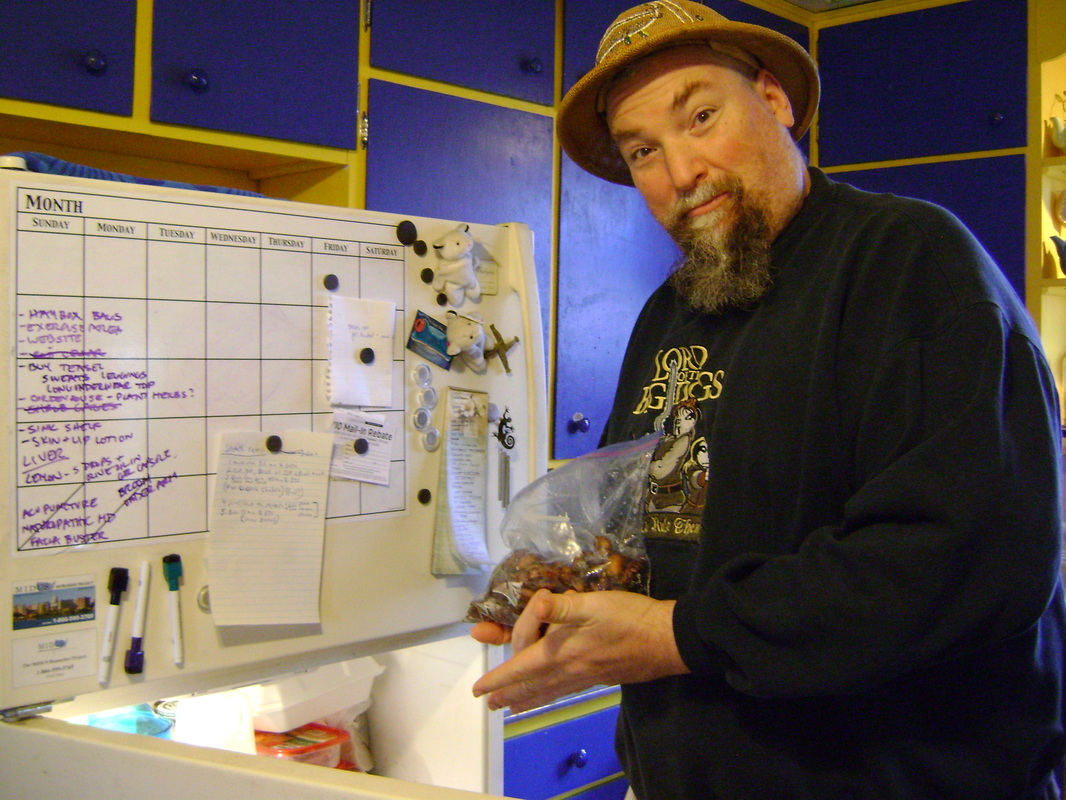
12. To store, groundnuts must remain cool and moist, so you can put them into a plastic bag while they are still wet, and store them in the fridge. If you need more room, they should also store well in damp sand in a root cellar.
|
13. Here's a close up of the groundnuts after they've been cleaned and removed from their strings:
EATING GROUNDNUTS:
Theresa was smitten with groundnuts from her first bite and loves their earthy taste.
Bear doesn't think they're too shabby, either.
Bear doesn't think they're too shabby, either.
|
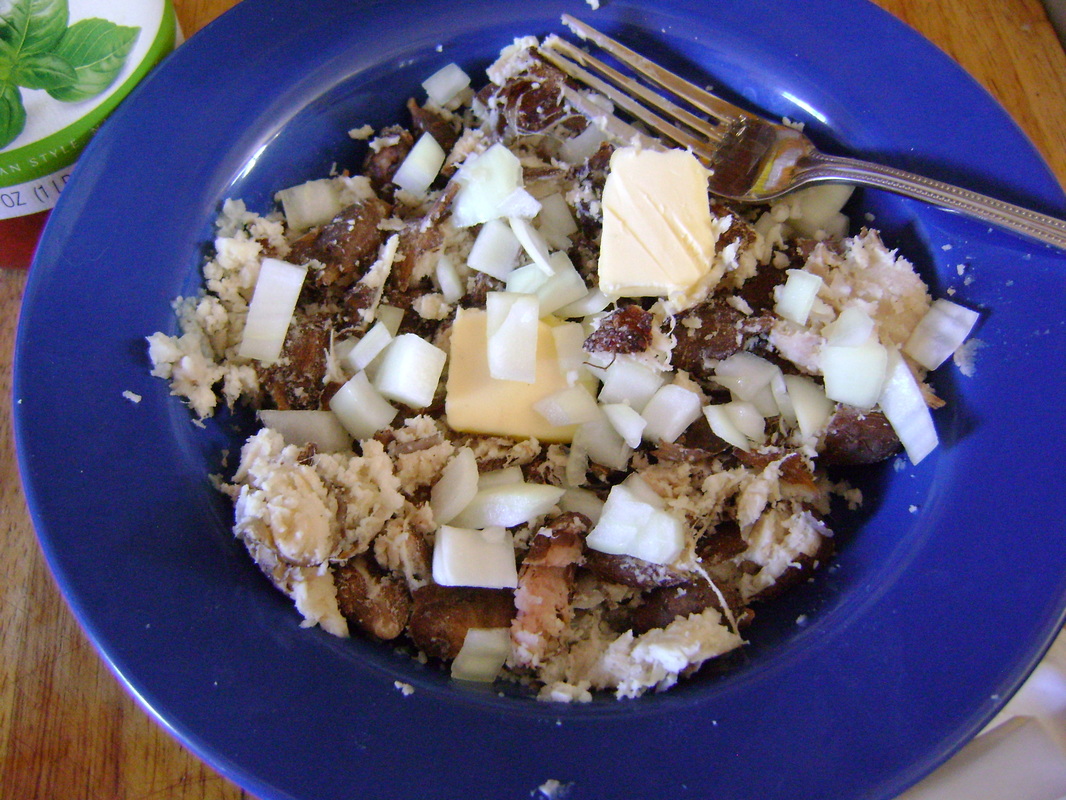
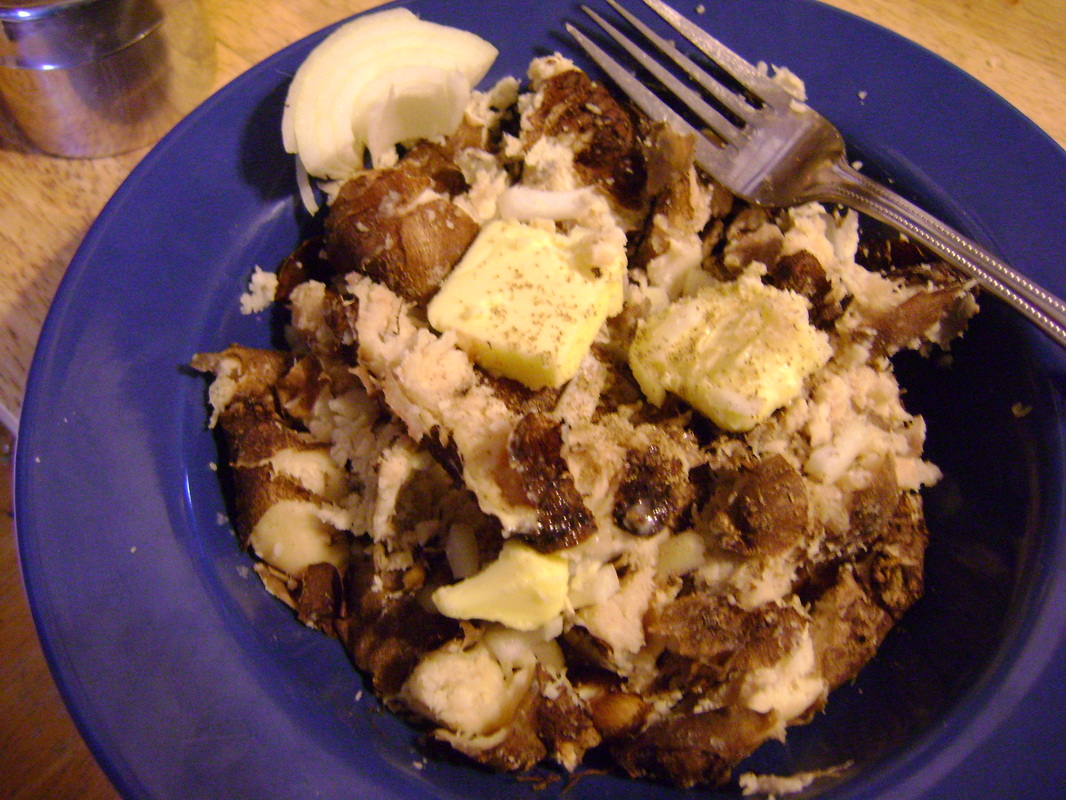
BOILED & MASHED:
Theresa's favorite way of eating groundnuts so far is to simply:
|
|
|
|
|
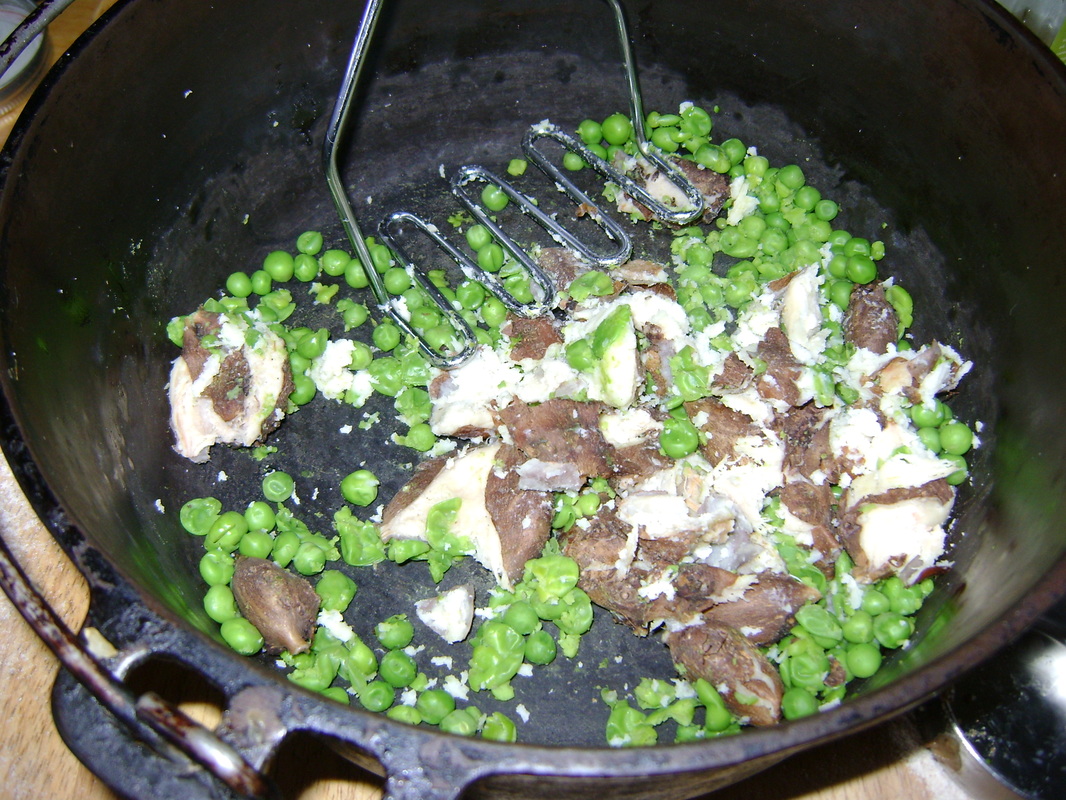
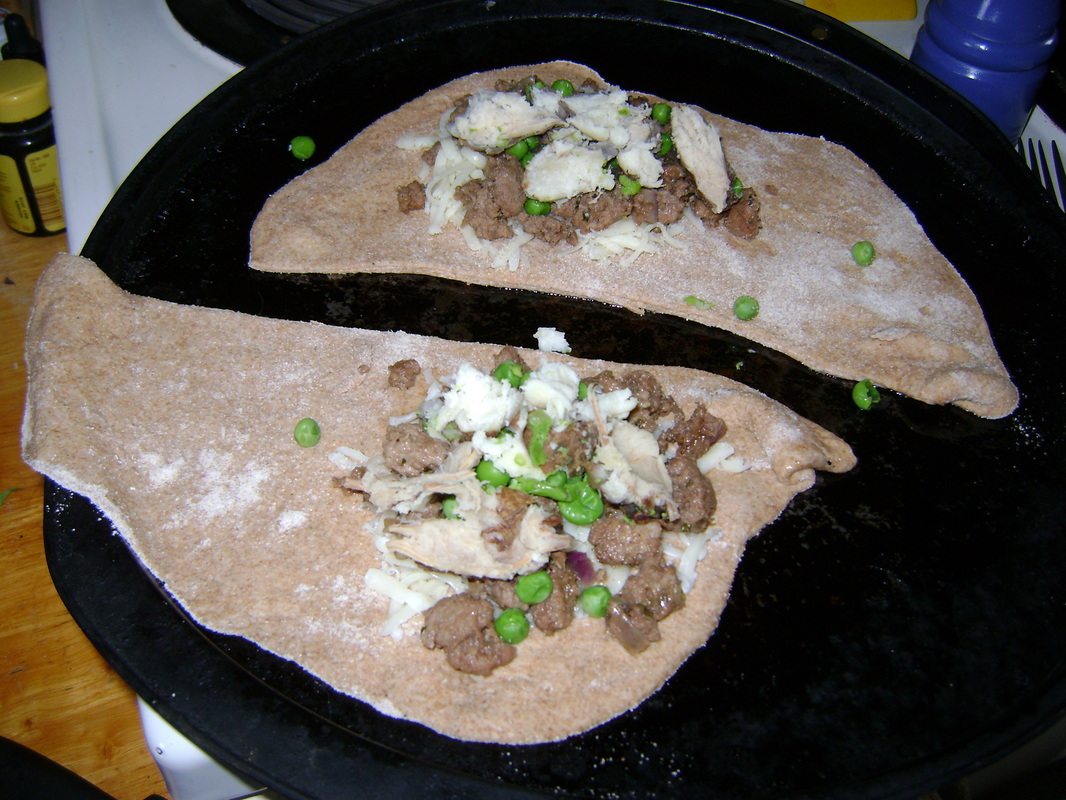
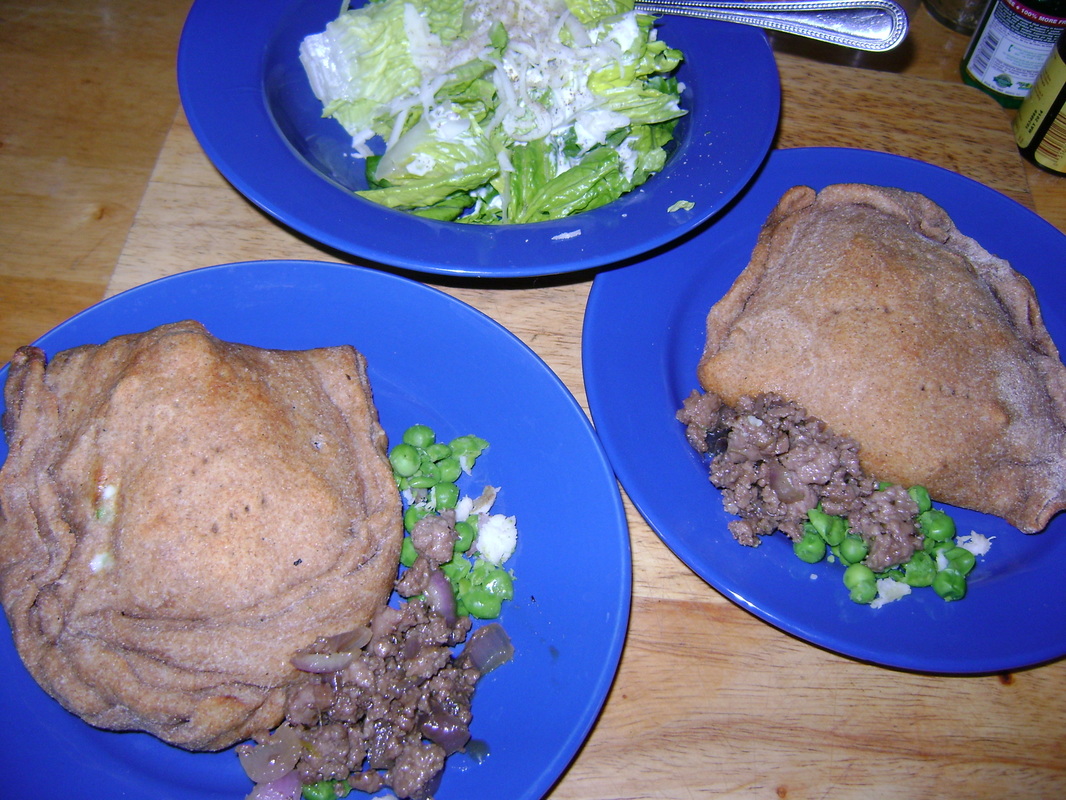
Pasties:
We have also put boiled & mashed groundnuts in pasties, instead of using other root vegetables. We added peas, onions, and ground meat. They were great with a salad:
We have also put boiled & mashed groundnuts in pasties, instead of using other root vegetables. We added peas, onions, and ground meat. They were great with a salad:
|
|
|
Other Culinary Options:
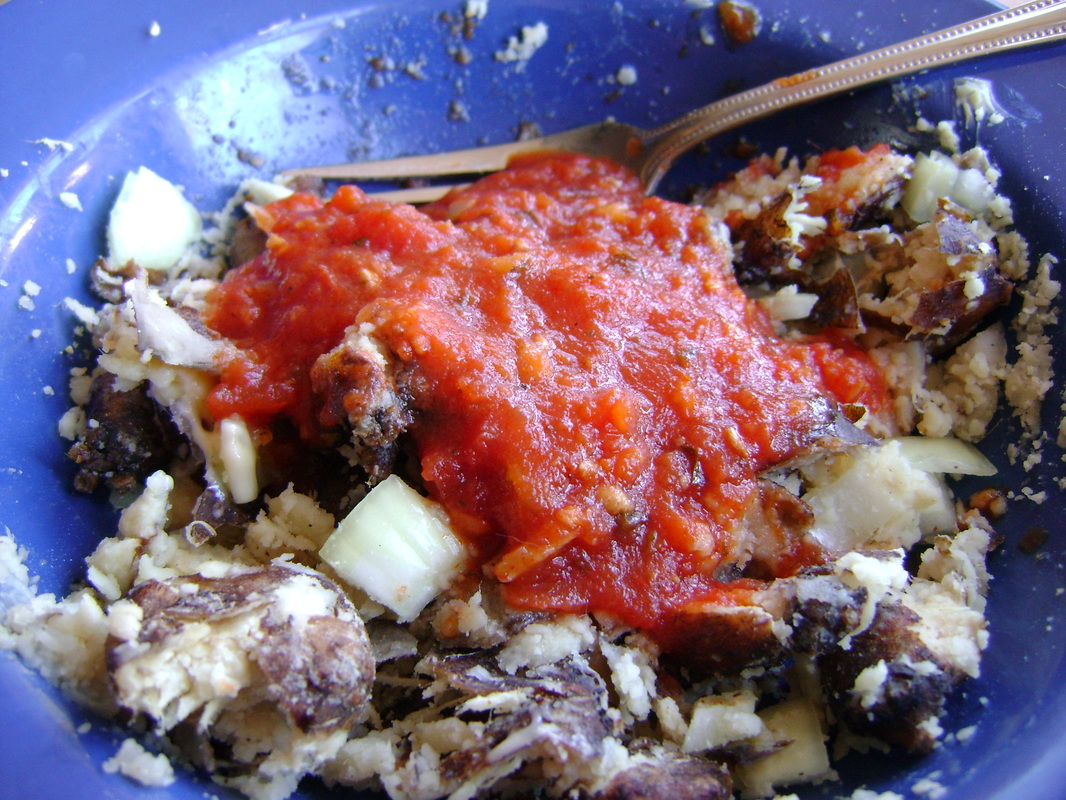
- Theresa has read that some people who don't like plain groundnuts (although she can't imagine it), treat them like refried beans, adding appropriate spices (cumin, chili powder, salsa), and eating them with chips.
- One of our friends who forages a lot prefers to eat groundnuts raw.
RETURN to the PERENNIAL VEGETABLES page.